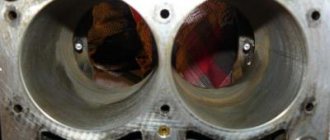
In order for an engine with a 402 carburetor from a UAZ to work normally, you need to set the ignition correctly, and how to do this will be described in this article. Many novice car owners incorrectly set the marks when changing the timing belt, so our auto service often receives engines that require major repairs. This should not be allowed, since, firstly, it is costly for the owner. Secondly, such a breakdown leads to the purchase of a new engine. But this doesn't happen often.
How the ignition system works
For the ZMZ 402 model, this order looks like this:
The car engine is started by turning the key in the ignition switch - at this moment the charge from the battery is supplied to the starter, which begins to rotate the crankshaft, activating the distributor (via the drive). At this very moment, electric current is supplied to the coil, then through the commutator the charge is supplied to the spark distributor (distributor), which in turn distributes the current through the wires to the cylinder spark plugs.
IMPORTANT to know that the switch is a block of transistor switches that serves to control the currents that pass through the inductor.
Early ignition
One of the most common problems with the ignition system is too early an ignition timing angle - this is when, when fuel is supplied to the engine cylinder, the working mixture of gasoline and air in the combustion chamber ignites much earlier than the piston approaches top dead center. If the initial ignition timing is set too early, then problems with the vehicle's performance may occur. To avoid this, you should pay attention to signs of early ignition. And this is: • The engine does not start the first time (the crankshaft turns in the opposite direction when starting the engine) • Unstable operation of the engine at idle • Detonation of unburned fuel (a chirping sound appears that does not disappear when the speed increases) • Carbon deposits on the spark plugs ignition (fuel that is not completely burned is deposited on the spark plug) • Shots in the muffler (fuel burns due to misfire of the ignition) • Black smoke from the muffler (fuel that is not burned in the combustion chamber burns out) • Increased fuel consumption
Late ignition
On engines with a carburetor power supply system, late ignition is the ignition of the fuel mixture at the moment when the piston has already reached top dead center or has already passed it. When the engine operates this way, fuel consumption increases, power and throttle response deteriorate. The main signs of late ignition are: • Trouble starting the engine (several attempts are needed) • Sluggish vehicle dynamics while driving (the engine stalls when the speed increases) • Spark plugs are light gray or white • Shots in the carburetor (fuel burns out in the intake manifold) ) • Engine overheating (the mixture burns out during the expansion stroke, which contributes to engine overheating)
Preparatory process
Before you begin adjustment work with your own hands, you need to prepare the necessary tools and consumables, which include:
- set of measurement probes;
- a set of wrenches (socket or ring);
- new valve cover gasket;
- crankshaft ratchet key;
- spark plug wrench Needed to remove spark plugs;
- Phillips and flathead screwdrivers;
- clean rags.
Upon completion of preparation, when all the required tools are prepared, you can proceed directly to the adjustment work.
Source
Procedure for adjusting the ignition system
To correctly install the ignition on the ZMZ 402 engine, the following factors must be taken into account: • The engine operating order is 1-2-4-3 • The distributor rotor rotates counterclockwise • The backlash on the spark plug should be no more than 0.8 mm • The resistance value of the resistor on the distributor should be from 5 to 8 kOhm • The resistance value on the spark plug ranges from 4 to 7 kOhm • The stator winding resistance varies from 0.45 kOhm to 0.5 kOhm
Label matching
To begin setting the correct ignition timing, you need to turn the crankshaft to a position that indicates 5 degrees. This is done as follows - you need to set the first cylinder at top dead center (end of the compression stroke). To do this, you need to align the middle mark on the crankshaft pulley with the mark on the cylinder head.
ATTENTION. The compression stroke on the first cylinder can be set if the distributor has not been removed before - by opening its cover, the slider will stand opposite the internal contact of the wire connecting to the spark plugs of the first cylinder.
If it is not possible to determine the compression stroke in this way, then it is necessary to unscrew the spark plug from the first cylinder and plug the hole with a rag or paper. Then you should start cranking the crankshaft until the paper-shaped plug is removed with the help of air created inside the cylinder. This will be the moment of compression.
Advance angle adjustment
Next, you need to loosen the octane corrector bolt, which is located on the distributor. A 10mm wrench will come in handy here. Then the advance angle is set approximately in the middle of the scale (this will be zero). Next, using the same 10mm wrench, you need to loosen the bolt securing the octane corrector plates. The next step is to rotate the distributor housing so that both marks coincide - the red mark on the rotor head and the mark on the stator. When the housing is installed in the desired position, it is necessary to fix the distributor housing with one hand and tighten the bolt with the other.
Checking the correct installation of the ignition
The correctness of the set ignition timing is checked while the car is moving - at a speed of 50-60 km/h, the gas pedal is sharply pressed, a short-term detonation should follow (1-3 seconds). If detonation disappears after this time, then the moment was chosen correctly. You can set the ignition more accurately using a strobe light.
This short guide will help you set the ignition yourself without resorting to the help of specialists at home.
Source
Fine tuning: weights and springs
The adjustment of the weights begins after this. This is already called fine adjustment of the distributor. In this case, the UZ is being adjusted, for which the proofreaders - TSNTR and VK - are directly responsible.
The first, centrifugal regulator contains two weights and two springs. When the distribution rotor rotates, the weights, under the influence of the CNTR forces, diverge to the sides. During this process, the shaft with cams or the shutter moves (if the ignition system is contactless). Thus, the contacts operate noticeably earlier.
Two springs act as counteraction to the CNTR force, on which the effective functioning of the entire ignition system depends. The springs themselves are different, and this is done this way for a reason.
- The first spring is longer, it is responsible for the moment the CNTR regulator, which carries out tension, comes into play. At the same time, this spring adjusts the right angle up to 1.2 thousand revolutions per minute, ensuring rigidity.
- The second spring is shorter, but it is much stiffer than the first. Corrects the breaking moment, ensuring free movement.
Experts insist that the second spring must be provided with free movement. However, some car enthusiasts believe that this results in unstable operation of the internal combustion engine at low speeds. It is supposedly regulated by the tension of this spring.
As for the VK or vacuum corrector, it contributes to the occurrence of advance only during the operation of the first chamber. In other words, when it comes to partial load on the power plant.
By itself, this advance regulator cannot create advance either at high speeds or under loads. This should be understood. And on XX, by the way, too.
Video below about the operation of weights on a distributor
How to set the ignition! Help!
So this is the problem. Engine ZMZ 402 I set the ignition as in the book, the pulley to the middle mark, then I set the scale to the middle mark, then I align the marks and tighten it. The engine runs smoothly and starts without pressing the gas pedal. BUT if you press the pedal smoothly, the revolutions increase normally, but if you press hard, a dip appears and a shot hits the carburetor. As I understand it, the ignition turned out early, it needs to happen later. I tried to put it at different angles, it still shoots at the carb. I reached the edge of the scale, there’s nowhere to go later, and it still shoots.
Tags: setting the ignition ZMZ 402
Comments 34
1. Having aligned the mark on the KV pulley (3 mark) and the front cover, it is not a fact that it will be TDC. You need to unscrew the spark plug of the first cylinder, insert a screwdriver there, for example. The piston of cylinder 1 must be at the level of the block (i.e., not recessed), the screwdriver must rest against the piston. If this is not the case, turn the pulley another 1 turn, aligning the marks. Check the position of the piston again. 2.Next, remove the distributor cover and check. The slider should stand opposite the output of the explosive wire for cylinder 1. If so, we assemble the distributor. 3. Set the mark on the distributor to 0. 4. Start the car; with the carb properly configured, the speed should be around 700-800. 5. From idle we press the gas sharply; if it shoots into the carb, the ignition is early, if it shoots into the exhaust - later. Setting it up. 6. When driving in 4th gear at a speed of 60 km/h, sharply press the gas to the floor, while a detonation sound should be heard for 3-5 seconds, similar to the knocking of valves.
In our city, tuning the carb, adjusting the valves and ignition costs about 1000 rubles. I don’t think it’s that much money, especially since people give a guarantee. Before winter, I think the best thing is to drive and not have any problems. And you will study in the summer - winter, I say again, is not the best time for such practice.
Well, everything is not on time for me, and no one does painting at sub-zero temperatures, and they don’t tinker with the engine. I’m probably frostbitten XD For us, setting up the carb last year cost about 600-700 rubles, I don’t know now. Well, if you do anything yourself If it doesn’t work, you’ll have to take it to a specialist)
Eh. if a person does not know what and how to do, then most likely everything needs a comprehensive setup. Without experience, it is better to give the car to a professional. And then, over time, you learn to adjust one thing. I drove the 402 engine for 3 years, never rented the car out to anyone, and learned from my mistakes. But winter is not the best time for this
Honestly, there’s no point in giving the car to someone, firstly, I don’t trust it, and secondly, I simply want to save money, and thirdly, I’m interested in it myself. I’ll learn little by little, I’m not in a hurry))
Eh. if a person does not know what and how to do, then most likely everything needs a comprehensive setup. Without experience, it is better to give the car to a professional. And then, over time, you learn to adjust one thing. I drove the 402 engine for 3 years, never rented the car out to anyone, and learned from my mistakes. But winter is not the best time for this
Before giving it to the masters, I first tinker with it myself and learn at the same time. Where else can you gain experience without tinkering with it yourself? And if it doesn’t work out, the masters have a green light.
Don't touch the carburetor yet. Start with the simplest options, we will eliminate them sequentially from simple to complex until it works. 1. Check whether your distributor drive is installed correctly. it may not match the tooth. then you won't have enough scale... looks like your case. To do this, remove the cover from the distributor and place the knee in the TDC position, and place the distributor itself in the “0” position. At the same time, your slider should look exactly at the explosive wire going to the first cylinder. If this is not the case, unscrew the two 13 (or 14) nuts securing the drive, lift it and rotate the slider so that it looks at the explosive wire of the first cylinder. We set the ignition according to the book, if the problem does not go away, go to step 2. 2. Set it up by ear. We start it, warm it up. We set up the carburetor as written in the book (we bring it to the average settings), and do not forget to mark on a piece of paper the settings that were on it before the intervention... you never know. We loosen the fasteners of the distributor and begin to move it into late ignition. We ensure that there is no failure when the throttle is opened sharply. Everything should work out... If it works, we begin to adjust the carburetor in accordance with preferences. If it doesn’t work, go to point three. 3. Shooting into the carburetor is possible if the fuel level in the float chamber is insufficient. Check the manual. I don’t know how it is set up on the K151; the instructions or more experienced comrades will help you here. 4. Valves. It makes sense to rebuild. We set the TDC of the first cylinder, take a flat feeler gauge at 0.3 and adjust the 1,2,4 and 6 valves. We make one revolution of the crankshaft and set 0.3 on valves 1,2,4 and 6, but counting them now from the engine shield (4th cylinder). It's not an exact adjustment, but it's a good adjustment and will ensure that the valves are sealed tightly (if not killed). 5. If the above procedures did not help, let's move on to the carburetor... now let's get serious. See if the accelerator pump sprays well when you open the throttle sharply. If not, then this is the reason for your failure. We fix it by checking the manual. If it doesn’t help... 6. If it doesn’t help, disassemble and clean, set up according to the book and adjust the ignition as described in point 2. If it doesn’t help... I don’t know... By the way, did it come out right away for you or did it gradually get there, maybe it works which ones were carried out... Restoring the full picture in understanding the full clinical picture would be very helpful...
The distributor was installed correctly, it was changed in the spring together with an experienced Volgovod guy)
By the way, I also turned the quality and quantity screws, I don’t know, but it didn’t get any worse. It’s a pity that I got the carb manual too late) I recently adjusted the valves, built them according to the dipstick just like in the book.
I will now use the carb settings, and it won’t hurt to clean it anyway; it has never been cleaned in the history of this car. Thank you for such a detailed answer)
Don't touch the carburetor yet. Start with the simplest options, we will eliminate them sequentially from simple to complex until it works. 1. Check whether your distributor drive is installed correctly. it may not match the tooth. then you won't have enough scale... looks like your case. To do this, remove the cover from the distributor and place the knee in the TDC position, and place the distributor itself in the “0” position. At the same time, your slider should look exactly at the explosive wire going to the first cylinder. If this is not the case, unscrew the two 13 (or 14) nuts securing the drive, lift it and rotate the slider so that it looks at the explosive wire of the first cylinder. We set the ignition according to the book, if the problem does not go away, go to step 2. 2. Set it up by ear. We start it, warm it up. We set up the carburetor as written in the book (we bring it to the average settings), and do not forget to mark on a piece of paper the settings that were on it before the intervention... you never know. We loosen the fasteners of the distributor and begin to move it into late ignition. We ensure that there is no failure when the throttle is opened sharply. Everything should work out... If it works, we begin to adjust the carburetor in accordance with preferences. If it doesn’t work, go to point three. 3. Shooting into the carburetor is possible if the fuel level in the float chamber is insufficient. Check the manual. I don’t know how it is set up on the K151; the instructions or more experienced comrades will help you here. 4. Valves. It makes sense to rebuild. We set the TDC of the first cylinder, take a flat feeler gauge at 0.3 and adjust the 1,2,4 and 6 valves. We make one revolution of the crankshaft and set 0.3 on valves 1,2,4 and 6, but counting them now from the engine shield (4th cylinder). It's not an exact adjustment, but it's a good adjustment and will ensure that the valves are sealed tightly (if not killed). 5. If the above procedures did not help, let's move on to the carburetor... now let's get serious. See if the accelerator pump sprays well when you open the throttle sharply. If not, then this is the reason for your failure. We fix it by checking the manual. If it doesn’t help... 6. If it doesn’t help, disassemble and clean, set up according to the book and adjust the ignition as described in point 2. If it doesn’t help... I don’t know... By the way, did it come out right away for you or did it gradually get there, maybe it works which ones were carried out... Restoring the full picture in understanding the full clinical picture would be very helpful...
Quote “When you open the throttle sharply, see if the accelerator pump sprays well.”
Gasoline should flow from the accelerator pump nozzle even when the throttle valves are opened very smoothly. If not, then one of the two valves (or both) is not holding.
The accelerator pump in the carburetor is not working well. It should spray from the spout even with a slight pressure on the gas, and in an even stream.
Source
We adjust the ignition timing on the ZMZ-402 engine
Sometimes owners of a Volga 3110 or similar models are faced with a problem that the engine does not produce the speed it should, it is unstable and often stalls. In principle, a similar problem occurs in all cars and the reason for it may be that the ignition timing is set incorrectly. This negatively affects not only the power and speed of the engine, but also contributes to high fuel consumption and premature wear of the power unit.
This situation may arise after replacing the distributor sensor or other repairs related to the ignition system.
However, do not rush to contact the service, since setting this parameter can be easily done at home, having a basic set of tools and using these instructions. First, you need to install the crankshaft in a position in which the middle mark on its pulley coincides with the boss on the block cover. This position corresponds to an ignition timing of 5 degrees, the first cylinder is located at top dead center and both valves should be closed - the end of the compression cycle. There is another way to determine the required position: by unscrewing the spark plug from the first cylinder and inserting a paper gag into the hole, we turn the shaft and when the plug flies out, this indicates the beginning of the compression stroke. When the crankshaft is installed in the desired position, loosen the octane corrector screw and set its scale to the zero position, which is located in the middle of the scale. After this, using the same key, you need to loosen the screw securing the octane corrector plate, and, turning the distributor sensor, align the two marks - on the rotor and stator. Then we tighten the screws, making sure that the marks do not get lost. That's the whole process. As you can see, to perform it we need only one key for 10, the whole procedure will take a few minutes. You can also check the correct installation “in battle”. To do this, you need to start the engine and, moving in fourth gear at a speed of 50-60 km/h, sharply press the gas pedal. A small three-second detonation will confirm the correctness of the setting, its absence or, conversely, a long duration indicates that the ignition timing should be changed.
Such a quick and simple procedure will save a lot of nerves and money, and the Volga engine will not require spare parts for a long time.
Source
Device malfunctions
Replacement and repair of the distributor on the domestic “six” is carried out in the event of incorrect operation of the mechanism.
Below are the main symptoms of breakdowns that indicate possible malfunctions:
- The vehicle jerks while driving. Moreover, these jerks are completely uncharacteristic of a car.
- The engine generally does not start.
- When trying to accelerate the car, the car may also jerk, and the acceleration process itself takes a lot of time, and the engine may detonate - the piston rings knock.
- Increased fuel consumption.
As you can see, in general the symptoms are similar to those that appear when the ignition is set incorrectly. Of course, if such symptoms appear, it cannot be said for sure that the fault lies in the distributor, but attention should also be paid to diagnosing this unit.
As for the breakdowns that may force the car owner to repair or replace the mechanism, they are as follows:
- The unit slider is worn out and burnt out.
- The problem lies in the cover itself - the contacts on it could have burned out.
- Hall sensor failure. The problem may be associated not only with a breakdown of the controller, but also with poor contact on the regulator plug.
- Another reason that domestic drivers encounter quite often is the distributor bearing. After a long period of use, it could become loose, but it could also simply jam.
- Presence of mechanical damage, including cracks on the cover.
- Engine fluid gets into the distribution unit; usually the problem is related to the seal of the cap.
Distributor Gas-3307 and Gas-53!
Installation of a distributor drive on trucks of the Gas family with a ZmZ-511 gasoline engine!
Hello dear friends! Again, after my observations using Yandex metrics, a wonderful tool for web masters, I made one substitution for myself.
Installation of ignition and distributor drive on the 402 UAZ ZMZ engine
In order for an engine with a 402 carburetor from a UAZ to work normally, you need to set the ignition correctly, and how to do this will be described in this article. Many novice car owners incorrectly set the marks when changing the timing belt, so our auto service often receives engines that require major repairs. This should not be allowed, since, firstly, it is costly for the owner. Secondly, such a breakdown leads to the purchase of a new engine. But this doesn't happen often.
Electrical equipment GAZ 3110
As in any car, the GAZ 3110 electrical circuit contains automotive wiring with connectors, various relays and sensors, fuses, instruments, as well as energy sources and consumers. Energy sources are a generator and a battery; consumers include:
Starter design diagram for Gas 3110
- Heater and windshield wiper motors;
- Sound signals;
- Lighting devices;
- Ignition system elements;
- Radio, alarm, as well as other consumers installed by the user.
The Volga 3110 has an electronic speedometer. It should be noted that on the previous GAZ 31029 model the speedometer was equipped with a mechanical drive (cable). Also, unlike the 31029, the 3110 model now has a tachometer.
But the new device cannot immediately work on a GAZ car without problems, and therefore various problems arose with the speedometer and tachometer.
The tachometer in the first models had the following flaw - the instrument needle trembled, indicating the number of revolutions. Later, the manufacturer brought the device to perfection, and the owners of the first cars had to fix the defects with their own hands - solder an additional resistor into the tachometer circuit.
Tachometer from Volga 3110
After 1999 this problem disappeared on cars. It also needs to be said that there were different ones - they were produced in Vladimir and Riga.
Ignition system elements
The elements of ignition of fuel in the engine are dominant. Through it, the power unit is started. A couple of types of ignition systems have been developed for gasoline engines:
The elements for igniting a combustible gasoline engine are given in the list:
Attention! On an engine from a Gazelle or UAZ, a non-contact ignition system is used. A generator is added to it to control signals and devices to regulate advance: vacuum and centrifugal.
Experienced mechanics advise reading the characteristics given below to set the ignition correctly:
Now let's talk about how ignition of fuel in the power unit works.
How the ignition system works
The fuel mixture is ignited as follows:
This ensures proper ignition in the engine. However, there are early and late arson. Then we can talk about malfunctions of the power unit.
Early ignition
Early ignition occurs before the cylinder piston approaches top dead center. Gasoline with air and oil is ignited while the piston is still moving. Such problems arise due to an incorrectly set ignition angle.
Experienced mechanics identify such a breakdown by the following signs:
These are all signs of pre-ignition. Let's look at what happens when the ignition is slow and ignition does not occur on time.
Late ignition
If the marks are set incorrectly on 402 ZMZ engines, late ignition occurs when the piston has already passed the top point. The car owner can notice this by a drop in power with increased gasoline consumption.
Experienced mechanics notice late ignition by the following signs:
Correct ignition adjustment and adequate placement of marks will help to cope with the problems described above.
Procedure for adjusting the ignition system
To correctly adjust the ignition, you need not only to set the advance angles, but also to position the marks correctly. By the way, if the car owner does not understand and does not understand the design of the engine, then it is better to give this work to experienced mechanics in the service center.
Let's look at all the nuances of ignition adjustment.
Label matching
To correctly compare the marks and set the engine ignition, do the following:
To do these steps, you will need to remove the spark plug from the first cylinder and plug the hole with a rag. Rotate the crankshaft until this rag is removed by air, which creates pressure inside the cylinder.
Such actions will help to find the end of the compression stroke, otherwise the top dead center of the cylinder.
Advance angle adjustment
To set the ignition timing of the ZMZ 402, you need to do the following:
The car owner must then hold the engine distributor with one hand. And with his second hand he will tighten the screws. This is how the ZMZ 402 ignition is set.
Checking the correct installation of the ignition
Now the car owner will only have to check that the ignition is installed correctly. Whether he installed the ignition correctly or not can be determined as follows:
Attention! Experienced mechanics set the ignition in the engine using a strobe light.
Removing the distributor assembly with the oil pump drive
To carry out repair work on the distributor on a Gazelle or UAZ engine, you will need to remove it. This is done this way:
This task is easy and does not require special skills to complete. However, the car owner must have an understanding of the design of the motor. Installation is carried out in reverse order. It must be remembered that the distributor can only be installed in one position.
If you need to remove the oil pump with distributor, you need to do this:
Remove the gasket on the engine and put in a new one if that's the problem. If the position of the engine crankshaft remains unchanged, install everything in the reverse order. If even small changes occur, then first the piston is moved to top dead center. Align the mark on the crankshaft pulley with the mark on the cylinder head. The cylinders must be closed.
Then the distributor is installed.
Features of fuel ignition
Before installing and correctly setting the ignition order on the 402 engine, it is important to understand the design features of the distributor.
This engine was equipped with an electric flow distributor without traditional metal contacts. The innovation is that the complex process is controlled together with the generator by a vacuum advance regulator. The distributor sets the order in which the spark appears and the sequence in which the fuel is ignited in the cylinders. A mechanical slider helps to correctly “catch” the moments of the spark discharge. It is mounted directly on the pulley. Has a resistor to help mix noise. The switching device disconnects the circuit in the first coil. Subsequently, it converts electrical impulses emanating from the node into an intermittent short-circuit current.
