July 29, 2015 Lada.Online 206 196 21
Some owners of modern Lada cars (Priors, Grants or Kalinas) experience a whistling sound in the door area when driving at speeds above 80 km/h. Others complain about water and dust getting into the cabin. All these shortcomings can be eliminated with the help of modifications, which involve installing an additional door seal.
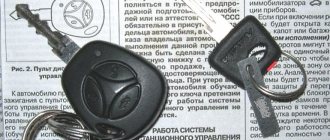
You will need: D-profile seal with dimensions 14*12 mm, degreaser, RKI-19 (article 000017504293020), RGI-135 (1118-6107028).
Replacing door seals
Good day to all readers.
I decided to change the door seals; their condition left much to be desired. The ones on the driver's door were clearly torn, the others were crushed and flattened.
I went to the car market this morning and bought a set of seals. Sold on Fortuna, he said that they were original, of course he was lying, but I couldn’t find any differences.
I drove away from the market and decided to change it right away, unpacked the seals and laid them out to bask in the sun.
I started the replacement from the rear left door, for which I unscrewed the plastic sill trim and pulled off the old seal.
Under the old seal it was dirty and in some places even damp, although it had rained a day ago. The good news is that at least there is no rust. I wiped off all the dirt with wet wipes, dried it for 5 minutes (the morning was very hot, the sun was burning!) and then installed a new seal.
Having installed it on the back door, I visually compared it with the front door, where the old one stood. Of course there are differences. that the new one is more “complete”, and the old one
.The door began to close and open more elastically, the seal slightly pushes it away.
There were also losses in the form of abrasions on the rear right door
Then I installed it on the three remaining doors in the same way.
The rib on which the seal is placed on all doors was cleaned of dirt and dried.
The purpose of this operation was to get rid of annoying noises and whistles at high speed, but, alas, it was only partially achieved.
I am generally satisfied with the work done, the noise has become less, by 30-40 percent, I’m thinking about what to do with it next.
Source
When do you need to replace seals?
The seal is a rubber band that is placed on the edge of the door or on the edges of the body in the place where the door is pressed against the opening. This tape may not be one, sometimes it is part of two seals at once to enhance the sealing properties.
The role of seals in the automotive industry is as follows: they provide sealing of the interior and create a certain climate in the vehicle interior. For example, when using a heater in winter, the heat should not be allowed to escape outside the cabin.
This often happens if one of the seals fails - the cabin immediately becomes cold. The problem of two seals instantly creates a draft in the cabin, which has a detrimental effect on the health of everyone in the car. The same can be said about the use of seals during hot periods. When operating a car in the summer, we often use air conditioning, which makes it necessary to keep cool air inside the car. To prevent it from leaving, it is necessary to maintain the seals in good condition.
Seals should be replaced in two cases: when they fail and during seasonal maintenance. In the first case, the failure of the seals can be determined both visually and by the effect of its poor performance: when using a heater, the car interior practically does not warm up, the same can be said when using an air conditioner.
The condition of the seal can be determined by its appearance. If there are cracks or torn spots in the rubber, the seal must be urgently replaced. It happens that the rubber deforms over time and is squeezed out of its seat: the seal sags and is not fastened effectively enough. Thus, it does not perform its functions properly and urgently needs to be replaced.
How to change door seals on a Priora
July 29, 2015 Lada.Online 164 426 21
Some owners of modern Lada cars (Priors, Grants or Kalinas) experience a whistling sound in the door area when driving at speeds above 80 km/h. Others complain about water and dust getting into the cabin. All these shortcomings can be eliminated with the help of modifications, which involve installing an additional door seal.
You will need: D-profile seal with dimensions 14*12 mm, degreaser, RKI-19 (article 000017504293020), RGI-135 (1118-6107028).
Main functions of seals
The main functions of conventional sealing material are:
| № | Function |
| 1 | increasing the level of sound insulation |
| 2 | increasing the level of thermal insulation |
| 3 | increasing vehicle protection from moisture |
| 4 | Reducing the sound that occurs when closing doors |
Thanks to the installation of an additional seal, the operating comfort of the vehicle increases.
Selection of replacement
You won’t find any kind of advice for naive and gullible car owners on the Internet. Some suggest installing window seals on the VAZ 2110 instead of rubber bands intended for this model, others suggest inserting tubes from droppers inside. In general, there is no limit to skillful imagination.
We will try to focus on the most acceptable options, with proven effectiveness in practice.
So, to replace rubber bands you can use:
Priorovsky door seal
Tip: Before choosing a seal, you need to very carefully measure the internal length of the rubber bands on the front and rear doors. It’s better to take a little more if you’re not using a “native” set, because shortening is always easier than sharpening.
In addition, if you plan to modify it for tighter insulation, you will also need a tube for additional door sealing, about 8 mm in diameter made of silicone or polyurethane.
For fixation, disposable pins and glue are used.
Additional door seals for Priora
When the heat and sound insulation system in a car is compromised, and in addition the door gap is more than 2 mm, you should think about making additional door seals. Why is this being done?
1. Additional door seals on Priora are needed if the car’s sound insulation leaves much to be desired. Nobody likes constant noise or whistling inside the car;
2. The same can be said about thermal insulation, since in winter you can freeze in Priora;
3. In order to increase the tightness of the car interior, additional seals will also be necessary.
Door seals for Priora come in different types. Often, car enthusiasts try to save on these elements and do not turn to specialized services, but come up with and implement convenient designs that help seal door gaps. Let's look at a few common options.
Foreign and domestic cars: sound insulation
If you compare the sound insulation of a foreign car and a Lada Priora, you will notice significant differences, which are primarily due to the fact that the foreign car has a more competently designed body and better located seals. Thus, in order to achieve the maximum effect of isolating extraneous noise, it is necessary to install additional seals in the right places on the car body and doors.
If you look closely, on foreign-made cars the door gaps do not exceed 2 mm, while on domestic cars this size is sometimes increased by 5 times, that is, it can be up to 10 mm. This makes you wonder how to install new seals on the Priora.
Dismantling
After purchasing everything you need, you can first begin dismantling and then installing a new seal. The first stage is removing the plastic facing panel from the threshold. This is done using a regular flat-head screwdriver. Just try to do everything carefully, without damaging the plastic clips that secure the panel.
This is followed by the removal of old rubber bands. This is done by tearing it off, then removing the residue using available tools. If you need to remove the remaining glue or small debris, use a solvent (be careful that it does not dissolve the paintwork of the car).
Next, you need to clean the entire doorway from dust and various contaminants, paying special attention to the lower parts. You can do dry cleaning with a brush and vacuum cleaner. If you still need to wash it, let the surface dry thoroughly before installing the rubber bands.
Additional seals for the Priora body
After the door seal is installed, we move on to the body. There are two “sides of the coin”: horizontal and vertical compaction. We install horizontal rubber bands at the top and bottom of the body:
And vertical ones for the rear door:
Thus, additional Priora seals will significantly reduce wind noise, eliminate dust and make the car interior warmer. Here is a general picture of the work done:
The issue price is 50 rubles/meter, no more than 10 meters will be required.
By the way, in order to maximize the effect of the door seals, it is recommended to soundproof the Priora doors.
Doors Lada Priora
If we talk about Priora doors, it is worth noting that the doors have a rather problematic design. First of all, this relates directly to the door fastening itself, which becomes loose during operation, and an unpleasant sound appears when it is closed. To fix these problems, the Priora needs to remove the trim and double the clips installed on the door.
A common problem is an unpleasant sound when the door lock is activated. To eliminate it, you will need to put special rubber pads on the lock levers.
Installation
This work, in principle, is not too difficult; it can be done even without special training. Just take into account that the installation of the seal and the simultaneous modification of wind and noise insulation must be carried out carefully and meticulously, then you will ensure greater interior comfort for several years to come.
The installation is carried out according to the following algorithm:
Almost immediately when closing the door you will hear a softer dull sound. And while driving you will not hear annoying noises and whistling of the cold wind penetrating inside. After a while, you see, you will forget about the pain in your previously cold left knee.
Additional seal
If you have completely replaced old rubber bands with new ones in all doors, then no additional insulation is needed. But in cases where you do not want or do not have the opportunity to do this immediately, and the old rubber bands have become crushed and worn out, you can install additional VAZ 2110 door seals as a temporary measure.
It could be a thin tube for thermal insulation. These are used in refrigeration equipment, etc. The material is a bit like black foam rubber, but denser. You may come across advice - to use meter seals for windshields in this capacity, but this is impractical. Firstly, it is quite difficult to find one, it is much more expensive, and is not easy to install - it is difficult to achieve a high-quality tight fit. seal
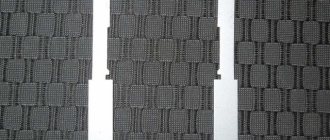
Flex seal Width Front door Front door Seal sticker on the rear door opening Result in the rear door opening Result with the door closed Close-up of the opening
However, regardless of the material chosen, its installation is no different.
As a rule, additional insulation of doors is carried out only in their top and rear parts. If there is a strong need - and in the front part, you just need to be especially careful in the area of the hinges so that the material does not interfere with the normal closing of the doors, otherwise some on the forums complain that after such actions problems arose with closing the doors.
Universal D-shaped seal Universal D-shaped seal Result on the rear doors Result on the rear doors
It is irrational to install anything additional in the threshold area. Dirt and water will accumulate there faster, and then corrosion, rust, holes...
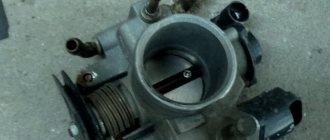
Additional vertical door seal RKI 19 Additional vertical door seal RKI 19 Additional vertical door seal RKI 19
The additional seal is simply glued to the body (not to the door), close to the existing one. When choosing a glue, make sure that it does not react with the paint surface of the car.
After gluing, close the doors and check whether the seal is coming out. If necessary, it is carefully trimmed.
Example of a seal
Let's look at the rubber door seals in the headlines of car service centers, and also find out their design numbers from the trunk lid catalogue, for which VAZ cars they are suitable and what they are used for.
So here is a photo of a rubber door seal for a VAZ Kalina-1118 car. The red circle shows the complex cross-section of the seal, which can be used to determine which vehicle it is intended for. We won't go into detail in this section, so everything is clear in the photo, but let's look at the design catalog number and the length itself to help make your choice. The same door seal is suitable in cross-section and length for VAZ 2170 Priora and VAZ 2110 cars.
Repair kit design number:
- 1118-6107018-10 length for entrance doors 3 meters 11 cm measurement error (+ -) 5 cm
- 2170-6107018-10 length for entrance doors 3 meters 11 cm measurement error (+ -) 5 cm
Door seals for VAZ 1118 and VAZ 2170 must be measured on site at the time of purchase. Sometimes door seals on sale have the same shape and cut as Kalinovsky and Priorovsky, but longer.
Later, see the second photo of the rubber car door seal of the Dozen 2110 key family, since here you can see a completely different cut shape, a less complex design compared to the Kalina car door seal.
- 2110-6107018 for the front door length 3 meters 17 cm, and for the back door 3 meters 4 cm, the measurement error (+ -) is 2 cm.
In the third photo we have the door opening seal of the “nine” of the best Lada 2109 car. On the “eight” with two doors, such seals are installed only in the form of a longer cut, if they are not there about 15 centimeters. The cars are from VAZ 2109 “nine” to 2115 “fourteenth” family.”
- 2109-6107018 for the length of the “nine” for all four doors 3 meters 42 cm Measurement error (+ -) 2 cm
- 2108-6107018 for figure eight length for two doors 3 meters 71 cm Measurement error (+ -) 2 cm
And now we come to sealing the rubber doors of cars of the “classic” VAZ 2101-2107 family. The cross section, as seen in the photo of the early cars, has a more or less simple shape compared to other gaskets shown on this rubber industry blog page.
- 2107-6107018 for all classic models length 3 meters 46 cm Measurement error (+ -) 2 cm.
In general terms, everything is clear with the side doors; next, let’s look at the trunk lid seals and the trunk lid opening for VAZ cars. Cross section of the trunk lid seal as we see the intricate design of the 2170 Priora key.
Repair kit design number:
- 2170-6307024 length 3 meters 36 cm measurement error (+ -) 2 cm
The rubber seal on the trunk lid of the VAZ 2112 car also applies to the Lada 2111 station wagon.
Repair kit design number:
- 2112-6307024 length 3 meters 87 cm measurement error (+ -) 2 cm
The rubber seal of the trunk lid of a VAZ 2110 car, compared to the previous one, seems less complex in section (see photo).
- 2110-6307024 length 4 meters 9 cm measurement error (+ -) 2 cm
So, let's move on to the final part. Before our eyes, the rubber trunk seal of a VAZ 2105 from the “classic” family. Being long from the “five”, it can be installed on all Lada cars, just by adjusting the length on site. It is this stamp that is approximately 35 centimeters more authentic than the Chevrolet Niva SUV.
- 2105-5604040 length 3 meters 46 cm measurement error (+ -) 2 cm
- 21213-6307024 length 4 meters 36 cm measurement error (+ -) 2 cm
Additional seals on Priora doors
Seals for Priora doors can be purchased at a hardware store. This D-shaped seal is self-adhesive, so you don’t need to buy additional glue. You can install an additional seal on the Priora door in different ways. The photo shows one of the options, which, according to the majority, is the most advantageous.
We also install a seal at the bottom of the door (photo by author). They are installed on special clips that come complete with the lower seals:
Advantages:
Disadvantages: if you do not take care of the lower door seal, then over time it begins to rust and rot under the rubber bands.
Source
Selecting a seal, correct fastening of the material
Having decided to install a certain layer of sealing material on the door of your car, in no case should you buy the first suitable material you come across, since only a certain additional seal is suitable for each car. Therefore, it is necessary to familiarize yourself with all the information regarding the material used to seal car doors, and only then will it be possible to purchase components. The RKI-19 brand material is suitable for Lada Kalina, but this sealing material is absolutely not suitable for installation on Lada Priora. Installation on Priora will require a little more material than on RCI-19.
The right choice allows you to increase the life of the car and significantly reduce the noise level entering the Priora’s interior. Installing additional seals on the doors allows you to perform a kind of “sealing” of the car interior and protect door locks and hinges from various contaminants that can easily pass through the door gap.
How to properly install an additional door seal on Lada Priora, Granta and Kalina
Some owners of modern Lada cars (Priors, Grants or Kalinas) experience a whistling sound in the door area when driving at speeds above 80 km/h. Others complain about water and dust getting into the cabin. All these shortcomings can be eliminated with the help of modifications, which involve installing an additional door seal.
You will need: D-profile seal with dimensions 14*12 mm, degreaser, RKI-19 (article 000017504293020), RGI-135 (1118-6107028).
Comparison of foreign cars and Lada Priora
First you need to figure out why you need to install door seals. The sound insulation of any foreign car and the Lada Priora has a large number of differences. First of all, it is necessary to note the fact that a foreign-made car has a better designed shape and structure of the car and the seals are installed much better. It is the desire to get a car with good sound insulation that forces car owners to additionally install seals on the Priora.
There is another significant difference in the design of the doorways of the Lada Priora car compared to cars manufactured by foreign manufacturers. This difference is the doorway gap; on foreign cars it, as a rule, does not exceed 2 mm, but on the Lada Priora this gap is several times larger, which creates an additional noise effect. That is why it is worth considering installing additional door sealing material.
Additional seal on the car door
We remove dirt and then degrease the edge of the car door. We glue the seal along the edge of the door, as shown in the photo.
All that remains is to close the gap with the seal between the doors (front and rear). Owners of Lada Granta/Kalina install additional seals of the RKI-19 type:
RKI-19 is not suitable for Lada Priora, because... the distance from the body to the doors on the Priora is significantly greater. It would be more correct to use a Z-shaped seal and install it on the edge of the rear door as follows:
How is a car seal replaced?
You must purchase the product before replacing it. Extreme care is required here. The fact is that for each car model, seals are made individually, which means that you cannot use a rubber band from another car. It is important to remember this when purchasing new seals!
A very important point concerns the thickness of the seals. To improve tightness, their thickness can be increased. It is worth considering here that the higher the thickness of the seal, the harder it is to close the car door. If the seal is too thick, then more force will have to be applied to close the door, and this increases the load on the lock mechanism. Remember that when the door is closed strongly, the wear of the lock increases significantly.
To change the seals, you need to remove the old ones. To do this, find the end of the tape, and if there is one, simply pull it so that it comes off the body or door. If there is no such end, then it can be created. To do this, the seal is cut in any place with a knife, and the resulting end is pulled by hand in the direction opposite to the body. Thus, we get rid of the old product.
Installing a new seal is much more difficult. The fact is that its shape is adjusted to the shape of the doorway and does not allow any other installation, and as you know, rubber is soft and does not allow the seal to take the correct shape, which makes it difficult to choose a place to start installation. Therefore, first apply the seal to the opening with the help of a partner, and then put on the approximate part of the seal. As soon as it is in place, gradually put the seal on the entire door opening. Try not to put on everything at once; gradualness is important here. Improper installation of the seal can lead to it simply stretching or tearing, and then you will have to buy another product.
If the other ends of the seal do not match the geometry of the body, then you are putting it on incorrectly. To do this, remove it in reverse order and try installing it again. This cycle can be repeated until the seal sits evenly along the entire length of the door. If this cannot be done, then the car has probably already been involved in an accident and the geometry of its body is seriously damaged, which creates big problems for installing the seal.
Additional seal for the car body
Owners of Lada Granta/Kalina can use the RGI-135 seal:
Universal method: We begin installing the rubber seals from the bottom corner of the windshield. We glue the seal onto the gutter seal, and glue part of the seal onto the plastic intakes of the windshield. Make sure there are no gaps between the doors and the body.
We go to the end of the back door and go down. We glue the lower seal onto the plastic threshold, and not above it. Otherwise, it will be of no use.
Instead of a construction D-shaped seal, you can use a seal from UAZ Patriot:
After installing all the additional seals, the doors will be noticeably more difficult to close in the first days of operation. After a week, the seal will take the desired shape and the doors will close as before.
There are several positive effects after such modification. The seal plays the role of sound insulation, whistling while driving will disappear, and road noise will decrease. In addition, less dust will enter the car interior, and the doors will close noticeably quieter with a pleasant sound.
In the survey we determine which method of installing an additional seal is the best. Along with the installation of additional sealing, it is recommended to install additional sound insulation of the doors.
Source
Seal fastening methods and their alternatives
As practice shows, additional door seals can be easily replaced with a regular rubber hose. For installation you will need superglue or double-sided tape and a surface degreaser. First you need to cut the pipe into several parts. After this, the first part is taken, degreased and secured with superglue in the right place. Then a tube is glued on top, the tube is attached to the side of the windshield, then it is pulled towards the rear door.
Installing an additional gasket may make it difficult to open and close, so additional adjustments to the door will be required. Installing the gasket takes approximately two to three hours. Additional seals are an excellent solution for eliminating noise and humidity in the Priora’s interior. In some cases, a special sealant can be used as glue; it is more suitable for installation than glue. With its help, you can not only secure the seal tightly, but also protect the car from rust.
The first changes in the interior are noticeable immediately after installing the seal on the car. After installation, the cabin becomes quiet and warm, and street noise practically does not penetrate. In case of rain, the seal prevents moisture from entering the interior.
The second most acceptable seal option for most motorists is the K-FLEX pipe seal, which can be purchased from a technical service. Its fastening is carried out by analogy with fastening a conventional rubber hose. After its installation, the doors will be sealed, but over time the pipe will become more flexible and the doors will close easily and the interior, thanks to the sealant, will be warm, dry and quiet.
Main functions of seals:
| № | |
| 1 | increase the level of sound insulation |
| 2 | increase the level of thermal insulation |
| 3 | greater protection of the car from moisture |
| 4 | reduction of noise when closing doors |
Thanks to the installation of an additional seal, the operating comfort of the vehicle increases.
Dense, even denser.
(I’ll say right away that you shouldn’t glue the lower door seals. Why? Answer from the link: Lower door seals: not everything is so simple.
I was sorting out the pantry and Kalinovsky RKI-19 seals caught my eye. I bought them a long time ago on the advice of a seller on the Internet, who convinced me that they would also go to the Priora.
But my suspicions did not let me down and they did not go to Priora. The profile of this seal is such that there is no way to install it between the doors of the priors. No, of course you can install it, but in this case this seal will be a priority, like a saddle for a cow. I decided to either use it somewhere or throw it away. Since it was a shame to throw it away, I thought very persistently. As a result, one single thought came to mind: on a Priora, this seal is only suitable as a seal for the lower part of the door. By the way, for these purposes there is an almost standard VAZ-2110 seal, which is also suitable for us. It looks like this:
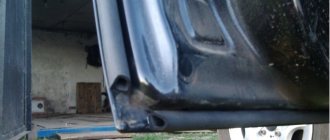
This picture was on both front doors. Everything was sanded, then treated with zinc, then degreased, then painted with 3 layers of primer, 3 layers of paint and 3 layers of varnish.
After which, within a day, a Kalinovsky seal was glued somewhere.
This seal does not cover the drainage holes (it is glued below them). Also, it additionally protects the front lower edges of the doors from subsequent rubbing of the paintwork. And everyone seemed to be happy, if one circumstance did not become clear: it does not compact anything. In short, in the area of the front lower edges of the doors, the distance between the door and the threshold is practically zero and therefore the door always rubs against the plastic threshold when closing. But as you move away from this place to the middle pillar between the doors, this gap increases specifically. It turns out that RKI-19 seals only a small area at the front bottom of the door, and in the remaining areas there is still a gap, albeit of a smaller size. Priora is such a Priora... I started looking for something to replace it. I didn't like everything I found. Until I saw a seal with this profile on Ebay:
I liked it. Ordered. And at the same time I ordered this clever seal with a Z-profile in order to close the gap between the doors:
And this one, to seal the rear doors from the arches:
So far only the first two have arrived. So, the door bottom seal is made of very soft rubber, which was nice. Glued it without problems.
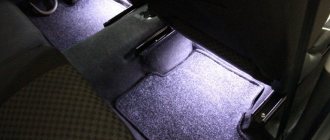
And here's what it looks like with the door closed:
Since this seal has a noticeably larger profile compared to the Kalinovsky one, it actually covers the entire gap at the bottom of the doors from start to finish. The door closes with it almost the same as without it, thanks to the soft rubber from which it is made. Well, the drainage holes are not closed. In general, some advantages. The thresholds are now always clear. Well, the sound insulation has become a little better. A simple newspaper test. This is how it was before:
And this is what happened after installing the seal:
Before applying the sticker, thoroughly degrease everything. It was enough for the openings between both doors + the openings between the front doors and the wings and there was still a little left. Here's the result:
Well, that's all for today. When the tubular seal arrives, I’ll write more about it. All the best. Continued here.
Source
Installing an additional door seal Kalina — »
How to replace the rubber seal from the VAZ “Lada Kalina” model...
Greetings to everyone on the auto blog new-lada.ru! It was decided to conduct a small experiment, which was inspired by the video I watched, where user Albert Aukhadullin presented a video clip showing the replacement of the “native” Logan rubber door seal with a rubber seal from the Volzhsky Automobile Plant model Lada Kalina (see video).
Logan door seal from Kalina
At the same time, the video shown says that after installing a new rubber seal from the VAZ Kalina, the windows in the cabin stopped fogging up, it became warmer, and the noise level noticeably decreased, plus other positive aspects of such an installation. Do we need to find out whether this is true or not?
I hope to eliminate with my own hands the blowing and then fogging of the windows through the rubber of the door opening, although fogging is not an issue at all, since they don’t fog up anyway. However, in addition to all of the above, I also have a specific goal, which is to eliminate noise from cars passing nearby, both when parked and when my Renault Logan car is moving.
The noise constantly comes out when passing cars, regardless of whether they are overtaking or moving towards them, and the noise is heard while passing right next to the door. Maybe it comes from insufficient equipment of the door cavity with noise-absorbing materials, or through the rubber velvet glass of the door, or maybe through the rubber seal of the door opening.
The rubber seal has already worn out somewhat during the operation of the Renault Logan car and the problem is presumably with it, as you can see below it is even slightly torn in places. For the experiment, two new rubber door seals from Kalina were purchased; they need to be installed on the front doors. For now, as an experiment, we will install the rubber seal only on the driver’s side.
New Lada: Lada Kalina Hatchback (Lada Kalina) - price, photos, reviews. Technical characteristics of Kalina hatchback
For the purity of the experiment, before installing a new rubber seal from Kalina’s car, I decided to check the noise level with the old “original” torn Logan seal. A special software application was downloaded to the mobile phone, which determines the noise level in decibels, which can be monitored by digital indicators on its screen. Now it shows the noise level during my conversation, it is quite high.
Next, I have prepared improvised noise “special equipment” for the experiment, which will produce sound. The equipment for the experiment will include the telephone already mentioned above and a camera equipped with a very sensitive microphone.
You can control the experiment either with your phone or with a camera, which records all sounds quite well. For the experiment, I’ll go outside, first of all I’ll make noise with an improvised drum with a saucepan, first with the “original” seal, and then with a new one from Lada Kalina.
I hope to see the results by reading the noise level on the phone, but also when I listen to the sound recording on the camera. So, everything is ready for the experiment: a telephone, a camera are installed, and you can see what the noise level will be if you close the door and I stop speaking in a loud voice. To complete the experiment, you can still start the engine and set the electric fan to the first speed position.
While the noise indicator shows about 39 decibels, this is with the engine running and the fan turned to the first position. Now that I’m convinced that all the “control devices” are working, I go out to create noise. You can immediately assume that people will look at me with surprise, but this doesn’t particularly bother me, the main thing is to conduct the experiment itself. I start banging the wooden device on the pan.
After knocking a little to experiment, I move on to removing the old seal. There are no problems with removal, since the old seal can be removed very easily. As the play progressed, I decided to compare the old and new rubber seal. On the old one, the “track” with fastenings to the ledge of the doorway has already clearly been reworked. Externally, both seals are generally similar and now you need to completely remove the old rubber seal and install a new one from scratch.
New Lada: Is the passport clearance of the Lada Kalina sufficient?
When removing it, I caught some wiring running along the top of the doorway. He put it back in its place. Having removed the old door seal, we install a new one, first focusing on how to install it correctly. The seal fits “at home” into the doorway without creating any problems. There remains a residue at the joint, which was removed with an ordinary knife, since the metal is of small thickness.
Having installed a new seal, you need to try how the driver's side of the door will close with it. The door closed with the usual light movement that you didn’t even feel any difference. I took the “noise devices” again and made a sound in the pan to control the noise of the new seal. The devices control everything at this time. We compare the results: before and after replacing the seal with a VAZ one from Kalina, and the conclusion is not very comforting yet.
It looks like the old seal had lower decibel readings. So far, the instruments show that the rubber seal from the Lada Kalina has become worse, judging by the increased noise levels. The fact is that when measuring the noise level with the “original” seal, the noise level was about 42-44 decibels, and with the new rubber seal it was 47, 48, 49. For the second door of the car, I decided not to install a new door seal for now, and ride on seal from Lada installed on the driver's doorway.
Now I'll try to drive with the new seal and do a test drive. The screen shows a label from the purchased product, where the barcode and “icon” of the BRT plant are indicated, which stands for “Balakovo Rezinotekhnika”, and its price upon purchase was 330 rubles, which is a very low cost for a new opening seal.
Write in the comments about the article about the rubber door seal. You can also watch videos dedicated to the operation, improvement and repair of the Renault Logan car. Video:
Door seals from Kalina to Renault Logan
You may also be interested in reading:
Article about replacing the fuel filter
How to change a heater fan
We will change windshield wipers on a Renault car