If you are planning to change the interior design of your car, then you cannot do without reupholstering the front panel, or, as they call it in everyday life, the dashboard. You can choose a new color scheme and texture for it. Or you can use materials similar to the previous ones and only slightly refresh the scratched and worn-out coating. Many motorists do not risk re-tightening the panel with their own hands for fear of ruining the appearance of the interior. However, the biggest difficulty in this process is deciding to start work. In addition, if you already have experience in reupholstering other interior elements, this task will not cause you any difficulties either.
Selecting material for reupholstering the front panel of the machine
The torpedo is constantly in sight, which means its appearance and quality will be striking both to you and to other passengers. The selection of material for reupholstering the front panel should be approached responsibly. Most often, the following materials are used in the interior design of a car:
- leather (artificial and natural);
- Alcantara (another name is artificial suede);
- vinyl.
You should not select material via the Internet. Pictures and descriptions will not give you a complete picture of the product. Before making a purchase, stop by a specialized store and feel each of the materials offered. It is also worth writing down the manufacturer and name of the shade. After this, you can order goods from the online store with peace of mind.
Genuine Leather
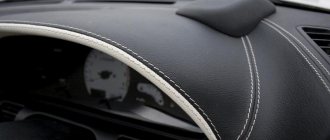
Genuine leather is a good choice for upholstering the front panel. This is a durable material that is not afraid of temperature changes, getting wet and fire. In addition, its surface is resistant to mechanical damage. Of course, you shouldn’t deliberately scratch the skin with a nail, but white stripes won’t appear on it by themselves either. The leather can be easily cleaned of dirt by regularly wiping it with a damp cloth. You don’t have to worry about the panel fading in the sun—it’s not afraid of ultraviolet radiation. And there’s no point in talking about the appearance of genuine leather: it will fit perfectly into the interior of even the most expensive and pretentious car.
Genuine leather gives the car interior a sophisticated look
Eco leather
If you can’t afford genuine leather, use its modern substitute - eco-leather. This type of material is called environmental because it does not emit harmful substances during operation. It doesn't look at all like the cheap leatherette of the late 90s. This is a durable, moisture-resistant and vapor-proof material that can maintain its appearance for a long time. Do not be afraid that the eco-leather coating will crack in a short time. In terms of its performance qualities, the material is not inferior to genuine leather. In addition, eco-leather is suitable for drivers with allergies.
eco-leather has good performance characteristics, but is much cheaper than natural leather
Alcantara
Recently, Alcantara has become one of the most popular materials for interior upholstery, including the dashboard. This is a non-woven synthetic material that feels like suede. It combines a velvety soft surface with easy care and high wear resistance. Just like skin, it does not fade in the sun. High humidity and temperature changes also do not affect it negatively. Many drivers prefer to cover the entire interior with Alcantara to create an atmosphere of home comfort. Others use it to design individual elements to dilute the severity of the leather. In any case, Alcantara is perfect for covering a dashboard.
Alcantara is a synthetic fabric similar to suede
Vinyl
If you want to create an unusual interior design, consider using vinyl films. There is a rich variety of textures and colors on the market today. You can choose a calm black or gray color, or you can find an imitation python fabric in an acid green color. Chrome-plated films, as well as films with a carbon or metallic effect, are very popular. They are even easier to care for than leather. Vinyl films have, perhaps, only one drawback: they are easy to accidentally scratch. But the low price allows you to re-tighten the panel as often as you want.
Using vinyl film you can imitate various materials, including carbon fiber
In order to save money, some motorists do not purchase special automotive material, but a similar one intended for reupholstering furniture. At first glance, it seems that there is no difference between them. However, this is not true: furniture leather and other materials are designed for use at constant and comfortable indoor temperatures. The car heats up in the bright sun and cools down in the cold. Furniture materials will quickly crack under such conditions.
Installing and connecting music in the cabin
To one degree or another, it is difficult to do without this with any approach to improving the interior (starting from ascetic options and even more so in the case of serious alterations). Car audio and multimedia in the UAZ are real, although in most cases it is extremely irrelevant, taking into account the peculiarities of off-road operation. Therefore, during internal tuning, in any case, you will have to deal with the installation of music. Moreover, not only the head unit of the system itself, but also all the accompanying car audio components - amplifiers, acoustics, subwoofers and other “bells and whistles”. Usually a simple UAZ gets by with a minimum of such equipment, but there are exceptions that amaze with the originality and power of the equipment.
Installing a mid-range speaker in the front door.
Cool car audio in Hunter's trunk - a complete set of equipment.
A simple way to mount broadband acoustics in doors.
Various aspects of this type of modification can be found in the Car Audio section of our article catalog.
Other improvements to the interior
- Aluminum cladding;
- Rolling down windows in doors;
- Electric windows;
- Air conditioner;
- Pasting with film (carbon, wood, aluminum);
You can read about all these areas in the following materials. .
Video on tuning the interior of the 469th UAZ / Hunter
Video selection on internal tuning in UAZ showrooms. Work of varying degrees of complexity and material costs (cost of materials, spare parts and additional accessories).
And the latest photos with descriptions can be viewed in the UAZ Tuning section, or in the UAZ 469 tuning category of our photo album. Enjoy watching!
Real photos of internal tuning
You can find other useful materials using the links below.
You can view all articles on the topic Car tuning - photos online on one page by clicking on the link Photos on tuning UAZ models 469, 3151 and Hunter. Even more useful information
You will find it in the section: Car tuning - online photos of our article catalog.
You might be interested to see:
Source
Do-it-yourself car torpedo reupholstery
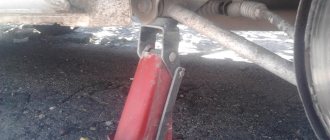
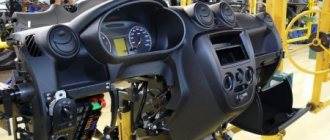
Reupholstering the front panel begins with its dismantling. This is a rather labor-intensive process. In addition, the pattern of fasteners and clamps is not the same on different car models. There are a large number of wires connected to the panel, and if you are afraid of damaging them, contact a car service center for help.
If you want to do this yourself, do not neglect the car’s operating instructions: all parts and fasteners are described in detail there. Removing a torpedo always begins with disconnecting the battery terminals. Once you have de-energized your car, you can begin dismantling.
Before you start reupholstering the panel, it should be dismantled
Video: how to remove a torpedo
As a rule, dismantling the steering wheel takes longer than reupholstering itself. Be careful and remember to disconnect any wires you encounter.
Tools
In order to retighten the torpedo, you will need the following tools:
- set of screwdrivers for dismantling;
- sandpaper (both coarse and fine grain);
- degreaser;
- antistatic cloth;
- self-adhesive interlining or masking tape;
- marker;
- sharp tailor's scissors;
- roller or spatula with a plastic sheet;
- a sewing machine with a foot and a leather needle (if you chose this material);
- special glue for leather (or the material you are using);
- hair dryer (preferably a construction hair dryer);
- material for upholstery.
Preparatory stage
When the torpedo is dismantled, it is necessary to prepare it for reupholstery with new material. This is done as follows.
- The part is degreased with a special product. It is not recommended to use acetone-based products for this.
- The surface over the entire area is sanded first with coarse-grained sandpaper, and then with an abrasive with a finer grain.
- The remaining dust after sanding is removed with an antistatic cloth.
If the case is severely damaged, you can putty the panel using a special compound for plastic. After the surface has completely dried, you can begin making patterns and reupholstering the part.
Your further actions will depend on the shape of the panel. If it is quite simple, with right angles and unexpressed bends, you can try to cover the torpedo with a single piece of material. But if the shape is complex and has many curves, you need to make a cover in advance. Otherwise, the coating will form wrinkles.
Schemes for smooth switching on of the backlight
To smoothly turn on the backlight of the scale and arrows, you need to spend a little effort, and more specifically, re-solder the circuit.
Below are two diagrams, in the first case - the dashboard, and then - the arrows. The circuits can be implemented on small pieces of a circuit board, which are sold in radio parts stores.
Consider one important factor: if the LEDs differ in power, they will not light up at the same time, some ahead of time, others late, but in general the backlight will turn on smoothly. This also applies to the LEDs on the scale.
The cost of reupholstering the front panel of a car yourself
The amount you spend on reupholstering a torpedo directly depends on the cost of the material. The average price for high-quality natural perforated leather is about 3 thousand rubles per linear meter. A standard size panel will take no more than two meters.
Eco-leather is already much cheaper: it can be found for around 700 rubles, although there are more expensive options. The price of vinyl film ranges from 300–600 rubles, depending on the type and quality. As for Alcantara, its cost is comparable to genuine leather, so you won’t be able to save on artificial suede.
High-quality high-temperature glue will cost you 1.5 thousand rubles per jar. We do not recommend using cheap superglue or Moment glue: you will be bothered by an intrusive smell, and the coating itself will deteriorate if the car heats up too much. Threads for leather products are sold at a price of 400 rubles per spool. Let's assume that you already have a hair dryer and a sewing machine at home, which means there will be no additional expenses for equipment.
Thus, we receive from 1.5 to 7 thousand rubles for the material, plus 2 thousand for consumables. As you can see, even when choosing expensive leather, you can spend 10 thousand rubles. In the salon, the price tag for this procedure starts from 50 thousand rubles.
The process of re-upholstering a car dashboard with your own hands has many nuances. However, the difference in price between do-it-yourself work and the service of a car workshop is so great that you can spend time studying the instructions, and then on the reupholstery itself. In addition, it will not take much time: the panel can be dismantled in 1.5–2 hours. It will take the same amount of time to reupholster. And if you find an assistant, then things will go much faster.
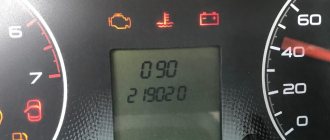
A car's dashboard or dashboard is a panel located in the front section of the cabin that houses instruments, controls and a steering wheel. It is made from high density plastics.
A torpedo in a car is damaged as a result of an accident, from constant contact with the hands of the driver and passengers, or from various objects that are carelessly thrown at it. If the front panel of the car has lost its appearance, it can be replaced or restored. These parts are expensive at salvage yards and in stores; moreover, it is not always possible to select suitable components for older car models. There are several methods used to restore the instrument panel with your own hands, let's look at them and dwell in detail on the most popular option - painting.
Replacing seats
Installing seats from a foreign car instead of standard ones is one of the best options for tuning the UAZ interior. Quite often in this process, the complexity of the work is at a relatively low level, and the cost of second-hand chairs is also often low, and the result can exceed the best expectations. Sometimes UAZ 469 or Hunter are equipped with leather seats from luxury foreign cars (BMW, Mercedes, Lexus, etc.). Examples of such installations can be seen in the photographs below.
Front leather seats from a foreign car (BMW X5).
Rear foreign-made seats from BMW X5 in the UAZ interior.
Replacing the seats and covering the floors and doors with corrugated aluminum.
Do-it-yourself methods for repairing a car dashboard
Self-recovery of a torpedo is carried out in one of three ways:
- Painting a torpedo with your own hands.
- You can cover the car dashboard with polyvinyl chloride film. The advantages of vinyl finishing include a wide selection of textures and colors of PVC films, their wear resistance and strength. The disadvantage of this method is that not all polymers that are used to make dashboards form good adhesion to polyvinyl chloride, so after some time the film peels off from the surface.
- Reupholstering the instrument panel with leather is an expensive finishing method. Leather (natural or artificial) is a durable, wear-resistant material that makes the interior luxurious. Reupholstering a torpedo with your own hands requires experience from the performer, since working with leather has many nuances. In order not to spoil expensive material, it is better to entrust this robot to an experienced craftsman.
A popular way to independently restore the appearance is to paint the dashboard, so let’s look at it in more detail.
How to make dashboard arrows backlit
The color of the speedometer and tachometer needles is important. If they are white, then you can leave them as they are. But if not, then you need to remove the old paint with a knife and treat them with alcohol, then paint them with white varnish or regular paint.
The color of the arrow should be white, because only it conveys the entire gamut of LEDs.
You can try the shooter separately. This requires LEDs with a diameter of 3 mm at 12 V.
Important!
In the car network, the voltage is 12 V; if the LEDs are designed for a lower value, then they cannot be connected directly. They should be connected through a stabilizer.
If the diameter of the LEDs is larger, you will have to make additional holes for them.
Preparing for painting
The restoration of a torpedo begins with the preparatory stage, which includes dismantling and preparing the surface of the part for applying paint.
In order not to stain the interior and protect it from the unpleasant smell of solvents and paint, the dashboard is removed. Carry out work on removing the dashboard in the following sequence so as not to damage the part:
- Disconnect the negative terminal of the battery.
- Remove removable elements: steering wheel, plugs, decorative elements.
- Unscrew or open the fasteners.
- Carefully move the panel and disconnect the electrical wiring of the devices from the power supply.
- Remove the panel through the front door of the cabin.
- Remove devices and buttons.
The torpedo in the car is constantly in contact with the hands of the driver and passengers, so dirt and grease accumulate on it. These contaminants contribute to the peeling off of new paint, so the panel is thoroughly washed in soapy water, wiped dry and degreased. For cleaning, you can use household detergents: special car shampoo, laundry soap solution, dishwashing liquid and others. Suitable solvents for degreasing are acetone, technical alcohol or white spirit, as well as special sponges and wipes for cars impregnated with a degreaser.
Setting up the ESP-8266
Before connecting the ESP8266 Module to the circuit, it must be flashed and configured in Tcp2uart (tcp to uart) transparent bridge mode so that it transmits the received data from the com port to the tablet via Wi-Fi.
It is better to flash via a USB-UART converter, which must have a 3.3V source output to power the ESP8266. Also, this source must provide the required current of at least 200mA.
Ready! Now, when the ESP-8266 module is connected to the Arduino, it operates in transparent bridge mode and transmits the necessary data via Wi-Fi.
Painting
You can paint the torpedo using special paints for plastic or coloring compounds for car bodies. The paint is sprayed using a spray gun from a distance of 20 cm from the surface of the part. Restoring a car dashboard with paints in aerosol cans is rarely done, since they cannot be used to achieve uniform coloring. Such compositions are usually used for touch-up of individual panel elements.
Painting is carried out in a ventilated area, protected from dust and direct sunlight. The paint is applied in three layers:
- The first layer, the thinnest, is called the developing layer, since after its application the errors made during grinding are emphasized. Any defects that appear are carefully sanded with fine abrasive sandpaper. The first layer of paint is applied with minimal overlap, that is, adjacent stripes overlap only along the edge, and unpainted areas of the surface are not allowed.
- The second layer is applied on the not dried first one. Adjacent stripes of this layer should overlap each other by half.
- The third coat of paint is applied in the same way as the first.
The dashboard can be matte or glossy. Experts advise not to open the dashboard with varnish, as the glare of light creates an additional load on the driver’s vision and distracts him from the road.
If you want the surface of the devices to be shiny, varnish it. The varnish is applied in 2 layers, 20 minutes after painting. For plastic parts that come into contact with the hands of the driver and passengers, two-component polyurethane varnishes are suitable. They form a smooth, glossy surface, but do not leave fingerprints on them, which is important for a part that often comes into contact with the hands of the driver and passengers.
It takes several days for the dashboard to completely dry. After this time, it is inspected, defects that appeared during painting are eliminated and installed in the salon.
Disassembling the console
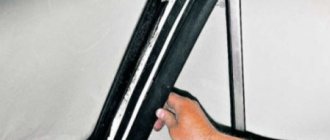
Initially, you need to disassemble the dashboard: remove the protective glass, then the arrows, but keep in mind that they are very fragile, and in order not to damage them, it is better to slip thick paper under the screwdriver; it does not require much effort.
For the dashboard substrate, you will need a knife, with its help you need to cut through the layer of sealant around the entire perimeter.
After removing the “cover”, use a knife to carefully scratch the filter; it is a special paint. Then degrease this area with acetone or alcohol.
Putting a sticker on the dashboard
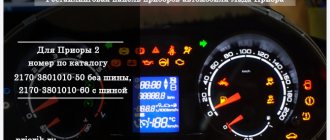
In addition to the above mentioned methods for changing the color of the backlight, you can also change the appearance, that is, the image of the instruments as the driver will see them.
For this purpose, special stickers are most often used. To do this, you should disassemble the instrument panel and get to the instrument backing, on which the values and numbers are printed.
It is worth remembering that stickers are sold for each model, make and year of manufacture of the car separately. As an example, it may be the same car, make and model, even year of manufacture, but the instrument panel is different. One will have a tachometer, the other will not. Therefore, stickers should be selected very carefully.
Before gluing, try it superficially on the factory panel to see if it fits the fasteners, or if there is anything that interferes with the smooth application of the sticker. If the old coating can be removed, then it is better to do so; the new sticker will look much prettier. Now that everything is fine, the surface on which you will glue it should be wiped with a degreaser. Glue one side and, while pressing the sticker, slowly pull off the protective layer. It’s important to smooth it out so that there is no air under the sticker, otherwise the temperature will cause it to peel away from the surface in a few months.
After completing the procedures, you can put everything back together and mounted it to see how well the instrument panel has improved. Next, we assemble everything in reverse order, installing the panel in its proper place.