Searching in auto parts stores for such small, but sometimes very necessary parts as generator brushes, starter brushes, heater motor for my car (VAZ-11174, 2010 onwards, mileage at the time of writing 135,000 km) in my region (I live in a village, I work in a small town) led to a disappointing conclusion - you will find horseradish (((. Please, the entire assembly is assembled - either in stock or to order. The experience of reassembling the KZATE 85A generator speaks in favor of the last option (due to the hassle of removing and installing) I removed the old one I immediately installed a new one (preferably BOSCH, especially relevant for lovers of music and heating everything and everyone, since the KZATE 85A does not keep the windshield heated when connected to the “north” - I installed it and connected it myself while I’m using it to the “South”).
If you have time to tinker, and if you have “direct hands”, you will definitely find a useful resource on the details of starter-generators on the Internet. The downside is that it is English-language.
We find the required article and then search the Internet resources of local auto stores. In my region I can find something in ASTA and Dvizhkom stores.
Cargo BX2132 analogue of BOSCH 1 127 014 028, I suspect that the BOSCH F 000 BLO 6F8 (2170-37010-13) will also fit
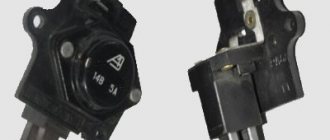
I collected brushes in the near future and expect to use them in the TRT5 10142 voltage regulator of the KZATE 9402.3701-06 14V 85A generator.
The regulator needed to be torn apart a little (in the photo), so having hands with soldering experience is simply necessary))) Some kind of black, possibly silicone sealant, was poured under the regulator control board.
Attention, question - tell me what can I fill the cavity with? Can regular vinegar silicone corrode too much?
If the voltage regulator unit, capacitor and not a tight fit of the brushes are faulty, or if they are worn out, the vehicle's supply voltage deviates from the norm. In this case, it is necessary to check the above listed elements and, if necessary, replace them. In this article we will talk in more detail about diagnosing and replacing generator elements in a Lada Kalina car.
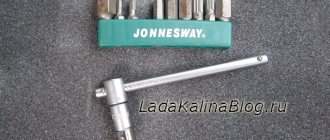
To remove the Lada Kalina voltage regulator you will need the following tool:
flat-blade screwdriver, 8mm and 10mm open-end wrenches and 7mm, 8mm and 24mm socket wrenches, hammer, soldering iron, universal meter (with DC voltmeter and megger)
Checking the functionality of the voltage regulator on the Lada Kalina generator
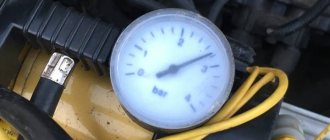
1. Move aside the rubber insulating cover of the positive terminal from the generator.2. Start the engine and allow the engine to warm up so that the vehicle operates normally at idle speed.3. Measure the voltage between the positive terminal and the body (negative terminal). The voltage should be 14.5-15.1 volts.
Detailed description of replacement
First, you need to disconnect the negative terminal of the battery to prevent a short circuit. After this, remove the protective plastic cover by slightly pressing the three latches on it, as shown in the photo:
Then you need to pry up the small power plug with a screwdriver and pull it up with the force necessary to remove it. Personally, in my case, the wire was very tight on the contact, so I had to try hard before removing it. It is better to do everything carefully so as not to tear the solder off the voltage regulator.
After this, you can unscrew two small bolts, as shown in the photo:
And the last one will be a large bolt, which does not need to be turned out completely, you can just loosen it slightly:
And freely remove the voltage regulator along with the brushes, as clearly shown below:
If a part needs to be replaced, buy a new one and install it in the reverse order of removal. The price for a voltage regulator along with alternator brushes for a Lada Kalina will be about 350 rubles.
Searching in auto parts stores for such small, but sometimes very necessary parts as generator brushes, starter brushes, heater motor for my car (VAZ-11174, 2010 onwards, mileage at the time of writing 135,000 km) in my region (I live in a village, I work in a small town) led to a disappointing conclusion - you will find horseradish (((. Please, the entire assembly is assembled - either in stock or to order. The experience of reassembling the KZATE 85A generator speaks in favor of the last option (due to the hassle of removing and installing) I removed the old one I immediately installed a new one (preferably BOSCH, especially relevant for lovers of music and heating everything and everyone, since the KZATE 85A does not keep the windshield heated when connected to the “north” - I installed it and connected it myself while I’m using it to the “South”).
About the principle of operation of a car generator
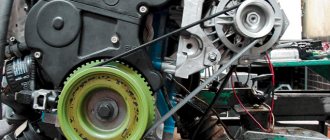
The operation of the Lada Kalina generator unit is based on the following principle: an alternating current is induced in the stator winding, which is subsequently transformed into direct current through a rectifier module located on the body of the unit. The generator cover is also equipped with an electronic voltage regulator and a brush holder. The rotor of the device receives torque from the crankshaft pulley. The transmission link is a poly V-belt.
The basic characteristics of the generator set include the following parameters:
- maximum generated current – 85-90 Amperes;
- operating range of on-board voltage – 14.4-15.1 Volts;
- rotation ratio of the motor and rotor – 1:2.4;
- right-hand direction of rotation.
The housing of the unit is held together by pins that tighten the stator with the covers. The mounting sockets of the indicated covers contain bearings, which ensure the ability of the rotor to rotate. The rear bearing is installed inside the cover with a minimum gap. The front element is equipped with the ability to slide along the surface of the rotor shaft. It is fixed inside the front cover with a slight interference fit, and a pressure plate covers it from the outside. The back of the device is protected by a plastic casing.
Let's move on to the switching diagram of the generator with the on-board network. The connection diagram is very simple. After turning on the ignition, power begins to flow to the voltage regulator through the battery discharge lamp circuit. When the motor starts, the excitation winding is supplied with supply voltage from three diodes mounted in the rectifier unit.
Using the indicated signal lamp, the generator unit can be checked. If the device is working properly, the lamp lights up when the ignition is on. It goes out when the engine starts. When this phenomenon is not observed and the lamp continues to shine, the generator set should be diagnosed for the presence of malfunctions. In some cases, replacement is required, and many are interested in how to remove the generator?
Checking the voltage regulator for serviceability:
1) First of all, you will need to find where the generator itself is located and after you find it, move your hand aside the rubber cover, which is indicated by a reddish arrow, this cover covers terminal “B” in more ordinary words this is the positive terminal and it goes from the generator, to this terminal (by the way, it is also indicated by a blue arrow) you will need to connect the positive wire of the voltmeter and after connecting it, throw another wire (minus wire) going all the way from the same voltmeter to ground (the places where you need to connect wire, indicated by a green arrow), after the operation has been completed, a constant current voltmeter will show you the voltage in the vehicle’s on-board network.
We change bearings in Lada Kalina
The rectifier units present in the designs of generator sets of the AvtoVAZ model range have received a considerable number of negative reviews during operation. This statement is also true for the Lada Kalina we are considering. These modules can break down even after a mileage of 10 thousand km, which requires repair or replacement of the device. It has also been revealed in practice that the cause of most malfunctions is the generator set bracket. However, bearings can also fail prematurely. It is gratifying that the owners are able to cope with such a problem on their own.
To repair the generator module, it will require preliminary disassembly. For this purpose, we “grab” the tips of the stator cables with a screwdriver and slightly pull them out of the springs present in the diode bridge. Next, you need to unscrew the bolts holding the bridge itself. In addition, unscrew the connecting bolt.
Having disassembled the body of the LADA Kalina generator set, we resorted to checking the integrity of the rear bearing. Here you will need to twist its outer ring. If it rotates without noticeable difficulties or sounds, and is not inclined to emit play, then we ascertain the serviceability of the bearing. When the slightest signs of wear are evident, we change it without hesitation.
The next step is to dismantle the generator unit bracket. Using the same screwdriver, we pry up the stator and remove it from the casing. The bracket design contains a bearing, which is also subject to inspection and replacement (if necessary).
The bearing of the front part of the LADA Kalina generator is rolled inside the casing. The manufacturer does not recommend replacing it. However, experts still advise performing this procedure, since if it breaks down, you will have to replace the entire generator, which is very expensive.
Replacing rear pads Kalina
Idle air control Kalina
Kalina torpedo
This bearing can be removed, but you will first have to remove the pulley and the plug present here. Next, using a hammer with a rubber striker, we excavate the rotor. Note that the front lining of the product will have to be clamped with a vice. We remove the bearing with special care.
Toyota Vitz or Lada Kalina
A colleague and I have a sport here - what’s better, the Toyota Vitz that I had or the Lada Kalina that he drives? And the argument flared up, everyone defends their own car... But objectively, what would you choose? And it’s very interesting WHY such a choice, since my colleague, unfortunately, could not give a single argument that the Toyota Wits is no cooler than the Lada Kalina. Except, perhaps, for the fact that the viburnum is his, and that’s why it’s good. So, a few parameters of both cars: Toyota Vits, 1999. The estimated cost of the car is now about 200, but it was bought for 170 thousand. The steering wheel is right. Gasoline consumption is 92, displacement consumption is about 7-8, depending on the city and highway. There is a Conder, an automatic transmission, a bunch of bells and whistles, it hasn’t seriously broken down in three years of operation - well, only some consumables were replaced, such as oil, a little in the suspension. Naturally, an A-class small car, 1-liter engine, 70 horses. Lada Kalina, 2006. The estimated cost of the car is about 170 now. The steering wheel is left. Gasoline is also 92, displacement consumption is 7 on the highway, 8-9 in the city. There are no bells and whistles, it's mechanical. Among the breakdowns over the same three years of operation are the starter, alternator, clutch, pump, and a breakdown in the cylinder head. By class - sedan, engine - 1.6, horsepower - 80 horses. Really, which is cooler?
Tags: Which generator on Kalina 11194 with air conditioning
Replacing the generator regulator relay on a Lada Kalina: photos, videos, articles
A three-phase voltage regulator (charging relay) is installed on the generator. Responsible for maintaining the voltage of the on-board network within a given limit in all operating modes.
The output voltage may be affected by changes in rotor speed, electrical load, and ambient temperature.
Failure is considered one of the most common problems associated with the operation of the generator. Replacing an element does not require practical skills.
Replacement process
The process of removing the generator on Kalina depends on whether it has a tensioner on it or not. A belt without a tensioner can only be removed together with the generator or simply cut (if it’s old).
- Disconnect the negative wire from the battery.
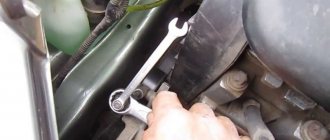
- Loosen the generator and remove the belt. Use a 13 key to loosen the tensioner and remove the belt.
- Disconnect the wire plug. By pressing the latch, we snap off the plastic block.
- 10mm wrench , unscrew the nut that secures the terminal of the two wires, hidden under the rubber boot. Lift the boot and unscrew the nut by 10.
- Remove generator mounting bolts The mounting bolts are located at the top and bottom of the generator.
- Remove the generator from the car.
- Using a flat-head screwdriver, pry up the 3 latches and remove the protective plastic cover of the generator. The latches are located on the side surface of the cover.
- Disconnect the wire plug connected to the diode bridge.
- Use two keys to unscrew the bushing. Mounting the regulator relay: 1 – contact under the bushing, 2 – bolts securing the relay body.
- Remove the 2 washers located behind it.
- Using a Phillips screwdriver, remove the 2 screws holding the charging relay.
- Remove the part from the generator. View of the generator with the relay removed.
- Assembly of the unit is carried out in the reverse order of removal. After assembling the unit, it is necessary to check the reliability of the wire connections and tighten the generator belt.
How to replace brushes on a removed generator
With the generator removed, work on replacing the brushes will be much easier. Having access from all sides, it is easy to examine the wear of the brushes and replace them. The main problem in this option will be removing the generator from the car. You need to unscrew the generator mounting bolt, loosen the belt tension, remove it and unscrew the mounting bolts connecting the generator to the engine housing. If you can get the generator from above, consider yourself lucky. There are often cases when, to remove the generator, you have to remove not only the air filter and pipes, but even the radiator.
How to remove brushes from a generator located on a car
If the previous owner installed a brush block with a relay regulator in the generator, then the question of how to change the brushes on the generator without removing it from the car is much easier to solve than replacing individual brushes. If there is sufficient space in the engine compartment, it is also possible to replace the brushes separately without having to remove the generator.
All work on the vehicle's electrical equipment should begin by disconnecting the battery.
- The voltage regulator is removed;
- The production of brushes is measured;
- Old brushes are unsoldered;
- Contacts are cleaned;
- New brushes are soldered;
- The free movement of the generator brushes is checked;
- The regulator is installed in place;
- We connect the battery and start the car.
If everything went without errors, you won’t have to worry about how to check the generator brushes for a long time. Now, knowing perfectly the structure of the generator after disassembling it, it will not be difficult for you to fix other generator malfunctions with your own hands.
How to replace a generator set?
How to remove the generator? In some cases, repairing the generator unit is impractical or cannot restore the functionality of the device.
Replacement is required here. The process itself is not an intricate undertaking, so it will not take much time from the owner of the Lada Kalina.
For a successful replacement operation we will need:
- Remove the belt, first loosening the tension element.
- Disconnect the plug together with the cable terminals.
- Unscrew the nut securing the upper section of the unit and remove the bolt.
- Use the same method to remove the bolt at the bottom of the device.
- Remove the generator unit from the engine compartment.
Replacement and installation of a new device is carried out using the reverse algorithm.
Determining wear and replacing brushes on the generator
There can be many reasons for poor battery charging, one of which is worn out alternator brushes. To check their condition, you need to remove them and inspect them. All this can be done on Kalina with a generator installed, but for clarity, I will show it with a removed one. So, in order to remove them we need:
- 8 key, or socket with small ratchet
- Open-end wrench 13
- Flat head screwdriver
Signs that it's time to change the alternator brushes:
- The car's electrical appliances suddenly turn off (even while driving);
- Headlights, dimensions and even interior lighting dim and flicker;
- A sharp decrease in the voltage of the vehicle's on-board network;
- A sharp discharge of the battery, which will be very difficult to recharge in the future.
Each of these points may indicate wear on the generator brushes, which are located inside this unit. Many people wonder how to check brushes. In order to check the remaining length of the generator brushes, it is enough to disconnect the generator from the battery and remove the voltage regulator. After this procedure, you can determine by eye how worn out any of the generator brushes are. If the length is less than 0.5 centimeters, the brushes definitely need to be changed. Checking the brushes should be carried out during routine inspection of the generator.
Restoring an electric motor at a VAZ
Let's first look at how to replace the brushes of a VAZ 2107 generator. For work, we will be equipped with the following tools:
- set of spanners;
- screwdrivers - set;
- rubber hammer.
So, we begin work on changing the generator brushes on the VAZ 2107.
- We disconnect the terminals of the battery, and also unscrew the cables from the terminals of the electric motor, dismantle it by unscrewing the fasteners. Loosen the belt and remove the electric motor.
- Unscrew the pulley mount while holding the rotor with a tool.
- Disconnect the traction relay.
- After unscrewing the nuts, remove the front cover of the assembly unit using a rubber hammer.
- We also use a rubber hammer to push the rotor out.
- We detach the back cover from the stator.
- We remove the brush holder from the stator and reinstall the worn parts.
- The electric motor is assembled in the reverse order.
This process, if something is not clear, you can also visually study the video called “replacing VAZ 2107 brushes.” Replacing brushes in a VAZ 2106 generator is done in exactly the same way.
If we turn to VAZ models with front-wheel drive, then there are not so many differences in the procedure. For example, let’s first consider how to replace brushes on a VAZ 2110, for which we first take this:
- spanners;
- Screwdriver Set;
- hammer, block, or rubber-tipped mallet.
- Having loosened the belt, disconnected the wires and unscrewed the three bolts, we dismantle the electric motor.
- Having taken the unit out of the car, remove the pulley, holding the rotor with a screwdriver. In principle, the traction relay and rotor do not need to be dismantled; for the “seven” we did this for ease of work.
- Next, unclip the latches on the back of the electric motor, and then remove the plastic casing.
- We immediately see the voltage regulator assembly along with the brush holder.
- Unscrew the two screws and remove the brush holder.
- We renew worn parts.
- We do the assembly in reverse.
By the way, changing brushes on the VAZ 2112 is carried out one by one according to the same instructions. Now let’s figure out how to replace an element on a VAZ 2109.
We will need to prepare:
- set of spanners;
- Phillips and slotted screwdrivers;
- rubber hammer.
Here's what we do (this is an option without removing the traction relay).
- After loosening the belt and removing the tensioner bar, we dismantle the entire unit.
- On the dismantled unit, unscrew the pulley.
- After unscrewing the nuts, remove the front cover of the electric motor.
- Push the rotor out with a rubber hammer.
- We detach the stator from the back of the electric motor.
- We unfasten the diode bridge, take out our failed graphite tips and install new ones.
- Assembly is done on the way back.
It must be said that the work of replacing brushes on a VAZ 2114 takes place in exactly the same sequence. The same applies to work on the VAZ 2115.
Generator Problem
I’ll answer right away, there are two working 10x generators, and it suits my khan, the rings where the brushes go are worn out and I’ve already changed the brushes 3 times in 2 years.
Vitaly (Shrikara) rings change...cost 250 rubles
Seryoga (Patti) It will do without any problems, just for charging to start you need to rev it up to 2000-2500 after starting the engine
Alexander (Saturnus) I agree with Vitaly, the rings change without problems, I changed them two months ago.
Anton (Addyson) It’s 100 kilometers to get the rings...
Alexander (Saturnus) I traveled 120 kilometers, and there were no rings in my city.
Andrey (Riina) Why such speeds? How about a push?
Seryoga (Patti) Excitation of genes occurs through a lamp in the instrument panel, there is not enough generator for the 10th
Andrey (Riina) It turns out that at idle, the gene will not work normally.
Seryoga (Patti) It will only be necessary to accelerate initially
Andrey (Riina) In general, as they say, a kick for speed.
Seryoga (Patti) Alternatively, set the anchor from the tenth
Andrey (Riina) You mean, the stator is Kalinovsky, and the rotor is from 10?
Seryoga (Patti) yes
Seryoga (Patti) Or even the back cover with brushes
Andrey (Riina) Is the lid suitable for 10?
Seryoga (Patti) What year of manufacture?
Andrey (Riina) 11
Seryoga (Patti) Okay, I won’t confuse you, there are 3 generators on the viburnum, and the first ones differed slightly from the tenths
Andrey (Riina) Thanks for this
>Design and repair of the Kalina generator
content .. 220 221 222 223 224 225 226 227 228 229 ..