The Starline A93 operating instructions include an electrical diagram that must be followed when connecting the alarm. The service manual will allow you to perform the initial setup of the security system, including programming anti-theft options and automatic engine start.
Alarm characteristics
Security functions of STARLINE A93
- 3D shock and tilt sensor will work when jacking up and evacuating the car
- Free monitoring (optional) When you connect StarLine GPS-GLONASS-Master, you can find out the location of your car with an accuracy of several meters
- 2CAN (optional) Integration of the 2CAN interface ensures installation of alarm systems on vehicles equipped with several digital CAN buses
- Shockproof keychain with protected antenna
The main distinguishing feature of this alarm system among others in the same price category can be noted
- Three stages of protection. First comes the password, then the immobilizer, then the standard system
- Smart engine start, based on temperature time, timer, alarm clock or after a time interval
- The range of the key fob reaches two kilometers
- Quick installation, without interfering with the vehicle system
- Remote adjustment function
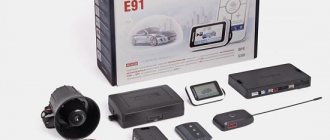
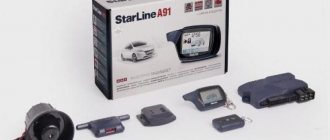
Starline a93 delivery set
- Brief operating instructions;
- Warranty card;
- Memo;
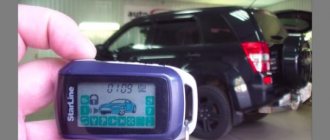
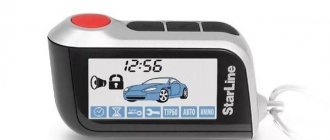
- Main control keychain with feedback and LCD display;
- Central processing unit;
- Main key fob battery (AAA);
- Additional relay together with block;
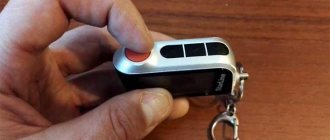
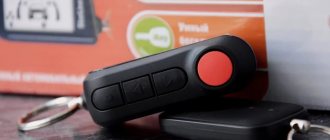
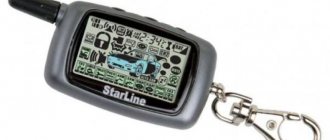
- Additional keychain;
- Power module;
- Standard immobilizer bypass module*; siren*; — power cable for power supply and control of light signals;
- Transceiver module (transceiver)
- Cable for connecting the power module and engine temperature sensor to the car alarm unit;
- 2CAN interface connection cable;
- Central locking cable with 6-pin connector;
- Cable with 6-pin connector for connecting car alarm inputs;
- Main cable with 10-pin connector;
- Transceiver connection cable;
- LED indicating alarm status;
- Wire for connecting the hood limit switch;
- Service button;
- Engine temperature sensor;
- Adapter for connecting additional sensors;
- Hood limit switch, 2 self-tapping screws, ground terminal, 1N4007 diodes
Video review of the configuration:
What areas does Starline A93 protect:
- All opening parts: doors, hood, trunk, parking brake, brake pedal, control, through limit switches
- Body, vibration response, two-level shock sensor, tilt sensor
- Ignition, control via input to the ignition circuit
- Engine - blocking relay, code relay StarLine R3 (optional)
- Interior space - additional sensor (optional)
Anti-theft device options:
- Security mode with sound and light alarms
- Providing alarm alerts to a key fob with an LCD display
- Silent activation/deactivation of security mode
- Silent security mode
- Security mode with engine running
- Turning security on/off without using a key fob
- Automatic return to security mode in case of accidental shutdown
- Automatic arming
- Immobilizer mode
- Anti-robbery mode
- Panic mode
- Programmable personal code for emergency disarming of the security mode
- Engine blocking and its preservation when dismantling the car alarm
- Programmable 2-step engine lock release
Self-diagnosis and fault detection functions:
- Indication of trigger causes for 11 zones
- Alarm of a faulty zone when arming
- Automatic monitoring of the status of security sensors with disabling faulty ones and reporting their malfunction
- Indication of the fact of activation by sound signals
- Indication of car alarm by LED and on the key fob display
- LED indication of limit switch serviceability
What service functions does this model have:
- Activating sensors before turning off the interior lights and bypassing the door area
- Disabling security, adjusting the volume of signals
- Remote disabling of the shock and tilt sensor in security mode
- Remote control of the central locking system (central locking)
- Central locking control from the ignition switch
- Two-step lock opening
- Two-pulse closing of door locks
- Six channels for controlling additional equipment
- Car battery voltage monitoring
- Determining the temperature inside and outside the car
- Search from car
- Light alarm for open doors
- Turbo timer mode
- Remote programming of functions and key fobs
- Service mode
- Car interior light control
- Call from car
- Insurance against accidental pressing of key fob buttons
- Registering new key fobs and deleting lost ones from the system memory
- Setting the time, alarm clock, timer
- Main key fob charging control
- Possibility of working together with GSM modules StarLine M20, M30 and StarLine M21, M31 (car alarm control and monitoring its status via GSM channel
- Remote and automatic start, extension, engine stop
- Remote engine start in cars with a start-stop button
- Works with any engine: gasoline/diesel
- Transmission choice: manual or automatic
- Monitoring engine operation using signals from a tachometer, generator or mains voltage
- Protection against starter overexposure when starting the engine
- Understanding the remaining engine operating time on the key fob
Description
Starline b9 operating instructions
Automatic start is available as an option along with the alarm system. In this configuration, the engine starts remotely, and, if necessary, remotely in automatic mode. In the latter version, the engine starts at a specified time or at a specific temperature. Optionally, the security complex is equipped with a telephone control option. In this case, the alarm system is supplemented with a GSM interface, which sends information to the car owner’s smartphone. The keychain has a shock-resistant design. The design of the keychain is ergonomic. The internal antenna is protected. The 2CAN+2LIN option allows you to install a security alarm on modern cars equipped with CAN or LIN buses. As an additional option, it is possible to connect free monitoring. In this case, the car owner can track his vehicle on the website starline.online. The accuracy of location is measured in meters. The option is available if there is a GSM interface and when GPS-GLONASS is connected. Satellite systems are also an optional extra.
Setting up autostart alarm Starline A93
Starting the car:
- Move the gearshift knob to the neutral/parking position (switch off all gears);
- Turn off the ignition and remove the key from it (the engine must be on);
- Activate the parking brake (on manual)
- Close all doors tightly, as well as the hood and trunk lid;
If any step is missed, remote launch is not possible. But with proper preparation of the car (the engine is turned off by the alarm itself), it can be started from the remote control in different ways.
Press and hold button 1 (until two melodic beeps appear), then release the button
It is not possible to start the engine automatically if the vehicle's ignition is turned on, the brake pedal is pressed, the hood is slightly open or the parking brake is applied, and on vehicles with a manual transmission the "soft neutral" procedure has not been performed.
Periodically starting the engine from the key fob:
This function is especially relevant in winter, when periodic warming up of the engine is required. The starline a93 key fob can automatically start the engine to warm up (after 2, 3, 4, 24 hours).
How to set up autorun by time
The Starline A93 alarm system allows you to regularly start the car engine at regular intervals. The start period can be set from 2 hours to 24 hours with a minimum increment of 2 hours.
To activate the mode, you must:
- place the key fob cursor on the icon with the image of an hourglass and briefly press button No. 1 - the car will respond with one light signal, and the key fob with one melodic sound;
- The key fob display will display the current value of the car engine autostart period for 4 seconds (for example, “4H” means that the engine will start every 4 hours).
To change the engine autostart period, you need to lightly press button No. 1 until the desired value appears on the display. Each press of button No. 1 increases the automatic start period by 2 hours.
After the desired autorun period value is displayed on the display, press button No. 1 and hold it until a melodic trill sounds, or wait until the selected autorun period is automatically saved, which will occur 4 seconds after selecting the desired parameter. At the same time, two short melodic signals will sound on the key fob, and an icon with an hourglass will begin to appear on its display. A few seconds after setting the selected parameters, the engine will automatically start and warm up.
- How to set up a Starline A93 alarm
Activate autostart mode based on temperature
This feature monitors the outside air temperature and, if necessary, starts the car engine to warm up. The start temperature is set within the range from -3 °C to -27 °C, the minimum step is 3 °C. The minimum period of time between restarts (excluding time spent warming up the engine) is 60 minutes. Once the user activates the temperature-based engine start feature, the number of temperature starts is not limited.
To enable engine autostart mode based on temperature, perform the following steps:
- press the icon with the image of a key and button No. 1 - the car reacts with one light signal, and the key fob emits a melodic trill once;
- over the next 4 sec. the key fob display shows the current value of the starting temperature;
- to change the temperature value, you need to press button No. 1 (1 press = 3 oC);
- after selecting the desired temperature parameters, hold down button No. 1 until a sound signal is heard, or wait for automatic saving, which occurs after 4 seconds.
If the engine autostart function based on temperature is successfully activated, the key fob emits two short melodic signals, and the icon with the image of a key on the key fob display becomes active.
Auto start on alarm clock
When this function is activated, the car engine will automatically start at the specified time. To activate the function, perform the following steps:
- the key fob cursor is moved to the icon with the image of a clock and button No. 1 is briefly pressed, after which the car emits one light signal, and the key fob emits one melodic sound;
- the key fob display shows the time after which the engine will automatically start according to the alarm clock;
- after 5 sec. The current time display on the key fob resumes.
The engine autostart function using an alarm clock is activated for one start cycle. The fact that the mode has been successfully enabled is indicated by active icons depicting a clock and a bell on the key fob display.
Remote engine start
StarLine a93 conveniently and effectively introduces a remote start function for the power unit, which creates additional convenience when operating the vehicle.
Setting the software neutral
· The handbrake is activated when the engine is running, the driver leaves the cabin, closing the doors. Pressing the second button turns on the mode;
· The ignition is turned off. Depending on the program neutral conditions, the motor either continues to operate or not;
· The car is armed.
Table: starting, extending operation and stopping the engine from the key fob
| What to do. | Keychain. | System. |
| Start the power unit from a distance. | ||
| Button No. 1 to notify with two melodies. | · One siren signal; · One flash of headlights; · Doors are locked; · The motor will start. |
|
| Extension of work. | ||
| Press and hold the first button until two tunes are played on the remote control. | · The headlights will blink once; · The engine is running. |
|
| Stop the engine from a distance. | ||
| The first button is long, the fourth is short. | · Four flashes of optics; · The engine stalls. |
|
Table: instructions for setting autorun by time
| What to do. | Keychain. | System. |
| Setting a timed trigger | ||
| Cursor to icon: Click on the first key. | The headlights will flash once. |
|
| Select the period with the first key. | — | The period change is shown on the display: |
| Recording into memory with the first key before the melody. | After a few seconds, the engine warm-up cycle begins. |
|
| Disable the function. | ||
| Cursor to icon Click on the first key. | Two flashes of headlights. | · One remote control melody; · The icon will disappear |
Table: temperature trigger setting
| What to do. | Keychain. | System. |
| Setting the start based on outside air temperature. | ||
| Cursor to icon: Click on the first key. | The headlights will flash once. |
|
| Select the period with the first key. | — | The change in the start temperature value is shown on the display: |
| Recording into memory with the first key before the melody. | After a few seconds, the engine warm-up cycle begins. |
|
| Disable the function. | ||
| Cursor to icon: Click on the first key. | Two flashes of headlights. | · One remote control melody; · The icon will disappear: |
Table: autostart on alarm clock
| What to do. | Keychain. | System. |
| Setting the alarm to start. | ||
| Cursor to icon: Click on the first key. | The headlights will flash once. |
|
| Disable the function. | ||
| Cursor to icon: Click on the first key. | Two flashes of headlights. | · One remote control melody; · The icon will disappear: |
How to set the time on Starline A93
Press button 4 until there are three signals: one melodic and two short. At this time, the clock image will start flashing.
Setting up the clock must begin within eight seconds, otherwise the key fob will exit the function menu
The hours are set with button 2, minutes with button 3. After setting the hours, the transition to minutes is carried out using button 4.
Another press of button No. 4 leads to setting the alarm clock. The alarm clock is set in the same way as the time. Exit the alarm clock setting mode using button 4.
- Connection diagram and operating instructions for Starline Twage A6 alarm system
Select the section you are interested in about Starline A93
Car drivers > Useful information > Accessories and gadgets for cars > Alarm system > StarLine > A93 > Operating and setting instructions for the Starline A93 alarm before—>
Careful study of the operating instructions for the Starline A93 alarm will allow you to quickly understand all the functionality that this car security system provides and the correct procedure for using them.
p, blockquote1,0,0,0,0—>
p, blockquote2,0,0,0,0—>
But before that you will need to make some initial settings. If the alarm installation was carried out independently, then the car enthusiast will also cope with these actions himself.
p, blockquote3,0,0,0,0—> p, blockquote4,0,0,0,0—>
Advantages and disadvantages of the system
Advantages of the anti-theft complex:
- Extensive functionality. The alarm has many useful options that make driving easier. For example, auto engine start, “Anti-robbery”, “Comfort”, etc.
- Possibility of monitoring the main parameters of the vehicle and the anti-theft system.
- Convenient alarm control using the remote control.
- Possibility of expanding the functionality of the anti-theft installation through the use of additional devices. According to owner reviews, the system works efficiently only with Starline modules.
- Availability of digital interface.
Minuses:
- Problems with the remote control appear after a certain time. Compared to key fobs from other versions of Starline alarms, the device in the A93 model wears out faster. This may be due to increased wear and tear on the internal elements of the communicator.
- High cost of the security system.
- Car alarms are not universal; they cannot be installed on some models of modern vehicles. For example, using the system on a Lada X-Ray car, the car owner will be faced with a lack of access to all functions.
Initial setup of the Starline A93 alarm before starting operation
h21,0,0,0,0—> p, blockquote5,0,0,0,0—>
Setting Shock/Tilt Sensor Sensitivity
h31,0,0,0,0—>
The sensor is located in the transceiver device. Sensitivity can be adjusted using a USB programmer, as well as an LCD key fob. Let's consider the sequence of actions when setting up using a key fob:
p, blockquote6,0,0,0,0—>
p, blockquote7,0,0,0,0—>
p, blockquote8,0,0,0,0—>
Setting the sensitivity of the tilt sensor using the LCD key fob is carried out in the following sequence:
p, blockquote9,0,0,0,0—>
p, blockquote10,0,0,0,0—> adsp-pro-1—>
Entering the main programming menu
h32,0,0,0,0—>
The programming menu is entered using the LCD key fob and the service button in the following sequence of actions:
p, blockquote11,0,0,0,0—>
p, blockquote12,0,0,0,0—>
Sequence of programming service and security functions
h33,0,0,0,0—>
p, blockquote13,0,0,0,0—>
p, blockquote14,0,0,0,0—>
Programmable Function Tables
h34,0,0,0,0—>
p, blockquote15,0,0,0,0—>
p, blockquote16,0,1,0,0—> adsp-pro-2—>
p, blockquote17,0,0,0,0—>
p, blockquote18,0,0,0,0—>
Programming engine starting parameters
h35,0,0,0,0—> p, blockquote19,0,0,0,0—> p, blockquote20,0,0,0,0—>
Programmable Trigger Function Selection Table
p, blockquote21,0,0,0,0—> p, blockquote22,0,0,0,0—> p, blockquote23,0,0,0,0—> p, blockquote24,0,0,0,0 —>
How to set the time on the Starline A93 key fob
h36,0,0,0,0—>
To set the time on the key fob, you must perform the following sequence of actions:
p, blockquote25,0,0,0,0—>
- Enter the functions menu by holding down button 4 of the key fob. After this, the clock on the key fob will start flashing.
- Within 8 seconds, use buttons 2-3 (more - less) to set the required clock time.
- A short press of button 4 will set the minutes, then the alarm, and then until the setting is completed.
Programming the volume of siren confirmation signals
h37,0,0,0,0—> p, blockquote26,0,0,0,0—>
Reset to factory settings
h38,0,0,0,0—> p, blockquote27,0,0,0,0—> p, blockquote28,0,0,0,0—>
The Starline A93 car alarm provides flexible programming of additional channels. This procedure is complex and requires special skills in working with Starline equipment, as well as experience in setting up vehicle systems.
p, blockquote29,0,0,0,0—>
Programming the CAN + LIN interface channel
h39,0,0,0,0—>
This programming is performed after connecting all Starline A93 security alarm devices. To enter programming mode, you must perform the following steps:
p, blockquote30,0,0,0,0—>
- Turn off the power supply to the complex.
- Disconnect the CAN + LIN interface connector.
- Turn on the power to the security system by holding the service button until the siren confirms the siren five times.
- After pressing the service button, the siren signal should sound four times, which confirms the transition to the programming mode.
adsp-pro-3—>
Entering a four-digit vehicle number
h310,0,0,0,0—>
Each car model supported by the CAN interface has its own unique four-digit number. This unique number can be found in the Car Table of the CAN telematics brochure, which is included in the Starline A93 alarm kit, or on the manufacturer’s website.
p, blockquote31,0,0,0,0—>
Sequencing:
p, blockquote32,1,0,0,0—>
- Enter programming mode as above.
- Quickly press the service button the number of times corresponding to the first digit of the number. The siren will confirm the number of sound signals corresponding to the number.
- Carry out a similar procedure for subsequent numbers.
- After entering the last digit, two siren signals will sound in two seconds, indicating that the number was entered correctly and will be recorded in the security system. Otherwise, four beeps will sound. Programming will have to be done again.
The graphical algorithm of actions is shown in the figure:
p, blockquote33,0,0,0,0—> p, blockquote34,0,0,0,0—>
Setting CAN + LIN parameters
h311,0,0,0,0—>
Sequencing:
p, blockquote35,0,0,0,0—>
- Go to programming mode.
- Enter the programming menu section by pressing the button corresponding to the section number the number of times.
- Perform parameter programming.
Graphic example of the algorithm:
p, blockquote36,0,0,0,0—> p, blockquote37,0,0,0,0—>
A more detailed description of interface programming can be found in the Starline A93 installation instructions.
p, blockquote38,0,0,0,0—>
Operating instructions for alarm system Straline A93
h22,0,0,0,0—> p, blockquote39,0,0,0,0—>
You can download the operating instructions for the Starline A93 alarm with or without auto start (corresponding to your configuration) on the manufacturer’s official website.
p, blockquote40,0,0,0,0—> adsp-pro-7—> p, blockquote41,0,0,0,0—>
To do this, in the section Catalog - Security systems - Discontinued - you should find your alarm system:
p, blockquote42,0,0,0,0—> p, blockquote43,0,0,0,0—>
Next, go to the Instructions section for your alarm kit - after which the instructions in the form of PDF files will become available for download:
p, blockquote44,0,0,0,0—> p, blockquote45,0,0,0,0—>
For example, the operating instructions for the Straline A93 alarm with auto start can be downloaded from.
p, blockquote46,0,0,0,0—>
Features of operation
h23,0,0,0,0—> p, blockquote47,0,0,0,0—>
The Starline A93 alarm does not cause any particular problems during operation, especially if it was installed in accordance with the manufacturer's recommendations. Malfunctions in its operation may be due to:
p, blockquote48,0,0,1,0—>
- frequent voltage drops along the power buses (discharge of the battery in winter, poor contact with the body along the negative bus);
- moisture entering the interior in the area where the central unit is installed;
- damage to the engine temperature sensor;
- attempts of unauthorized access to the car (especially with the use of special means - grabbers, high-voltage shockers);
- water getting into the key fob.
adsp-pro-4—>
In case of possible software failures, first of all it is necessary to disarm and arm the car several times. If the alarm fails again, you need to reset it to factory settings, then re-program the main functional parameters.
p, blockquote49,0,0,0,0—>
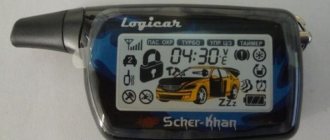
Pros and cons compared to A91
The Starline A93 Dialog model is a successor to the A91 generation. The latter is today considered obsolete and is no longer produced or supplied to the market. Its functionality is significantly weaker than that of the A93 model.
The A91 anti-theft system lacks the following:
- driver authorization using PIN code;
- communication channel control option;
- the ability to carry out self-diagnosis by the alarm to determine non-working areas and devices;
- The A91 signal kit does not include smart tilt and shock controllers.
According to reviews, the A91 model does not have a keyless entry option; installing additional units will not solve this problem. There is also no hidden bus protection function. This allows the criminal to quickly find the alarm control module and hack it by disconnecting the power and de-energizing the siren. Although the A91 model is crypto-resistant, which makes it quite reliable, the A93 has options that provide more comfortable control.
Rate the Starline A93 alarm system
Survey
- 5
- 4
- 3
- 2
- 1
Loading …
What to do if a car alarm starts to take on a life of its own
h24,0,0,0,0—> p, blockquote50,0,0,0,0—>
This is usually said if the alarm system starts to go off randomly in security mode, does not allow you to disarm the car, or performs other independent actions that are not associated with human activity or other factors. In this case you should:
p, blockquote51,0,0,0,0—>
- check the limit switches of all doors, hood, trunk, there may be rattling;
- examine the installation location of the central car alarm unit (for moisture leakage), its elements, power circuits (no sparking);
- check the key fob battery;
- If the previous steps do not reveal a malfunction, reset to factory settings.
If the set of measures listed does not change the situation, you need to temporarily turn off the alarm and contact a specialist.
p, blockquote52,0,0,0,0—> adsp-pro-5—>
How to urgently turn off Starline A93
h25,0,0,0,0—> p, blockquote53,0,0,0,0—>
During operation, situations are possible when the key fob is lost. In this case, you can disarm the car using the service button. In this case, you need to know the PIN code if it was entered when installing the alarm or during operation.
p, blockquote54,0,0,0,0—>
The standard algorithm for disabling a car alarm using the VALET button (service button) is as follows:
p, blockquote55,0,0,0,0—>
- Open the door and leave it in the open position.
- Turn on the ignition, enter the first digit of the code, turn off the ignition.
- Turn on the ignition, enter the second digit of the code, turn off the ignition.
- Repeat similar actions until the 4th digit of the PIN code.
- After the last time the ignition is turned off, the car alarm should unlock the car.
In cars equipped with a “Start-Stop” button instead of a regular ignition key, it is not necessary to turn the ignition on and off. Most likely, it is programmed to press the brake pedal or raise the parking brake.
p, blockquote56,0,0,0,0—>
If the PIN code is forgotten or, even worse, unknown, set by the previous car owner, there is no other chance but to physically disable the car alarm. There is practice that even with a known code, due to software glitches, the alarm did not react in any way to either the key fob or the service button. In this case, you can try resetting the alarm to factory settings.
p, blockquote57,0,0,0,0—> p, blockquote58,0,0,0,0—> p, blockquote59,0,0,0,0—>
The sequence of physically turning off the car alarm:
p, blockquote60,0,0,0,0—>
- Disconnect the +12 Volt alarm power supply circuit. If fuses are installed along the power circuits, it is enough to remove them from their sockets. The power drawback can not be turned off.
- Remove all connectors from the central unit. It is usually located near the driver's left knee, under the dashboard or on the center console.
- Restore broken engine interlock circuits. If you installed the car alarm yourself, restoring the interlocking circuits will not cause any difficulties. Otherwise, you must be guided by the car's electrical equipment and alarm diagram. In most cases, alarm installers block the engine via the ignition, injector and fuel pump control circuits. As a last resort, you can restore these circuits bypassing the car alarm if access to the electrical wiring leading to the central unit is difficult.
If you were able to start the car with the alarm turned off, before continuing to drive to the repair site, it is necessary to isolate the conductors disconnected from the central unit and hide them so as not to interfere with driving the car.
p, blockquote61,0,0,0,0—>
Look at the pinout of the OBD2 connector to which diagnostic devices are connected.
After how long or what mileage you need to change spark plugs.
How to check a car using its state license plate https://voditeliauto.ru/poleznaya-informaciya/online/proverka-avtomobilya-po-gos-nomeru.html and what you can find out about it.
p, blockquote62,0,0,0,0—>
Video - brief operating instructions for the StarLine A93 CAN+Lin alarm using the Kia Ceed as an example:
p, blockquote63,0,0,0,0—> p, blockquote64,0,0,0,1—>
after—>
May be of interest: Find out prices for any car model Add your advertisement Scanner for self-diagnosis of a car Add your advertisement A video recorder is an indispensable gadget for a car enthusiast Add your advertisement How to quickly get rid of scratches on a car body Add your advertisement StarLine a93 is a modern new generation car alarm that keeps your car safe at a high level.
The Starline A93 alarm system with auto start allows you to control the car remotely, which is very convenient. For example, in winter, you can turn on the interior heating in your car or start the engine to warm up without leaving your home. In summer you can also control the air conditioner remotely. The operating instructions for the key fob will show all the possibilities and tell you how to use the alarm correctly. On this page of the website you can download the StarLine a93 Can Lin operating manual. The manufacturer of Starline a93 GSM strongly recommends reading the user manual before use. Thanks to this, setting up the key fob will be easier, and you will be able to familiarize yourself with all the functionality of the device.
A brief guide to using StarLine a93 ECO will help you set up the key fob step by step, get acquainted with the principle of its operation, and familiarize yourself with information on programming the device.
Recommendations for installing car alarm components
Although the connection diagrams and installation maps differ for Starline alarm models, the locations of the main components are identical.
According to the numbers on the diagram, the main components are placed as follows:
- The central control unit is usually located under the center console near the driver's seat or behind the glove box. It is better not to install the unit in the engine compartment, since there are a large number of devices there that can affect the purity of the digital signal. In addition, the control unit contains a temperature sensor, so there should be no heat sources nearby, for example, heating system pipes.
- The transceiver module together with the antenna is installed in the upper part of the cabin, usually in the area of the windshield, to improve the quality of signal reception and increase the maximum control range. It is necessary to ensure that there are no metal objects or other electronic devices nearby. The distance must be at least 5 cm. The transceiver is connected to the 5-pin output, which is located on the control unit using the wire that comes with the car alarm.
- A flashing LED informing about the status of the security system is connected to a 2-pin output in the central unit. If the indicator flashes, it means the car is protected. A non-working indicator indicates that the car alarm is disabled. It is advisable to place the LED in the area of the windshield so that it is visible from a distance and informs the driver that the alarm is activated.
- The siren is mounted in the engine compartment away from heat sources, with the horn facing down so that moisture does not accumulate. If the siren operates for a long time after the alarm is triggered, it may fail. To prevent such a situation, it is advisable to include a 5A fuse for the siren in the electrical network.
- The power unit temperature sensor is attached to a metal part of the cooling system, preferably close to the thermostat, near the standard coolant temperature regulators.
Limit switches for the luggage compartment and hood must be installed so that there is a gap of at least 3 mm when closing. They must be in reliable contact with the body (video author - AvtoDobryak.ru).
The secret Valet button is installed in a place where it is difficult for an attacker to reach when breaking into a vehicle. With its help, the security system is switched to service mode. Similar requirements apply to installing a button to activate the anti-robbery mode. Both buttons are connected by wire to the control unit.
The two-level shock sensor is connected to the control unit using a four-wire cable. Before you turn on the sound on the Starline alarm system, you need to correctly adjust the sensitivity of the sensor during installation. If the sensitivity is too high, false alarms may occur due to strong gusts of wind or from passing cars. The adjustment is carried out using potentiometers located on the regulator body.
Engine blocking increases the anti-theft characteristics of the alarm, as the thief will face serious problems after breaking into the car. Connection to the system is carried out via a black-yellow cable, but you need to program the connector type to HP. These actions are performed according to the instructions and connection diagram for the Starline alarm system.
Installation should begin by connecting the power wires of the main units. The negative must be connected to the standard mounting bolts of the car's grounding wires. They are located either in the area of the mounting block or in the front of the car in the lower corners. If you cannot find the fastening bolts, you can make your own ground fasteners to the metal parts of the body for grounding. Typically, such fasteners are mounted under the dashboard.
To enable the autostart mode, the alarm system has an immobilizer bypass.
Proper use – maximum effect
The installation instructions are also available online, allowing you to read them without downloading. The instructions are what you need to read first. There are several reasons for this:
- After reading the user manual, you will not break the key fob trying to learn how it works on your own;
- You will learn the full functionality of StarLine a93;
- You will be able to competently use all the capabilities of the device;
The operating instructions are available for download and online viewing on our website completely free of charge. After reading the manual, you will learn how to configure options individually, be able to use car autostart, learn how to receive car safety notifications on your mobile phone and discover many other possibilities.