What car enthusiasts don’t do to make their car more convenient and unusual. Some car owners spend a lot of money on professional dashboard tuning. And some craftsmen prefer to do it themselves. This kind of tuning is quite easy to do. In order to replace conventional light bulbs with light-emitting diodes (LEDs), you do not need to have special knowledge or skills. We’ll tell you how to make LED backlighting for the instrument panel in a car with your own hands.
A well-lit dashboard is not only more informative at night, but also has a better view
Disassembling the console
Initially, you need to disassemble the dashboard: remove the protective glass, then the arrows, but keep in mind that they are very fragile, and in order not to damage them, it is better to slip thick paper under the screwdriver; it does not require much effort.
And to remove the dashboard backing you will need a knife, with its help you need to cut through the layer of sealant around the entire perimeter.
After removing the “cover”, use a knife to carefully scratch the filter; it is a special paint. Then degrease this area with acetone or alcohol.
Replacement instructions
The procedure for replacing dashboard lamps is not particularly difficult. The only problem may be disassembly, which allows you to remove the backlight panel and get to the light bulbs. The difficulty is that the fastening screws are located at different points, and you need to know their location. Let's consider the process in order:
Required Tools
To replace the light bulbs in the dashboard you will need:
- a screwdriver with a cross blade;
- a flat-head screwdriver, preferably with a thin blade for unsnapping plugs and fasteners;
- pliers for dismantling cartridges;
- set of replacement lamps.
A small number of necessary tools makes the work convenient and fast. If you plan to make a small tuning - changing the color or brightness of the backlight, then additional devices will be required to remove the factory paint, dismantle the plastic filters and a solvent to clean the remaining paint layer on the back of the instrument panel.
Replacing the backlight
To obtain an even backlight, it is recommended, if possible, to change all the dashboard bulbs at once. Replacing one lamp can create a situation where after a week you will have to repeat the entire procedure in order to change another burnt out lamp. Therefore, experts recommend updating all the lighting at once. It is also advisable to replace incandescent lamps with LEDs - they are economical, have a wide range and provide a large selection of shade and brightness.
How to disassemble the dashboard
First of all, you need to remove the decorative trim from the radio. On the VAZ 2114, the dashboard is mechanically connected to this part, so you need to immediately disconnect it. After this, perform the following steps:
- Using a flathead and Phillips screwdriver, the decorative casing is disconnected. The steering column should be lowered as much as possible so that it does not interfere with the work. You will have to carefully snap off the decorative plugs and unscrew the 5 screws securing the casing. You also need to remove the handles from the sliders and the heater switch;
- After disconnecting the screws, the casing must be pulled towards you. You should act carefully; perhaps not all elements have been removed yet and they can be broken. You don’t have to completely remove the casing; there’s enough room to unscrew the mounting screws;
- To disconnect the dashboard you need a long Phillips screwdriver. Unscrew the screws, tilt the shield towards you and pull out the terminal blocks with connecting wires.
Replacing backlight bulbs
To dismantle the cartridges, it is convenient to use small pliers. They grip the flat back. It is carefully turned half a turn counterclockwise, after which the assembly can be removed from the socket. In a similar way, all elements to be replaced are extracted. Then the lamps are removed and new copies are installed in their place. Insert the cartridges into the sockets and turn them half a turn clockwise to secure them. After this, it is recommended to connect the terminal blocks, apply operating voltage and check the functionality of the light bulbs until the casing is assembled. The vehicle systems are checked:
- turn on the ignition and check the operation of the oil pressure, generator and check indicators. Raise the handbrake lever and see if the lamp lights up;
- trigger an alarm to check;
- switch the high and low beam of the headlights and determine whether the indication works;
- include dimensions.
If all elements of the lighting system are operating normally, reassemble the dashboard in the reverse order. This completes the process of replacing the VAZ 2114 dashboard bulbs.
How to make dashboard arrows backlit
The color of the speedometer and tachometer needles is important. If they are white, then you can leave them as they are. But if not, then you need to remove the old paint with a knife and treat them with alcohol, then paint them with white varnish or regular paint.
The color of the arrow should be white, because only it conveys the entire gamut of LEDs.
You can try and highlight the arrows separately. This requires LEDs with a diameter of 3 mm at 12 V.
Important! In the car network, the voltage is 12 V; if the LEDs are designed for a lower value, then they cannot be connected directly. They should be connected through a stabilizer.
If the diameter of the LEDs is larger, you will have to make additional holes for them.
It is recommended to place LEDs either along the entire scale or opposite those values near which the arrow is most often located.
Advantages of LED lighting
The modern automotive market offers users a huge number of different types of lighting sources that can be used for car tuning. It must be taken into account that not every car needs this, since most manufacturers today equip cars with diode lighting during production.
Photo gallery “Different dashboards”
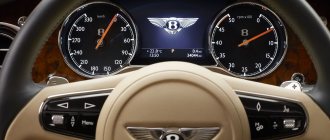
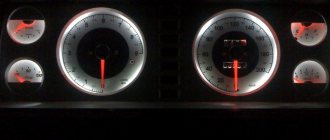
1. Tidy with LED lighting
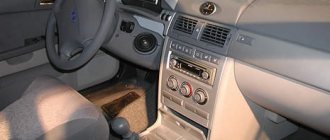
2. Tidy with conventional backlight However, in many cars, the backlight of the speedometer and other elements of the tidy is not as effective as we would like, so car owners decide to change it. In particular, this is especially true for older vehicles produced when LED lighting was not as common. Why many car enthusiasts choose LEDs:
- Due to the small size of the light sources themselves. This makes it possible to install a light bulb anywhere on the control panel.
- Easy to solder diode components together for their further connection. But you need to take into account that if you are dealing specifically with a diode strip, then to perform this task you should follow some rules.
- The ability to achieve full illumination even with the use of a limited number of diode elements.
- One of the main advantages is that the car owner can organize both regular white and colored lighting. You can use yellow, red, green, blue light sources. In addition, if one of the components fails, it can be easily replaced if necessary.
- Diode lamps consume significantly less electricity. This is especially true for cars with anti-theft systems that operate on a battery (the author of the video is the MrMacyuk channel).
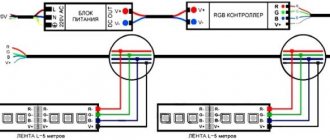
Schemes for smooth switching on of the backlight
To smoothly turn on the backlight of the scale and arrows, you need to spend a little effort, and more specifically, re-solder the circuit.
Below are two diagrams, in the first case - the dashboard, and then - the arrows. The circuits can be implemented on small pieces of a circuit board, which are sold in radio parts stores.
Consider one important factor: if the LEDs differ in power, they will not light up at the same time, some ahead of time, others late, but in general the backlight will turn on smoothly. This also applies to the LEDs on the scale.
Recommendations
- As a rule, when replacing instrument backlight bulbs, many owners want to obtain high clarity and brightness. Please note that if the lights on the dashboard are too bright, this brightness is sufficient on a sunny day. However, at night the panel may glow too brightly, making it uncomfortable to look at the instruments. The result is high eye fatigue and difficulty reading information in the dark.
- To get maximum comfort, it is better to immediately install an additional brightness control in parallel with the diode lamps. This will make it possible to adjust the brightness of the instrument panel illumination. To change the brightness, you need to connect the backlight through a variable rheostat. This solution will allow you to adjust the intensity of the glow taking into account different conditions. Typically, such regulators are on sale in the same place where the diode backlight bulbs themselves are sold. It is important to determine in advance where these regulators will be installed.
Let us also add that if it is necessary to replace the lighting of other elements (for example, on the center console, in the climate control area, etc.), the procedure for replacing lamps is practically no different. The main thing is to disassemble the panels and gain access to the old lamps to dismantle and replace them.We also recommend reading the article on how to make car soundproofing yourself. From this article you will learn which “Shumka” is better to choose for a car, how to apply sound insulation, etc.
- The price of diode light bulbs today is quite low, and the choice is quite large. The same can be said about diode strip. At the same time, you should not save much; it is better to opt for medium or more expensive options from well-known manufacturers. As a rule, the service life and operating efficiency of high-quality products are much higher than their cheap counterparts.
We collect
When everything is ready, we begin to slowly assemble the console. First of all, we install the substrate. Apply sealant to the back side and glue it to the panel.
Then we put the arrows and protective glass in place. After modernization, the instrument panel looks bright and unusual.
LED lighting not only looks unusual and bright, but is also a good addition to the car in terms of economy, which helps save battery power, since LEDs consume 80% less energy than a regular light bulb.
DIY installation
Replacing the LED backlight yourself will not cause any problems. Before installation, be sure to check all lamps for serviceability, and also look at the degree of illumination. Next, carry out the following actions:
- disconnect the negative terminal from the battery;
- prepare the workplace: move the seat back as far as possible and lower the steering wheel, if possible;
- disconnect the dashboard;
- remove the glass: do this very carefully, especially if it is glued;
- replace the light bulb or the entire diode strip;
- check the operation of the system and then install the glass and panel back, return the steering wheel and seat to their usual position.
After this, the process of replacing the instrument lighting can be considered complete. The main thing is that after the procedure all devices can be seen clearly in the dark. This will ensure safety on the road and prevent your vision from deteriorating. When replacing, you should not miss a single detail, and disassemble the panel very carefully. If everything is done correctly, the driver will be provided with a comfortable ride.
Legality of outdoor lighting and fines
In our country, laws are interpreted in favor of the interpreter. The wording is vague and can be interpreted in two ways. What you need to know.
There is no direct ban on installing underbody lighting . But there are a number of points that allow us to find fault with you and, unfortunately, there is nothing to oppose them with.
Making unforeseen changes to the vehicle design
Decree of the Government of the Russian Federation of October 23, 1993 N 1090 (as amended on August 27, 2018) “On the Rules of the Road.” Appendix: List of faults and conditions under which the operation of vehicles is prohibited. Clause 7.18.
Changes were made to the design of the vehicle without permission from the State Road Safety Inspectorate of the Ministry of Internal Affairs of the Russian Federation.
It is impossible to obtain official permission to install lighting (uncertified element). Punishment for violation: warning or fine of 500 rubles .
This is the most loyal point on which they can find fault with you. You will often get off with a warning.
Violation of the rules for installing lighting devices
You will fall under this clause if you install LED car lighting in prohibited colors.
According to the Russian Federation Traffic Regulations, section 3.6. External lighting devices. Installation is prohibited:
In front - lighting devices with lights of any color except white, yellow or orange; At the rear - reverse lights and license plate lights with lights of any color other than white, and other lighting devices with lights of any color other than red, yellow or orange.
In short, the following is allowed:
- The front is just white, yellow and orange;
- at the rear - the license plate is illuminated only in white, the rest - only in red, yellow or orange.
Violation of this clause of the traffic rules entails deprivation of a driver's license for a period of 6 months to a year .
Installation without permission of devices for supplying special light signals
Code of Administrative Offenses of the Russian Federation Article 12.5. Driving a vehicle in the presence of malfunctions... point 4.
Driving a vehicle on which, without appropriate permission, devices are installed to provide special light or sound signals (with the exception of a security alarm).
This is the most dangerous point and, if the evil inspector wishes, any additional lighting of the car can be adjusted to this wording. In practice, it is used very rarely (unless you put a red flashing tape in the radiator, this option will definitely be regarded as a special signal). It is difficult to challenge in court, but it is possible by replacing the punishment with a fine of 500 rubles.
Violation provides for deprivation of rights for a period of one to one and a half years , with confiscation of devices for signaling.
Please rate the article. We tried our best:)
Did you like the article? Tell us about her! You will help us a lot :)
Order of Operations
Remove the radio cover using a screwdriver, carefully threading the tool under the socket. First we pull it out from the bottom, then the top part of the lining. The electrical wires leading to the cigarette lighter must be disconnected. Now we find the screws on the dashboard and unscrew them. Remove the handles from the damper sliders and the heater switch by pulling them towards you.
- Now you need to remove the dashboard panel, it is held not only by screws, but also by other fasteners, so first you will have to loosen it a little.
- Now you need to disconnect the wiring from the panel: from the clock, from the alarm, from the headlights and other devices.
On the back surface we find cartridges. It's easier to unscrew them with small pliers. Release the cartridge by turning it counterclockwise. Half a turn is enough. We do the same with the rest of the cartridges - they are all designed the same. We check the lamps with a tester and determine which ones are faulty. Or we change the entire combination, for example, to LEDs. We screw in the light bulbs tightly, remembering that they operate under conditions of vibration and shaking. We install all the cartridges in place. We use pliers again. Turn half clockwise until it stops. Now we connect the panel to the instrument connectors and check the functionality of all the light bulbs: from the ignition to the hazard warning lights. If everything works correctly, we fix the panel and perform the installation in the reverse order, before installing the radio cover.
Film instead of LEDs
The more transparent the film, the brighter the instrument illumination will be; depending on the color of the film, the instrument illumination will be. The principle is designed in such a way that light from a standard backlight passes through the film, thereby changing color and illuminating the devices.
Here, as they say, the colors will be limited by your imagination; you can make numbers of one color, arrows of another, and lines of a third. Some amateurs use sandpaper and a scratch pad to clean the base of the instruments on the back side (from the backlight side) so that the numbers and indicators appear brighter. The film can be used as a special film, also sold in car dealerships, or you can find it yourself from scrap materials. A big plus is that no changes will be made to the electronics, which means there can be no short circuit.
Combined instrument lighting
To implement this type of lighting, you need to stock up on the following materials:
- double sided tape;
- LED in a socket (three pieces);
- foil.
In order to remove the dashboard, it is necessary to clarify the removal steps with the instructions that came with the vehicle. The algorithm of actions here is as follows:
- removing the instrument cluster;
- carefully unscrew the speedometer cable and disconnect all existing plugs;
- illumination sources should be located in the upper part of the instrument panel - three light bulbs. There will also be a green filter here. It can be removed or left;
- The light bulb is being replaced with LEDs and a foil diffuser is being installed. We secure it with double-sided tape.
Ready-made dashboard lighting
After this, all that remains is to assemble all the panel parts and install them in their original places.
Note! In any case, you can safely experiment with the colors of the LEDs in order to get the most beautiful type of glow.
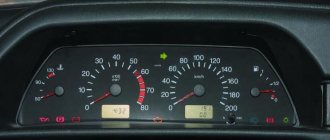
Designations of light bulbs, indicators, icons and buttons on the instrument panel of VAZ 2114, 2115
First, let's look at the descriptions and meaning of the panel icons and buttons, regardless of whether the car is equipped with an injector or a carburetor.
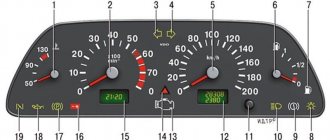
Instrument panel diagram VAZ 2114, 2115
1 - Control sensor that measures the temperature of the coolant in the engine cooling system. During normal operation of the power unit, the antifreeze temperature should not exceed 90 degrees. But minimal deviations are sometimes acceptable. If you notice that the engine begins to overheat frequently, be sure to contact a car service center for help. Sometimes the sensor itself may give incorrect results.
2 - A device such as a tachometer processes information that comes from the crankshaft and displays it on the panel. The tachometer readings indicate the number of engine revolutions.
3.4 - Turn indicators. If the indicators flash simultaneously, but slowly, this may indicate a possible problem with the bulbs themselves or in the electrical wiring network.
5 — The most basic element of any instrument panel is the speedometer. Thanks to it, the driver can determine the speed of movement. A slight error in the indicators is allowed, but it should not exceed the indicator by more than 5 kilometers. If such readings differ significantly from the real ones, then most likely the problem is in the speedometer.
6 — Fuel level sensor in the fuel tank. When the level in the tank drops to 6-7 liters, a red light comes on, indicating that the car needs to be refueled.
7 - Low fuel level indicator.
8 — Symbol indicating the light is turned on. It is triggered when the low beam and parking lights are turned on.
9 — The brake light indicates that the vehicle’s brake system is not working correctly. Most often it lights up if there is not enough brake fluid in the car.
10 - A blue light indicates that the high beam headlights are on.
11 — Button for resetting the daily mileage. The total mileage of the car is shown at the top, and the daily mileage at the bottom.
12 - on-board computer display with mileage indicators.
13 — Alarm activation symbol (light). When the emergency light is turned on, the light begins to flash red.
14 — “Check” symbol. It is triggered in case of possible problems with the car’s power unit. There can be many reasons for this, from problems with mixing the combustible mixture with air, to breakdowns of various engine power components. In any case, you need to contact the service for computer diagnostics or repairs.
15 — External air temperature sensor and time indicators. The daily mileage reset button allows you to scroll from the temperature readings to the time readings when scrolling.
16 - Battery charge sensor. Most often it lights up when the battery is almost completely discharged. If the indicator light is very weak or, on the contrary, bright, then the problem may be in the generator.
17 - Handbrake activation icon. It lights up both when the engine is on and vice versa.
18 — Icon showing engine fluid pressure. Usually its appearance indicates an insufficient amount of lubricating mixture. In such a case, be sure to check the oil level. Sometimes the problem can be caused by the oil pump not working properly.
19 - If the engine is equipped with an injector, then there is a reserve icon on the dashboard. Well, if the engine is carburetor, then this is a suction indicator.
Buttons on the instrument panel
- Dimensions switch
- dipped headlights
- Front fog light button
- Rear fog lights
- Heated rear window
Purpose of additional lighting
Additional dashboard lighting is intended for:
ensuring a more original appearance of the instrument panel; better lighting of the main components of the PCB; providing additional lighting for the car interior; increasing safety while driving - if the backlight of the instrument panel effectively illuminates the dashboard, this will allow the driver to pay attention to the main parameters in a timely manner.
Installing a diode light bulb in the tidy
If you want your instrument lighting to be as efficient as possible, then the best option would be to install LEDs; in this case, you have several options:
- The dashboard lighting can be arranged using individual LED elements, so you can provide effective decorative lighting. It is necessary to take into account that the diodes themselves may have different colors; accordingly, such lighting can become part of the tuning.
- Also, the backlight of the instrument panel can be organized using a diode strip, which is often used in everyday life. If you get tired of the color of the glow, the diode strip can be completely replaced. The installation procedure will not take much time, since the tape has a self-adhesive backing.
Organization of backlighting of stove control buttons
The second most popular situation in organizing the lighting of the dashboard in a car is the illumination of the stove control buttons.
Stove control buttons
Foil reflector
The organization of the backlight of the console buttons intended for controlling the stove is carried out as follows:
- First, remove the handles, as well as the glass from the control unit;
- We make a reflector out of foil. It will need to be secured under the removed glass;
- then carefully unscrew the lower part of the console. Under it there will be a cartridge with an old light source, which must be replaced;
- replace the old light bulb with an LED;
Ready-made console lighting
The simplest way to create backlighting involves the following manipulations:
- take the button out of the console;
- we disassemble it into its component elements;
- inside such a button there should be a light bulb that changes to an LED;
- if necessary, you can remove the light filter from the button or combine it with a new diode glow. As a result, you can get a new beautiful and unique shade.
As you can see, illuminating the console designed to control the stove in a car is quite easy.
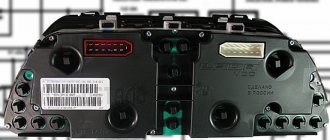
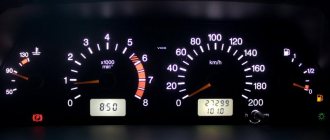
What kind of lamps are needed?
Before disassembling your VAZ, it makes sense to drive it to the nearest auto store and stock up on new light bulbs. But which ones to buy? Judging by the first photo, the backlight and indication lamps have different sizes. The choice is simple: if the backlight bulbs have burned out (position 2 in the same photo), then you will need AMN 12-3-1 (T3W) bulbs. If they are indicator ones, then A 12-1.2 (Wl.2).
LED light bulbs
If you are tired of changing light bulbs in the power supply of your VAZ or are just a fan of modern tuning, then you can install LED light bulbs instead of incandescent ones, since the industry also produces those that have the same standard size, base, socket and operating voltage.
Important! The battery charge indicator lamp cannot be changed to an LED one - the battery will not be charged properly.
Simple and fast upgrade
In principle, with your own hands you can either completely replace the instrument panel of a VAZ 2110 or tuning the existing one.
One of the quite popular options is replacing light bulbs with LEDs. Moreover, there is no difficulty in this - you need to remove the light bulbs and insert LEDs in their place.
However, there is one small trick: they work well only if the polarity is observed! If the LED does not light up immediately when connected, you need to remove it, turn it 180 degrees, then reinsert it into the socket.
Even such a simple replacement will increase the brightness of the dashboard, but this is not enough, it is hardly worth completing the tuning with your own hands.