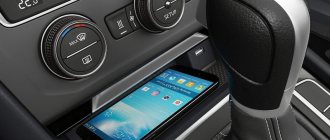
Interior tuning is the easiest modification method. By spending a few minutes, the “internal appearance of the car” can be changed very significantly. To immediately obtain a visible result, individual interior details are modified, including standard decorative elements, etc. This covers various trims, interior door handles and trim. In addition, the presence of covers that protect the seats, if their design is chosen correctly, will help improve the subjective perception of the interior. Let's look at solutions that relate to tuning Kalina-2 and look quite successful.
Lighting
The interior lighting of the Lada Kalina leaves much to be desired. Only the front part of the car is equipped with a small lamp. The rear area of the cabin does not have any lighting devices. According to numerous reviews, tuning the interior of the Lada-Kalina hatchback includes installing a rear row light, which an LED strip will help with. You can connect it to the front lamp, and hide the wiring under the ceiling card. For convenience, you can mount a separate switch in the rear row area. Thanks to this, passengers have the opportunity to turn it on themselves if necessary.
Torpedo
The dashboard is considered one of the important elements of the interior. For tuning the interior of Lada-Kalina, two main options are used. The first, which costs a budget, is to buy a special panel trim and attach it over the standard dashboard. This option is considered inexpensive because during its installation it may be difficult to select the exact dimensions. Therefore, the overlay will have to be trimmed a little. This is a rather complex and difficult process, which, if done incorrectly, can completely ruin the appearance of the salon. The second option is to purchase a completely new dashboard. In this case, installation will not take much time. However, you will need to spend a lot of money.
Dashboard
The torpedo has a great influence on the interior of the entire cabin. And if we compare the tidy of the Kalina with the classic Zhiguli models, then the Togliatti engineers have stepped far forward, but they are still very far from ideal. To produce torpedoes, the factory uses very low quality plastic. This negatively affected the performance of the instrument panel. The colors fade over time, the plastic itself becomes covered with small cracks, and the entire torpedo begins to make unpleasant sounds when moving. You can improve the appearance of the dashboard and get rid of extraneous sounds yourself, for this you need:
- Disassemble the torpedo and glue all the places where the plastic comes into contact with metal, foam rubber or other insulating material.
- If necessary, secure all electrical wiring harnesses with plastic clamps.
- Secure the air ducts that direct the flow from the heater.
- Replace all plastic fasteners with new ones.
- You can also make changes to the color scheme of the torpedo along the way by covering it with a special film. If the hands grow from the right place, this procedure is not difficult to perform on your own.
- Installing a “Grant” central tunnel with cup holders will significantly improve the appearance and add more practicality. The tunnel has a different color from the original instrument panel, this can be corrected by covering it with vinyl film. There are also no holes for the electronic mirror adjustment unit. They will need to be made separately or find another place for installation.
- By installing an armrest between the front seats, you will significantly reduce fatigue from driving a car over long distances. The armrest is also an additional niche for various small items.
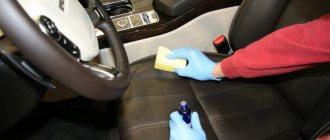
Cover trims
If sticking special decorative trims on the dashboard does not seem enough, you can dismantle the plastic door trim yourself and improve it. For example, tuning the interior of a Lada Kalina, which imitates natural materials, always looks impressive and attractive. After removing the trim of the standard parts, cover its elements with durable vinyl or carbolic film. After the material is glued, all parts are assembled strictly in the reverse order. Most often, car enthusiasts use film with a pattern similar to the texture of wood. Let us remind you that special pads can be mounted on parts of the speaker system housing.
To do the work yourself, you will need a stationery knife, scissors and the material itself. Experts advise sticking the film directly onto the plastic.
Pre-mark the places where the holes for the buttons will be located. To do this, use a paper stencil. For convenience, remove the plastic panel. After you cut out the pattern, clean the plastic parts and degrease their surface. Only after this can the film be applied.
Pasting with vinyl based film
The outer surface of the vinyl film can imitate carbon. This material is also offered in different colors. Each element subject to modification is first dismantled. In Kalina-2, this action is simple to perform: the linings snap off, and the door handles are attached with self-tapping screws. Each step of the work performed is shown in the photo:
Refinement of air duct covers
Every detail needs to be covered.
Installation of decorative elements completed
Result of revision
By the way, no one says that you need to limit yourself in choosing colors. White carbon fiber in Kalina-2 also looks good, even if vinyl is actually used again:
This is how it all started
We paste over each element
Door armrest trim, pasting
The most suitable tone, its choice
The owners have already tried all the options shown above on their cars. But no one forbids trying to invent something new.
When working with vinyl, the workpiece is cut along the contour, leaving an allowance of up to 10-15 mm. After gluing, the surface sometimes has to be leveled, for which hot air is used. Use a regular household hair dryer.
Armchairs
Of course, the seats in a car are not the first thing passengers pay attention to. And tuning the Lada-Kalina's cabin will be incomplete if the seats are not improved or completely replaced. The main disadvantages of the Lada-Kalina seats are the short bottom cushion and the lack of lateral support.
To eliminate these shortcomings, it is better to contact a specialized studio to rebuild the standard shape of the chairs. The second way to tune a Lada Kalina is to select a more suitable seat option from another car. Installing new seats is considered more acceptable due to the amount of money that is spent. In fact, specialist tailors will charge large sums of money for their services. But if you're lucky enough to find seats that suit you best, you can redo the fastenings yourself.
How to take up trunk space
In Kalina-2, as in most other hatchbacks and station wagons, the trunk and interior are separated by a removable shelf. This shelf can be dismantled, or you can use it to install speakers. True, then there will be little space left for the subwoofer, especially if we are talking about a hatchback:
Subwoofer housing in the trunk of a hatchback
Everything looks great in the station wagon, especially if the shelf has been removed:
Homemade subwoofer housing in the trunk of a station wagon
The amplifier in both cases is mounted on the back of the rear seat. In fact, it is not recommended to do this - the cladding elements are not designed for significant loads.
Steering wheel
Not every car enthusiast likes the standard Lada-Kalina steering wheel. Therefore, they very often want to replace it with a more stylish and convenient one. One of the options for tuning the interior of the Lada Kalina sedan is to install a sports steering wheel. This original upgrade has many advantages: the car’s interior will become more interesting, and most importantly, the updated sports steering wheel, thanks to its aggressive appearance, will allow the driver to feel much more confident on the road. But in order to easily and without problems mount a new steering wheel on the Lada-Kalina, you will need a special adapter.
The use of carpet and leatherette
Need a simple tuning option - please. Try fixing the fabric, called “carpet”, to the inner surface of the glove compartment:
The glove box of Kalina-2 is covered with carpet
If everything works out, the same material will be used to cover the door pockets and individual trim elements:
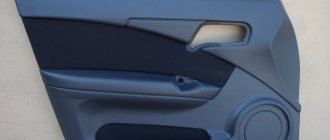
Refinement of door trim
The carpet sheet is held on the plastic with glue. The necessary materials are available at parts stores. By the way, instead of carpet you can use leatherette. We will leave the choice to the owner.
LED Strip Light
In addition, an excellent addition to all of the above tuning options to complete the interior improvement picture is to install new lighting around the entire perimeter of the cabin. To do this, you will need to lay a diode strip of the desired color (or different shades) and connect it to a standard battery, that is, the on-board network. Additional lighting due to the LED strip will give the interior an attractive appearance and highlight all the changes made.
The following tuning of the Lada-Kalina interior is carried out with your own hands:
- Installing a diode strip around the perimeter of the car allows you to provide additional lighting for literally the entire interior. The brightness and shade of the backlight directly depend on the LEDs you have selected. This lighting option allows you to increase illumination by an average of two or even more times. If necessary, you can install separate ribbon inserts into the roof of the cabin, and it is quite possible to create the effect of a “starry sky”.
- Attaching an LED strip to the elements of the front dashboard, in its lower part, allows you to additionally illuminate the areas at the feet of the driver and passengers. This tuning will increase the comfort of being in the car.
- Also, in some situations, the LED strip is mounted on the car body. Most often, such lighting is used as auxiliary or even main running lights. However, such tapes are often exposed to external mechanical influences from the environment, which is why they can quickly fail.
If you want to become the happy owner of an original and stylish car and proudly drive on the roads, tuning will help you with this. Such improvements will help improve not only the appearance of the machine, but also increase its efficiency. You are guaranteed the envious glances of all surrounding car owners!
Interior ventilation controls for Lada-Kalina
Levers 9 and 5 of the damper drive regulate the intensity of air supply through the side (8) and central (4) nozzles by changing the position of the dampers (up to their complete closure). Levers 1 and 3 of the guide vanes of the side and central nozzles change the direction of the air flow.
Ventilation (supply of unheated air) of the interior.
- set switch 2 to the extreme left position (blue dot on the control unit) - the heating stove faucet is completely closed;
- set switch 4 to the horizontal right position;
- open nozzles 4 and 8, turn lever 5 on the central nozzle down, and lever 9 to the right on the left side nozzle and to the left on the right side nozzle;
- Set heater fan operating mode switch 1 to the desired mode;
- If the windshield fogs up, set switch 4 to the vertical upward position.
Preventing glass fogging.
- set switch 2 to the extreme right position (red dot) - the heating stove faucet is completely open;
- set switch 4 to the vertical position up;
- Set switch 1 of the heater fan operating modes to position “2”.
Quick heating of the interior.
- set switch 2 to the extreme right position (red dot) - the heating stove faucet is completely open;
- set switch 4 to the horizontal position to the right;
- Set switch 1 of the heater fan operating modes to position “3”;
- open the side and central nozzles.
Ensuring a comfortable temperature in the cabin.
- set switch 2 to the required position (desired temperature);
- set switch 4 to the horizontal position to the left;
- Use switch 1 of the operating mode of the interior heater fan to select the required intensity of warm air supply to the interior.
When the heating system is operating at maximum mode, it is not recommended to open the car interior windows.
Outside air can enter the cabin through the door windows when the windows are down and the air intake located in front of the windshield on the right and equipped with a dust filter that cleans the air from dust, soot, pollen, etc. The air entering the cabin through the intake passes through the heater.
The location of the air current distribution organs is shown in Fig. 1.11, the location of the heater and ventilation controls is in Fig. 1.12.
The flow distribution organs are located on the instrument panel
1 - air supply ducts for passengers in the rear seat
2 - side nozzles for supplying air to the driver and passenger on the front door or on the windows of the front doors. The air flow is controlled by grilles (in the vertical direction and flaps in the horizontal direction)