Replacing the tap
To replace the faulty faucet of the VAZ-2114 stove, we will need 10/13 wrenches (socket ones will work much more conveniently), rags, a Phillips-head screwdriver, and a container for draining the coolant. Dismantling algorithm:
- we drive the car onto an overpass/inspection hole, place a prepared container with a capacity of about 5 liters under the drain hole, unscrew the plug and wait until all the antifreeze is drained;
- go to the interior, unscrew the screws that secure the left panel cover;
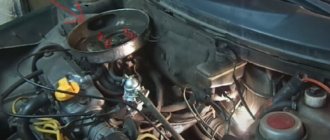
- on the right side under the panel we find the heater tap, to which the pipes from the engine compartment are connected, put a rag under them and use a screwdriver to remove both pipes;
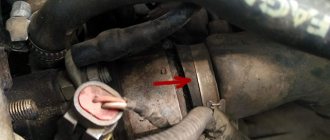
- go back to the engine compartment, find the studs on which the faucet is attached to the car body, unscrew the bolts with a 10mm wrench;
- now nothing is holding the crane, we go into the interior and pull it out, disconnecting the drive fastening cable;
- We attach the cable to the new tap, install it in its original place and reassemble it in the reverse order.
We look in the engine compartment for the pipes connecting the power unit to the tap, use a screwdriver to loosen the fastenings in the form of clamps, and remove the pipes;
Diagnosis of stove malfunctions
The design of the stove is quite simple. It would seem that there is nothing to break here. The heater cannot break down completely, since its design consists of components independent from each other. However, some elements can fail quite often. These include:
- radiator;
- tap;
- pipes;
- resistor;
- mode switch.
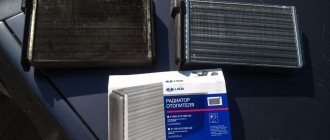
Heater radiator malfunctions
The main reasons for the failure of the stove radiator:
- clogging;
- the appearance of a leak (depressurization).
In the first case, deposits accumulate on the inner walls of the radiator tubes. They can form as a result of:
- long-term operation of the radiator;
- use of low-quality coolant;
- getting dirt, friction products, water, etc. into the cooling system.
As a result, the circulation of antifreeze in the heater radiator is disrupted or completely stopped, and the air entering the cabin does not have time to heat up normally. In winter, it will be cold inside the car, and defrosting the windshield will become a real problem.
A leak in the radiator can appear as a result of corrosion and drying out. Coolant leaking from the heater usually forms a puddle on the floor under the panel on the passenger side. In addition, a characteristic odor will appear in the cabin, and an oily coating will form on the windshield due to evaporation of the coolant, reducing the driver’s visibility. The latter is especially true when driving against the sun or at night, when oncoming traffic is moving with its headlights on.
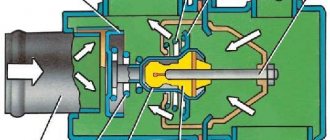
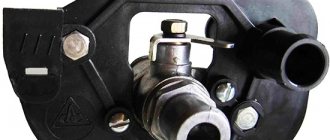
Stove tap leaking
The stove valve may fail for two reasons:
- souring of the locking mechanism;
- drying out of the device casing.
If the stove has not been used for a long time, the tap may become sour. In this case, when trying to open the tap, you should not use much force, as you can damage the tap itself or break the control cable.
When the housing dries out, the leak may not be immediately noticeable. But after some time, signs similar to those of a radiator leak will appear (a puddle of coolant on the floor, a pungent odor in the cabin, an oily coating on the windshield).
If the heater valve is faulty, coolant begins to leak into the cabin.
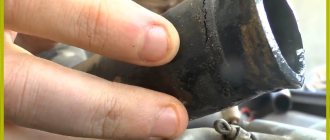
Wear of pipes
Antifreeze from the heater radiator may begin to leak through the inlet and outlet pipes as a result of their wear under the influence of chemically active substances included in the coolant and high temperature. In addition, the pipes can be damaged if the clamps that ensure the tightness of the connections are over-tightened.
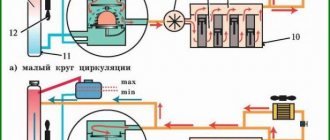
There are a total of four pipes in the heating system of the VAZ 2113–15 - two in the engine compartment, connecting the engine to the tap, and two in the cabin, going from the tap to the heater radiator. Coolant leakage can occur in different ways. In one case, the antifreeze will flow onto the engine protection and onto the street, in the other - into the car interior. In any case, it will appear as:
- drop in coolant level in the expansion tank;
- puddles forming under the car or in the cabin;
- the appearance of an unpleasant odor in the cabin.
Resistor failure
The stove resistor consists of two windings and serves to change the resistance of the electric current supplied to the fan. The fan motor can operate in three modes, which can be changed using a switch.
Replacing pipes
As a rule, when replacing a faucet or heater radiator, all pipes are replaced, especially if they have been in place for a very long time and have not been replaced before. The operation of replacing the pipes of the VAZ-2114 stove will also be required if one of the pipes is damaged. Unfortunately, in the latter case, you will have to complete all steps from 1 to 25 described in the instructions for replacing the heating radiator. After access to the radiator and tap has been opened, loosen all the clamps and carefully remove all four pipes. They can stick to the seats, so you need to work very carefully so as not to damage nearby nodes or injure your hands.
Installing new pipes, as a rule, does not cause much difficulty, but you should not immediately tighten the clamps to working condition. First, we reassemble in the reverse order, fill in fresh antifreeze, start the engine and let it run for 15–20 minutes to check for coolant leaks. After the engine is turned off and cools down a little, you can tighten the clamps until they are fully tightened.
Main causes of malfunction
There can be several reasons for such problems, but the most common are:
- Worn or damaged pipes.
- Incorrect connection of pipes.
- Broken stove tap.
- Radiator failure.
The first of these reasons - wear of pipes - can occur for natural reasons during operation, since the chemicals contained in coolants have a corrosive effect, which is complemented by the influence of high temperature.
In addition, the hoses of the VAZ 2114 stove can be easily damaged by over-tightening the clamps on them. When such damage occurs, fluid leaks from the system.
In total, VAZ 2114 cars have 4 pipes. Two of them are located under the hood and two in the cabin.
Their damage, which led to a coolant leak, can be judged by the following indirect signs:
- there is a constant drop in the liquid level;
- a specific smell appeared in the cabin;
- A puddle of coolant forms under the car or in the passenger compartment while parked.
If at least one of these signs is observed, then urgent diagnostics of the pipes should be carried out and their replacement.
Tightening the clamps on the pipes should be done with medium force. Over-tightening may damage them.
Repair/replacement of resistor
A faulty resistor may be indicated by the fan operating in one mode, when manipulations with the switch do not affect its blowing speed. To replace the resistor, you need to prepare a screwdriver with a Phillips head, fine-grain sandpaper and a multimeter. Algorithm of actions:
- disconnect the negative terminal of the battery;
- unscrew the screws that secure the right console cover;
- Use a screwdriver to unscrew the screws securing the right cover of the center console;
- you will have access to the resistor, from which you need to disconnect all the wiring and evaluate the contacts for burning. If the contact surface is oxidized, use sandpaper to clean it down to metal;
- It may well be that the resistor has lost its functionality precisely due to burning/oxidation of the contacts, so we assemble everything in the reverse order and check whether the fan will work in all normal modes;
- in case of a negative result, again remove the negative terminal, the panel cover and unscrew the screw that secures the resistor to the body;
- We remove the resistor and use a multimeter to measure the resistance at the resistor inputs and at the inputs of both windings. In the latter case, the indicator indicating the working condition of the additional elements is 0.2 Ohm. For the entire resistor, the standard resistance should be 0.8 ohms. If the multimeter readings do not match the specified values, replace the resistor with a new one, and then reassemble in the reverse order.
Switch replacement
If, after repairing or replacing the heater resistor, the fan continues to show signs of life in only one mode, regardless of the position of the switch, it is necessary to check the functionality of the latter. To do this, we again need a screwdriver, as well as scissors (or fairly powerful tweezers). Work order:
- remove the negative terminal from the battery;
- unscrew the 4 screws that secure the right panel cover;
- remove from the slots and pull out the switch by pulling it towards you;
- Using scissors, tweezers or another suitable tool, unscrew the nut that holds the switch;
- on the right side of the console, remove the switch, identifying and disconnecting all connectors from it;
- inspect the contacts for scale, rust or other defects, clean them with fine sandpaper;
- We install the switch in place, connect the terminal and check its operation. If there is no effect, the switch must be replaced with a new one.
If you perform any of these operations for the first time, it may take a lot of time, but you can save on buying extra spare parts and gain invaluable experience in replacing a VAZ-2114 stove. It is worth noting that for VAZ 2112 - 2115 models there are no fundamental differences in the repair or replacement of heating system parts.
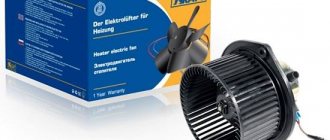
WHICH TAP IS BETTER?
All owners of VAZ 2114, 2115 and other models unanimously claim that the original faucets that are equipped with the stoves of these cars are the most unreliable. The locking mechanism is a rubber membrane. Aluminum housings are susceptible to corrosion and quickly turn sour. True, the price of these parts is low - 80-120 rubles. Apparently, the price is calculated on the fact that the faucets will change every season.
Ceramic faucet is considered the most wear-resistant
But car owners don’t want to crawl under the car every time it gets cold, spoil their shoes with leaking antifreeze, and freeze inside the car. Yes, and this is a troublesome task - replacing the faucet on the VAZ 2114 stove. Therefore, motorists give preference to more reliable models of faucets:
- ceramic, their locking mechanism is made of ceramic plates, and the body is made of high-quality plastic;
- Ball valves, the locking element of which is a ball with holes.
Most VAZ 2114 owners prefer the Yavva ceramic faucet as one of the highest quality and most reliable. Although these models have lower heat transfer than ball models. The latter are susceptible to oxidation, but to a lesser extent than the duralumin models of AvtoVAZ cranes.
Is it possible to replace the radiator of a VAZ-2114 stove without removing the control panel
With the onset of autumn cold weather, many owners of VAZ cars complain that the interior heating works very poorly and does not provide a comfortable temperature.
There are many reasons for this problem, but the most basic of them is a clogged stove radiator, which gets dust, small stones, poplar fluff, etc. How to determine that this is the case? Diagnostics is quite simple - you just need to put your hand on the supply and discharge pipes of the device for a few seconds. If their temperature is noticeably different (the inlet pipe is hot and the outlet pipe is cold), then you will need to replace the radiator of the VAZ-2114 heater. Otherwise, you should pay attention to such details as the temperature sensor (thermostat), pump impeller and others.
Tools and materials
To replace the heater radiator in a VAZ-2114 you do not need expensive and complex tools or equipment. It is enough that almost every car enthusiast has a new spare part in his garage. To complete the job you will need:
- new heater radiator - aluminum or copper;
- a set of ring and open-end wrenches, you can use a set of sockets with a ratchet;
- curly screwdriver;
- set of hexagons;
- container for draining antifreeze;
- fresh coolant, no more than 4 liters.
Additionally, it is better to stock up on rags to wipe off antifreeze that has spilled into the cabin; in addition, you will need a stop for the torpedo - a wooden block of 50x50 mm, about 40 cm long, is perfect.
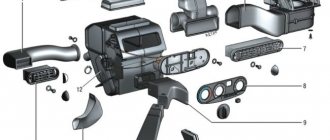
How to remove a stove radiator
The process of dismantling the heater radiator on VAZ-2114 cars can be carried out in two main ways. The first involves removing the entire control panel, as well as other elements surrounding the part being replaced. We recommend carrying out repairs in this way only if you have the appropriate experience and are completely confident that after completion of the work there will be no “extra” components left. No such confidence? Then it is better to contact a car service or carry out repairs in a simpler way, which we will describe below.
It does not require dismantling the torpedo, but to perform repairs in this way you will definitely need an assistant. Work is carried out in the following order:
- remove the console and glove compartment;
- unscrew the bolts and screws that hold the front panel so that it moves freely in different directions;
- remove the cables for controlling the operating modes of the stove, which are located on the driver’s and passenger’s sides;
- remove the radiator cap;
- dismantle the rubber radiator pipes. It is advisable to first place a basin or other container under the device so as not to spill antifreeze on the floor;
- We hire an assistant. His task will be to carefully move the torpedo to the side, which will allow the radiator to be removed. In this case, you need to be extremely careful not to break anything or tear out the front panel of the car by the roots.
Work order
Replacing the radiator of a VAZ-2114 stove without removing the dashboard allows you to save time, and this does not require any special skills. Let’s immediately make a reservation that part of the torpedo will still have to be disassembled, but the center console will remain in place, and this is the most labor-intensive part of the operation. At the initial stage of work, the side part of the panel on the passenger side is removed; to do this, use a screwdriver to unscrew the screws securing it.
To drain the coolant, you need to unscrew the bolts of the front protection, which is located under the engine compartment. The antifreeze is drained through a special plug located in the cylinder block; to unscrew it, you will need a 13 mm spanner. To prevent it from spilling on the ground or the garage floor, a container is placed under the car. To increase the rate at which antifreeze flows out, you can open the cap of the expansion tank.
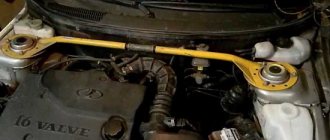
Using a hexagon on the passenger side, the torpedo mount is unscrewed, after which it can be easily bent.
Next, you need to unscrew another fastener, located on the passenger side under the lower part of the center console. After this, the torpedo can be easily raised so that it remains in the same position, a stop of suitable length can be installed under it; a block with a cross-section of 50x50 mm and a length of about 40 cm is enough.
In the opened space you can see the heater radiator, which is attached to three self-tapping screws. They must be unscrewed so that it can be safely removed from the socket. In this case, a problem will arise - another self-tapping screw is hidden behind the plastic body of the torpedo, which needs to be unscrewed. To get to it, it is advisable to drill a small hole in the plastic through which you can insert a screwdriver. To do this, you first need to remove the glove compartment. If you try to move the torpedo, you can break the plastic and then removing the heater radiator on a VAZ-2114 will turn into an expensive procedure.
Next, you can proceed directly to dismantling the heater radiator. To do this, remove the clamps and disconnect the pipes, under which it is better to place a small container or rag, since there is still antifreeze in the system, which will spill directly into the cabin. After this, the radiator is removed from the mounting socket without any effort. It is advisable to examine it to see where the damage was and where the antifreeze is leaking from; corrosion damage appears in this place and streaks are visible, which once again confirms that the stove radiator needs to be replaced.
The new heater core fits into place effortlessly and should not cause any problems. It is secured with self-tapping screws, including through a hole previously drilled in the dashboard. In this case, it is advisable to inspect the faucet, since this is another weak point of the heating system. It should be completely dry and the lever should be easy to turn. The glove compartment is installed in place, the dashboard and the removed side panel are screwed to the mounts.
Before adding coolant, you need to check whether the plug on the cylinder block is tightened so that the coolant does not spill out. Fresh antifreeze is poured into the expansion tank to the level; if during operation the level drops, it will have to be topped up.
To carry out the tests, you need to start the engine and, after waiting until it warms up, turn on the heater. It should heat well in different modes, and the interior should remain dry, without stains of spilling antifreeze with a characteristic odor. At first, it is recommended to periodically look at the floor to make sure that all connections are tight and the new radiator is not defective.