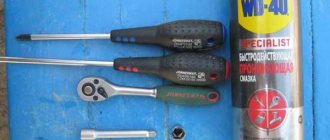
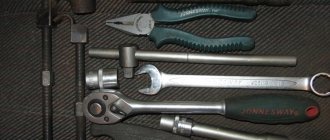
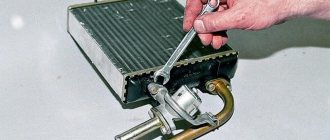
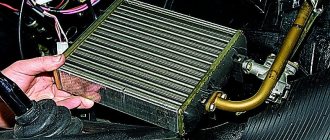
With the onset of autumn cold weather, many owners of VAZ cars complain that the interior heating works very poorly and does not provide a comfortable temperature. There are many reasons for this problem, but the most basic of them is a clogged stove radiator, which gets dust, small stones, poplar fluff, etc. How to determine that this is the case?
Diagnostics is quite simple - you just need to put your hand on the supply and discharge pipes of the device for a few seconds. If their temperature is noticeably different (the inlet pipe is hot and the outlet pipe is cold), then you will need to replace the radiator of the VAZ-2114 heater. Otherwise, you should pay attention to such details as the temperature sensor (thermostat), pump impeller and others.
How to remove a stove radiator
The process of dismantling the heater radiator on VAZ-2114 cars can be carried out in two main ways. The first involves removing the entire control panel, as well as other elements surrounding the part being replaced. We recommend carrying out repairs in this way only if you have the appropriate experience and are completely confident that after completion of the work there will be no “extra” components left. No such confidence? Then it is better to contact a car service or carry out repairs in a simpler way, which we will describe below.
It does not require dismantling the torpedo, but to perform repairs in this way you will definitely need an assistant. Work is carried out in the following order:
- remove the console and glove compartment;
- unscrew the bolts and screws that hold the front panel so that it moves freely in different directions;
- remove the cables for controlling the operating modes of the stove, which are located on the driver’s and passenger’s sides;
- remove the radiator cap;
- dismantle the rubber radiator pipes. It is advisable to first place a basin or other container under the device so as not to spill antifreeze on the floor;
- We hire an assistant. His task will be to carefully move the torpedo to the side, which will allow the radiator to be removed. In this case, you need to be extremely careful not to break anything or tear out the front panel of the car by the roots.
You can see all the details of the procedure in the photo and video attached to the article.
Features of installing a new radiator
Installation of a new radiator and assembly of the car is carried out in the reverse order. At this stage, it is important not to accidentally lose the panel fasteners, and also to follow the rules listed below:
- It is better to install new clamps on the radiator pipes, which will ensure complete tightness of the heating system;
- It is advisable to lubricate the outlet and inlet fittings of the device with soap or some detergents to simplify the installation of the pipes, as well as improve their fit to the fittings;
- The central pillars of the panel need to be secured especially well, since they are responsible for the main functions of driving the car;
- after the panel is installed and secured, you need to check that the cable settings are correct, and also make sure that the faucet and valves are open to the proper level;
- When filling the system with coolant, you need to make sure that there is no air in it. After the antifreeze level has been restored, be sure to start the engine and make sure that the pipes and their connections to the radiator are tight.
If you follow all these rules, you will be able to ensure the perfect operation of the heater in your car, as well as minimize the risks of its repeated failure due to clogging of the system.
How much does it cost to replace a radiator at a car service? The price for this service is quite high, since specialists usually remove the control panel, which takes much more time and requires considerable effort. Using the method described above, you can replace the part yourself and save money.
How to remove the stove on a VAZ 2114
A stove is an indispensable element for any car, making its operation in winter convenient and comfortable. However, it also tends to fail, and then it needs to be urgently repaired. The heater includes several elements, each of which can fail. But in order to replace the motor, radiator, resistor, the device must first be dismantled. Today we’ll talk about how to remove the stove on a VAZ-2114 with your own hands and why you might need it.
Major heating problems
Every car enthusiast runs the risk of encountering a situation where the heater controls are turned on full, but there is simply no thermal effect in the cabin. In this case, it is most likely impossible to do without disassembling the heating element. But before you start dismantling, you need to be fully aware of why you are doing it. Let's look at the main malfunctions of the stove.
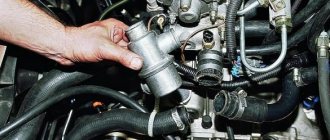
- Problems with the thermostat. They can be easily diagnosed by a side effect - the speed of warming up or overheating of the engine. If the thermostat is stuck in the open position, then the coolant will flow out in a large circle, causing the engine to warm up longer. And we get a situation in which the engine runs normally, seems to be fully supplied with fuel from the injector, but takes an awfully long time to heat up. If the thermostat gets stuck in the closed position, the opposite effect will occur (the stove will also not work).
- Airing. Have you filled in new antifreeze and noticed that there is no heating in the car? There may be a traffic jam. Diagnosing a malfunction is not difficult: you just need to start the engine, let the car warm up, wait for the fan to turn on and touch the pipes connected to the tap fittings. If the temperature on one of them is different to the touch, the problem can be considered detected.
- Radiator clogged. This problem occurs especially often after untimely replacement of antifreeze. The longer the old fluid is in the system, the more it will be deposited on the walls.
These are not all possible breakdowns. But no matter what happens to your stove, it needs to be removed and repaired.
We will talk further about how to do this, and also talk about the main nuances that need to be taken into account when removing the device.
How to replace the heater radiator on a VAZ 2114
Let us immediately make a reservation that it will not be possible to dismantle the stove without removing the panels. Be sure to take this point into account. So how is the procedure carried out? Let's look at the step-by-step instructions.
- Removing the front panel. Experienced car enthusiasts know how difficult it is to do this without damaging the body. VAZ installs terribly fragile fasteners on its products, which means they can be easily broken. It is unlikely that anyone will like switches sticking out among the wires due to the lack of a dashboard. So be very careful.
- Draining antifreeze fluid. Before removing the stove, you need to remove all antifreeze from the system, otherwise it may spill into the interior during dismantling.
- Turn off the radio and electronics. Experts recommend marking disconnected wires with appropriate stickers to save time searching for matches in the circuit.
- Removing the steering column.
Actually, the stove is right in front of you. Then there is absolutely nothing complicated. Now you can get to any of its elements, remove it, disassemble it and put it back in place. Installation is carried out in reverse order. If some points remain unclear to you, use the video instructions on our website and learn clearly about all the intricacies of disassembly.
Heater radiator failures
The most common causes of radiator failure are:
- depressurization of the device;
- clogged tubes.
When clogged, the internal radiator tubes become covered with deposits, narrowing their clearance and impairing the circulation of coolant. Clogging most often occurs as a result of using poor-quality coolant. The advanced age of the car also leads to the appearance of this problem, as does the entry of dust, dirt, water, and friction products of the power unit into the heating system. Due to a significant decrease in the circulation rate, normal heat exchange is disrupted, and the antifreeze simply does not have time to cool, which leads to engine overheating.
The appearance of a leak in the radiator is a consequence of mechanical damage, corrosion processes and drying out of the material from which the radiator tubes are made. In this case, a decrease in the volume of antifreeze leads to an increase in its temperature and a deterioration in engine cooling, as evidenced by the readings of the temperature sensor.
Which is better: copper or aluminum heater radiator for VAZ 2114
Which heater radiator is better for a VAZ 2114? The question is more relevant than ever. All owners of the fourteenth understand that the heating system leaves much to be desired. Not only does the car not warm up enough (although in most cases it is difficult to do anything about the temperature regime in many regions), but the heater also tends to fail, antifreeze begins to leak, and so on.
As a standard, especially on first-generation Samaras, VAZ used copper radiators. Relatively recently, a domestic manufacturer adopted foreign experience and began to use aluminum heaters. And yet, which is the best heater radiator for the VAZ 2114 still needs to be figured out.
Heater radiator VAZ 2114
Aluminum or Copper
Obvious advantages of an aluminum radiator:
- the presence of side ribs is much larger than that of a competitor
- the width of the channels for air flow is greater (this fact can significantly reduce the risk of breakage, and also increases the efficiency of heat supply at idle)
The obvious disadvantage of an aluminum radiator:
- heats up very quickly and cools down just as quickly (heat transfer is 209.3 W/m.deg)
- As soon as a leak is discovered, it needs to be replaced; such a unit cannot be resuscitated
Obvious advantages of a copper heater:
- heats up for a long time and cools down just as long (rather, the second part of the radiator’s property is a plus), heat transfer is 389.6 W/m.deg
- can be reanimated: as soon as a leak appears, you just need to solder the hole
Obvious disadvantages of a copper heater:
- fewer ribs than the competitor
- the channels are small and narrow, they tend to clog quickly, which impairs warming up and adds more reasons for repairs
- At idle it barely warms up.
- it is difficult to find a high-quality copper heater, since almost everyone who makes units from such material uses impurities and can paint the original material, which naturally reduces the heat transfer property
Today, aluminum radiators are clearly more popular than copper ones. And this is primarily due to the difficulty of finding a high-quality copper unit. And if luck smiles on you, then the price for a copper radiator of a VAZ 2114 stove will be many times higher than for an aluminum radiator. Average. You will get aluminum from 1000 rubles, and copper from 1700 rubles! This is still good, if you install it yourself, the radiator replacement service will cost 800-1000 rubles, on average. By the way, if you can’t solder a leaking copper heater on your own, then taking it to the service center every time will be very expensive; you’ll be able to save up for a limousine. And since all VAZ spare parts tend to be imperfect, keep in mind that you will have to deal with this one way or another. So think about whether it’s worth buying a copper radiator for the VAZ 2114 stove.
Specific examples
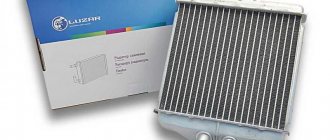
The painted copper radiator on the VAZ 2114 deserves special attention in the debate about which heater radiator is better, copper or aluminum. By the way, these are made by an office called “LUZAR”. There is no need to take such units: they are very cold, and have minimal heat transfer! But such devices have a full year warranty.
Why is everything so bad with Luzar? An autopsy will show: the rubber band, which is located next to the passage channels of the ribs, simply becomes damp after a relatively short period of time (less than a year) and the same short mileage. Another big disadvantage of Luzarov radiators is that the pipes are separated from each other, this reduces heat transfer, but makes the cost advantageous.
In general, it is now difficult to find a zero radiator that is relatively recent. Factory junk will crumble, radiators from the manufacturer are not always of decent quality. Therefore, the guideline you can choose is very simple (when choosing a radiator): it just has to be working and not clogged. And what material it is made of is the tenth thing.
Another company, DAAZ, has proven itself very well. There is only one minus - try to find it, and then try to find the original. By the way, the heat output of the Daazov heater is slightly lower than the factory one in the VAZ. And in terms of quality it clearly wins.
Another example is a heater from Oberkraft. The factory carefully approaches the testing process of the unit, which is why it is covered by a good warranty (one year). This device is made of aluminum alloy, which meets modern quality standards. An obvious advantage is the good, uniform distribution of heat throughout the cabin (apparently, they decided not to skimp on pipes), but considering the price, you can’t say that this is an easy purchase – from 1,800 rubles. But there are justifications for this price:
- Corrosion resistant
- Relatively light in weight
- Very important: resistant to temperature changes!
- Robust design
- Excellent and uniform heat dissipation.
In winter, even the highest quality stove will play tricks in terms of heat output. We offer a couple of good tips on how to make the interior warmer:
- You need to change the antifreeze and rinse the entire cooling system - this will remove all the debris in the tubes, making it easier for air to enter the cabin
- A great way to improve the microclimate is to install a new stove!
- You can also replace the cooling radiator with a new one - this will save the antifreeze from premature fatigue
- An option is to replace the pump, because it is responsible for the stability of coolant circulation at idle
- Run all the pipes and get rid of air pockets
As strange as it may sound, the stove can be insulated. Yes, for example, after running the entire system, you can glue all the joints, then the heat through the pipes will be precisely directed through the channels towards you, and not spread in an unknown direction. Another way: change the mode of air intake from outside to recirculation (why it is worth explaining this elementary action as one of the ways: yes, because many people think that the stove needs to be plugged! But the air intake does not come clearly from under the hood, which is what they are trying shut up, but just from outside!
So, as soon as such a crazy thought appears in your head, change the air intake mode). The last option for preserving heat is to insulate the interior itself. A very logical action, especially considering the presence of gaps around the body on the fourteenth.
How to change the heater radiator on a VAZ 2114 video
Heater design features
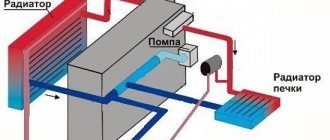
It must be said that the eighth and ninth family of VAZ cars have an identical heating system. In each case, the heat source is the main element of the car, which is represented by the engine. But the generated heat still needs to be conveyed, as they say, to the consumer. In this case, the coolant is antifreeze, which is supplied to the cooling system. It warms up the stove radiator. He himself is in a closed casing. It is blown by a stream of air, which is pumped by the heater turbine.
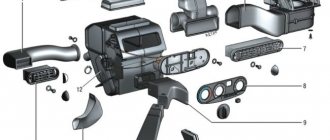
Heater design features: 1 – heater control damper lever; 2 – left heater casing; 3 – draft of the foot heating damper; 4 – radiator gasket; 5 – heater radiator: 6 – heater seal; 7 – electric motor; 8 – fan casings: 9 – impeller; 10 – windshield heating flap; 11 – air duct for heating the windshield; 12 – side nozzle air duct; 13 – side nozzle; 14 – draft of the windshield heating flap; 15 – central nozzles; 16 – foot heating damper; 17 – right heater casing; 18 – heater control handle; 19 – crane control rod; 20 – heater control damper rod; 21 – handle for supplying air to the windshield; 22 – handle for supplying air to the feet of the driver and passengers; 23 – control lever bracket; 24 – bracket for fastening the heater casings; 25 – internal ventilation air duct; 26 – window in the heater casing; 27 – heater control damper; 28 – lever for the foot heating flap.
There is an air duct for warm air to enter the cabin. If the heater radiator is cold, then we can definitely say that it is “sick.” This unpleasant situation can occur in all VAZ cars without exception. If the clogged radiator of stove 2114 is made of copper, then it will still last for some time. The case with an aluminum radiator requires immediate replacement.
Replacing the heater radiator on a VAZ 2114 without removing the panel, pro tips
Heater radiator VAZ 2114
There are so many car enthusiasts, so many reasons for replacing the heater radiator on a VAZ 2114. The forums are filled with cries for help. However, there is no single solution to fix similar problems.
Replacing the VAZ 2114 radiator heater is often accompanied by VAZ 2114 owners with a lot of wasted time and endless swearing. Changing a stove radiator with your own hands is not difficult, but it is quite difficult to get to it. Why you should not send your car to a car service center to replace the heater radiator:
- The price for work in a car service is quite expensive
- Replacement is made with a blunder
- When you remove the front panel, something will definitely break (checked more than once)
Note: The heater radiator is removed only if: the radiator is leaking, or the radiator is clogged.
Our instructions will help you replace the VAZ 2114 heater radiator yourself and solve the most common interior heater repair problems. If suddenly you haven’t found a solution that will help you with repairs, search for a video of replacing a stove radiator on a VAZ 2114. If you are a car enthusiast and not a professional at a large car repair center, you shouldn’t think that you won’t succeed, or your hands are not growing from there , just start small. For example, a common case is when heated air flows through the middle of the cabin, or into the legs, and cold or slightly heated air flows to the sides and into the windshield. In winter, such a problem is simply a nightmare: you will suffer and get very cold, it will not seem like enough to you. There is a way out - adjusting the heater damper or faucet. Replacing the stove radiator on a VAZ 2114 is not required in these cases.
Resistor fault
As noted above, the resistor is designed to change the level of resistance of the current supplied from the generator to the heating system fan. In the VAZ-2114, using a switch, you can ensure the fan operates in three modes. In the extreme position, the fan is powered by a voltage equal to the nominal voltage of the vehicle's on-board network, providing maximum power output. In the intermediate position of the switch, the level of the supplied voltage is reduced due to one of the two resistor windings, the resistance of which increases by 0.20 Ohms. In the third mode, the second winding also comes into operation, due to which the total resistance of the resistor increases by 0.80 Ohms, reducing the fan rotation speed to a minimum.
If the windings burn out, regardless of the switch position, the fan operates only at full power. The inability to switch fan operating modes is evidence of a resistor malfunction.
ADJUSTING THE TAP
Method one
So:
- Remove the bracket holding the cable sheath to the furnace valve body.
- We pull the cable off the stove valve lever.
- Open the tap with your hands to the maximum opening position.
- Unhook the cable from the levers.
- We take out this cable. (You can put it in your stash).
- We will close the tap in the spring, or you don’t have to close it at all.
If this method does not work, then:
- It is necessary to adjust the length of the cable and sheath so that in the extreme right position of the lever on the lever block the faucet is fully open
- Secure the cable with a latch
Method two
Damper adjustment:
- We remove the bracket that holds the cable sheath on the left side of the body - you will feel one lever there.
- We move the lever towards ourselves - this is the maximum open position.
- We adjust the length of the cable so that in the extreme right position of the longest lever on the block of levers, the damper is open as much as possible.
- Let's fix it.
By adjusting the heater, you can make sure that the heated air hits the windshield. The cabin will also become warmer.
Attention: It is important not to overdo it when adjusting, so as not to break the plastic to which the cable is attached.
If replacing the VAZ 2114 stove radiator does not suit you:
- We move the damper to the “hot” position, secure it tightly, covering it with plastic mass.
- At the same time, we send the drive cable to the spare parts warehouse. The positive effect is felt immediately, although the temperature of the cabin is now regulated only by the heater tap.
- It will become so warm that you can forget about hats and sheepskin coats. The driver becomes comfortable even in forty-degree frost. Cold air is insulated.
- However, the air on the right will be colder. It all depends on the deformation of the damper during the operation of the car: on the side opposite to the cable, the damper cover ceases to close tightly.
Replace the additional heater resistor
The operating speed of the stove on a VAZ 2114 car is regulated by an additional resistor. Its design provides for the presence of two spirals with a certain resistance. If the heating system operates in the first mode, then the current passes through two spirals. If you turn on the operation at second speed, the current will flow through one spiral. When using the third speed, the current will flow bypassing the resistor altogether. The location of the additional resistor is in the place under the gas pedal.
For the most part, repair of this part is not required, but it often fails due to the fact that the contacts burn out. In this case, they need to be cleaned. It is possible that the block may melt.
First of all, it is necessary to remove the left trim, which is located on the instrument panel. Then you need to disconnect the wires from the additional resistor and remove it, after unscrewing the screw. Visually inspect its integrity. Use a multimeter to determine the presence of a break. If it is found, the part is replaced. Assembly must be carried out in reverse order
REPLACING A RADIATOR FUEL FOR A VAZ 2114
You can completely remove the heater and then adjust it. The work is carried out in stages:
Attention: Before removing the heater, do not forget to disconnect the ground terminal from the battery. At the same time, drain the coolant (antifreeze) from the system.
- Now we remove the instrument panel and the floor tunnel lining. Then carefully disconnect the interior heating air duct.
- We perform the same actions with the wires from the fan motor, resistor, incoming and outgoing faucet hoses.
- We sequentially unscrew the nuts securing the tap (there are two of them) on the front panel.
- Remove the seal from the faucet tubes.
- We unscrew the nuts securing the stove to the body (four in total).
- We can easily remove the heater and control assembly.
- Upon completion of the adjustment process, we install the stove in the reverse order of removal.
Repair/replacement of resistor
A faulty resistor may be indicated by the fan operating in one mode, when manipulations with the switch do not affect its blowing speed. To replace the resistor, you need to prepare a screwdriver with a Phillips head, fine-grain sandpaper and a multimeter. Algorithm of actions:
- disconnect the negative terminal of the battery;
- unscrew the screws that secure the right console cover;
- Use a screwdriver to unscrew the screws securing the right cover of the center console;
- you will have access to the resistor, from which you need to disconnect all the wiring and evaluate the contacts for burning. If the contact surface is oxidized, use sandpaper to clean it down to metal;
- It may well be that the resistor has lost its functionality precisely due to burning/oxidation of the contacts, so we assemble everything in the reverse order and check whether the fan will work in all normal modes;
- in case of a negative result, again remove the negative terminal, the panel cover and unscrew the screw that secures the resistor to the body;
- We remove the resistor and use a multimeter to measure the resistance at the resistor inputs and at the inputs of both windings. In the latter case, the indicator indicating the working condition of the additional elements is 0.2 Ohm. For the entire resistor, the standard resistance should be 0.8 ohms. If the multimeter readings do not match the specified values, replace the resistor with a new one, and then reassemble in the reverse order.
HOW TO REPLACE THE RADIATOR OF A VAZ 2114 OVEN
So:
- We replace the radiator ourselves.
- We start by draining the antifreeze from the cooling system.
- Then remove the dashboard.
- Replacing the heater radiator in a VAZ 2114 begins with the interior. Inside the car, under the dashboard, disconnect the hoses leading to the heater tap pipes.
- To perform these actions without problems, loosen the clamps.
- Do the same in the engine compartment: remove the hoses of the faucet pipes, unscrew the nuts securing the radiator, and remove the faucet from the panel.
And now in order
Loosen the clamps, remove the hoses, remove the radiator mounting nuts
- Removing the rod holder
- Disconnect the rod from the lever itself
- We go into the interior, lift the cover from the gear shift lever.
Removing the cover
- We remove the trim trim: which is located under the handbrake.
Removing the overlay
- We unscrew and take out the rear trim: located between the seats. We move it back for convenience.
- Disconnect the air duct (cabin) from the heater housing and remove it.
Disconnect the cabin air duct
- Disconnect the resistor and motor connectors.
- Unscrew the nuts (2 pairs) to the left and right of the heater.
Nuts securing the heater
- Remove the radiator along with the panel.
- We are making a replacement.
- We install the heater radiator in the reverse order of disassembly. We check the condition of the pipes and clamps and replace them if necessary. The replacement of the radiator with VAZ 2114 stoves has been successfully completed.
- After replacing and installing all parts in place, fill in coolant.
- We start the engine and check the functionality of the stove.
- If suddenly the stove does not heat well, it means that an air lock has formed in it, you should get rid of it.
Another case when the stove does not heat:
Situation: A car owner’s heater does not warm up the interior well, although heated air is supplied, the engine temperature is within ninety degrees. The heating radiator is also hot, the pipes are in good condition. We do the following:
- We independently unscrew the side of the dashboard on the passenger side.
- We inspect two hoses located near the engine shield, extending from the heater. Let's try them by touch.
- If they are cold, it means they are clogged.
- We clean them and everything works!
Changing the stove motor
If you get into your car, start it, turn on the heater fan and hear silence, check the fuse box. One of them may need to be replaced. If the motor does not work after this, you need to check whether the contact has come loose or the electric motor is covered. Solutions:
- If you are a novice driver, then go to a car service center.
If you are an experienced car enthusiast, follow these steps:
- We look under the panel and inspect the contacts of the fan and switch.
- We unpick the connector and use a probe to check the voltage on the motor. If there is voltage, then we take out the motor.
- Perhaps the negative has fallen off the motor. Let's attach it in place. After a couple of minutes the car gets warmer.
Wear of pipes
Coolant may leak from the heating system through the inlet/outlet pipes. This result is usually caused by their wear under the influence of aggressive substances that are components of the liquid, combined with high temperature. The appearance of leaks in the pipes can also be caused by excessive efforts when tightening the clamps during their installation (for example, after replacing leaky old pipes).
The heating system of the VAZ-2114 car includes 4 pipes, half of which are located in the engine compartment, ensuring the passage of antifreeze between the power unit and the heater, and the other two are located in the cabin, ensuring coolant circulation between the radiator and the heater tap. Liquid leakage can occur in two different scenarios. The first involves antifreeze leaking out into the area where the power unit is protected; with the second option, it will flow into the cabin. Signs of a leak in the pipes:
- decreasing coolant level in the expansion tank;
- the appearance of a persistent unpleasant odor in the cabin;
- presence of smudges in the passenger compartment or under the engine protection.
STOVE TAP REPAIR
VAZ heater valve
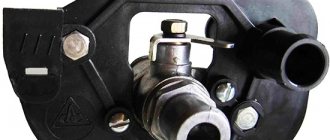
The heater tap (see photo above) is designed to regulate the flow of coolant through the heater radiator. On VAZ 2113, 2114, 2115 models the same heater faucet is installed. The main failures of the stove tap are oxidation, jamming, leakage, which results in a puddle of coolant appearing under your feet.
Why is the faucet leaking?
Possible reasons:
- With the onset of spring, we close the heater tap and move the regulator to the extreme position.
- From spring to autumn, we don’t use it, so the faucet turns sour.
- In winter, we open the tap again, turn on the stove, and as a result the tap flows.
- In this case, it must be replaced.
- In addition to replacing the faucet itself, it is recommended to replace the cabin filter in the fall because... it becomes clogged with leaves and the air flow weakens.
Which faucet to choose
In the spare parts store you can see three heater taps:
- Ceramic
- Factory (standard)
- Ball
Which to choose:
- The body of a ceramic faucet is ordinary plastic, but the locking mechanism consists of two ceramic plates.
- Factory cost from 80 to 100 rubles. The operating principle of which is based on a rubber membrane. As practice shows, it is not reliable, subject to acidification and is installed only if there is nothing better at hand.
- Let's move on - ball valve. Its operating principle is based on a ball with holes instead of a membrane, as in the second option. This specimen is subject to oxidation, but is much more reliable than a factory faucet.
- The ceramic faucet is the most reliable of all of the above; we recommend installing it to avoid unnecessary problems.
- The only drawback is the reduced throughput of the ceramic faucet, which reduces heat transfer. It turns out: the most reliable faucet is a ceramic one, but the heating weakens when using it.
Where is the stove valve located?
The heater valve is located under the console (in the center). Remove the side panel near the passenger's feet. Two pipes lead to it. To change the heater tap you do not need to drain the antifreeze or remove the dashboard. But in this case, you have to lie head down and do some of the work by touch.. To change the heater tap you will need:
- New heater tap
- Crosshead screwdriver
- Clamp 16x23mm
- Capacity 5L or more
- Coolant
- Key to "10"
- Rags
How to replace a stove faucet
We carry out the work on a cold engine:
- Completely remove the instrument panel.
- Place a rag under the passenger's feet and the faucet to absorb spilled coolant.
- Open the hood, remove the heater hose clamps, then remove the pipes from the tap itself, drain the antifreeze into a prepared empty container.
- We move to the salon. Using a Phillips screwdriver, unscrew the clamps securing the heater pipes to the faucet and remove them. We place a container for coolant under the pipes
- We take out the lever rod bracket and pull it out of the hole.
We take out the rod bracket, pull it out of the hole in the lever
- Let's move under the hood again. Using a 10mm wrench, unscrew the fastenings of the faucet to the shield.
- We return to the salon and take out the faucet.
We insert the new tap in the reverse order of removal:
- Installing the new faucet in place
- We secure it from the engine compartment using two nuts (pre-lubricated with a product that protects them from corrosion)
- From inside, open the tap completely and tighten the bracket.
- Then we put on the pipes from the passenger compartment and secure them from the engine compartment.
- Pour in coolant
- We start the engine and warm it up. We check the pipe clamps, tighten them if necessary, and turn on the heating.
If you don't fully understand something, be sure to watch our video.
Switch replacement
If, after repairing or replacing the heater resistor, the fan continues to show signs of life in only one mode, regardless of the position of the switch, it is necessary to check the functionality of the latter. To do this, we again need a screwdriver, as well as scissors (or fairly powerful tweezers). Work order:
- remove the negative terminal from the battery;
- unscrew the 4 screws that secure the right panel cover;
- remove from the slots and pull out the switch by pulling it towards you;
- Using scissors, tweezers or another suitable tool, unscrew the nut that holds the switch;
- on the right side of the console, remove the switch, identifying and disconnecting all connectors from it;
- inspect the contacts for scale, rust or other defects, clean them with fine sandpaper;
- We install the switch in place, connect the terminal and check its operation. If there is no effect, the switch must be replaced with a new one.
If you perform any of these operations for the first time, it may take a lot of time, but you can save on buying extra spare parts and gain invaluable experience in replacing a VAZ-2114 stove. It is worth noting that for VAZ 2112 - 2115 models there are no fundamental differences in the repair or replacement of heating system parts.
How much does it cost to replace a radiator for a VAZ 2114 stove?
Average prices for repairing suspension and other elements of a VAZ 2114 car.
| DIAGNOSTICS | Price | |
| 8 V | 16 V | |
| Suspension front, rear - diagnostics | 300 | 300 |
| Diagnostics of internal combustion engines | from 500 -1000 | from 500-1000 |
| Suspension broach | 709 | 709 |
| Compression measurement | 400 | 500 |
| Transmission - diagnostics | 491 | 491 |
| ENGINE | Price | |
| Flywheel ring with clutch removed - replacement | 294 | 294 |
| Engine assembly - replacement | 4500 | 5500 |
| Engine - overhaul | 22000 | 23500 |
| Engine protection - removal/installation | 250 | 250 |
| Removable oil caps - replacement | 2000 | 4000 |
| Valve cover - replacement | 422 | 621 |
| Engine oil - replacement | 349 | 349 |
| Engine support (mount) - replacement | 545 | 545 |
| Engine sump - broach | 491 | 491 |
| Crankshaft bearing with clutch removed - replacement | 327 | 327 |
| S/U cylinder head | 2505 | 3500 |
| Cylinder head bulkhead | 2500 | 3500 |
| Engine Pan Gasket - Replacement | 927 | 927 |
| Intake manifold gaskets - replacement | 1308 | 1308-1749 |
| Exhaust manifold gaskets - replacement | 1308 | 1129 |
| Camshaft - replacement | 1363 | 2499 |
| Alternator belt - replacement | 327 | 327 |
| Replacing the drive belt tensioner roller | 348 | 348 |
| Timing belt - replacement | 1036 | 1940 |
| Timing belt roller - replacement | 1036 | 1940 |
| Rear crankshaft oil seal - replacement | 2834 | 2834 |
| Front crankshaft oil seal - replacement | 1690 | 2594 |
| EXHAUST SYSTEM | Price | |
| Muffler - replacement | 491 | 491 |
| Removing the catalyst (without s/u) | 700 | 700 |
| Intake manifold - replacement | 1363 | 1363 |
| Exhaust manifold - replacement | 1308 | 1179 |
| Reception pipe-gearbox bracket - replacement | 273 | 273 |
| Exhaust pipe laying - replacement | 491 | 491 |
| Resonator - replacement | 469 | 469 |
| Reception pipe (PANTS) - replacement | 654 | 654 |
| SUPPLY SYSTEM | Price | |
| Gas tank - replacement | 981 | 981 |
| Carburetor - replacement | 600 | — |
| Fuel pipe - replacement | 600 | 600 |
| Fuel line - replacement | 5000 | 5000 |
| Air filter - replacement | 164 | 164 |
| Fine fuel filter - replacement | 273 | 273 |
| Fuel hose - replacement | 251 | 251 |
| COOLING SYSTEM | Price | |
| Coolant expansion tank - replacement | 251 | 251 |
| Coolant - replacement, drain/fill | 491 | 491 |
| Water pump (POMPA) - replacement | 2398 | 3302 |
| Cooling and heating system pipe with drained coolant - replacement | 153 | 153 |
| Radiator - replacement | 872 | 872 |
| Thermostat - replacement | 536 | 436 |
| Electric cooling fan - replacement | 654 | 654 |
| VENTILATION AND HEATING | Price | |
| Heater (stove) valve - replacement | 1417 | 1417 |
| Heater radiator (stove) - replacement | 1308-3000 | from 1500 |
| Stove motor - replacement | 872 | from 872 |
| IGNITION SYSTEM | Price | |
| Ignition coil - replacement | 273 | 273 |
| Distributor cover, slider - replacement | 491 | |
| High-voltage wires - replacement | 218 | 218 |
| Spark plugs (1 piece) - replacement | 44 | 54 |
| Distributor with ignition control - replacement | 491 | |
| ELECTRICAL EQUIPMENT | Price | |
| Battery - replacement | 273 | 273 |
| Replacing the oil pressure sensor | 164 | 164 |
| Reverse switch - replacement | 382 | 382 |
| Brake light switch - replacement | 273 | 273 |
| Generator - replacement | 709 | from 709 |
| Ignition switch - replacement | 818 | 818 |
| Steering column switch - replacement | 709 | 709 |
| Starter - replacement | 654 | 654 |
| Email windshield washer motor body n/a, reservoir - replacement | 109 | 109 |
| TRANSMISSION | ||
| Clutch | Price | |
| Clutch cylinder reservoir, GTZ - replacement | 251 | 251 |
| Clutch fluid - replacement | 382 | 382 |
| Flywheel - replacement | 3161 | 3161 |
| Clutch pedal - adjustment | 327 | 327 |
| Clutch assembly - replacement | 2943 | 2943 |
| Clutch cable - replacement | 491 | 491 |
| checkpoint | Price | |
| Gearbox (removed) - repair | 3924 | 3924 |
| Gearbox (remove - install) - replacement | 2524 | 2524 |
| Gearbox link - replacement | 600 | 600 |
| Gearbox oil - replacement | 469 | 469 |
| Transmission cushion - replacement | 532 | 532 |
| Speedometer drive - replacement | 532 | 532 |
| Speedometer cable - replacement | 469 | 469 |
| Front suspension | Price | |
| Stretch Bracket (CRAB) - Replacement | 469 | 469 |
| Replacement of silent blocks of front levers - 1 side | 665 | 665 |
| Stabilizer link (1 side) | 229 | 229 |
| Replacing longitudinal tension silent blocks (“daisies”) (for 1 side) | 436 | 436 |
| Plug-in cartridge (strut shock absorber) - replacement | 981 | 981 |
| Strut support bearing (1 side) - replacement | 981 | 981 |
| Front hub bearings (1 side) - replacement | 927 | 927 |
| Drive assembly (1 piece) - replacement | 676 | 676 |
| Spring (1 piece) - replacement | 850 | 850 |
| CV joint boot (1 piece) - replacement | 769 | 769 |
| Stretching - replacement | 578 | 578 |
| Suspension arm - replacement | 589 | 589 |
| Strut (shock absorber assembly) - replacement | 763 | 763 |
| Ball joint (1 pc.) - replacement | 436 | 436 |
| Replacing spacers (1 piece) | 500 | |
| CV joint (grenade) 1 piece - replacement | 818 | 818 |
| STEERING | Price | |
| Steering shaft - replacement | 600 | 600 |
| Tie rod end (1 piece) - replacement | 382 | 382 |
| Steering rack boot - replacement | 1 744 | 1744 |
| Steering rack (assembly) - replacement | 1 417 | 1417 |
| Tie rod assembly (1 piece) - replacement | 491 | 491 |
| Rear axle | Price | |
| Beam assembly - replacement | 3488 | 3488 |
| Wheel bearing - replacement | 654 | 654 |
| REAR SUSPENSION | Price | |
| Shock absorber (1 piece) - replacement | 545 | 545 |
| Rear beam silent block (1 side) | 545 | 545 |
| Replacing spacers (1 piece) | 300 | 294 |
| Shock absorber bushings (one side) - replacement | 927 | 927 |
| Beam bushings - replacement | 3924 | 3924 |
| Spring (1 piece) - replacement | 545 | 545 |
| BRAKE SYSTEM REAR/FRONT | Price | |
| Brake drum (1 side) - replacement | 327 | 327 |
| Brake disc (1 piece) - replacement | 654 | 654 |
| Brake fluid - replacement | 491 | 491 |
| Rear brake pads (1 side) - replacement | 382 | 382 |
| Front brake pads (1 side) - replacement | 273 | 273 |
| Brake drum boot - replacement | 687 | 687 |
| Brake disc boot - replacement | 698 | 698 |
| Rear brake pressure regulator (KOLDUN) - replacement | 491 | 491 |
| Parking brake lever (handbrake) - replacement | 600 | 600 |
| Parking brake lever (handbrake) - adjustment | 382 | 382 |
| Caliper guide (4 pcs) - replacement | 709 | 709 |
| Caliper - replacement | 632 | 632 |
| Bleeding the brake system | 382 | 382 |
| Brake system tee with bleeding - replacement | 709 | 709 |
| Parking brake cable - replacement | 818 | 818 |
| Brake pipes with brake bleeding - replacement | 545 | 545 |
| Vacuum booster - replacement | 872 | 872 |
| Main brake cylinder - replacement | 654 | 654 |
| Rear brake cylinder - replacement | 648 | 545 |
| Vacuum booster hose - replacement | 327 | 327 |
| Brake hose - replacement | 327 | 327 |
Positions of radiators in the rating
A large number of radiator models offered by the manufacturer made it possible to arrange them in accordance with the rating:
DAAZ (article 21080-8101060-00)
DAAZ (article 21080-8101060-00)
The model comes with original packaging in red or blue. There are swirlers. The radiator itself has a small honeycomb size. Such a radiator can last the owner from 3 to 6 years. Aluminum is used as the manufacturing material.
Radiator with article number 1102-8101.100
Radiator with article number 1102-8101.100
The manufacturer is Orenburg Radiator LLC. Made from copper, with excellent heat transfer properties. The design is equipped with small honeycombs. Such a radiator will work no worse than the “native” device. The service life is up to 10 years.
Heater radiator luzar vaz 2114
Heater radiator luzar vaz 2114
This design is used more and more often by motorists. It is made of aluminum, but in terms of characteristics and quality it is not inferior to the “native” copper radiator. Has a large number of positive reviews.
AURORA
AURORA
This radiator costs the least of all, but also has the lowest characteristics. The radiator is made of aluminum of the poorest quality. In addition, airflow is carried out over a fairly small area. As a rule, it is used only in extreme cases.
Alaska
Alaska
There are no swirlers in the design. It has approximately the same cost as the Luzara radiator. Made from aluminum.
In any case, when purchasing, you should inquire about the availability of a certificate for the product.
