Do you value nerve cells? A creaking panel trim on a VAZ 2110 is far from the most pleasant and even annoying sounds that you can involuntarily “enjoy” while driving. And what can we say about the aesthetic side of the issue? The cheap plastic of the product clearly does not emphasize the status of its owner. This also adds to the motorist’s problems associated with the need to maintain the “tidy” and regularly patch new cracks on it.
If the heater in your car constantly works poorly in winter, especially when it comes to heating the side windows, you can also safely point your finger at the instrument panel. This is truly an eternal problem with most VAZ cars. The reasons are very banal, which will be discussed in more detail a little later.
There is no need to change, as they say, for good or bad. AvtoVAZ may not always be attentive to the small structural details of its cars, but all of them can be easily eliminated by the motorists themselves. Therefore, the problem of panel overlay can also be solved quite simply. And how - it depends on you and on which of the ideas below you like best.
How to maintain an old trim on the instrument panel of a VAZ-2110
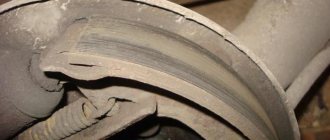
The main problem with this kind of product is, of course, low-quality plastic, which tends to crack. An equally serious problem is the peeling of the main parts of the “side”. There are only three of them: upper, lower and middle, respectively. It is at the connecting joints that it often happens that the cracks widen.
Most motorists, at a minimum, seal all heat-conducting channels of the “dashboard”, thanks to which the instrument panel overlay on the VAZ 2110 works much more efficiently. Anti-creaking is also used, since the unpleasant sound of plastic rubbing at the joints puts quite a lot of pressure on the head when driving.
Sound insulation of the VAZ 2110 dashboard
Very often, VAZ drivers have to learn how to repair cracked plastic. There are special means for this. Cracks can also be repaired by cold welding or epoxy resin, but after this procedure it is still necessary to repaint the surface of the restored panel. Nobody forbids also reupholstering the torpedo with leatherette or other finishing material as a good alternative.
Over time, the panel, one way or another, becomes substandard, greatly discrediting the presentability of your VAZ-2110. Patches and gluing cannot be done in unlimited quantities, and this is not a rewarding task. Have you ever thought about the need to replace your “tidy”? Below we will try to explain why you need this.
Noise insulation
If you think that installing a panel overlay will immediately solve many problems, then this is not entirely true. We still need to work on eliminating the creaking, for which we need to glue and stretch everything with our own hands; we also need to soundproof the panel itself, and at the same time the floor. It is also possible that the air ducts will need to be replaced or modified.
To work you need, based on a VAZ 2110:
- Six sheets of bimast are a self-adhesive material used for sound insulation. It consists of three layers: 1 – thick aluminum foil; 2 – bitumen; 3 – raw rubber. The standard sheet has a size of 60x90 cm;
- Three sheets of splen measuring 100x125 cm and 0.8 cm thick. This is also a self-adhesive material resembling foam;
- One standard sheet of Bitoplast-5 (black self-adhesive foam rubber).
All these materials will be needed in order to glue all the places that make creaking and other noises, and so that the sound insulation in the VAZ 2110 interior is at the level, and not what it actually is.
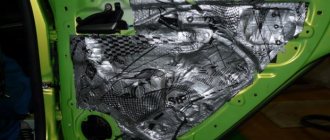
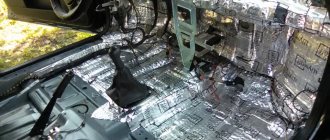
In order to know for sure that in the future nothing will creak or rattle on the VAZ 2110, irritating those in the car, normal sound insulation is needed. On the floor of the entire front part (up to the rear seats) and on the front panel with your own hands you need to glue the butt joint in the following sequence:
- Bimast (and roll);
Interior sizing Bimast Bomb
Interior sizing Bimast Bomb
Interior sizing Bimast Bomb
- Splen. It can be slightly stretched, while it follows the contours of the surface being pasted;
Sizing with Splen on top of Bimast
Sizing with Splen on top of Bimast
Sizing with Splen on top of Bimast
- Laying factory sound insulation on top.
Why should you consider replacing the lining?
Perhaps you really think that replacing the front trim of the dashboard will be an overwhelming task for you. However, it is difficult to argue that the original factory plastic is hardly distinguished by high quality and presentability, and something needs to be done about it. A good overlay for the instrument panel of a VAZ 2110 Euro-model will cost about 6,000 rubles and has a lot of advantages:
- updating the aesthetic appearance of the VAZ-2110 car interior;
- There are also exclusive offers that inherit the design of prestigious imported cars;
- you get rid of the problems of low-quality plastic: fading of the material in the sun, creaks, cracks and widening gaps at the junction of panel elements;
- improved sound insulation properties: all kinds of noise emanating from under the hood of a car (including when driving on poor-quality roads) will be transmitted to a lesser extent into the interior of the VAZ-2110;
- The furnace air ducts of the stock lining for the panel leave much to be desired, so you will certainly improve the heat exchange performance inside the cabin in the winter season.
Europanel for VAZ 2110
By the way, there are several types of “Europanels” for the “ten” from VAZ. For example, Euro-1 is quite ascetic in its design and does not have a glove compartment opposite the passenger seat. But it is available for the rubber from the series number two. There are also decorative trims that only complement the interior design and are mounted as upholstery on top of the main ones.
The original stove ventilation system in VAZ-2110 cars really does not suit most drivers. Because of this, many motorists do not have the opportunity to drive comfortably in the winter. You can, of course, modernize an old panel cover: seal all the cracks with model material, compensating for heat loss, but buying a completely new one can really kill “two birds with one stone.”
You can come up with a lot of logical arguments in favor of why the new overlay for the VAZ 2110 panel is good. This means that if you have the means and capabilities, all you have to do is pick up the tool and get to work. Below we will briefly describe how to replace the front pad.
Disassembly
Replacing the panel, installing the trim, and do-it-yourself sound insulation require quite a lot of disassembly. Therefore, it is very advisable to mark all removed parts. For example, using self-adhesive labels on goods.
So:
- Remove the front seats;
- The floor tunnel is also subject to dismantling;
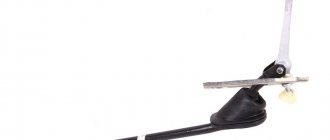
- We also remove the steering column cover and the steering wheel itself;
- The steering column switches also need to be removed;
- Next we remove the glove compartment;
- We disconnect the connectors and relays from the mounting block;
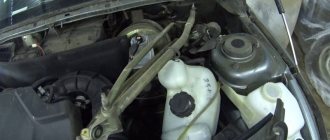
- After removing the front pillar covers, remove the instrument panel of the VAZ 2110, disconnecting everything that is possible from it. If you do not have many devices installed other than those standardly provided, then it is better to remove the panel along with the wires.
Also, in order for the sound insulation to be such not only in name, you need to remove the ECU bracket and sills, and then carefully remove the factory sound insulation.
How to easily and correctly remove the old “tidy”
A car torn apart during the dashboard repair process looks really scary. The front seats were pulled out of the cabin, the steering wheel was removed, and a pile of electrical wiring was sticking out from the bottom of the car. In all appearances, the VAZ-2110 we adore seems as if it has been plundered with its insides turned inside out. In order to perform such a seemingly complex operation, you only need pliers and a cross-head screwdriver.
There are really a lot of connecting connectors and this is perhaps the most terrible moment of replacing a VAZ “tidy” for most motorists. The truth is that you don’t need to understand all these intricacies of electrical wiring. Just make it a rule to mark and label all disconnected connectors, and then the reverse installation process will be no more difficult than assembling a children's Lego set.
Thanks for subscribing!
Be prepared for the preliminary disassembly phase to steal most of your day. It's better to start in the morning. It is unlikely that you will be able to complete it in less than five to six hours of painstaking work. During the dismantling process you will:
- remove the seats in the cabin;
- completely dismantle the heat-conducting tunnels on the floor;
- remove the steering wheel together with the switches located under it;
- dismantle the instrument panel along with the trim;
- the same applies to relays and other connectors accessible after removing the glove compartment. The VAZ-2110 headlight hydraulic corrector and other regulators on the panel are removed.
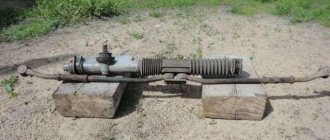
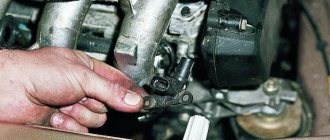
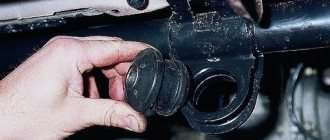
The VAZ-2110 stock panel is attached to the car body with a set of self-tapping screws and two studs in the area of the heat tunnel of the furnace, which directs air flows to the side windows. After unscrewing the screws, the only thing that can prevent you from removing the panel is the unplugged wiring harnesses, which you already know what to do with. And, since you have decided to start replacing the “tidy”, upgrading the display panel would also be a good idea.
Alternative
They mainly use the so-called Euro panel overlay.
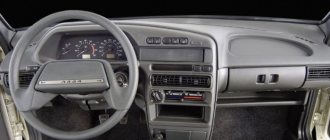
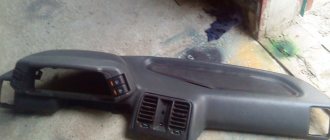
Panel trim for old VAZ 2110
Panel trim VAZ 2110 Euro-1
Panel trim VAZ 2110 Euro-2
Panel trim VAZ 2110 Euro-3
Overlay Kashtan panel VAZ 2110 (instrument panel according to class=”aligncenter” width=”1023″ height=”543″[/img] Overlay Kashtan panel VAZ 2110 (instrument panel according to class=”aligncenter” width=”660″ height=” 405″[/img] Panel trim VAZ 2110 Kashtan
Panel trim VAZ 2110 Kashtan
Panel trim VAZ 2110 Kashtan
This trim for the VAZ 2110 is sold as a kit, which includes:
- Actually, the overlay;
- Inserts for finishing on the instrument panel, air ducts, as well as for the button;
- Buttons: heated rear window and rear foglights (these buttons have locks); turning on the dimensions and low beam (dual);
- Two pads for buttons;
- Six plugs that can be placed instead of buttons where they are not needed;
- A set of wires with the help of which the specified double switch is turned on and a block for them;
- Brackets for the instrument panel.
This material will help you make your own dashboard lighting:
1. The pad itself
2. Inserts for buttons, air ducts, instrument panel trim
3. Buttons, pads, plugs, harnesses
The pad itself is usually softer than that of the VAZ 2110, and does not produce an annoying squeak like the standard one.
Practice shows that proper replacement of such a lining will significantly improve the appearance, sound insulation, and glass blowing.
Some tips for updating the instrument (display) panel of the VAZ-2110
If the standard panel overlay on the VAZ 2110 for indicating sensors and meters has already become boring to you, you will probably be pleased to know that replacing this element of the car is extremely simple. This is where you can show your creative talents in artistic and printing skills. If this kind of work is not for you, you can always buy ready-made overlays in the store, or contact a designer.
If you're wondering exactly how to personalize the dashboard trim above your steering wheel, it's relatively easy to do. A template is created in a graphic editor on a computer (CorelDraw, Photoshop or similar) and then printed on self-adhesive film (preferably dark matte color) using a plotter. There are a lot of ready-made templates for the VAZ-2110, as well as modified ones, on the Internet. This is much more profitable than buying ready-made overlays in the store.
Tuning the VAZ dashboard using LED display is also very popular. This kind of lighting practically does not heat the plastic, is durable and consumes minimal electricity. But the overlay will now look extremely stylish and fashionable. You can connect either a stationary backlight, which is turned on with the ignition, or one controlled by a special regulator (you can set the operating mode, brightness and color).
Delivery by Russian Post
Note! Almost all goods sent by Russian Post can be paid upon receipt (cash on delivery). But in some cases, a partial prepayment in the amount of the DELIVERY COST will be required, namely:
- The delivery price is higher than the cost of the ordered goods;
- Delivery price by Russian Post is more than 600 rubles;
- The order contains items that are made to order (for example, parts painted in body color, stainless steel products and the like)
Advantages: the most widespread network in Russia, delivers to any corner of the country, including the most remote ones.
Flaws:
- high cost of delivery of heavy or large parcels, as well as the weight of one parcel should not exceed 20 kg;
- long delivery times and queues in large cities to receive parcels.
Delivery time depends on how far your locality is from Tolyatti and usually ranges from 2 to 14 days.
The cost of delivery is calculated based on the volume, weight of the selected product and the distance to the recipient’s settlement from 230 rubles.
Russian Post commission for cash on delivery service (not to be confused with delivery costs)
- purchase price up to 1,000 rubles. – 70 rubles + 5% of the amount;
- purchase price from 1,000 to 5,000 rubles. – 80 rubles + 4% of the amount;
- purchase price from 5,000 to 20,000 rubles. – 180 rubles + 2% of the amount;
- purchase price from 20,000 to 500,000 rubles. – 280 rubles + 1.5% of the amount.
Russian Post - Delivery of goods up to 20 kg throughout Russia. https://www.pochta.ru
Delivery time and cost Track the parcel Calculate delivery by mail