Share:
Tightening torques for VAZ cylinder head 8 and 16 valves are the topic of this article. It shows the tightening torque of the cylinder head bolts of various cars. Tightening diagrams for VAZ cylinder head bolts of different models are posted. The sequence of tightening the cylinder head bolts for each VAZ engine is described. Marks of bolts connecting the cylinder head to the engine block are laid out.
The tightening torque of the VAZ cylinder head is the size of the tightening force of the fasteners of the cylinder head of a VAZ car engine, at which the threads of the hardware do not break and the body of the cylinder head does not deteriorate.
Tightening torque of cylinder head bolts VAZ 2101
Tightening the cylinder head bolts 2101-1003271 and 1/60441/30 must be done 2 times, in the order shown in the image.
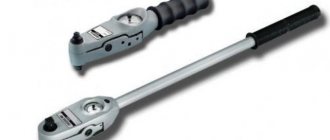
The tool used is a 19mm head, a 13mm head, a collar and a rod or ratchet
Tightening torques for VAZ 2101 cylinder head bolts from 1 to 10:
- 1 time - 34 ÷ 42 N/m;
- 2 times - 100 ÷ 120 N/m.
Torque of head bolts No. 11:
- Primary moment - 14 ÷ 16 N/m;
- The final force is 32 ÷ 40 N/m.
Niva rear axle shank tightening torque
Rear axle section
1 – bearing lock ring; 2 – brake pad; 3 – brake drum; 4 – wheel mounting stud; 5 – wheel cap; 6 – brake cylinder; 7 – brake shield; 8 – axle bearing; 9 – axle shaft seal; 10 – spring support cup; 11 – differential box bearing; 12 – breather; 13 – differential box; 14 – driven gear of the main gear; 15 – satellite;
16 – semi-axial gear; 17 – bolts securing the gearbox to the rear axle beam; 18 – drive gear bearings; 19 – drive gear oil seal; 20 – flange; 21 – drive gear nut; 22 – dirt-reflecting ring; 23 – spacer sleeve; 24 – adjusting ring; 25 – drive gear; 26 – satellite axis; 27 – gearbox housing; 28 – rear axle beam; 29 – axle shaft.
View of the rear axle from the gearbox side (rear axle drive shaft removed): 1 beam; 2 — gearbox flange; 3 — flange fastening nut; 4 — gear housing; 5 screw for fastening the gearbox housing; 6 - drain plug
The rear axle consists of a beam, a gearbox with a differential and two axle shafts. The main gear is hypoid, its gears are selected for noise and contact, so they can only be replaced as an assembly (the pair is marked 2106). The main gear drive gear is integral with the shaft (shank) and is installed in the neck of the gearbox on two tapered bearings. The outer rings of the bearings are pressed into the neck seats, and the inner rings are put on the shank. A spacer is installed between the inner rings; When the shank nut is tightened, the bushing is deformed, providing constant preload to the bearings.
The bearing preload is controlled by the moment the drive gear rotates (other parts are not installed). For new bearings, the turning torque should be in the range of 157–197 N.cm, for bearings after a run of 30 km or more – 39.2–59.0 N.cm. In this case, the shank nut is tightened to a torque of 118–255 N.m, periodically checking the rotation of the drive gear. If the specified turning torque has already been reached and the nut tightening force is less than 118 N.m, it is necessary to replace the spacer sleeve with a new one, since the old one is too deformed. Replacement of the bushing is also necessary in the case when the turning torque is higher than permissible (due to inattention during tightening).
If the main pair or pinion bearings are replaced, the shim thickness must be re-selected. It is mounted on the shaft between the drive gear and the inner race of the large bearing. The method for selecting a ring is described in the section Disassembling the rear axle gearbox.
Some of the rear axle malfunctions
The driven gear of the main gear is attached to the differential box flange with special bolts without washers. These bolts must not be replaced with any others. The differential box rotates in two tapered bearings. Their preload, as well as the gap between the teeth of the main gear gears, is adjusted by nuts screwed into split bearing beds. The side gears are installed in cylindrical sockets of the differential box and rest on it through support washers. These washers are selected in thickness so that the gap between the teeth of the satellites and semi-axial gears is in the range of 0–0.1 mm. The satellites are installed on an axle with constant engagement with the semi-axial gears. The axis has spiral grooves for supplying lubricant to the rubbing surfaces.
Tightening torques for the cylinder head of the VAZ 2102 engine
Tightening the cylinder head fasteners must be done in 2 steps, according to the sequence indicated in the drawing below.
To tighten it, we use a 19 and 13 socket head, as well as a torque wrench.
Screwing force for cylinder head mounting from 1 to 10:
- Initial - 3.4 ÷ 4.2 kgf/m;
- Final - 10 ÷ 12 kgf/m.
Screwing force of the bolts of the head of block No. 11:
- First time - 1.4 ÷ 1.6 kgf/m;
- The second is 3.2 ÷ 4.0 kgf/m.
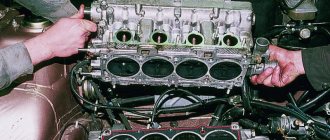
Removing and installing the cylinder head
On a car, the cylinder head is removed if troubleshooting does not require removing the engine itself or if it is only necessary to remove carbon deposits from the surface of the combustion chamber and valves. The sequence of operations is as follows.
Drain the coolant from the radiator and cylinder block, remove the air filter and close the carburetor neck with a technological plug. Disconnect the wires from the battery, spark plugs and from the coolant temperature gauge sensor, and disconnect the choke drive cable from the carburetor.
Using a wrench 67.7812.9514 (tubular socket 21 mm), unscrew the spark plugs and coolant temperature sensor, disconnect the throttle drive rods from the intermediate lever on the cylinder head cover and remove the cover.
Place the gear shift lever in the neutral position and turn the crankshaft until the mark on the camshaft sprocket aligns with the mark on the camshaft bearing housing. This operation is necessary to ensure that the camshaft sprocket is correctly positioned when installing the cylinder head on the engine.
Disconnect the hoses from the carburetor, the intake pipe, from the outlet pipe of the cylinder head cooling jacket and from the fluid supply pipe to the heater. The bracket for fastening the liquid drain pipe from the heater, the starter protective shield and the exhaust pipe of the mufflers are disconnected from the exhaust manifold.
It is better to leave the exhaust manifold and the intake pipe with the carburetor on the head. They are more convenient to remove later, when disassembling the cylinder head
Next, release the cap nut 1 of the chain tensioner, press the tensioner rod with a mounting blade and fix it with the cap nut. Remove the camshaft sprocket and lower the chain down, preventing it from sliding off the oil pump drive shaft sprocket.
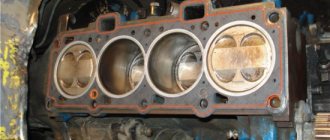
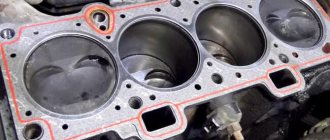
Unscrew the bolts securing the cylinder head to the block and remove the head and gasket located between the head and the cylinder block.
Install the cylinder head onto the block in the reverse order of removal. Before installation, check that the centering bushings are in place on the cylinder block in the sockets for bolts 7 and 10.
The cylinder head mounting bolts are tightened in the sequence shown in the figure, in two steps: first, tighten bolts 1-10 with a torque of 33.3-41.16 Nm, and then tighten them with a torque of 95.94-118.38 Nm. After this, tighten bolt 11 to a torque of 30.67-39.1 Nm.
When installing the camshaft sprocket, you must pay attention to the alignment of the installation marks and tension the chain as indicated in Section. "Engine adjustment".
When installing the cylinder head cover with a gasket, tighten the cover fastening nuts to a torque of no more than 7.85 Nm, so as not to cause rupture of the gaskets along the mounting holes and warping of the cover. Each time when disassembling the engine, it is recommended to replace the cover gasket with a new one.
After installing the cylinder heads, check and adjust the gap between the levers and cams of the camshaft, the drive of the air and throttle valves of the carburetor, and the ignition timing.
Top of page
Tightening torque of cylinder head bolts VAZ 2104
Tightening the block head must be done 2 times, in sequence, according to the diagram below.
To do this, use the following tool: a head for 19 and 13, an extension and a measuring ratchet
The tightening torque of VAZ 2104 cylinder head bolts from 1 to 10 is performed in two times:
- Tighten the bolts once to a torque of 34 ÷ 42 N/m;
- Tighten the bolts once with a torque of 100 ÷ 120 N/m.
The tightening torque for cylinder head bolt No. 11 is performed in two times:
- The bolt is tightened once with a torque of 14 ÷ 16 N/m;
- tightens once with a torque of 32 ÷ 40 N/m.
When Bolts Need Replacement
Before you begin tightening the bolts, you should inspect them. A visual assessment of the condition is not enough; it is necessary to check the fastener parameters. He must:
- have dimensions 12/120 mm;
- be with intact thread;
- have no curvature along the entire length.
Some mechanics recommend regularly screwing new bolts into the cylinder head. Others adhere to the rule that replacement should only be carried out if the fastener is screwed into the socket tightly. It is best not to skimp on bolts, since using a component that is obviously stretched increases the risk of its metal breaking. The consequences of this are almost unpredictable; in most cases, it will be possible to restore the operation of the power plant only with the help of specialists.
Tightening torques for cylinder head of VAZ 2106 and VAZ 2121
The block head bolts are tightened in 2 approaches, according to the diagram shown below.
To do this, we use a head for 19 and 13, as well as a torque wrench
| Engine model | Cylinder head bolt number | Tightening torques for VAZ cylinder head bolts, N/m | |
| Elementary | Final | ||
| VAZ 2106 | from 1 to 10 | 34 ÷ 4,2 | 10 ÷ 12 |
| 11 | 14 ÷ 16 | 32 ÷ 40 | |
| VAZ 2121 | from 1 to 10 | 34 ÷ 4,2 | 10 ÷ 12 |
| 11 | 14 ÷ 16 | 32 ÷ 40 | |
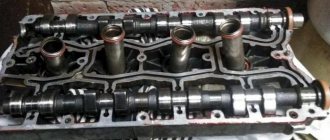
Removing and installing the camshaft
Removal is most often necessary either during a major overhaul or for replacement in cases of failure. To carry out the work, the following tools are required:
- heads for 10, 13 and 17;
- handle with ratchet;
- knob;
- extension cord with cardan;
- socket wrench 13;
- device for mounting and dismantling the VAZ camshaft.
First, the valve cover is removed, which is bolted to the cylinder head and has a rubber gasket. Try not to damage it, otherwise oil may leak in the future. After this, the timing chain tensioner is unscrewed. It is located on the right side of the engine when viewed from the interior. The camshaft gear is turned by the head to 17.
For convenience, place the car in gear and place wheel chocks under the rear wheel. Move the gear to the side; if necessary, you can pry it off with a convenient tool. Now all the nuts that secure the camshaft housing must be unscrewed. To make the job easier, use a wrench first.
Tightening torques for the cylinder head of VAZ 21073, 21213, 21214, 21214-10
Tightening bolts with 1 ÷ 10, models 21213-1003271 and 1/60441/30 is performed in 4 approaches in the order shown in the picture.
The tool used is a 12mm head, a 13mm head, a curved drap and an extension or ratchet.
| Engine model | Cylinder head bolt number | Tightening torque of VAZ cylinder head bolts, N/m | |||
| Elementary | Second time | Third time | Final | ||
| VAZ 21073 | from 1 to 10 | 12 ÷ 20 | 50 ÷ 70 | rotates 90o ÷ 110o | rotates 90o ÷ 110o |
| 11 | 14 ÷ 16 | 32 ÷ 40 | — | — | |
| VAZ 21213 | from 1 to 10 | 12 ÷ 20 | 50 ÷ 70 | rotates 90o ÷ 110o | rotates 90o ÷ 110o |
| 11 | 14 ÷ 16 | 32 ÷ 40 | — | — | |
| VAZ 21214 | from 1 to 10 | 12 ÷ 20 | 50 ÷ 70 | rotates 90o ÷ 110o | rotates 90o ÷ 110o |
| 11 | 14 ÷ 16 | 32 ÷ 40 | — | — | |
| VAZ 21214-10 | from 1 to 10 | 12 ÷ 20 | 50 ÷ 70 | rotates 90o ÷ 110o | rotates 90o ÷ 110o |
| 11 | 14 ÷ 16 | 32 ÷ 40 | — | — | |
Healthy ! Tightening torques for VAZ 2107
Tightening torques for the head of the VAZ 2109 block
The cylinder head bolts must be tightened in four steps, in the sequence shown in the diagram below
Mount the cylinder head on the block. Before doing this, check that the crankshaft and camshaft are located at TDC (all valves of the 1st pot must be closed). Tighten the head bolts in the following order, in 4 steps:
| 1 | moment 2 kgf-m; |
| 2 | moment 7.1 - 8.7 kgf-m; |
| 3 | turn 90o; |
| 4 | tighten 90o. |
Tightening torque for cylinder head VAZ 2108 - 21083, 2110, 2111
Tightening the cylinder head bolts of VAZ 2108 - 21083, 2110, 2111 is performed 4 times in the order shown in the image
For screwing, the following tool is used: adapter 67.7812-9543 for bolts of brand 2108-1003271, wrench TL-98-110 with parameters E14 for bolts of brand 2108-1003271-01, bend and extension or power tool of brand IP - 3111.
The tightening torque of the cylinder head bolts of the VAZ 2108 - 21083 is carried out in 4 steps:
- once we tighten the bolts to a torque of 18 - 22 N/m (1.8 - 2.2 kgf/m);
- Tighten the bolts once to a torque of 70 - 85 N/m (7.0 - 8.5 kgf/m);
- turn it 90° once;
- Once again, turn the bolts 90°.
| Engine model | Cylinder head bolt number | Tightening torque of VAZ cylinder head bolts, N/m | |||
| Elementary | Second time | Third time | Final | ||
| VAZ 2110 | from 1 to 10 | 18 ÷ 22 | 70 ÷ 85 | turn it 90o | turn 90o |
| VAZ 2111 | from 1 to 10 | 18 ÷ 22 | 70 ÷ 85 | turn it 90o | turn 90o |
Healthy ! Tightening torques for VAZ 2108
Basic recommendations
First of all, it should be noted that such a procedure can be carried out after repairing the power unit or in order to check the tightening torque of the bolts during engine operation. If the cylinder head has been dismantled, you should carefully inspect the bolts, as well as the holes in the cylinder block for their installation. Screws must not have elongation or deformation of the threaded part. The holes in the block for the bolts are cleaned of any remaining engine oil, liquid, or other foreign particles. If this is not done, the cylinder block may be damaged, and the cylinder head will not be able to be tightened with the required force.
This is interesting: Causes of valve knocking on a cold engine and how to eliminate them
Work should begin only after reading the vehicle manufacturers' recommendations for operation and repair. There the driver will find all the necessary information to complete the job, including the forces and sequence of tightening the bolts.
Another feature of using such bolts is their installation at a certain angle. To do this, you will need a special key with an indicator that will show the degree of inclination.
User Igor Ivanov shows in the video the installation and tightening of the cylinder head.
Bolt tightening torque (force)
The tightening torque for the bolts is different for each car (due to design features). Each vehicle has its own table of fastener tightening torques. In the next section, we will consider the cylinder head fastening forces using the example of a VAZ head.
Table: tightening torques for connections depending on thread diameter
| Nominal thread diameter | Turnkey size of head, bolt (nut), mm | Thread pitch, mm | Strength classes according to GOST 1759–70 | ||||
| Bolt | |||||||
| 5.8 | 6.8 | 8.8 | 10.9 | 12.9 | |||
| screw | |||||||
| 6 | 10 | 1 | 0,5 | 0,8 | 1,0 | 1,25 | 1,6 |
| 8 | 12 — 14 | 1,25 | 1,6 | 1,8 | 2,5 | 3,6 | 4,0 |
| 10 | 14 — 17 | 1,25 | 3,2 | 3,6 | 5,6 | 7,0 | 9,0 |
| 12 | 17 — 19 | 1,25 | 5,6 | 6,2 | 10,0 | 12,5 | 16,0 |
| 14 | 19 — 22 | 1.5 | 8,0 | 10,0 | 16,0 | 20,0 | 25,0 |
| 16 | 22 — 24 | 1,5 | 11,0 | 14,0 | 22,0 | 32,0 | 36,0 |
| 18 | 24 — 27 | 1,5 | 16,0 | 20,0 | 32,0 | 44,0 | 50,0 |
| 20 | 27 — 30 | 1,5 | 22,0 | 28,0 | 50,0 | 62,0 | 70,0 |
| 22 | 30 — 32 | 1,5 | 28,0 | 36,0 | 62,0 | 80,0 | 90,0 |
| 24 | 32 — 36 | 1,5 | 36,0 | 44,0 | 80,0 | 100,0 | — |
Correct tightening order
There is a certain order for tightening the bolts; it is the same on almost all cars - from the center of the head to its edges, cross to cross. So, for example, the two central bolts of the right and left rows are tightened first, then the two bolts located to the left of the central ones, then the two to the right of the central ones, then the two bolts located on the left in both rows, and the bolts located on the right in both rows complete the order.
It is important to remember that fastening is always performed in three to four approaches:
- The first approach is a force of 3-4 kgf.
- The second approach is a force of 7 kgf.
- The third approach is a force of 9 kgf.
- The last approach is a force of 11.5 - 12 kgf.
Some nuances
The tightening torque is one of the main factors for the normal fit of the block head. But this criterion is influenced not only by the applied force, but also by the fasteners themselves:
- General condition of the bolts – new or used;
- Presence of lubricant on the threaded part;
- Thread condition.
The type of power plant (petrol, diesel), as well as the number of valves, does not affect the cylinder head tightening technology. But this does not mean that the force and tightening procedure are identical for all motors, and before seating the head, you should definitely study the conditions for performing the operation and all its features.
Errors when installing the head
If you do not use a torque wrench when installing the cylinder head, you may make a mistake with the force, which will lead to uneven torque. In such cases, there will be excessive or insufficient force, which will result in either deformation of the head surface or allow the breakthrough of gases, oil or coolant. In both cases, this is fraught with serious consequences for the engine.
If you follow the rules for tightening the fastening bolts, as well as the required torque, you can always count on reliable and durable operation of the installed parts. The gas distribution mechanism in the engine plays a major role, so you should not neglect the rules for installing the component elements.
Tightening torques for VAZ 2112 cylinder head
Tighten the bolts three times in the order shown in the image
To tighten the bolts, you must use adapter 67.7812-9543, a gate and a rod or a power tool model IP - 3111..
The tightening torque for the cylinder head bolts is:
- First time - 18 ÷ 22 N.m (1.8 ÷ 2.2 kgf.m);
- The second time - turn it 90°;
- The third time - twist it 90°.
Healthy ! Tightening torques for VAZ 2112
Tightening torques for the head of the block VAZ 2113, 2114, 2115
Tighten the bolts in four steps, in the order shown in the image
To tighten the bolts, you must use a Torx E14 socket wrench.
Warnings! Reuse of cylinder head bolts is only permitted if their length does not exceed 135.5 mm
Using a caliper or a mechanic's ruler, measure the length of the bolts.
Important ! Bolts longer than 135.5 mm are replaced.
Tighten the M12XI.25 cylinder head mounting bolts 4 times:
- Initial force - 2 kgf/m;
- Second time - 7 ÷ 8.6 kgf/m;
- Third time - turn it 90°;
- The fourth time - tighten the bolts 90°.
The remaining tightening torques for bolts and nuts of all threaded connections of VAZ 2113, 2114, 2115 vehicles can be found here
General rules for performing work, methods used
There are a number of general rules that must be followed when installing the block head:
- It is important to strictly observe the tightening torque. For these purposes, a special tool is used - a torque wrench. It is not recommended to perform this operation with regular keys;
- The head bolts must be pulled smoothly, jerking is not allowed. Since the tightening force on the last approaches is significant, extending the wrench arm with a pipe can simplify the procedure and ensure smooth, uniform tightening;
- Before installing the bolts, you need to carefully inspect the condition of the threads on them. There should be no dirt or foreign particles on the coils.
- The threads of fasteners should be lubricated with engine oil before tightening. But you should not pour grease into the holes for the bolts (especially for “blind” holes), since in the future it will not allow the fasteners to be fully tightened.
Despite the fact that each engine has its own characteristics of tightening the cylinder head, the general technology of this operation is the same. In general, two methods are used to tighten fasteners:
- In several approaches, bringing the tightening force to the required value;
- Tightening the fasteners to a certain force (in one or more approaches), and then tightening the bolts twice to a certain angle.
The tightening method is selected based on the type of bolts.
The first method is used when using non-stretching bolts (these are not used now, but they can be found on old cars). But often this type of fasteners requires tightening after a certain period of engine operation in order to compensate for the shrinkage of the cylinder head gasket. But such fasteners are allowed for reuse, and more than once.
The second method of tightening the block is relevant for most modern cars. And all due to the use of tensile bolts (the so-called TTY type).
Such fasteners, due to elastic deformation, are able to compensate for thermal expansion of the head and shrinkage of the gasket, but for this they need to be put into deformation mode (in fact, just stretched a little).
To do this, it is necessary to tighten the bolts twice to a certain angle. On some cars this angle is 45 degrees, on others it is 90 degrees.
But after the elements are put into elastic deformation mode, they will no longer be able to return to their original state, and therefore their reuse is not allowed due to the high probability of destruction.
Tightening torques for VAZ 21114 cylinder head
Tighten the cylinder head bolts in four steps according to the diagram shown below in the figure:
To tighten the bolts, you must use an adapter type 02 15 12 10 f. "Stahlwille", 234 N 10L f. "USAG", IN 30L10 f. "GEDORE", S09H410 f. “JONNESWAY” for hardware 2108-1003271, replaceable head 14, wrench TL-98-110 size E14 for bolts 2108-1003271-01, wrench and extension or impact wrench type IP - 3111, torque wrench.
The tightening torque for the cylinder head bolts is:
- First reception - 18 ÷ 22 N.m (1.8 ÷ 2.2 kgf.m);
- Second reception - 70 ÷ 85 N.m (7.0 ÷ 8.5 kgf.m);
- The third step is to turn it 90°;
- The fourth technique is to twist it 90°.
General procedure
Although tightening the cylinder head has many nuances and features, the general technology of the operation is not complicated, it is only important to comply with the conditions.
The general algorithm of work is as follows:
- We study the documentation (tightening order and force);
- We prepare the tool;
- We inspect and wipe the surfaces of the block and head, clean the mounting holes (with a rag or compressed air);
- We lay the gasket;
- We put the block head in place (the correct placement of the gasket and head is ensured by guide bushings);
- Lubricate the threads of the fasteners;
- We install the latter in the holes and tighten them by hand;
- We specify the drawing scheme, the number of approaches and the force of each of them, as well as the time of breaks between approaches (all this is indicated in the documentation);
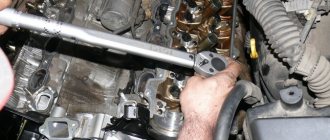
- We make the first approach, observing the tightening order (for convenience, you can mark the bolts according to the order with a marker). In the photo is a VAZ 2103;
- We carry out all subsequent approaches.
Some vehicles additionally require re-tightening of fasteners after a certain period of vehicle operation. This information must be indicated in the technical documentation.
Tightening torques for the cylinder head of the VAZ 11183 engine
Tighten the cylinder head hardware four times according to the drawing shown below:
To tighten the bolts you need to use an adapter type 02 15, 12 10 f. "Stahlwille", 234 N 10L f. "USAG", IN 30L10 f. "GEDORE", S09H410 f. “JONNESWAY” for dowels 2108-1003271, replaceable head 14, key TL-98-110 sizes E14. For bolts 2108-1003271-01 - gate and rod or wrench type IP - 3111, torque wrench.
The tightening torques for the block head bolts have the following parameters:
- 1 time - 18 ÷ 22 N.m (1.8 ÷ 2.2 kgf.m);
- 2 times - 70 ÷ 85 N.m (7.0 ÷ 8.5 kgf.m);
- 3 times - turn 90°;
- 4 times - turn it 90°.
Tightening torques for the cylinder head of the VAZ 21124 engine
Tighten the bolts in 4 stages in the order shown in the figure below:
To tighten the bolts, use the following tools: adapter type 02 15 12 10 lb. "Stahlwille", 234 N 10L ph. "USAG", IN 30L 10 lbs. “GEDORE”, S09H410 f. “JONNESWAY” for bolts 2112-1003271, replaceable head 14, wrench TL 98-110 size E14 for bolts 2112-1003271-01, wrench and extension or wrench type IP-3111, torque wrench ..
The tightening torque of the cylinder head bolts is:
- Stage 1 - 12 ÷ 20 N.m (1.2 ÷ 2.0 kgf.m);
- Stage 2 - 26 ÷ 34 N.m (2.6 ÷ 3.4 kgf.m);
- Stage 3 - turn by 90°;
- Stage 4 - turn by 90°.
How to tighten correctly?
You can tighten the bolts with the help of specialists or yourself. If you have never encountered the need to perform this task before, then below we will look at how tightly you should tighten the screws and in what sequence you should do it.
Be sure to strictly observe the tightening torque, since if the head bolts are overtightened, this will lead to cracks and damage to the cylinder head. If this happens, the car owner will have to carry out major repairs to the unit. The working surface of the hole, as well as the threaded connection of the screw, must be as clean as possible. A wire brush can be used to clean the cylinders.
If during the task you find “blind” holes for the head screws, use a cleaning lubricant carefully. If the volume of the substance is greater than required, it will be difficult to install the pin all the way
It is recommended to lubricate the threads of new bolts with a small amount of engine oil or another type of lubricant.
Tools and materials
To tighten the cylinder head, prepare only one tool - a torque wrench, which will allow you to determine the tightening force of the screws. It is best to purchase a key in a specialized store or rent it at a service station, since this tool can only be used for tightening and tightening. Using a regular wrench will not allow you to determine how many kilograms the tightening force is.
When purchasing bolts, it is recommended to give preference to branded parts. Be sure to look at the threaded part - it must be intact, without damage or defects; if any, the fasteners are replaced.
Channel “Engine Repair! And interesting!” published a video that describes all the nuances of the stretching process.
Algorithm of actions
The order and strength required when pulling the cylinder head bolts is as follows:
- In accordance with the diagram below, tighten all bolts using a torque wrench. The tightening torque on the first round of tightening the fasteners will be about 3.5 - 4.1 kgf/m. First, the bolts are tightened, which are located in the center of the block head - top and bottom. After this, the two upper and lower fasteners are screwed in, installed on the side of the screws located in the center. Then the two outer bolts are tightened. Please note that you need to tighten the left pins first, and then the right ones. Screw number 11, located at the bottom left, does not need to be touched.
- This is the first stretch circle. At the second stage, the bolts are tightened in a similar order. Only the force with which the fastening elements are tensioned by the tool will be 10.5 - 11.5 kgf/m.
- At the third stage, the bolt is tensioned, which is marked with number 11 in the diagram. The tightening force of this screw should be 3.5 - 4.0 kgf/m.
Loading …
Tightening torques for the head of the VAZ 21126, 11194 engine block
Twist the hardware 4 times in the sequence shown below in the image:
For screwing, you must use the following tool: adapter 67.7812-9543 for bolts model 2108-1003271, wrench TL-98-110 with size E14 for bolts brand 2108-1003271-01, bend and rod or power tool model IP - 3111.
| Engine model | Cylinder head bolt number | Tightening torque of VAZ cylinder head, N/m | |||
| 1 time | 2 times | 3 times | 4 times | ||
| VAZ 21126 | from 1 to 10 | 12 ÷ 20 | 26 ÷ 34 | turn it 90o | turn 90o |
| VAZ 11194 | from 1 to 10 | 12 ÷ 20 | 26 ÷ 34 | turn it 90o | turn 90o |
When is it necessary to tighten the cylinder head?
The need to periodically tighten the cylinder head is typical only for car brands that were produced up to 2010 inclusive. All other models of modern cars have a completely different engine structure, as a result of which this stage of work is not carried out. However, for those who own the same VAZ-2106 or 2107, this problem is primarily relevant during the car’s annual maintenance.
Advice: when repairing the ignition switch on a VAZ-2107, be sure to check the further operation of the engine. Replacing any element related to the operation of the engine greatly affects the condition and operation of the cylinder heads.
The need to tighten the cylinder block arises as a result of the gradual accumulation of water in the place where the bolts come into contact with the cylinders in the block. In this case, the main reason lies in correcting problems with lubricant leakage. After all, if oil begins to leak a little from the engine housing, then within a couple of months you will encounter problems with the operation of the engine cylinders.
Lubricant leakage occurs for various reasons. Let us highlight the main ones:
- Destruction of the structure of the block head itself. This problem is most often associated with periodic overheating of the engine or shorted wiring.
- The appearance of violations in the tightness of gaskets in the cylinder head block. During operation, the gaskets wear out and it becomes necessary to periodically tighten the bolts. The tightening torque itself is adjusted in a car service center or with your own hands after the car has traveled 100 thousand km. It is also necessary to adjust the force after replacing the cylinder head.
Tip: Don't try to simply change the gaskets in the cylinder block. If the gain is set incorrectly, they will still be erased at the same speed as previously used samples.