The Korean car Daewoo Nexia is in fact a budget development that combines individual GM technologies, developments from the German concern Opel, etc. One way or another, the low initial cost, affordable prices for spare parts and fairly inexpensive maintenance make this car popular.
At the same time, one of the important points written in the manual and relating to scheduled maintenance of the Daewoo Nexia car is the replacement of the timing belt. According to the regulations established by the manufacturer, replacement is carried out every 60 thousand kilometers. However, it is important to understand that this is an average resource.
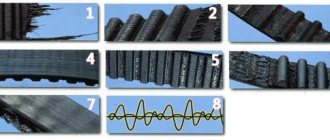
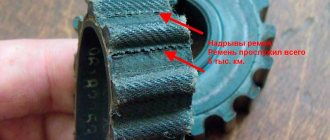
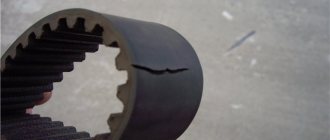
Belt wear can occur much earlier than expected. This will depend on the operating conditions and quality of the part itself, as well as a number of other factors. Next, we will look at what factors influence the reduction in belt life and how to replace the timing belt on a Nexia, depending on the type of internal combustion engine (Nexia 8-valve engine and Nexia 16-valve engine).
Necessary tool
We definitely change the pump because the belt is tensioned by it and as soon as we touch it the o-ring will definitely leak. To replace it, we will need a special key for 41. Its price is a little more than a thousand rubles, but if the procedure is one-time, it can be made from metal 1 mm thick and bent as in the photo. One time is enough.
As well as a universal pulley holder, the tool is not required, but it is more convenient with it.
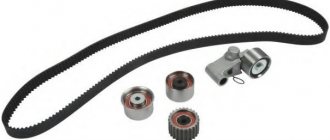
First of all, we buy everything you need: pump, belt, tension and idler pulley.
Let's examine the test subject.
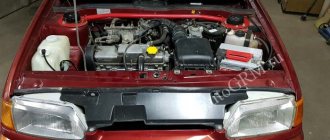
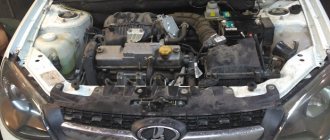
In Nexia, the engine under the hood occupies almost all the space and this promises us some difficulties. It is very inconvenient to unscrew the front engine mount, but putting it back in place is even more fun. I always remember several times the mother of the Uzbeks who installed this engine like that.
Why are timing marks needed?
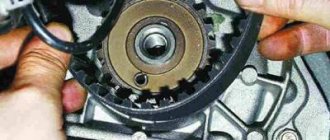
The timing marks are marks along which the timing belt is adjusted, as well as the drive belt is replaced. This element is quite important because it directly affects the operation of the power unit.
What happens if, when replacing a belt, you set the marks incorrectly or don’t set them at all? In this case, you can knock down the gas distribution mechanism, which will lead to many problems. Namely:
- Since the gas distribution has been disrupted, the injection and release of exhaust gases will be carried out incorrectly. Subsequently, the engine may start to stall, stall, fail to start, or consumption may increase. In turn, this can lead to consequences, such as increased wear, burnout of the valve mechanism and piston group, and others.
- Everyone remembers what happens when the timing belt breaks - valve bending. This happens because the gas distribution process is disrupted and the pistons hit the valves, which are subsequently deformed. The exact same principle works in this case. A broken timing mechanism will cause the piston group to fight against the valves, which will simply deform them.
- Shifting the timing mark when changing a belt or adjusting will result in fuel being injected too early or too late. The consequence of this may be flooding of the spark plugs or suction of exhaust gases into the combustion chamber.
In addition to the induced consequences, others may also arise, which can also lead to increased wear and tear of power unit parts or other problems.
Step-by-step instruction
Unscrew the intake pipe.
And an air filter with pipes.
We remove everything that bothers us. We also drain the antifreeze and remove the upper pipe.
Before removing the alternator belt, loosen the three bolts holding the power steering pulley. If you don’t do this right away, then later you will remember not only mom, but also dad, trying to stop the pulley and break the bolts.
We loosen the tension bolt of the generator and, moving the generator towards the engine, remove the strap.
We jack up the car, remove the right wheel and the plastic mudguard, if there is one. We see the crankshaft pulley and the air conditioner tension roller.
Loosen the roller nut and unscrew the tension bolt as much as possible, then remove the air conditioner belt. The nut is in the top photo.
We unscrew three bolts for 12 of the power steering pulley and four for 10 of the upper protective cover of the timing belt.
And we shoot last.
We jack up the engine through a plank by the pallet, but not by the air conditioning compressor.
We unscrew the two nuts securing the engine mount to the spar and the two bolts to the engine mount. It won't be easy with them, but the cardan will save us. Remove the engine mount.
Set the top dead center
Using the crankshaft pulley bolt, be sure to rotate the crankshaft clockwise until the marks on the camshafts match.
Unscrew the crankshaft pulley. If there is no special stopper, we put a partner behind the wheel, turn on the fifth speed and force him to press the brake, while at the same time, with a slight movement of the hand, we unscrew the crankshaft pulley bolt. After the pulley is removed, we see that the crankshaft marks match.
We unscrew the two 10mm bolts and, not forgetting the latch on the left, remove the lower protective cover of the timing belt.
We unscrew the two bolts securing the power steering pump and move it slightly to the side. There is no need to remove the bolts.
Use a hexagon to loosen the three bolts holding the pump. In the photo two are invisible, but there are two holes in the protective metal protection, approximately where the arrows are. In the following photos they will be visible when the iron protection is removed. Hitting them with a hexagon is very inconvenient, but you will have to suffer.
Using a special wrench 41, turn the pump until the timing belt loosens and remove it, insert it between the power steering pump and the engine.
We turn out the bolts of the camshaft pulleys, as well as the idler roller. The video in the photo has already been filmed.
We remove the pulleys and remember that on the intake camshaft the pulley is marked with the letter “I” and the exhaust valves with the letter “E”
We unscrew the three bolts of the tension roller and remove it.
We unscrew two bolts at the top and two at the bottom, one of the bolts is located on the right side of the air conditioning compressor, it is very inconvenient to photograph and remove the metal protection. You'll have to rack your brains a little to get it out.
Replacing the pump
We unscrew the three bolts of the water pump, those that are hidden under the protection. We remove the pump. We place a basin under the engine, since some of the antifreeze remains in the block and when dismantling the pump it will pour onto the ground.
We clean the seat and wipe it dry. Lubricate the pump's o-ring with a thin layer of sealant and put it in place. We turn it as counterclockwise as possible. We do not tighten the bolts too much since it still needs to tension the timing belt. We install iron protection, idler and tension rollers, and then camshaft pulleys. We check that all marks match.
Photo gallery
Photo 1. New consumables for Daewoo Nexia
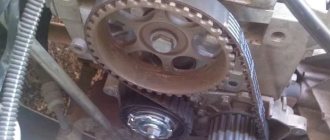
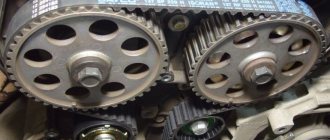
Photo 2. Camshaft marks
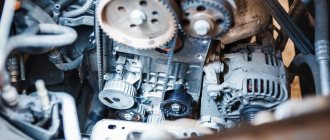
Photo 3. Installed new timing belt
We install a new timing belt
The descending branch of the belt must be tensioned during installation. Therefore, we first put the timing belt on the crankshaft pulley, then on the idler pulley, exhaust camshaft pulley, and so on.
Let's start stretching. We put a special key on the pump and turn it clockwise and look at the arrow on the tension roller, it should coincide with the mark.
Once we have achieved the desired result, tighten the pump bolts. Temporarily install the crankshaft pulley. We turn the crankshaft two turns and check that all marks match and the timing belt tension. If everything is in order, we proceed to assembly. We put all the parts in place in the reverse order of removal. You will have to suffer with the engine mount, which I warned you about at the beginning of the article. For this unforgettable adventure, we once again thank the Uzbeks who created the Daewoo Nexia with a sixteen-valve engine.
Fill in all the fluids and start the engine. After a few minutes of bliss from the work done, you can close the hood and forget about replacing the timing belt for another 60,000 kilometers.
If anyone is interested, the dealer manual says that the timing belt requires replacement after 64,000 kilometers or 4 years of operation, whichever comes first.
Now you can easily change the timing belt on your beloved Nexia, as well as offer your services to friends and be known among them as a real auto master.
Additional Information
Setting the timing belt to the TDC position may be required in many cases:
Any Daewoo Nexia driver with at least 3 years of driving experience should be able to set the timing belt to the top dead center position.
Although this work is not the easiest, an experienced craftsman installs the piston of the 4th cylinder in just 1 hour.
It is worth paying attention that when replacing the coolant pump, before installing the timing belt according to the marks, you need to drain the used coolant . This work is best done at the very beginning, before removing the accessory belt.
The coolant is drained using a valve on the main radiator of the Daewoo Nexia .
From the list of tools, the master will need:
Source
About the engine
This car model has won the hearts of many car enthusiasts not only in the regions of the Russian Federation, but also in many other CIS countries. In 2002, a power unit with a displacement of 1500 cm 3 began to be installed on the car, which replaced an engine with 8 valves in the cylinder head. The new engine already has 16 valves, which are driven by two camshafts. The Nexia engine with 16 valves is capable of developing a power of 85 horsepower.
An increase in the number of valves was required to improve the filling of the cylinders with the combustible mixture and the effective removal of exhaust gases from the working area. The use of an electronic engine control system and an injector in the power system made it possible to reduce fuel consumption and improve the dynamic performance of the car. The cylinder block, crankshaft, and pistons are used from the previous model. The cylinder head has received significant changes. The use of 16 valves required the installation of two camshafts.
Since 2008, Daewoo Nexia has been working with a more advanced engine, which has a displacement of 1600 cm 3, the power has increased to 109 horsepower. The cylinder head also has 16 valves, and the engine received an EGR valve. The poor quality of the fuel used often causes it to fail, so drivers get rid of this valve. This significantly reduces the environmental performance of the engine.
Do valves bend when broken?
Four valves per cylinder require consistency in the operation of the entire engine timing mechanism. When the valve train drive mechanism is working properly, there are no problems in the power unit. A broken timing belt damages almost all valves in the cylinder head. In addition, connecting rods, cylinder head guide bushings, and engine pistons may be damaged. Repairing the engine after this will require large material costs.
The designers tried to get rid of this problem; the pistons received recesses in the heads. After this, we did not get the desired effect; the valves are still damaged when the timing belt fails. To avoid such “troubles”. You should be careful when performing engine maintenance and use high-quality consumables.
Replacement timing
The operating instructions for this car recommend replacing worn out timing drive parts with a mileage of no more than 60 thousand km. However, in some cases this mileage may be slightly different. Its mileage depends on the operating conditions of the car, driving style, and the quality of spare parts used. Experts recommend checking the condition of the timing mechanism drive parts every time a technical condition is carried out. The presence of technical fluids in the working area of the timing drive is especially harmful. The most optimal mileage before replacement is 50 thousand km.
Source
