In the automotive auxiliary equipment market, Webasto is a system whose name has already become a household name. As an analogy, we can consider the famous “Xerox”; this trade name is now perceived as a synonym for any copying machine.
Webasto is a pre-heating system, thanks to which it is possible to increase the temperature of the power plant and warm up the car interior. The equipment greatly facilitates starting, reduces the load on the engine, and removes ice and snow from the vehicle glazing.
Some European manufacturers install a heater in the basic configuration of their cars, since its efficiency and practical use are beyond any doubt. Of course, it makes sense for drivers from Russia to pay attention to it.
Description of Webasto
The device does not weigh more than 5 kilograms and is integrated into the fuel supply and cooling system. The main task assigned to the device is to heat the fuel and the interior of the car. For accuracy and smooth operation, it is recommended to contact experienced specialists who will ensure installation and correct settings.
Using the device, it is easier to start the engine in cold and frosty conditions, as well as to melt snow and ice on the car windows. Therefore, Webasto is a relevant device for use in our climatic conditions.
Webasto preheater
Principle of operation
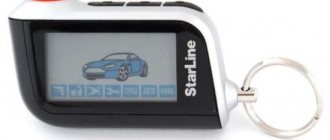
The set includes a remote control with which control is carried out. The operating principle is as follows:
- A flammable liquid is supplied from the tank, where it is heated in the combustion chamber. As soon as the liquid reaches 40 degrees, Webasto automatically turns off.
- The pump pumps the liquid further, it enters the engine and radiator, warming it and the interior.
The operation of the device is controlled by engine and ambient temperature sensors. It can start while the car is operating when the temperature outside is less than 5 degrees Celsius. In this case, fuel consumption can be minimized, and the car can be warmed up in the shortest possible time even in severe frost. On average, savings are 0.5 l/hour. The second control option for Webasto is a timer, which allows you to use the temperature maintenance mode. Upon arrival at the garage, the car owner will be able to appreciate the warm interior and pre-warmed car.
Kinds
The main types of Webasto include: liquid and air models. The Webasto instruction manual will help you figure out exactly which type of device suits your car. One such option is an air system, which consumes 0.2 fuel per hour.
When pumping fuel for combustion, air is forced from outside the machine. The resulting warm-air mixture promotes the release of heat during combustion. The heat exchanger ensures the selection of heat, which then enters the cabin. And all the excess comes out through the muffler. If the liquid type of device is installed under the hood, then the air type is installed inside the car.
Types of heaters
It is important to note that the 2 types of heaters are fundamentally different.
Atomonic preheater
This type is used to preheat the engine and is installed on cars with gasoline and diesel engines. It turns on automatically, subject to the set timer. Webasto is installed at the factory or at a service center.
Reheater
This type of liquid heater is installed on a car with a diesel engine; it is necessary when driving on the highway: in this case, the diesel fuel cools down even when the engine is running, and for it to work correctly, it is necessary to maintain the optimal temperature of the fuel. The main difference between an additional heater and an autonomous heater is that it is activated automatically when the engine is running.
The heater can be turned on forcibly while driving, but such a need rarely arises.
The models also differ in the following parameters:
- Car tank capacity
- Vehicle electrical voltage (12 or 24 V)
Some trim levels support two operating modes: winter and summer. Winter mode involves heating the coolant to 70-75°C, and summer mode involves only operating the fan.
Despite the convenience and obvious advantages of the heating system, for example, reduced engine wear, car enthusiasts are wondering: how to turn off Webasto? In what cases may it be necessary to turn off the heater?
Using the system
The video instruction manual for the device will reveal many interesting points:
- The fuel preheating unit must not be subjected to mechanical stress. It is worth taking care that there is no liquid or aggressive media in it.
- You should not run the device in a garage where there is no forced exhaust.
- If any unusual noise or odor appears, it is recommended to turn off the device. Removing the fuse will allow an emergency shutdown.
- The instructions for using Webasto indicate which fuel is preferable to use, which is what you should listen to.
- As a preventative measure, the device starts with a minimum power indicator when the engine is cold. The procedure is carried out once a month.
- The period of continuous operation is 60 minutes.
Webasto device
Launch methods
How to turn on the autonomy is described in the instructions, but it’s not difficult to guess that there are only three ways - through a remote control in the form of a key fob, a built-in timer, or from a mobile device:
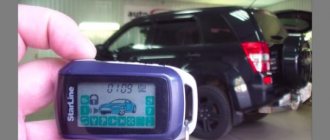
- The option with a key fob will cost about 10 thousand rubles. The range is 1 km, which allows you to start warming up in advance. Pre-setting allows you to set an exact period of time, then the temperature will be maintained and provide triggers. Owners of the device note that it is more convenient to control using the remote control than setting the timer time each time. The launch will be signaled by a signal on the key fob.
- The timer will cost three times less. It is important to clearly synchronize the time on the timer with the real one. Two criteria are programmed - heating and starting time. The maximum possible interval is 60 minutes.
- In the case of a telephone, a GSM unit must be installed. The signal is sent to any distance from any point. The device will respond to the received message from the phone. You can connect a maximum of five numbers. A modern application will allow you to have a complete picture of the condition of the car and device.
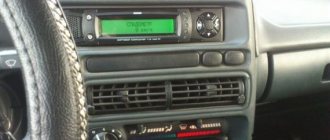
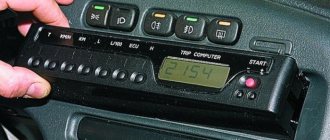
Setting the timer
The timer is located in the cabin, its use allows you to save fuel. Adjustable to within a minute, with three possible launches. There are several modes and a clear setting algorithm:
- To set the time, use the “<” or “>” buttons.
- To fix the on time, press “set” and use the forward or backward buttons to set the time.
- By holding down "set" and pressing "<" or ">", you can fix the duration of work, which can be 10-60 minutes.
To learn more about how to use the device, you should read the instructions for the device. Each manufacturer's Webasto has its own control buttons.
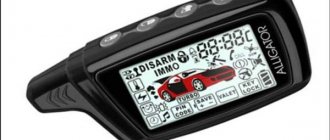
Remote control
Control using a remote control is more convenient for those owners who constantly park their car near the house. Programming the timer is not that difficult, but many drivers simply forget how to do it, but from the key fob you just need to press one button. The only drawback of remote control is that radio interference and power lines can become an obstacle to signal transmission.
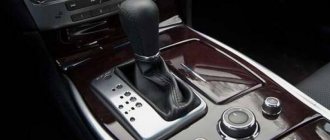
Starting the Webasto boiler from the alarm remote control - logbook of the 2008 Volkswagen Transporter on DRIVE2
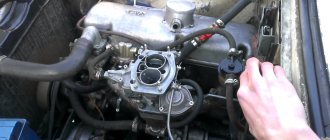
Having installed the Webasto boiler on the car, I realized how much I missed it last winter, I set the boiler operating time on the mini-timer to 30 minutes, but I had to start it at a specific time (which is not entirely convenient, because the travel schedule is very flexible), or by opening car and pressing the power button, which is also not very convenient, because you need to go outside, especially in cold weather. I decided to set up a remote launch of Webast, I didn’t want to install a GSM module because the price for it is high, and I don’t need its distances. Having surfed the Internet I have already seen many articles on how to connect everything yourself. What we need for this: Having an installed alarm system on the car, a 1533 mini-timer remote control, 1.5 m of wiring and a soldering iron. First, remove the remote control and disassemble it
disassembled mini timer remote control
On the lower left mic, which is responsible for starting/switching off the boiler, solder a thin wire to the leg
The photo is not mine, I forgot to take a photo myself, in it we can see where the wire needs to be soldered
Next, we install the remote control in place, and pull the wire to the place where the car alarm is installed. Having found the alarm unit, look at the exact name on it, and on the Internet we look for a connection diagram for your specific alarm system. I have a Panther installed, the connection diagram is as follows:
According to the diagram, we look at the free additional negative channel, I have it dark blue to control the trunk opening
to a free channel and connect our wire taken out of the minitimer remote control.
In my case, we press the trunk open button and the boiler starts, you can also turn it off. Now if I know that in at least half an hour I need to go somewhere, I sit at home, first start the boiler, and after 20 minutes the engine itself starts from autostart, leaving I’m already getting into a warm car.
Malfunctions and their elimination
In the event of an emergency screen lock, an error code lights up on the screen, which allows you to quickly identify the problem and fix it. The most common codes are:
- Malfunctions on the part of the control unit are indicated by code F 00.
- Unsuccessful startup attempts - F 01.
- If the flame breaks are observed more than three times - F 02.
- Problems with direction F 03.
- F 05- F 07, 09, 11 – closure indicator.
- F 10 possible overheating.
- The position of the overheating sensor F 14 is broken.
At the first breakdown, specialists check the connectors and fuses. Defects found are eliminated:
- A flame break can be eliminated by turning off the device for two or more seconds.
- Overheating is eliminated by shutting down and cooling the device.
- When the voltage is below normal, it can be eliminated by starting the battery.
- If black smoke appears from the chimney, it is worth cleaning the air duct or exhaust pipe.
When you can’t fix the problem on your own, you should contact a specialist or even a service center.
When choosing a device, you should rely on engine volume indicators. Depending on the budget that the owner is counting on, a control option is selected - remote control, mobile or timer. A more budget option is a timer that is installed on the instrument panel. But the most expensive option is remote control and the ability to install an application on your phone. But whatever the car owner chooses, Webasto will allow you to start the engine without problems during frosts and cold weather, and will provide warmth in the cabin.
Selection of device according to car characteristics
To choose equipment, you need to start from the parameters of the car. If the car has an engine of less than 2 liters , then a four-kilowatt Themo Top E . If the volume is larger , then take EVO5 .
Then the governing body is selected. Here the choice is yours. For an inexpensive car, they usually install a timer that can set the program for several days. Installed on the dashboard.
To receive signals from the phone, TermoCall 3 is used, which can connect to applications from the phone.
Webasto can be removed and installed on another vehicle. The manufacturer manufactures devices so that they work for 10 years . Because of this, drivers transfer the device to each new car.
Video: Launching with WEBASTO at -32°C (Nissan Safari (TD42))
Maintenance
Preventative work and maintenance must be carried out regularly at company service centers. The main range of repair work requires the use of specialized tools, special knowledge and skills that can only be obtained through professional training at Webasto. Failure to strictly follow all instructions can lead to unpleasant consequences, including injury.
The heater must be cleaned with the power turned off. Cleaning work must not be carried out using high-pressure apparatus.
Tags
Webasto diagnostics with your own Webasto diagnostics Webasto diagnostics with your own Webasto diagnostics Webasto After all, Webasto allows Webasto The Webasto system is familiar Webasto diagnostics with its own Car owners often have a car showroom every motorist. pre-heater of Webasto pre-heater Pre-heater of Webasto pre-heater Eberspächer pre-heater of Webasto pre-heater of Webasto preheater without Webasto diagnostics Webasto diagnostics with your own webasto wire. Webasto ThermoWebasto Webasto Webasto checkcomfortable webasto termo
toplesstheVAS pre-launch equipmentread the questioncontact the telephone standaloneand
Fuel
Problems with fuel supply to the heater most often occur in cold weather and indicate that you may have forgotten to change the summer diesel fuel to the winter one when you changed your car's shoes. If after leaving the car in a warm box the heater starts working, change the fuel. There is no heated garage - connect a canister with the correct winter diesel fuel to the Webasto and check if it starts working. If you find the reason, you will have to drain the diesel fuel, bleed the system, clean it, change the cleaning filtration, and fill in a new one.
There are also more complex reasons for fuel not reaching Webasto.
- The diesel fuel does not reach the pump itself. At the same time, the sounds are ringing, distinct, loud. The most common cause is air leaks due to depressurization of the fuel supply. Therefore, it is necessary to check the tubes;
- A solenoid valve can also ensure that there is no diesel fuel in the heater - for example, a plug has formed at its inlet. To check, you will need an ohmmeter: the resistance on the winding in normal condition should be in the range of 136-154 Ohms. For additional testing, you can give several short pulses to the valve with a frequency of up to 1 hertz and an amplitude between 8 and 11 V. At the same time, you should give the tube a flushing fluid (carburetor fluid is suitable). In many cases, no further action will be required.
Safety precautions
The uninterrupted operation of the heater can only be guaranteed by professional installation and startup of the device, carried out by qualified specialists after a comprehensive check of the equipment.
In accordance with the installation instructions, Webasto cannot be started at gas stations, fuel depots, enclosed spaces (garages), or anywhere where there is a risk of igniting dust or flammable vapors.
It is prohibited to operate and store the device at temperatures above 120 o C. If the device is exposed to an even higher temperature, irreversible processes occur that lead to final failure. The percentage of antifreeze in the coolant circuit should not be less than 20% of the total volume.
During operation, it is important to pay attention to the following points:
- The heater must operate only with the fuel and voltage specified in the factory documentation;
- In case of sudden excessive smoke, burning smell or extraneous noise, it is recommended to immediately turn off the power and pull out the fuse;
- For preventative purposes, it is worth running the device at least once a month. Switching on is carried out for 10 minutes with a cold engine and minimum fan speed;
- Once every two years you need to carry out a scheduled technical inspection at a service center.
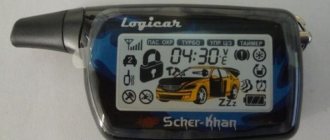
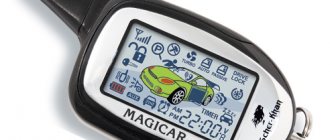
Remote controls
The timer is the main interface for working with the pre-heater. But as an option, the possibility of remote control is also provided. Using a radio installation with a Telestart T 91 remote control, you can set the modes and duration of Webasto operation at a distance of up to 1 km. How to use this tool? It is enough to insert the main radio unit into the electrical interface of the heater, and then synchronize it with the remote control, equipped with a signal indicator and batteries. More technologically advanced systems also allow for comprehensive control of microclimatic parameters in the cabin.
Another option for remote control is via a GSM module. This channel is organized on the basis of the ThermoCall TC system and provides even more tools for monitoring and control. For example, the operation of Webasto with GSM can be configured to connect to a smartphone. Through a special application, the owner of a mobile device will be able to remotely turn the heating on and off, program the operation of the installation, select operating modes, etc.