Dear car owners! Today we will learn how to repair minor scratches, chips and cracks in car glass. None of us are immune from such damage to car glass. The windshield of a car is especially damaged. It is almost impossible to dodge a stone flying from under the wheels of a car in front. And if such a nuisance happens to you, the most important thing is not to waste time and begin repairs as quickly as possible. Because over time, small scratches and cracks under the influence of rain, frost, dust and vibration can turn into deep cracks. And then a complete replacement of the windshield cannot be avoided.
Why repair chips and cracks?
Repairing a car that has a crack in the windshield is a mandatory step for safe driving and no problems from the traffic police. In addition to the unpresentable appearance, driving a car with a broken glass can also lead to other troubles:
- The presence of a large crack or with a certain location poses a risk to the life of the driver and passengers. If the chip is deep, a pebble can fly through it at full speed, which will result in injury to a person. In addition, poor visibility on the road can even cause a serious accident.
- If there are large cracks, the car will not be able to pass inspection. Since the defect can cause injury, it is impossible to obtain an inspection mark until it is corrected. According to GOST R 51709 - 2001, cars with any cracks in the wiper area and on the driver’s side are not allowed to be used. Driving such a vehicle is fraught with a fine.
- Any crack can become longer, wider, and deeper over time. This will lead to the need for a complete replacement of the glass or its expensive repair at a car repair shop. Also, a car with damaged glass immediately loses its market value, and it will be much more difficult to sell it.
Driving a car with a crack in the glass may result in a fine.
Brief background
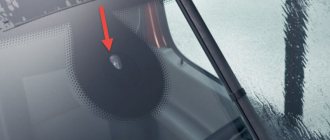
I was driving my Suzuki Jimny into the forest. I went out onto the track, accelerated, and then boom - the sound of an impact and as if something had cracked. I look more closely and see damage to the windshield on the passenger side glass. A small pothole or, as it is called, a chip, around which a web of cracks appeared in all directions. It should be noted that I have read many times that the Suzuki Jimny windshield is subject to frequent damage, since the angle of the glass is almost straight and all objects do not slip, but pierce the windshield. But until now I was lucky, and after driving for almost three years, I only caught small stones that broke and only slightly scratched the windshield. But this time the damage was more global.
Of course, the first thought is to look up the approximate cost of replacing the glass in case the crack starts to grow further. I looked at the prices and was disappointed. Replacing an entire windshield at this price just because of one damage is quite expensive and pointless.
I started looking for windshield repair options. The service quoted the cost of repairs as 2,000 rubles... A considerable sum for repairing a 1 cm glass chip. Especially considering that new Jimny glass can be bought for 2,500 rubles .
Of course, the decision was made to look for something about repairing the windshield with your own hands.
It turned out that the situation is not so catastrophic and repair methods already exist. There is even a special kit for windshield repair . There are decent videos about this issue and in some places on the drive its miraculous properties are mentioned. But I didn’t come across a detailed article, and that’s why I decided that my material might be useful to the reader.
Types of damage
The cause of cracks can be either a stone hit or a minor accident. All defects can be divided into five types according to their shape and features:
- Ray-shaped. Formed by a strong blow. They are usually long and extend to the edge of the windshield. Removal is possible if the size of the crack does not exceed 10–12 cm.
- Rounded. The cause of the appearance is a sharp blow from a hard object. Such defects must be removed as quickly as possible with preliminary drilling, otherwise they will spread over large areas of glass.
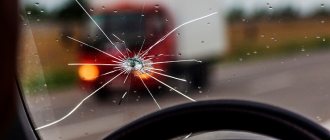
- Branching. Formed when hit by a heavy object or due to temperature changes. They are a whole scattering of branching rays, which is why they are difficult to repair.
- Double sided. They look like a beam that appears from the interior part of the triplex. Most often, the car owner has to replace the glass, since such defects are almost impossible to repair.
- Mixed (combined). Includes elements of different types of cracks. Their sealing is not always possible.
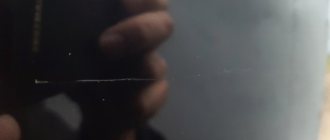
Branching crack on the windshield
How to stop the spread of a crack directly depends on its type. Usually, simple defects, chips and small dents are successfully repaired at home.
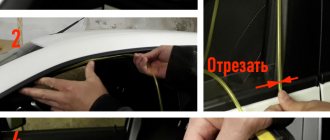
If a crack appears while driving
On the freeway, even the most careful driver is not immune to pebbles hitting the windshield. And if such an unpleasant phenomenon as a crack in your car glass catches you on the road, then you need to follow a few simple rules. First of all, you need to reduce the speed of the car to a minimum so that body vibration does not aggravate the situation. Also, to eliminate temperature changes, it is necessary to turn off the windshield defroster.
Windshield repair
The “twisting” effect of the body puts additional stress on the damaged glass, so when choosing a route, preference should be given to the most flat road possible. Therefore, driving on rough terrain is not advisable. Once you get home and examine the extent of the damage, you can begin car glass repairs.
What to do if a crack appears on your windshield
DIY kits
Automotive stores offer a large number of adhesives and ready-made kits for windshield restoration.
GlassProfi
The set includes a blade, an adhesive disk, polymer glue, a fixing suction cup, and a syringe. Using a disk and a suction cup, the syringe is securely attached to the crack area, after which the glue is squeezed out of it. After 3–4 hours, the defect will become invisible and the composition will completely harden. Using this product, cracks up to 3 cm in length can be easily removed.
Contents of GlassProfi windshield repair kit
Windshield Repair Kit
This set includes the same accessories as the previous one, but is additionally equipped with a protective film. It helps eliminate defects on regular and tinted glass. When introduced, the adhesive composition completely displaces air from the crack, so the hole will be reliably sealed. This kit is recommended for emergency repairs, as the glue hardens within 20 minutes.
Windshield Repair Kit
Done Deal DD6584
The polymer composition included in this repair kit is characterized by very high strength, almost several times higher than that of cheap analogues. The product contains acrylic acid, so you need to work with it in the air and only with gloves. Glass restoration should be carried out in the shade in summer, and in winter - after preheating the damaged area.
Windshield Repair Kit Done Deal DD6584
Permatex
The product included in the kit is recommended for removing deep chips and can also be used for quick repairs in road conditions. This glue is not suitable for filling long cracks. The composition can damage the paint on the car body, so the hood must be carefully closed before repairs.
Transparent adhesive sealant for glass Permatex
WIEDERKRAFT WDK 65182
The kit includes a set of repair plates, a scraper for cleaning the crack and removing excess glue, an injector, suction cups and glue. It is better to work with glue indoors - this way it will harden an order of magnitude faster. In the summer, after applying the composition, you can expose the car to the sun's rays to speed up polymerization.
WIEDERKRAFT WDK 65182 chip repair kit
Windshield repair using a kit: detailed instructions using the Windshield Repair Kit as an example
| № | Operation | Description |
| 1 | Cleansing the injury site | Use the included blade to clean out the chip. |
| 2 | Applicator attachment | Position the applicator suction cups so that they do not overlap the damaged area. Press the applicator firmly onto the injury. This will block the access of oxygen to the chip. |
| 3 | Syringe attachment | Attach the syringe to the applicator so that the liquid container is as close to the surface as possible. |
| 4 | Filling the syringe and preparing for use | Pour 7-10 drops of polymer into the syringe and screw the cap clockwise |
| 5 | Polymer filling | Once the plug is screwed in, the crack will be filled with adhesive material. You need to wait 20 minutes for it to harden. |
| 6 | Removing the applicator | Carefully remove the applicator. |
| 7 | Cleaning up damage | Carefully clean the damaged surface using the included blade. Remove excess adhesive mixture. |
| 8 | Adding composition (if necessary) | If there are air bubbles or places where the polymer has not reached the damaged area, add it. |
| 9 | Applying polishing strips | Apply polishing strips to the damage. They are needed for the final stage of polymer hardening. |
| 10 | Polymer hardening | Place the car in the sun or shine a UV lamp on the damaged area. |
| 11 | Removing polishing strips | Remove the polishing strips 10 minutes after installation. |
Repairing a crack in a windshield with your own hands
Before work, you need to prepare all the necessary tools and consumables and thoroughly clean the glass. Restoration is carried out only at temperatures above +10 degrees, but without using heating devices near the car, otherwise there is a risk of glass cracking. In a cold room, condensation can penetrate into the crack, which will reduce the quality of the finished seam.
Preparatory stage
First, you need to remove all dirt and dust from the crack and surrounding areas. Glass can be washed, dried and degreased, but blowing it with a pump gives an even better effect. This will allow you to remove even the smallest dust particles, which in the future will reduce the adhesion of the glue to the glass. The edges of the crack should be carefully sanded and wiped with a degreaser (acetone, alcohol).
Washing a defect on the windshield
Required materials and tools
If you purchased a ready-made glass repair kit for the job, it already contains all the necessary accessories, except for electrical tools. When completing the kit yourself, the following are usually used:
- Polymer glue. It is absolutely transparent and looks like liquid glass. Under the influence of sunlight, the composition hardens and reliably holds the edges of the chip together. When buying glue, you need to pay attention to the polymerization time and buy the one that is suitable for a particular situation.
- Ultraviolet lamp. Typically used if glass repairs are carried out in winter, although it will make the work easier in any case.
- Drill with a drill for glass. The device must have a speed control function.
- Scraper (scriber). Needed to remove dirt and debris from the crack.
- Sharp knife. Useful for removing glue residue or dirt from hard-to-reach areas.
- Individual protection means. For safe work, you should use gloves and a respirator.
- Injector-syringe made of metal, plastic with a suction cup and stand. Necessary for high-quality filling of the defect with glue.
- Magnifying glass and flashlight. They are useful for a detailed examination of the boundaries of a crack and assessing the result of its elimination.
Tools and materials for auto glass repair
Crack sealing process
First, the scale of the restoration is assessed: the crack is examined and its boundaries are determined. Next, the growth of the defect is stopped and the stress in it is reduced: a hole is drilled at a distance of 1–2 mm from the end. You need to drill glass with a drill at minimum speed and very carefully so as not to break it.
Further work is carried out as follows:
- Fill the syringe with glue.
- Using a suction cup and stand, attach the syringe to the point where the crack begins.
- Carefully apply the adhesive composition directly into the defect, strictly controlling the supplied volume.
- If you have a pump, blow it through the crack (with minimal pressure) so that the composition is evenly distributed even into the smallest cracks.
- Remove the stand and wash it of glue.
- Use a sharp tool to remove excess product from the surface of the glass.
- Dry the polymer composition with an ultraviolet lamp according to the instructions (the operating time of the lamp is always indicated on the glue packaging).
- If there is no lamp available, expose the car to direct sunlight, but the drying time will increase by about 3 times.
After polymerization of the glue is completed, polishing begins, using a special attachment on a drill or doing it manually. As a result, the surface will become perfectly smooth and will get rid of irregularities and bulges.
Materials and tools
You can also watch video instructions and visual examples of car glass repair. This will make it easier for you to find answers to all your questions.
The price of the entire set will not be particularly low, but compared to the cost of the services of masters, you can save a lot. You need to buy the following:
- Polymers. This is an adhesive designed specifically for these purposes, that is, glass repair. Choose compositions with minimal hardening time and a transparency coefficient similar to the glass of your car;
- Injector and bridge. Devices that allow you to inject glue into chips and cracks. The simplest ones are made of plastic, while the professional ones are made of metal. Choose the cheaper one, it's not that important;
- Pump. Allows you to blow out all contaminants from cracks;
- Flashlight. Needed to search for crack boundaries;
- Drill and diamond drill;
- Scriber;
- Ultraviolet lamp to speed up the hardening process of the glue;
- A little detergent and a napkin to seal the result.
This is a normal kit that can do a miracle. Reviews about the effectiveness of such repairs are direct confirmation of this.
Stages of work execution
Well, friends, are you ready for the most important moment? After all, now the repair process begins. Believe me, there is nothing complicated in such work. Yes, there are some nuances and peculiarities, but even a beginner can handle it.
- Get rid of unnecessary stress. No, 100 grams are not needed for courage. But you need to relieve the tension from the windshield. You should find the edge of the crack and make a hole using a drill and a diamond drill bit. Just step back literally 2 mm from the edge. Next, apply a little pressure on the forehead so that the edge of the crack fits into this hole. This will stop the defect from branching out;
- Your next tool is a pump, water and wipes. Maybe a little washer. Blow off excess dirt, rinse the glass carefully and dry it so that no moisture remains on the surface;
- Next we move on to the bridge and injector. It is important to place the tool exactly where the crack is. Try to act carefully, without pressing on the glass;
- Once the installation is complete, gradually introduce the adhesive. You don't need to pour too much either. You yourself will understand how much is enough. After all, it depends on the specific size of the damage;
- Using the applicator, gradually fill the damage, trying to insert the glue strictly into the center. You need to get rid of excess air, otherwise you won’t be able to hide the defect;
- After introducing the polymer, you can stick a special film that fixes the glue inside the crack and levels the surface of the glass;
- Remove the bridge and take the ultraviolet lamp. The film is removed with a scraper. Dry the glue, otherwise you will have to wait quite a long time. Although, if you have time, you won’t need a UV lamp. Just be... No, be patient;
- When the glue is completely dry, it remains to be sanded, removing the excess amount of polymer. The crack should become invisible. Try to polish the forehead properly. Any quality polish will do.
The work is not difficult, but it requires accuracy and utmost attention. If you follow these rules and use quality materials, you will succeed.
As always, please subscribe, leave a comment and tell your friends about us. It's so easy for you and so necessary for us!
In what cases can repairs be done?
Is it possible to drive with a large crack if it is located outside the driver’s field of view of the road? Most likely, such a car will not pass inspection, and without repair, the glass will become unusable in a short time. A complete windshield replacement will have to be done if:
- a significant piece has fallen out of the glass, or it has completely cracked, fallen apart,
- the defects are significant in size - from 20 cm,
- there is a whole network of cracks that extends from the main chip,
- damage passes through the edge of the glass, which compromises its strength,
- there are chips in the heating zone - in winter they will burst again anyway,
- the damaged area is a third or more of the total glass area.
If the damage is serious, the windshield needs to be replaced.
Useful tips
Nowadays you can easily buy glass glue, polymers, consumables, and suitable tools in auto stores. It is advisable to have repair kits in stock to eliminate defects in glazing. How to proceed is indicated in the instructions and on various forums, but you need to take into account several important points, due to which you can make the chip unnoticeable and the work effective:
- It is best to carry out glass repairs in an underground parking lot or in a garage where sunlight does not penetrate. The fact is that most polymers harden in the sun and can interfere with filling cracks. It is better to carry out repairs under a lamp directed at the windshield;
- There should be no foreign particles, oils, or glass residues in the crack. All this is removed with a thin needle, washed and dried;
- You should first prepare consumables. Use paper towels to dry your hands; the polymer can be poured into a syringe; it passes through the needle quite well, if not too viscous. The film for covering the resin is cut into strips of the required length. If it is not there, then you can use ordinary polyethylene that is not too dense;
- Repairing a crack is best done with two people. The main role is given to whoever is inside the car. Its task is to press on the defect from the inside. This is necessary so that the polymer fills the voids created by the impact:
- The polymer or glue is poured into the chip gradually. The drop must go deep, otherwise cavities with air will appear inside. An assistant in the car should move his finger, indicating the filling speed and its direction. Without his instructions from the outside, it is difficult to control the quality filling of voids;
- You need to walk along the crack from the beginning to the very end without returning. The polymer hardening process occurs quickly, so returning to the previous stage will lead to its cracking, which will result in the appearance of air bubbles. Accordingly, the filled area will be noticeable;
- Vertically located cracks are filled from bottom to top. In this case, the polymer may leak downwards; it is advisable to immediately collect it with a rag;
- If a defect is found in the upper part of the windshield, then this area can be tinted with a special strip;
- At the final stage of repair, the glass can be polished with a special compound.
There is no need to rush in the process of eliminating cracks in glass. It is better to first think about the upcoming actions and choose the best method for yourself. It is advisable to first consult with a qualified auto technician; the defect may not be repairable on your own.
Do-it-yourself repair or at a car service - what to choose?
It is not possible to repair windshield cracks on your own in all cases. Here is an approximate list of situations when you can try to deal with the problem yourself:
- have glass processing skills and the necessary tools, as well as suitable working conditions,
- a small or medium scratch, crack, or chip has appeared that has not spread to large areas of the glass,
- It is possible to purchase a high-quality adhesive composition or a ready-made repair kit.
If you do glass restoration at a service center, professionals will work on it, so the result will usually be better. All work will be completed in a minimum period of time, because the craftsmen have powerful modern tools and lamps.
However, the cost of repairs can range from 1000–1500 rubles per 1 centimeter of crack, which will ultimately result in a decent amount. Therefore, it is easier to eliminate small defects with your own hands, at least in order to save money.
Windshield restoration in a car service center
Self-repair of the windshield allows you to reliably repair the defect and make it 75–90% invisible. Good adhesives are now sold in any store, so it’s worth acquiring repair skills and not having problems in the future.
Types of automobile glass
In the modern automotive industry, the installation of three types of auto glass .
- Triplex. Consists of two glass sheets and an adhesive layer made of polymer material. Installed as a windshield.
- Stalinite. This type is obtained as a result of heat treatment. The hardened product is placed on the back and side windows.
- Tinted glass. During production, iron oxide is added to the glass material.
Advice! Immediately as soon as you get a chip or crack, cover the damage with tape, film or other means (whatever comes to hand) to prevent internal contamination. This often helps make the chip less noticeable.