Inductive type sensors
To operate the sensors installed in the front brake mechanisms, gears are made on the housings of the external hinges of the front wheel drives.
To operate the sensors, master discs are installed in the rear mechanisms under the brake drums.
Rice. 4. Rear wheel speed sensor
Pulse signals from the sensors enter the control unit.
When one of the wheels is blocked, the hydraulic modulator, at the command of the control unit, limits the pressure in the corresponding channel.
If a malfunction is detected, the control unit informs the driver using a warning lamp on the instrument panel.
The problem can be determined by the fault codes.
An ABS malfunction may be caused by a failure of the wheel rotation sensors or a malfunction of the hydraulic valve block itself.
If the ABS fails, the braking system remains operational, but braking efficiency is reduced.
Removing the ABS hydraulic unit
We install the car on a lift or inspection ditch.
Disconnect the plug block of the wires from the hydraulic unit.
We disconnect the brake pipes going to the brake mechanisms from the hydraulic unit of the anti-lock braking system. We install plugs on the tubes and holes in the hydraulic unit.
Disconnect the primary and secondary circuit pipes of the master cylinder from the ABS hydraulic unit.
Using a 13mm socket, unscrew the two bolts securing the hydraulic unit bracket to the front side member.
Remove the hydraulic unit with the bracket assembly.
Using a 10mm wrench, unscrew the hydraulic unit from the bracket.
Hydraulic unit installation
We install the hydraulic unit on the bracket and secure it with nuts. The tightening torque of the nuts is 7 – 10 Nm.
We install the hydraulic unit with the bracket assembly on the car body and tighten the two bolts with washers securing the hydraulic unit to the left side member.
We remove the plugs and attach the tubes to the ABS hydraulic unit. The tightening torque of the tube fittings is 15 – 18 Nm.
Attach the plug block. Install the battery. We bleed the brake system.
Removing and installing the front wheel ABS sensor and rotor
We install the car on a lift or inspection ditch.
Disconnect the front wheel speed sensor harness connector from the front wiring harness.
Using a flat-head screwdriver, remove the speed sensor harness block holder from the hole in the car body.
Remove the sensor harness from the brackets on the front suspension strut and the car body.
Using a TORX E8 socket, unscrew the bolt securing the speed sensor to the bracket on the steering knuckle and remove the sensor.
Installing the front wheel speed sensor
Before installation, apply AZMOL LSC-15 lubricant to the mating holes. Install the sensor in reverse order. The tightening torque of the sensor mounting bolt is 6 – 9 Nm (0.6 – 0.9 kgcm).
If it is necessary to replace the ABS rotor of the front wheel, then replace the drive assembly: (right front wheel drive part. 11180-2215010-10, left front wheel drive part. 21700-2215011-00) or the outer hinge assembly (part 11186-2215012 -00).
Removing the speed sensor and rear wheel rotor of Lada Granta
We install the car on a lift or inspection hole.
Disconnect the rear wheel speed sensor harness connector from the wiring harness.
Using a flat-head screwdriver, remove the speed sensor harness block holder from the hole in the car body.
Remove the rear wheel speed sensor harness from the mounting brackets located on the rear suspension arms and vehicle body.
Using a TORX E8 socket, unscrew the bolt securing the speed sensor to the bracket.
Remove the rear wheel speed sensor.
Before installing the speed sensor, lubricate the mating parts with grease.
The tightening torque of the sensor mounting bolt is 6 – 9 Nm.
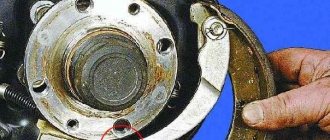
Removing the rear wheel rotor
Place the car on a lift and remove the rear wheel.
Using a 7mm socket, unscrew the guide pins securing the drum.
We insert the pins into the threaded holes of the brake drum and screw the pins in sequence. Thus, compressing the brake drum.
Removing the brake drum
Removing the rear wheel rotor
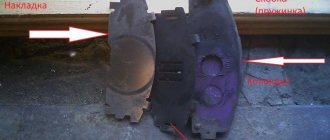
In the rear block of a car with an ABS system there is a hole into which the tip of the speed sensor fits.
Installation
Apply grease to the hub seating belt, install the brake drum and tighten the guide pins. The tightening torque of the pins is 7 – 15 Nm. Install the wheel.
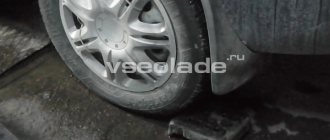
Inspection of pads at a service station or yourself
For inspection, you will need to remove the corresponding wheel. Those. you need a jack or lift (pit). You will also need a caliper and a ruler to measure the remaining friction layer.
Typically, the minimum permissible thickness of the residual layer is 1.5 - 2 mm.
A brake disc with deep grooves also indicates severe wear. For discs, the minimum permissible thickness is 10-12 mm.
The wear of the brake pads in the rear brake drums is determined through a special inspection hole in the drum body; if there is none, then you will have to remove the entire brake drum and use a ruler or caliper to measure the remaining thickness of the friction layer. Indirectly, the condition of the rear pads is related to the handbrake, when it stops holding or operates on the last click - this indicates increased wear.
Diagnostics of friction lining wear level
Most modern cars are equipped with special digital wear sensors. When the programmed level is reached, an indicator light is activated on the central instrument panel, indicating a breakdown of the brake circuit.
Unfortunately, the Lada is not yet equipped with digital sensors; you need to navigate by the actual thickness of the body of the lining. The maximum permissible threshold for using the body is 1.5 mm. Above the specified limit, the operation of the technical device is not safe. The degree of wear can be determined by removing each wheel and measuring the thickness with a caliper.
Alternative option: turn the steering wheel to the extreme left/right position, visually assess the thickness without resorting to dismantling work. The above recommendation applies exclusively to the front contour. For rear wheels, unconditional removal of discs.
How to extend the life of brake discs
To delay the replacement of brake system elements, here are some tips:
- Don't drive. Your car is not designed for this from the factory.
- Don't skimp on consumables. Bad pads or discs lead to grinding, vibration, squeaking and rapid wear.
- Brake smoothly. When braking sharply, there is maximum friction, which heats up and wears out the disc faster.
- Do not overcool the brakes. If, after aggressive braking with overheated brakes, you drive into a puddle, the metal will instantly cool, which can cause thermal deformations.
After driving through puddles, the brakes lose their effectiveness. It is recommended to dry them immediately by briefly pressing the brake pedal.
Replacing rear pads on a Lada Granta with ABS
Replacing brake pads in Lada Granta drum brakes, it would seem, should not cause any difficulties. Nevertheless, there are cases when inept handling of the brake mechanism ends in damage to the brake drum, friction linings of brake pads or brake cylinder boots. To avoid such disgrace, we will find out the secrets that the Lada Grant with ABS has related to drum brakes.
How to check brake pad wear on a Grant
No one will bother replacing brake pads right away. There are reasons for this, and mileage does not play a major role here. The service life of VAZ pads is quite difficult to predict. The level of wear on the rear drum brake pads greatly depends on the quality of the friction linings and their composition, as well as on the driving style.
First of all, poor performance of the handbrake will indicate wear of the rear pads. When braking under normal conditions, it is difficult to feel the wear of the rear pads, since 75% of the braking force falls on the front wheels.
But Granta has one clue - this is a hatch in the brake shield, closed with a rubber plug. It can be found if you pick up the dirt on the back of the shield.
If you open the hatch, the wear of the front pad will be clearly visible, and the front pad wears out much faster than the rear one.
If you replace the pads on only one side, the car may pull to the side when braking, especially on slippery roads.
Changing brake pads on a Grant with ABS
The process of replacing pads on a Grant with and without ABS differs only in small details. Firstly, a drive disc is installed behind the brake drum. Secondly, there is an ABS sensor installed in the brake shield on the rear side, which will need to be removed. Thirdly, the pads for cars with ABS have technological holes for this sensor.
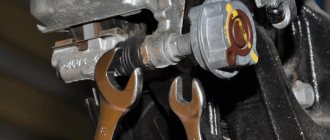
First of all, you need to release the handbrake cables. If we still have the factory heat protection installed above the muffler, it will have to be removed by unscrewing 4 nuts.
Then we simply unscrew the handbrake tensioner locknut with a 13 mm wrench, and loosen the second nut until it stops.
We get to the brake mechanism. We fix the car with wheel chocks, jack up the right or left rear part, having previously removed the wheel bolts. We remove the wheel.
Using a socket or 7 mm spanner, unscrew the guide pins that secure the drum to the hub.
How to remove a brake drum on a Grant
To remove the brake drum without any problems, we use the civilized “impactless” method. We look carefully at the brake drum holes, located at the same diameter as the guide holes. They are diametrically opposite and have threads cut into them.
In order to remove the drum from the hub without effort and a hammer, we screw two bolts 50-60 mm long with the same threads as on the guide pins into these holes.
We screw the bolts evenly, 15.-2 turns on each side.
As a result, the drum will overcome the resistance of the pads even if a groove has formed on the working surface, and will be removed like clockwork.
Now the entire brake mechanism is within reach. First of all, we remove the master disk; nothing else holds it.
Symptoms of wear parts
While driving, there are several signs that you can use to determine when it’s time to change the pads of the front or rear brakes, or even all together. The symptoms are:
- a metallic grinding sound when you press the pedal indicates complete wear of the linings;
- increased travel of the brake pedal, its vibration when pressed;
- when braking, there is a feeling that the front or rear of the car is being pulled to the side, and on a slippery road the car easily goes into a skid;
- the handbrake does not work properly;
- To stop you need to put more force on the pedal.
If, when braking, a metallic grinding and squeaking sound is heard from the wheels, then the question of how long to change the unusable parts is no longer worth asking. Replacement must be done urgently, since there are no friction linings left and the steel base is rubbing against the working surface of the disk.
Never allow the brakes to wear out completely, otherwise you will have to replace the discs along with the pads, which is significantly more expensive.
If you notice one or more symptoms indicating problems with the wheel brake mechanisms, check the condition of the linings. Recommendations for performing diagnostics are as follows:
- If your car is equipped with alloy wheels with large holes, then you won’t have to disassemble anything to inspect the front calipers. If necessary, jack up the car to align the disc opening against the brake mechanism.
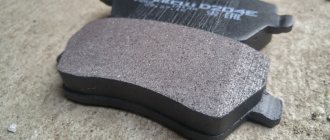
- Wheels with steel rims must be removed. Inspect the front brake pads and evaluate the thickness of the linings. If it is less than 3 mm, the parts should be replaced immediately. With a thickness of 3-5 mm you can drive another 1-2 thousand km, no more.
- Rear brakes are disc or drum. The first ones are examined similarly to the front ones, but the second ones will have to be disassembled. Remove the wheel and release the handbrake, then unscrew the drum and carefully knock it off the hub. Unlike the front pads, the rear pads need to be changed when the thickness is 1.5-2 mm.
When, as a result of diagnostics, wear of elements close to the maximum is detected, but replacement is postponed for various reasons, drive carefully and without haste. It happens that a worn lining comes off completely when you press the pedal sharply .
When conducting diagnostics, pay attention to the working surface of the brake drums and discs. If its wear is 2 mm or more (determined by the depth of the groove with a caliper), then the part must be replaced.
General issues
Let's figure out when you need to change the pads and what to choose from components.
When to change rear pads
The rear pads on the Grant are changed at the following indicators:
- the wheels make noise - rattle - vibrate when braking;
- 1.5 mm (or less) left on the pads;
- the pads have delaminated, causing the wheels to periodically jam;
- stopped holding the handbrake;
- You recently changed the front pads, but haven’t touched the rear ones yet.
Selection of components for Grants
We have compiled a table of article numbers for spare parts for replacing brakes. Here it is (can be used to search and order online):
List of article numbers for all spare parts that may be required for work.
For example:
Here are the results of searching for pads in one well-known online store.
Here is the same in another well-known online store.
There are never too many options.
ABS allows you to shorten braking distances and maintain maneuverability when braking.
How to understand that it is time to change brake pads without direct access to them
Having figured out at what mileage the pads should be replaced with new ones, let’s look at the main symptoms of wear using methods that do not require special tools and are accessible to everyone.
- If you have alloy wheels and disc brakes, you can sometimes observe the pads directly:
- The simplest option. The pad wear indicator will work. There are electronic and mechanical. Electronic is a light on the dashboard. It is triggered by a short circuit on the sensor when it touches the metal.
The principle of a mechanical indicator is even simpler: when braking, a characteristic whistle of the indicator will be heard.
If there is no indicator, you will hear the sounds of metal rubbing against metal as the friction layer is destroyed or abraded.
- Pay attention to the amount of brake fluid. As a rule, it is filled to the top. In the absence of leaks, the drop in level is caused by increased piston stroke due to pad wear. A critical level drop is also indicated by a warning lamp.
- When braking heavily, you can feel a vibration in the steering wheel. Usually occurs due to deformation of the pad or brake disc itself. You can carry out a test: after accelerating to 80 kilometers, perform emergency braking (make sure that no one is behind you!) - if there is a beating on the pedals, a pull to the side, then you need to replace the pads and, very likely, the discs as well.
- The braking distance to a complete stop increased, the brake pedal began to grab at the end of the stroke, and other oddities appeared in the operation of the brake pedal.
- There is a pull to the side, and skidding occurs on slippery surfaces due to uneven braking.
Instructions for calculating fuel consumption. Read it, it will help you save money.
Proper battery charging will save you in winter. Find out how to do it correctly and quickly.
How to replace Grant rear brake pads without ABS
Let's look at the whole process step by step. To work you will need:
- New pads (choose depending on whether the car has ABS or not);
- Keys 13: open-end and ratchet with long head;
- Wheel key;
- Head E-8;
- Head for 7;
- Screwdrivers for removing and installing springs;
- Pliers.
Preparing to replace pads
Getting ready to remove the brake pads. For this:
- We park the car on a flat surface;
- Remove the handbrake and put it in neutral;
- We support the wheels with wheel chocks (you can use bricks, bars, etc.);
- We pump out the brake fluid to the MIN level - use a syringe or an enema bulb;
- We remove the wheel bolts;
- We hang the rear wheel (jack up the car) and remove it.
We support the wheels, remove the handbrake and wheel.
How to remove a brake drum on a Lada Granta
The drum on the Grant is removed like on any other VAZ model. To do this, use a 7 key to unscrew the guide pins and remove the drum.
It is not recommended to knock the drum with a mallet or hammer - there is a risk of damaging it.
Replacing pads yourself
Attention: from this moment on, do not press the brake pedal. Otherwise, the brake pistons will extend and removal/installation will be difficult.
Step 1: To loosen the springs, press the pads inward. We press them out with a pry bar, focusing on the brake shield.
Move the brake pads.
Step 2 (based on the picture below) – remove:
- upper spring No. 5;
- expansion bar No. 6;
- lower spring No. 13;
- guide springs No. 7 (available on both pads).
At this stage we need springs 5, 13, 7 and bar 6.
Step 3: Freely remove the left block. The handbrake lever is attached to the right one - so we pull out the block itself and use pliers to remove the cotter pin securing its finger to the block.
We remove the handbrake lever from the cable, remove the cotter pin and disconnect the handbrake lever from the block.
Step 4: Reassemble with new pads in reverse order.
If the new shoes make it difficult to put on the drum, they can also be pressed inward using pry bars.
Other reasons for replacing pads
In addition to situations with critical wear, it is necessary to change brake pads in the following cases:
- the thickness of the friction material is more than 5 mm, but the lining itself has begun to peel off from the steel base;
- cracks and chips appeared on the surface, the material began to crumble;
- stains of oil or brake fluid that reduce friction properties were found on the parts;
- when the brake drum or disc is replaced.
Another reason for replacement is due to the abundance of low-quality fakes on the automotive spare parts market . New pads purchased from an unreliable retail outlet begin to squeak or squeak terribly after 1-2 thousand km, although the working part is still far from completely worn out. The culprit is the material of the part, whose hardness is comparable to metal, causing the surface to “slick” and create a creaking sound. If the elements made from unknown materials are not replaced, then the production on the brake discs will increase sharply.
Many modern cars are equipped with special sensors that detect a decrease in the thickness of the friction layer and send a signal to the driver when it reaches a critical level. This is also a reason to remove parts with worn linings and install new ones.
Replacement process
First of all, you need to find the plate on which the bend is located. It is recommended to bend the bottom plate, then it will be convenient to lift the brake mechanism up and replace the pad. The purpose of this plate is to stop the fixing bolt of the brake cylinder and the lower pin. Using pliers, the edges are moved apart slightly to allow access to the bolt.
Next, the guide pin is fixed with a 17 key, and the bolt is removed using a spanner.
The completed manipulations allow you to dismantle the plate. The bracket rises and the pads open.
Worn elements are removed, all dirt from the seat is carefully removed with a brush with stiff bristles; even special metal brushes can be used.
New pads are installed. To put the bracket back in place, the piston is pushed into the cylinder all the way; this can be done with pliers or a screwdriver.
All processes are repeated in reverse order. Don't forget to form a bend on the plate to ensure a tight fit on the bolt.
Sequence of actions when replacing pads on Granta yourself
Front
- We place the car within the perimeter of the repair zone, squeeze the parking brake, and engage first gear. We fix the rear row of wheels with wheel chocks;
- Jack up the side and remove the wheel;
- We unscrew the upper and lower guides, move the caliper to the side, do not unscrew the line;
- Carefully pry up the anti-squeak plates with a screwdriver and remove the pads;
- We troubleshoot the caliper, clean it, and blow it out if necessary;
- We install new linings.
After replacing the front pads, check the level in the tank. It is located in the engine compartment. We carry out a similar procedure with the second wheel. Service center technicians recommend replacing the circuits at the same time. For example: front / rear, all four calipers. Subsequent replacement after 30,000 km.
Rear So, to change the rear brake pads on a Grant, do the following:
- fix the front wheels, do not release the parking brake;
- jack up the rear side, remove the wheel;
- tapping the rim evenly with a hammer to knock it off its seat;
- remove the pressure plate, spacer bar;
- unpin the base of the fixation, the ear of the handbrake cable;
- remove the old ones and install new friction linings;
- The mechanism is pinned in the reverse order.
Recommendations for selection
Rule one and very important: you cannot change the front or rear brake pads one by one. It is necessary to install a set of new elements on the front or rear axle, otherwise when braking the car may seriously drift to the side. Even when one pad is worn out, all four must be replaced . As a temporary option, it is possible to install 2 new parts on one rear wheel.
When choosing new pads in the store, use the following recommendations:
- Products must match the car model and be sold in high-quality packaging with included instructions. The inscriptions on the box are clear and without errors indicating Chinese origin.
- Make sure that the friction material is the same color, without foreign inclusions.
- The surface pressed against the plane of the disk must be flat. Small chips along the edges and depressions are allowed if they occupy no more than 1% of the total area of the working plane.
- Cracks at the interface between metal and friction material are unacceptable.
Ideally, you should buy original products in original packaging. This will save you from unpleasant surprises, unscheduled replacements and emergency situations when operating your car.
The safety of a car directly depends on the serviceability of all systems in the car. While many drivers regularly check the level of oil, antifreeze, brake fluid, and the condition of the steering and wheels, the wear of the brake pads usually manifests itself with a nasty whistle and deterioration in braking properties. Pads are consumables that have their own service life and replacement schedule. Let's figure out how long brake pads last, what they are made of, what their service life is, and the reasons for their early failure.
Step by step: how to change the front pads on a Grant
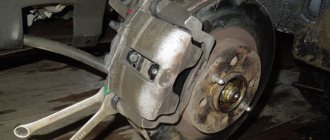
Let's get to work. We find a plate with a bend that locks the bolt securing the brake cylinder to the lower pin - as in the photo below.
Start: Using pliers, bend the edges back to unscrew the bolt.
Next step: hold the guide pin with a 17mm wrench while unscrewing the bolt (13mm socket).
Align the locking plate. We fix the pin (spring size 17), unscrew the bolt (key size 13).
Next: remove the removed bolt along with the plate. Now we can lift the bracket and access the pads.
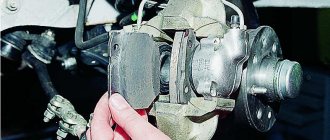
Unscrew the bolt completely. Raise the bracket assembly. At this stage, do not press the brake pedal. Otherwise, the piston will completely come out of the brake cylinder.
We remove the old brake pads. We clean their seat with a brush.
We take out the unusable pads. If you are replacing for the first time, remember how the old pads were installed.
Next: put new pads in place of the old ones.
To be able to lower the bracket, we must push the piston as far as possible into the cylinder. The photo shows two methods.
The first method: push the piston in without lowering the bracket. Second: push in the piston by lowering the bracket and using it as a stop.
Method 1: The bracket is not lowered. Using sliding pliers, push the piston into the cylinder.
Method 2: The bracket is lowered. We rest the screwdriver against the edge of the bracket and press the piston into place.
Method 1 is preferable, since the second can only be done without the pads in place.
We put everything back together in reverse order.
Be sure to bend the corner of the locking plate to lock the brake cylinder bolt in place!
The last step after final assembly is to press the brake pedal several times. This will bleed the brakes and set the clearance between the pad and the piston.
Then check the brake fluid level in the reservoir. Top up as needed.
What affects service life
The purpose of a brake disc in a car is to convert the car's kinetic energy into thermal energy by friction of the pad against the disc itself. Good brake rotors and pads should have ventilation and a large contact patch for greater efficiency.
The resource is reduced by the following factors:
- Groove. This is practiced to eliminate runouts or collars.
- Low quality of the metal from which the disc itself is made.
- Poor quality brake pads, which wear out the disc itself faster.
Poor quality brake pads
Aggressive driving with frequent braking leads to increased disc wear. Due to overheating, the metal becomes deformed or warped. Stock cars have very bad brakes - they are not designed for driving like this. All sports cars that are used only on race tracks are equipped with premium devices designed specifically for racing. If you put an unprepared car on the track, the brakes will very quickly lose their effectiveness.
Articles of brake pads Lada Granta
Let's denote that the Granta's brake circuit is presented in a classic style: front disc and rear drum pads. This type/scheme was borrowed from Kalina, Priora, and earlier models.
| № | Article/OEM/brand | Price, rub.)* |
| 1. | Original catalog items 21100-3501080 | from 900 |
| 2. | 21100-3501089 | from 1200 |
| 3. | Disc TRW LADA Granta Article: GDB1384 | from 1450 |
| 4. | rear TRW Granta, Kalina, Datsun art. GS8210 | from 1300 |
| 5. | Allied Nippon ADB2794 (set) | from 3200 |
| 6. | Allied Nippon ADB2795 with calipers from Lada Priora 2110 | from 1100 |
| 7. | Allied Nippon ADB0173 | from 1100 |
| 8. | Rear brake pads Grant Sport / Kalina article number: 21905-3502080-87 | from 1100 – 1200 |
| 9. | Front brake pads LADA Granta Sport / LADA Kalina-2 Sport | from 1200 |
*Prices are current as of September 18, 2018.
The list presented is not exhaustive and is for informational purposes only. The manufacturer allows the purchase and subsequent installation of components not listed in the list. The main requirement for parts is quality workmanship and professional installation. Among foreign analogues, Lada Granta liftback brake pads are in high demand:
- BOSCH 0 986491700, 0 986495214;
- ICER 181308;
- Lucas – Girling E9 90R-01111/479;
- LYNXauto BD-4601, LYNXauto BD-4605;
- FENOX BP40005O7;
- FERODO FDB527;
- TRW 21170.
Rear pads for Grants
Lada Granta rear brake pads with number 2108-3502090 are also equipped on VAZ 2110, Kalina, Priora and Samara cars that do not have an ABS system.
Rear brake pads on Grants with ABS are numbered 21920-3502090-10. For retail, product code 21920-3502090-55 is used.
They differ from the previous ones by the presence of a hole for the wheel rotation sensor. Identical components are used on VAZ 2110, second generation Kalina, Priora, Samara cars with an anti-lock brake system.
These clutches are supplied to the AvtoVAZ conveyor by JSC TIIR. The TIIR-444 composite overlay itself is marked with article number 2192-3502105. The improved composition of the linings is designed to increase the tenacity of the rear brakes especially for cars with ABS.
Lada Granta rear clutch parameters:
Let's summarize
As you can see, the process of replacing brake pads is not complicated; it is important to initially understand how to fix it. The work will not take much time - half an hour, and the second or third time you will do it even faster
Pay attention to the sounds when braking: if there is a whistle, grinding or creaking, you feel kickback in the pedal, the system begins to “beat” - it’s time to install new pads. Practice shows that on a Lada Granta, for a driver with a calm driving style, the service life of the kit increases to 50 thousand kilometers, for motorists and reckless drivers it decreases to 30 thousand kilometers
In general, this is the case, I drove on factory TIIR pads, you all know them very well, and I think I’m sick of this creaking sound when I press the brake! A friend recommended pads from the Markon company (I think that’s what they’re called), they didn’t creak on his Chevrolet Niva!
After driving about 1 thousand km they whistled like a cop's UAZ! After about another 300 km they began to whistle like a suu... gopher! I later realized that the factory ones were just whispering and not whistling compared to Markon. I thought about putting the factory ones back but then I remembered that I threw them away! =)
Just a song and not pads, but imagine in traffic jams for half an hour to an hour and a half! My mind just explodes! Yes, it's a shame =)
I was searching on the Internet and found out what kind of pads do not creak on the Grant. A lot of people wrote about Feradoo (green, they are soft and brake worse) and Ferado (red, they brake better but wear out the brake disc faster), everyone says that the green ones squeaked after a certain mileage, then everyone apparently started buying red ones. But the result is that they still creaked sooner or later.
When I saw a Lada Granta passing in a traffic jam on the street, I wanted to run out of the car and ask, “What brand of pads do you have!” =))) I then heard this creak from everyone, like a block maniac =))))
Read more: Negative camber spacers for rear wheels of VAZs
But after searching on the Internet, I found a video recording of one dude who was talking about TRW GDB 1446 pads.
Then I found a blog post for Daseros (Lada Kalina) and asked him about the creaking, he answered me “I drove 15 thousand, there wasn’t a single creaking... these are pads for Europe. Excellent))) I’m shocked)”
The next day I started looking like crazy for TRW GDB 1446 pads, we didn’t have them in the car markets and in stores either! But after searching the Internet I found it on the website www.exist.ru/price.aspx?p >
Now they cost 1,228.33 rubles due to the dollar jump. And then they came, I immediately checked the license via my mobile phone using the QR code, everything was fine and not a fake =)
Working on the brakes on a Grant is required when the car begins to wobble when braking, and extraneous noises are heard in the area of the rear wheels. What’s worse is if one of the wheels starts to jam when stopping. This article describes a step-by-step replacement of Grant's rear brake pads.
Reviews of VAZ Granta brake pads
The mileage has reached 56 thousand. I decided to change the front pads, which I installed at the beginning of operation, at a mileage of 4-5 thousand. Then I chose RosDOT Euro, they cost about 300 rubles, if memory serves. So they drove off, it turns out 50,000 km, plus/minus. I’m very pleased, the brakes were predictable, soft, they didn’t eat up the disc, yes. The first 10 thousand creaked. It was decided by going to the car wash. The last two years have been silent. When removing it, it was denied that there was a reserve of one third. It was still possible to travel up to 60 thousand.
- 2017-05-11
I prefer Asimco - inexpensive, soft, do not creak, but the first ones I installed wore out after 40,000 km.
- 2016-09-22
Rosdot. Don't put this crap on. 1. They brake poorly. 2. They get warm if you apply the brakes
160, which is why they buzz loudly. 3. They wear out too quickly. With less active driving (as we like), they lasted FOR A MONTH.
- 2016-06-19
I installed Finwhalle 218 front pads in the fall. Before that, I changed the factory ones to Finwhalle 210 several years ago. So the 218 is terrible. Of course they brake, but in the heat, after active driving, after rain or a car wash, they make such groans, squeals and grinding noises that the passengers and pedestrians get scared. 210 were not guilty of this and were better than the factory ones. I’ll ride these pads and probably give up the fin whale, but at one time they were good. So, if anyone has doubts about taking the fin whale or not, then probably don’t take it anymore, then more than the price of a horse on them based on currency differences. Domestic ones are 1.5-2 times cheaper and I think they will be no worse. For 7000 km I think they should have gotten used to it and not made the groans of a dying whale. I’ll probably drive the rest of it with these sounds.
- 2016-05-31
I installed green ferodos, it lasted for 2 years and 100 t.km. Green ones are soft, the discs “eat” little, but the friction properties are not the best, and can let you down under heavy braking.
- 2016-05-18
There were Rosdot euros. in 2 thousand They whistled, mom don't worry.
- 2015-11-26
They suggested installing the simplest Rosdot... I bought it, installed it, I’ve already driven 2000 on them, I’m happy as an elephant! They brake just like the expensive options, the price of the Rosdot is 370 rubles.
- 2015-11-25
Replaced the front pads. Supplied by Fortech. They brake well and don't squeak! Finally they don't creak! Now we also need to change the rear ones, as it feels like the rear brakes are worse than the front ones.
- 2015-04-27
I installed BEST and drove about 200 km on them. I can’t say anything bad so far. The stock ones were TIIR-295, with which, when you pressed the pedal evenly and smoothly, the car first smoothly slowed down, and at some point suddenly came to a standstill. We always had to dose out the effort so that we wouldn’t catch up from behind. I haven’t noticed this with BEST yet. They creak in the same way, that is, at the very end of the braking distance during smooth braking, press a little harder - there is no creak.
- 2015-04-16
Now it came to the rear ones, I couldn’t decide on them for a long time, just as now, in principle, I still have doubts. I ended up taking Mintex, it’s inexpensive and I’m pleased with the quality. Moreover, the guys and I have already tried them on more than one car, though only the front ones. But I think the building is of good quality. While I won’t say anything bad, they slow down, there is no squeaking, this is what pleased me most. I'll see how I get at least 200 km.
- 2015-03-29
A short report on the pads. The standard ones were TIIR 295. There were no complaints about the pads. At all. They braked normally and did not squeak. I left the car at TO-2. A call from the dealer, the pads need to be changed. Lan, I say change it. They changed them and installed them like “Japanese” Allied Nippon ones. It feels like bricks rather than pads. The creaking appeared almost immediately, but I hoped that it would get used to (I drove almost 1500 km). No miracle happened. Not only is the creaking incredible, but from time to time a grinding noise began to appear. Patience is over. Today I installed TIIR 299 with mastic and an anti-squeak plate.
- 2015-03-04
I'm tired of the squeaking of the original pads, which was coming from the interior from the very first kilometers) I bought a fortech company recommended by friends, the squeaking disappeared and the braking became better, changing it is a pleasure, everything is simple) After 1000 km they creaked) well, it’s weak and not always, it’s not clear what it depends on ) Relatives creaked and squeaked always and much louder!
- 2014-10-21
I bought myself front pads from TEXTAR 2117002. In my humble opinion, they work perfectly, there are no squeaks at all, from the first minute. They brake perfectly, I'm completely satisfied.
- 2014-08-20
I bought a Dafmi, I've already driven about 500 km on them, they squeak. The factory ones creaked much louder and nastier, but these ones squeak so much, it’s unpleasant, but it doesn’t hurt the ears and if music is playing, you can’t hear them. But still, I don’t recommend it.
- 2014-08-08
A couple of thousand km ago I changed the pads to green ferodo ones. Now the brake light can be safely removed from the car - 5-7 minutes of Moscow traffic jams and the whole block will know that you are slowing down. I have never heard such a whistle before. After this the brakes become like cotton wool. So I don’t recommend it for residents of big cities - the pads really don’t like high temperatures. Nothing on the track at all.
- 2014-07-10
How to replace front brake pads on Lada Granta
Before moving on to the step-by-step process, we will indicate the main preparatory points. Without them, you cannot start replacing.
Required tool for replacement
To work you will need:
- Brake fluid;
- Suction for excess brake fluid (if necessary, you can use a syringe or enema);
- Socket wrench 13;
- Open-end wrench 17;
- Pliers;
- Sliding pliers or a reliable flat-head screwdriver;
- Brush for cleaning pad seats (any hard one).
Wheel chocks can be used to secure the vehicle in place. If there are none, support the wheels on both sides with half a brick.
Wheel chocks or chocks must be used when removing wheels from a vehicle.
Preparatory work
Mandatory preparatory work includes the following items:
- Check the brake fluid level - if it is above the maximum, you need to remove some. Otherwise, there is a risk of it being squeezed out after replacing the pads.
- Secure the rear wheels with anti-roll bars.
- Remove the wheel rim bolts.
- Jack up the desired wheel and remove it.
- Prepare all tools and pads for replacement.
Change all four pads at once - 2 for each wheel. Replacing one by one is dangerous - it leads to runout and loss of direction of the car when braking.
What else you should know about replacing pads
When choosing new pads in a store, you should pay attention to their quality and originality of the manufacturer. It is better to pay attention to trusted companies: ATE, Dafmi, brembo, STS, VATI. Cheap, low-quality products can brake much worse, and in a critical situation they can collapse, which will lead to loss of control over the car.
How can you tell if a particular wheel is slowing down?
Evidence that the brakes on a given wheel are working is a shine on the disc or drum:
Where are brake pads changed?
At an official dealer, or at any service station where they repair chassis. There are also specialists who specialize only in brake system repairs.
Is there an alternative to replacing the pads? How to increase the period of their replacement?
Yes, this is a brake pad restoration. When they simply change the friction layer. The cost is usually equal to or even more expensive than buying new pads, but the friction layer in this case is much thicker and of better quality, according to experts. As a result, the service life of the restored part increases several times.
How long does it take to change brake pads?
According to service station standards, 0.8 - 1.2 hours are allotted for replacing both rear and front pads, depending on the car model.
How often should you change brake discs?
Brake discs and drums do not require regular replacement very often. Usually they are enough for 3-4 sets of pads, after which severe wear of the disc will affect the braking efficiency and service life of the new pads. Sometimes, instead of replacing, it is enough to sharpen the brake disc itself, if its thickness allows it. We do the same with brake drums.
When and how to change Lada Granta brake pads
Front brake pads should be replaced when the linings have worn down to a minimum thickness of 2 mm, or have become unusable due to loss of their properties: the linings have peeled off, crumbled or become charred. On average, front pads last 15-30 thousand. km. mileage The service life of the rear clutches is on average three times greater than that of the front clutches.
In order to change the front pads on a Grant yourself, you will need:
- key to 13;
- key to 17;
- flat screwdriver;
- jack.
The procedure itself is quite simple. To replace the front pads you need:
- Raise the car using a jack and securely support it with jack stands.
- Remove the wheel and unscrew the steering wheel for easy access to the brake mechanism.
- Unscrew the lower bolt of the caliper using keys 13 and 17. First bend the corner of the fixing washer with a screwdriver.
- Remove the lower guide bolt and lift the caliper up. Before removing the pads, it is recommended to immediately press in the caliper piston using a screwdriver (pressing it between the inner pad and the disc).
- Carefully inspect the condition of the caliper itself, the guide boots and the working cylinder.
In case of extreme wear of the brake discs to a working surface thickness of 18 mm, it is better to replace the Lada Granta brake pads together with discs from the same manufacturer and, of course, a set for both front wheels at the same time.
Examples of replacement kits:
- Disc brake pads TRW GDB469M + ventilated brake disc TRW DF4107 ;
- Disc brake pads, set ATE 13.0460-2965.2 + Ventilated brake disc ATE 24.0120-0187.1 ;
- Front disc brake pads, set Brembo P 41 003 + Front ventilated brake disc Brembo 09.8903.14.
The procedure for replacing rear drum pads is a little more troublesome and will require some skill. You can learn more about the nuances using the example of the Lada Kalina car in the article.
Make your life easier and brighter
Analogues of brake pads for Lada Granta
The products of the German company ATE enjoy the greatest popularity and positive reviews among analogues. These front pads under article number 13.0460-2965.2 work well in tandem with the original brake disc in all operating modes.
In second place in popularity and quality are Lucas/TRW products. Front brake pads with article number GDB 1446 have a built-in electronic wear sensor for vehicles in the Luxury configuration. Their price is slightly higher than that of TRW GDB 469 pads, which are also an analogue for replacement. lower quality M pads available for sale
Prices and articles of other popular analogues are presented in the table:
We change the rear brake pads on the Lada Grant with our own hands
According to the regulations, brake parts must be inspected every 15 thousand km. The replacement interval for the Granta car is not regulated. But if the pads are damaged, they need to be replaced. And when performing a replacement, they first carry out preparations: they lower the DOT fluid level, release the handbrake, and the car itself must be secured. Let's look at each step in more detail.
| TOP 15 most useful products for Lada Granta - OUR EXPERIENCE! |
1 Three preparatory steps 1.1 For vehicles with ABS 2 All steps for replacement
- 2.1 Need to get rid of unnecessary details
2.2 Pull out the pads 2.3 What you need to know 3 Check the parking brake 4 Select components
Three preparatory steps
The standard equipment is equipped with: front disc brakes, and at the rear, a drum mechanism familiar to domestic car enthusiasts.
The DOT fluid reservoir needs to be checked for level. It must match o. Excess liquid is drawn out of the tank using a syringe or bulb. First, of course, you need to unscrew the cap (see figure below).
Are the wheels different on different models and modifications of the Lada Granta?
The brake discs on different modifications of the Grant differ only in size. All of them are ventilated:
| R13 | R14 | R15 | |
| Where are they located? | "Kalina", "Granta" with an eight-valve engine | “Priora”, “Kalina” (eight- and sixteen-valve engines), “Lada Granta” and “Granta Liftback” - only for sixteen-valve engines | "Granta Sport" and "Kalina Sport" |
| Peculiarities | Less anther | Same size as boot | Installed only on sports versions of cars |
| Width | 250 mm | 280 mm | 380 mm |
| Acceptable wheel size | R13 and more | R14 and more | R15 and more |
If you want to upgrade your car's brakes, you can replace R13 with R14. The main thing is that the rims are no smaller than R14. This is practiced by those who are not satisfied with the stock Grant brakes. After modification, users experience a significant improvement in braking quality.
Install R14
If such a replacement does not suit you, take a closer look at new brake discs from foreign cars. They will fit perfectly, no modifications will need to be made. Those who made such a replacement were satisfied.
General questions about replacing pads on a Grant
Let's consider the main points on the frequency of replacing brake pads and their choice for the car.
Replacement frequency
According to the factory regulations, the front pads are checked for maintenance without replacement. Change only when the following factors appear:
- Strong squeak/whistle when braking.
- Thickness 1.5 mm or less;
- Delamination, charring and staining;
- Brake vibration when driving;
Often they are coated with a layer of material that begins to squeak when braking. This happens as the pad wears out. This is how the mechanism itself signals the need for replacement.
Please note: Brake material may vary depending on the manufacturer. This is fraught with the following:
- Early brake failure;
- Painting of wheel rims in dust from crumbling material;
- Squealing from brakes immediately after replacement;
- Increased wear of brake discs.
New brake pads and old ones
For clarity, we will give examples of wear on the front brakes during operation of the machine.
Wear is visible on the brake part of the old pad. If you do not change it for a long time, severe wear may appear on the disk.
This is what happens to discs when driving for a long time with worn out pads. Sooner or later, such wear will lead to cracks in the disk.
Which brake pads to choose
The factory parameters for the product are as follows:
- Thickness 17.3 mm;
- Width 104.4 mm;
- Height 61.9 mm.
Products from Bosch, Ferodo, LYNXauto and others are suitable for installation.
Urgency
Now it’s time to answer the main question: how long do brake pads last on a car and when should they be changed? What affects their wear and the maximum mileage that is possible for a car without maintenance?
One of the fundamental factors that affects how long a car runs on the same brake pads is driving style. It's no secret that exactly how the braking is done and how often the driver has to press the pedal directly affects the service life of the brake pads and how long they last from replacement to replacement.
Obviously, the less often you have to brake, the longer the service life of the brake pads and the longer they last. However, we should not forget that the force that the pads exert on the disc has a very significant effect on the service life of a particular consumable. In this regard, to save money, it is recommended to brake as smoothly as possible and only at those moments when it is really necessary. It is worth noting that the difference in how long the pads travel with a calm and aggressive driving style is significant, and in some cases it reaches an impressive 35–40%.
Also, the quality of the consumable itself has a strong influence on how long the pads last on the car and the service mileage. It has long been known that, in order to save money, in the production of the most inexpensive pads, materials are used that not only wear out quickly, even if the driving style has always remained quite smooth, but also have weak adhesion properties. There is no need to remind once again that such a short service life of brake pads directly affects the safety of the driver and passengers, and it is especially important to understand this for owners of cars with high mileage, the wear of which is significant.
How to replace Grant rear brake pads without ABS
Let's look at the whole process step by step. To work you will need:
- New pads (choose depending on whether the car has ABS or not);
- Keys 13: open-end and ratchet with long head;
- Wheel key;
- Head E-8;
- Head for 7;
- Screwdrivers for removing and installing springs;
- Pliers.
Preparing to replace pads
Getting ready to remove the brake pads. For this:
- We park the car on a flat surface;
- Remove the handbrake and put it in neutral;
- We support the wheels with wheel chocks (you can use bricks, bars, etc.);
- We pump out the brake fluid to the MIN level - use a syringe or an enema bulb;
- We remove the wheel bolts;
- We hang the rear wheel (jack up the car) and remove it.
We support the wheels, remove the handbrake and wheel.
How to remove a brake drum on a Lada Granta
The drum on the Grant is removed like on any other VAZ model. To do this, use a 7 key to unscrew the guide pins and remove the drum.
It is not recommended to knock the drum with a mallet or hammer - there is a risk of damaging it.
Manufacturers' recommendations
The brake pad consists of a base made of thick metal with a lining made of friction material attached to it. Its components are rubber, graphite and mineral fibers bonded with technological resins. How often to change these important parts for safe driving is indicated in the car's operating instructions. Typically, passenger car manufacturers recommend observing the following intervals between replacements:
- on cars of post-Soviet countries, it is planned to install new parts after 10-15 thousand kilometers;
- on foreign cars, whose spare parts are traditionally of higher quality, the interval is from 15 to 25 thousand km;
- a separate category is powerful sports cars, where replacement is carried out every 5-10 thousand km.
Practice shows that the front brake pads experience greater loads than the rear ones, which is why they wear out faster.
Russian car enthusiasts should not rely entirely on the recommendations in the technical data sheet, since the wear of the linings is influenced by many factors:
- The more aggressive the driving style, the faster the working surfaces wear out, because on 1 km of travel you use the brakes twice as often as the average driver.
- Operating conditions of the machine. If you constantly drive on unpaved and poor roads, then wear accelerates due to dirt getting on the brake discs and drums.
- The quality of the material from which the part is made.
- Technical condition of brake drums and discs. When grooves appear on the surfaces of these elements, the linings wear out much faster.
- Constant transportation of goods.
This raises the question of how long brake pads last in real life. The mileage range is quite wide - from 5 to 45 thousand km, depending on the brand of car and the degree of influence of these factors. That is why it is important to independently monitor the condition of the linings.