On all cars produced by the Russian automaker AvtoVAZ, including the most popular model in our country, the Lada Priora, the clutch is activated thanks to a mechanism called a clutch cable. This special mechanism is very important in the car control system and is sometimes called a clutch. Those car owners who prefer to carry out replacements and repairs in the car in a timely manner and with their own hands will be interested in studying this material, in which we will tell you about this device and how the clutch cable is replaced and other nuances.
About working on the clutch cable on LADA Priora
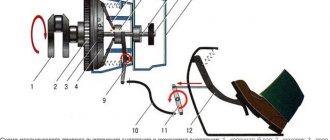
Initially, on domestic passenger VAZs with a rear-wheel drive system, the clutch was engaged thanks to an ordinary hydraulic system. The principle is exactly the same as that of the brake drive: all the pressure from the main cylinder is supplied to the so-called working cylinder. Only modern cars, such as, for example, the Lada Priora we are considering, received a front-wheel drive system; the specialists of the automobile manufacturer abandoned this principle of operation of the device in question, which greatly facilitated maintenance. The company has developed a reliable and very simple system for engaging a car clutch using a cable, now it is the main one in the entire system. The principle of the rocker arm, so to speak, is applied here, that is, when pressing the lower part of the corresponding pedal while sitting in the car, its working part, located at the top, passing through the rod (the so-called base), certainly begins to go in a completely different direction, plus everything else at this time she pulls the cable straight and, of course, behind her.
The second end of the cable is located on the drive fork of the clutch system. When the pedal is pressed, the clutch is released, thus directly enabling shift/on. transfer.
How to Identify Incorrect Clutch Adjustment
As drivers say, the clutch can be in two wrong positions.
- Weak.
- Overstretched.
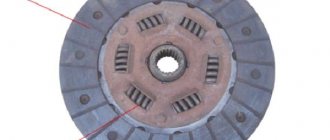
What does it mean? When the clutch is “weak”, it means that the release bearing is not fully pressing on the “petals” of the drive plate. This means that separating them is difficult. Accordingly, an unpleasant grinding sound of the box will sound. It will become very difficult to shift into gear. There is a risk of the gearbox shaft gears breaking. When the clutch is tightened, the picture is somewhat different, the gear engages perfectly, no difficulties arise. But! Under heavy loads, the disks begin to “slip.” That is, the engine roars with all its might, but the car does not pick up the required speed. There is a smell of burnt friction material. This means that the cable is too tight and the adhesion between the discs is broken.
Attention! Both options for incorrect adjustment lead to breakdowns and costly repairs later. Therefore, at the slightest sign of a violation, it is necessary to properly regulate the clutch drive.
Clutch cable device in Priora
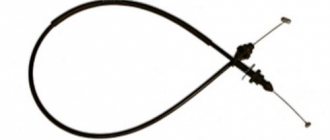
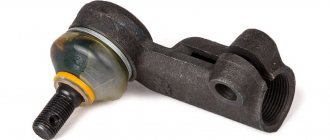
In order for the drive to work properly and stably, the core (cable) is located inside a special casing, completely fixedly fixed. As mentioned above, one end of the cable is attached to the clutch fork, as you understand, on the gearbox, and the other end is located in the cabin near the pedal. Each end is equipped with a fastening device. The ends are very different from each other, and it is simply impossible to confuse them in any way. There is also a rubber coupling; it is installed in the body in the hole where the cable goes into the compartment where the engine is located from the car interior.
So, the device consists of the following elements:
- In duplicate, fasteners for the casing.
- Clutch cable.
- Fastening element for fork.
- There is a special loop for the pedal.
- Rubber casing to protect the interior opening.
As you already understand, the core is located inside a hard shell, where it moves under the influence of return springs and the pedal itself. Thanks to this, its stable operation is ensured.
Priora diagnostic connector
Priora doesn't start well when hot
DIY replacement instructions
How to replace an oxygen sensor:
- The car is driven into a pit, the engine protection is dismantled.
- Locate the wiring from the regulator so you can get to the device.
- Next, the clamp is cut and the plugs are disconnected. Wait a few minutes for the motor to cool down.
- Using a 22mm wrench, the regulator is unscrewed.
- The new controller is installed in place of the old one, the assembly steps are repeated, only in the reverse order.
Price issue
The cost of the device depends on the manufacturer. On average, prices for oxygen sensors range from 1300 to 2600 rubles.
What is an oxygen sensor, or as it is also called a lambda probe, can be found out in the article. This publication will discuss how to replace this sensor if it breaks down on a car. The technological process is not particularly difficult, so even the most ordinary car owner can dismantle and subsequently install the DC on his car.
What are the main faults in the Priora clutch cable?
When the clutch cable on a Lada Priora is already in a state close to failure, or even possibly has failed, the driver will immediately feel it. When an attempt is made to engage the clutch in order to shift or engage a gear. Main types of breakdowns:
- The drive fastener to the pedal or probably the fork is broken. Always at such a moment the pedal will fall to the floor.
- The cable is disheveled. In this case, it is almost impossible to press the clutch pedal.
- The cable has broken. In this case, the pedal also falls freely.
All this indicates that it is time to conduct a thorough check of the drive on the Lada Priora. Each of the above malfunctions indicates that the clutch cable needs to be replaced and everything can be done even with your own hands. There is no point in replacing individual parts.
If you need to service your all-wheel drive, then you need to contact specialists and they will carry out preventive work for you; a car with all-wheel drive requires constant monitoring of the units.
Adjustment instructions
The Lada Priora is equipped with a clutch cable with a ratcheting mechanism. The cable is backlash-free and does not require adjustment, but manufacturers recommend this be done during every maintenance.
Clutch cable
To adjust the cable on the Lada Priora, you need to prepare a screwdriver and a ruler. The procedure then consists of the following steps:
- To perform work, you must open the hood.
- First you should disconnect the mass air flow sensor and.
- After this, a cable will be visible, at the end of which there is a plastic clip.
- Before adjustment, it is necessary to set the cable to its original position: overcoming the resistance of the spring, push the cable clamp forward until it stops in the direction of movement of the car.
- This clamp should be pulled towards you and the distance between it and the plug should be measured, it should be 27 mm.
- The distance is adjusted by turning the tip counterclockwise. In this way, an increase in distance can be achieved.
- Twist the clamp until the distance is 27 mm. Accuracy is very important here.
- Now you can release the cable and place it in the fork.
- After completing the steps, you need to get behind the wheel and press the pedal three times until it stops.
- Then again you need to measure the distance, it must be exactly 27 mm, otherwise we adjust until the desired distance is achieved.
- Next, you should insert the tip into the groove of the mechanism fork and release it. Thanks to the spring, the tip driver clamp is installed without any gap.
- After adjusting the cable, you need to return everything to its place, start the engine and check the operation of the mechanism.
After adjustment, the clicks disappear and the clutch release pedal operates softer.
Clutch pedals
When the clutch pedal travel is large, the clutch is not completely disengaged, so it still comes into contact with the flywheel of the power unit. When the stroke is low, the driven disk does not turn on completely, which leads to slipping and loss of torque.
You should measure your pedal stroke if the following symptoms occur:
- jerks appear when starting to move;
- noise and shock when shifting gears;
- the pedal gets stuck.
The symptoms described indicate that the mechanism requires adjustment. You can diagnose its operation on Priora yourself. To do this, start the engine, slowly release the PS and start moving. If, when the PS is released, the car immediately begins to move, this means that there is no free play. If the car does not budge even with the pedal fully released, then its travel exceeds the norm. The brake pedal should be at the same level as the brake pedal. In this case, its full stroke will be in the range of 125-135 mm. Fluctuations up to 160 mm are possible.
We measure the free play of the pedal
When making adjustments, loosen the first cable adjusting locknut located in the engine compartment on the bracket.
Locknuts for adjusting free play
By tightening the second locknut, the distance and stroke of the PS are adjusted. Thus, the desired result is achieved. After completing the procedure, the first locknut is tightened.
If you adjust so that the brake pedal is located above the brake pedal, then the clutch will barely leave the floor. If it’s lower, it will set almost at the very end. If the PS is located too high, the basket wears out faster. The ideal option is that the brake and clutch pedals should be at the same level.
Loading …
In order to extend the life of any mechanism, you should use it carefully. You should not constantly keep your foot on the PS; it is better to place it on the left on the floor. During each technical inspection of the Lada Priora, it is recommended to monitor the free movement of the PS and the clarity of gear shifting and, if necessary, make adjustments.
Changing the clutch cable on a Priora
As we said, replacing the clutch cable in your LADA Priora is possible with your own hands, the most important thing is to know how to change it correctly. Read more about this.
To replace you will need the following tools:
- The keys are ordinary 8“/17“.
- Pliers/screwdriver/pry bar.
The replacement begins with dismantling the old drive, and you need to start from the interior of the LADA Priora. You will have to do everything with an assistant. Algorithm of actions:
- Slowly release the clutch fork. In this case, an assistant removes the cable fastening bracket from the pedal.
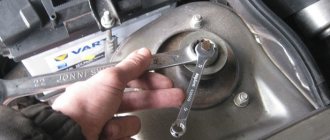
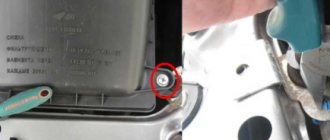
- Unscrew the fastening of the casing near the pedal. Use key 8 for this.
- Let's move on to the engine compartment, and using a screwdriver you should carefully pull out the seal there and pull the cable out there.
- We disconnect the negative terminal of the battery, since the work will be carried out next to the starter drive.
- Remove the air filter. Access to the cable fastening is now open.
- Using a 17 key, we easily release the shell latch. Thus, the core will be weakened and the tip in the fork at the point where the clutch is engaged can be freely removed.
- Remove the casing from the groove. This is all that is required for the drive to become free.
- Let's go to the salon. Let's start installing the new device. At this stage, the assistant must pull the cable from the engine compartment into the passenger compartment. Before starting installation, lubricate all open areas of fastening the tips and the core itself.
- We place it properly in the cabin, secure the tip mechanism, of course, to the pedal.
- Attach the casing.
- We press out the fork and attach the clamp directly to the fork.
- We put it in the place where the casing is supposed to be fastened, directly on the gearbox. Using a 17 key, we adjust the tension of the device in question.
- We fix the seal that was previously removed from there in a special hole in the passenger compartment.
- We put a device such as a car air filter in its rightful place.
Level control and topping up
Replacing the VAZ 2114 clutch with your own hands
To diagnose the fluid level you will need a white napkin:
- Start the car engine and drive for 10 minutes, this will allow the transmission to warm up.
- Checking the level is carried out on a flat surface. Stop the engine and wait about ten minutes until the transmission fluid drains into the pan.
- Open the hood and locate the dipstick to check the level. It is located on the right side of the engine compartment.
- Wipe the dipstick with a napkin and reinstall it in the hole, then remove it. If the fluid level is normal, it will be located between the two marks on the dipstick.
The service station channel in Simferopol published a video demonstrating the procedure for changing the lubricant in a Solaris automatic transmission.
↑ Route planning
In the CityGuide system, the route is built to the final destination, with the ability to add intermediate stop addresses. To get directions, you first need to select the map you need. You can enter your destination in several ways:
- through the search string;
- by specifying the address;
- from the POI menu;
- in history;
- from saved points to favorites.
- indicate a location on the map by touching the device screen;
- select a route from those previously saved in the navigator’s memory.
The choice of the finishing point is a signal for constructing a route. After completing the work, the system displays the result on the screen, visualizing the path and hints. Navigation of the Lada Vesta car provides for the construction of two types of routes: the shortest and the optimal. The construction of the optimal route is carried out for optimization reasons, taking into account distance, speed limits, class of roads and the possibility of avoiding potential traffic jams. You can set the route type in the navigation menu. If along the way there is a need to deviate from the specified trajectory, the route is automatically rebuilt.
How to install
Then the end of the cable is threaded into a hole located in the bulkhead of the engine compartment on the passenger compartment side of the car so that it ends up in the engine compartment. The rubber cover is also tucked in there.
The gear tip driver is put directly onto the clutch drive pin and secured with a bracket.
The end of the shell is secured with a nut to the pedal bracket. Make sure that the fixation is secure. It is unlikely that anyone will like to, if something happens, climb there again due to a poor-quality connection.
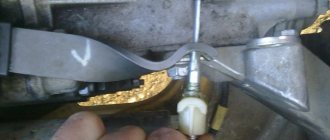
Next, under the hood, the lower part of the shell is stuck into a special hole on the gearbox bracket.
The leash is screwed onto the end of the cable (there is a thread there) - the latter should protrude approximately one turn outward, but no more.
Now comes the time to adjust the clutch drive. Upon completion of this process, the pedal is pressed all the way two or three times and then the setting is repeated.
The working surface of the tip driver must be treated with the above-mentioned lubricant.
All that remains is to make sure that the entire mechanism is now working properly and install all previously removed parts in place.
You can learn more about the process in the video below:
Mechanics
Mechanically, the clutch operation process is extremely simple. Let's analyze it from the moment the movement begins. After starting the engine, the car is in neutral gear (starting the engine in gear is bad manners). The clutch is depressed all the way - this means that it is turned off, the driven and pressure plates have separated, that is, a moment is created to change gear. The gearshift lever is moved to position 1, and first gear is engaged.
The pedal is smoothly released (the clutch is engaged), at this moment the most important thing happens: the distance between the pressure plate and the driven one is constantly decreasing, and the force transmitted by the engine has already set one disk in motion, which makes the moment of “collision” of the two disks become difficult. If the pedal is released abruptly, they will quickly touch, which means that the disc will stop (imagine that you are walking and tripping on a stone - much the same thing happens to the engine)
The engine may stall, or in the best case, the car will simply “bite.” At such moments, the “petals” on the driven disk suffer greatly - the more “flattened” they become, the closer the time for replacing the “hitch” is. If the discs come into contact smoothly and the driven disc is slowly set in motion, the car starts from a standstill.
