The steering mechanism is a fairly important unit, on the serviceability of which depends, among other things, the life of the vehicle crew. Modern cars use a steering rack.
note
The worm mechanism is considered an obsolete design, despite its simplicity of execution. It is difficult to achieve precision control with it.
The rack-and-pinion mechanism has an open design (unlike a worm gear); lubricant for the steering rack can be supplied by the driver in a garage.
This design also has a drawback: at the slightest leak, moisture and dirt enter the mechanism, and the lubricant quickly fails.
Our material will tell you how to choose the right consumables for the steering mechanism.
Lubrication
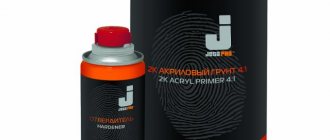
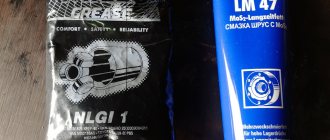
For VAZ cars, the only steering rack lubricant recommended by the manufacturer is FIOL-1.
1. Lubrication during assembly. First, the rail and the internal cavity of the housing are lubricated.
How to adjust wheel alignment with your own hands? - there is more useful information here.
- A generous coat is then applied to the plastic sleeve.
- Lubricant is placed in the seat for the needle bearing.
- The rail is installed in the housing.
- The steering gear shaft is lubricated.
- Grease gets clogged up in the bearing.
- The stop is lubricated.
- Screws and stoppers are installed.
- The casing and anthers are put on.
2. Lubrication without removing the rack. After cutting through the plastic clamps, the side protective caps are removed.
It is through the side holes in the rack body that lubricant is pumped. It is recommended to carry out this procedure at least once every 150 thousand km.
For convenience and greater efficiency, you can use a syringe with a nozzle made of a rubber hose of such a diameter that you can insert it between the rail and the body. The hose must be pushed from the side where the rod bolts are attached.
You may be interested in this article - When and how is a wheel bearing replaced?
At this point on the bushing there is a cut through which the lubricant will pass into the space behind the bushing and lubricate the steering mechanism.
How to lubricate the steering rack in the absence of FIOL:
- Litol. It is the most suitable lubricant to replace the recommended one. Has good lubricating properties and durability.
- Solid oil. Not recommended due to its tendency to dry out over time and lose its lubricating properties.
- Graphite grease. For the same reason as grease, it is not entirely suitable for lubricating the rack.
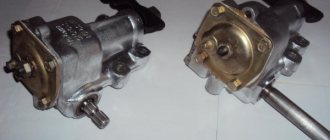
Components of the amplifier. Types of power steering
In general, the main task of an amplifier in a passenger car is to increase safety, and only then to ensure comfort.
The power steering device includes several main components:
- pump;
- distributor;
- power cylinder;
- connecting pipelines.
Power steering elements
The equipment used two types of hydraulic boosters:
- Combined (integrated).
- Separated.
The combined type is distinguished by the fact that the distributor and cylinder are integrated into the steering mechanism, which makes it possible to significantly reduce the metal consumption of the structure and make it more compact. Thanks to this, it has become widespread, including on passenger cars.
The split type was used on a number of trucks. Its peculiarity lies in the fact that the power cylinder is a separate element that interacts with the steering drive. But because of this decision, the power steering design turned out to be more cumbersome, so it is not used on passenger cars.
Pump
From the name of the amplifier it is clear that the main working element in this mechanism is liquid. Since it is incompressible, when pressure is created, a force can be obtained that will perform the required function.
And this pressure is created by the pump. In a simpler mechanism scheme, the pump is belt driven from. This design element can be gear (less common type) or rotary (also called blade). Most often, the second option is used on cars.
The design of a rotary-type power steering pump is very simple. Its main elements are a housing with supply and outlet fittings and a shaft, at one end of which a drive pulley is installed, and at the other - a rotor with blades. This rotor is located in a specially shaped chamber - the stator (its role is played by the housing). Due to this shape of the stator, liquid is pumped, which is then supplied to the outlet fitting leading to the distributor.
Power steering vane pump
The disadvantage of a pump driven from the crankshaft is that the pressure generated varies depending on engine speed. Because of this, the force created by the power steering at low speeds is insufficient, and at high speeds it is excessive, which leads to the appearance of an effect such as an “empty steering wheel” (“feedback” of the steering control is absent, so the information content of the steering control is very small).
Operating principle of gear and rotary pumps
To eliminate this drawback, the power steering pump device includes a pressure regulator that maintains it at a given value. It functions very simply - when the pressure is exceeded, the regulator, moving, opens a bypass channel between the supply and outlet channels and part of the pressure is released.
Distributor
Liquid under pressure created by the pump is supplied to the distributor. The task of this component is to distribute fluid flow depending on the steering position. The most widely used valve in passenger cars is the rotary type spool valve. This unit is an intermediate link between the column shaft and the steering gear.
Rail distributor device
The distributor consists of two elements - a shaft and a rotary spool. These elements are mounted on a torsion bar, which connects the column shaft and gear.
The distributor is approached by a supply fitting from the pump, a return line (through which the liquid returns to the pump) and two terminals leading to the power cylinder.
Distributor operating diagram
The essence of the distributor's operation is this: when the steering wheel rotates, the resistance coming from the wheels leads to twisting of the torsion bar, which in turn ensures the rotation of the spool relative to the distributor shaft. Because of this, some channels open and others close, that is, a redistribution of the fluid flow occurs.
Cylinder
The power cylinder acts as an actuator. In the combined type of power steering, it is completely integrated into the steering mechanism. The piston is the steering rack, which additionally has a washer with seals, and the cylinder is the housing. The piston divides the cylinder into two chambers connected by pipelines to the distributor.
Preparatory activities
Many experts advise taking certain steps to prepare for the replacement so that everything goes easier and faster. These actions include the following.
- Treat all nuts and fasteners with penetrating liquid. WD40 works great.
- If the tips last longer than one winter, to remove their fist you will need to use a 17 socket to unscrew the nuts.
- If the nuts stick, try heating them with a hair dryer. A gas burner is also suitable, but you need to be as careful as possible with it.
- Prepare tools for removing tips.
Today, two methods are used to dismantle steering tips - modern and traditional. The first involves the use of a special puller, and the second - a sledgehammer.
The traditional dismantling method involves the following actions:
- The steering wheel is turned all the way;
- Several strong blows are applied to the steering knuckle;
- Vibration causes the tip to pop out.
But the method has two serious drawbacks.
- It will take special skill to deliver precise, but at the same time accurate and strong blows.
- This method can reduce the service life of steering racks.
Therefore, the best option is a puller. You can literally buy it for 200-300 rubles, but it will be useful in the future and will significantly preserve the integrity of the remaining parts when replacing the launch vehicle.
Replacement
The replacement procedure is quite simple. Especially if you have prepared the connecting elements in advance and acquired a puller.
- Using a jack, lift one of the sides where you will begin to change the tips.
- Turn the steering wheel to such an extent that it is convenient for you to replace damaged elements.
- Treat the elements again with a penetrating liquid.
- Unscrew the fastening nut.
- Remove the tip from the steering knuckle hole. Here you just need a puller or the traditional old-fashioned method using a sledgehammer.
- Check the condition of the steering rods. Sometimes it is better to replace them in the first couple of wears. Besides, you still got into this knot.
- Replace damaged tips with new ones.
- Perform the reassembly procedure.
- Do the same with the second wheel.
- We recommend that you think additionally about protecting threaded fasteners from moisture and dirt. To do this, the threads can be lubricated with lithol, graphite grease, a tube of a suitable diameter can be put on, or heat shrink can be used.
- After completing the replacement of the steering tips, visit a service station to adjust the wheel alignment.
- If you don’t want to go to a service station, then count in advance the number of revolutions when removing the old tip. The new one is twisted by the same number of revolutions.
- Drive onto a straight road and check whether the car does not skid to the sides when driving in a straight line.
One of the main conditions for a successful replacement is the choice of quality parts.
What to choose
Finally, we will present several options for the most popular steering tips, which are used today when replacing a VAZ 2114. So you can decide for yourself what to choose and which ones are better.
The last two tips are foreign made. This makes their price higher. But the quality is somewhat higher than AvtoVAZ products.
Replacing a LV is not so difficult that you need to go to a service station and pay 500-1000 rubles for the work of the craftsmen. You can easily cope with this task yourself, relying on the video and instructions provided.
VAZ 2114: adjustment and tightening of the steering rack. Replacing tie rod ends
The steering rack is knocking
Repairing the steering rack on Kalina
When you feel shocks in the steering wheel while driving over uneven surfaces, and when turning, there is a knock somewhere at the bottom of the car - this is a message about a faulty steering rack. You should not delay repairs, since your life and the safety of others depend on the steering of your car. The entire steering mechanism assembly is very expensive, so today we will tell you how to eliminate a knock in the steering rack of a car with your own hands.
A knock in the steering rack is not the “end of the world”; it is still possible to carry out inexpensive repairs. Before you start eliminating the knock, you need to know what the steering rack is made of.
Video. Steering rack device
It is worth recalling that on our website there is already a publication on how to replace the steering rack with your own hands. You need to replace it after you are really sure that the part cannot be repaired.
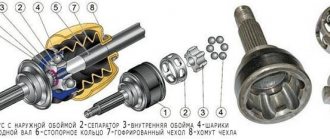
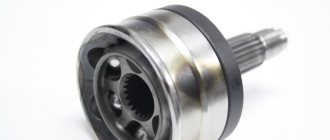
The steering rack consists of the following parts:
1. Power steering gearbox - it is designed to transfer force from the steering wheel to the car wheels. In a word - the main part that is responsible for turning the wheels.2. Steering rod - the steering rack is already attached directly to it.3. Movable joints that are attached to a car wheel.
Why is the steering rack knocking?
When you discover a fault in the steering rack, you are faced with two choices - go to a service station or do the repair yourself. If you decide to act on your own, you need to perform diagnostics.
Steering rack inspection sequence:
1. First of all, you need to turn off the engine, place the car on supports or the handbrake and ask a friend to drive.2. We go to the front of the car, where the knock is made, and ask a friend to turn the steering wheel left and right.3
We focus on the rubber corrugated boots and their condition. If there are serious damages on them, heavy leaks of lubricant, then most likely the cause of the malfunction is located there. 4
We listen to the turns of the car wheels, where the knocking comes from.5. Let's move on to repairing the faulty part.
4. Listen to the turns of the car wheels, where the knocking comes from.5. Let's move on to repairing the faulty part.
Let us remind you. that in the previous article we looked at how to replace the rear wheel bearing with your own hands. The process is quite simple and can be done in a garage.
What to do when the steering rack knocks? - instructions
If the problem is only in the tips, repairs will be available at an affordable price at any service station. I do not recommend performing this repair yourself, as this requires special tools and certain skills. Here's the wheel alignment - no problem, there are already instructions on our website.
When the knocking sound of the steering rack comes from the side of the connection with the steering rod, this defect can be eliminated in a garage.
1. Remove the rubber corrugated boot and remove the grease.2. We replace the bushing if it is damaged.3. We clean the spring from various dirt, this can be done with “solarium” or a special one. liquid.4. Install a new rubber boot.5. Then we tighten the bolt that regulates the movement of the sleeve.
Video. DIY steering rack repair
We assemble all the steering components of the car and check how everything works. If the knock in the steering rack “disappears”, then everything is fine and you managed to save a large amount of money that would have been required at a service station. If the steering rack is damaged, it will have to be replaced.
How to change the boot on the steering rack of a VAZ 21099 Steering rack is designed to convert the rotational motion that comes from the steering wheel into the translational movement of the steering rods, which turn the wheels and allow the car to be controlled. In order to prevent
Replacing the steering rack of a VAZ 2115 Replacing the steering rack of a VAZ 2115 is not the most difficult task, but it requires certain skills. You can replace the steering rack yourself, but I would advise calling an assistant.
VAZ-2115 or Lada 2115 is a restyling of the VAZ 21099, which was produced at the Volzhsky Automobile Plant from 1990 to 2004 and was the founder of the second generation Samara. Lada Samara sedan is the modern name of the car, its production began in 1997.
Alarming symptoms
No matter how often you change the steering rack lubricant, unfortunately, it cannot extend the life of all parts of the mechanism indefinitely. Therefore, if the following factors are detected, it is recommended to immediately stop using the vehicle and contact a service center.
- Increased steering play.
- Turning the steering wheel requires more effort than before.
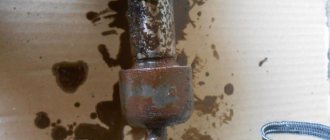
- Traces of steering rack lubricant leakage were found.
Knocking and extraneous sounds in the steering mechanism. They usually appear when making a sharp turn or turning the steering wheel, or when hitting protruding parts of the road. To make sure that the cause is in the rack, you need to:
- place the car on a flat surface;
- get out of the car and open the hood;
- unscrew the wheel until it stops in both directions;
- Listen carefully to where the sound comes from when you turn the steering wheel sharply.
Timely diagnostics will protect your car from possible future serious breakdowns and sudden expenses.
All lubricants have a different set of characteristics (composition, properties, cost). And if the question arises about which lubricant to use, then it is better to give preference to lithium. The best on the market are considered to be Litol-24, Fiol, Tsiatim and Severol. They are moisture-resistant, have a long processing interval, reduce vibration, do not wash off, and contain antioxidant and wear-resistant additives. Steering rack lubricant must have a high load-bearing capacity to avoid extrusion.
If a low-quality lubricant is used in operation, which does not meet the listed qualities, then this will soon lead to wear of individual parts and assemblies of the steering mechanism. It is important to always listen to your car, pay attention to warning signs in time, carefully choose which lubricant to lubricate, lubricate the steering rack in a timely manner and be responsible in choosing a lubricant.
Electric power steering is a component used to provide more comfortable driving. Not so long ago, domestically produced cars began to be equipped with EUR, in particular, in this article we will talk about Lada Kalinas. What malfunctions can occur with the Kalina EUR and what troubleshooting methods are there? Find answers to these and other questions below.
[Hide]
How to replace the steering rack on a VAZ 2113-VAZ 2115?
Removal
1) At the beginning of the operation, you will need to hang both front wheels from the car, for this operation you may need either one or two jacks (Just instead of one jack, you can also use logs), after the front part is hung, remove it from both sides of the car's wheel.
2) Now you need to remove the adsorber if you have one, because it takes up quite a lot of space and if you don’t remove it, then there simply won’t be much access to the steering rack.
3) Then, in the very central part of the rack, unscrew the two bolts that are also indicated in the diagram above as number 10, which secure the tie rods to the rack, but keep in mind the fact that these bolts are also secured with lock washers, which you will need to bend back (You will see them immediately ), so that they do not interfere with unscrewing these bolts securing the rods to the rack.
4) Next, climb into the cabin under the place where you have pedals installed and there look for the universal joint locking bolt (Indicated by the red arrow), if necessary, bend back part of the carpet (Carpet is what the floor of the car is covered with, before it didn’t exist, people replace it the styles themselves are linoleum, but this is in old cars, in new ones a carpet is used which covers the metal part of the body) if it will cover this bolt, but when you unscrew the bolt, insert a large screwdriver or a chisel into the groove indicated by the blue arrow and widen it so that the rack can be removed from the car.
5) Well, to complete the operation, unscrew the two (on each side) nuts that secure the rack to the car body, these nuts secure it in its outermost part, that is, on the left and, accordingly, on the right, and when they are unscrewed, then you can pull the steering rack towards you (this will remove it from the studs) and then remove it from the car.
6) Let’s add something else, usually new racks are initially sold assembled with steering rods, if you also have these rods for the racks (These rods, if you don’t understand what we’re talking about, are shown in the diagram and indicated by numbers 11 and 6) then in this case, you will have to remove the old rods from the car (the instructions are simply aimed at removing only the rack itself, and therefore we didn’t say anything about removing the rods at the beginning), if you don’t know how to remove them, then in this case, study the article entitled: “Replacing steering rods on VAZ 2109 cars.” (Don’t pay much attention to the VAZ 2109 brand, because the cars of the Samara and Samara 2 families are very similar to each other and therefore the rods are removed identically in both)
Steering rack adjustment
There is nothing complicated in adjusting it, the most important thing is to know a couple of things, namely, if adjusting the rack does not lead to anything (that is, the rack still knocks after adjustment, although the knocking should disappear or, in extreme cases, be less), then the rack It is recommended to either change it or repair it (For information on how to repair the rack, read the article entitled: “Repairing the steering rack on a VAZ”), but now let’s get back to the adjustments, you will first need a special key (Tell the car shop that you need a key to adjust the rack and if the seller turns out to be competent, he will sell it to you immediately), after you stock up on it, find a special nut (Indicated by a blue arrow in the small photo below, and its location is indicated by a red arrow) and tighten it a little, make sure that the knocking either disappears altogether (If the rack is still in acceptable condition), or it was there but not too strong, otherwise replace the rack with a new one, or, as mentioned earlier, repair it.
Basics of selecting power steering oil
Kalina steering rack repair
Currently, there are a large number of different lubricants on the market used in power steering.
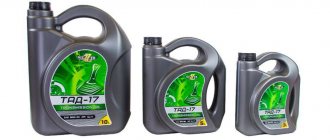
Power steering oils
Within the framework of a review article, it is not possible to list all types of oils used in hydraulic boosters. Let us consider only the general rules for selecting a suitable liquid.
- All oils for hydraulic amplifiers are divided into mineral, synthetic and semi-synthetic.
Today, mineral liquids are the most common. There is a rule: if the operating instructions do not specifically state the possibility of using synthetics and semi-synthetics, then only mineral-based oils can be used. Reverse interchangeability is also undesirable (that is, with recommended synthetics, it is better not to fill in mineral options), but is considered safer. - It is guaranteed to be safe to mix only liquids with the same or similar chemical compositions.
Often information about interchangeability is indicated on the packaging. Colors of power steering fluids As for color, there is an unspoken rule: red and yellow fluids can be mixed. Greens cannot be mixed with others, but only with each other. However, there is an exception here for the greens. Green power steering oils can be synthetic or mineral. Therefore, relying only on color is undesirable.
- In the short term, in case of a forced replacement rather than a planned one, you can temporarily fill in any oil. For example, in a situation where the return hose has come off and the liquid has leaked out, you can fill in absolutely any oil for a short period of time. The power steering pump will quickly fail when running dry.
Therefore, less harm will be caused by the wrong oil than by operating the power steering system without any lubrication at all. But before further filling with suitable oil, you will definitely need to flush the system.
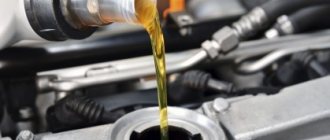
How to replace the fluid in the power steering and not make a mistake in choosing the right lubricant? The general answer is extremely simple: read the car's operating instructions.
DIY repair
First you need to stock up on the necessary set of tools:
- repair kit for the steering rack (as mentioned above, they are sold in three variations);
- bearings;
- lubricant;
- necessary keys and screwdrivers;
- We should talk separately about repair kits.
Minimum basic sets. Such sets usually have only 4 elements:
This set can only fix the simplest faults. Medium priced sets. Here, in addition to the things described above, there are shafts and other bearings. Expensive sets. There may already be entire slats here.
When purchasing, please note that you are purchasing a set specifically for your car (the brand is indicated on the package). Sometimes it happens that a car has a non-original rack, then it is necessary to purchase a repair kit for the car from which this rack was removed. Actually, any repair must begin with disassembling the steering rack
Often the problem is just a small bearing, and the entire rack does not require replacement
Actually, any repair must begin with disassembling the steering rack. Often the problem is just a small bearing, and the entire rack does not require replacement.
Work order
- Removing the steering rack
- Unscrew the thrust nut using a 17mm hexagon.
- Remove the thrust nut, retaining ring, rack stop and spring.
- Remove the drive gear shaft boot, and then the retaining ring.
- Unscrew the nut holding the steering gear bearing. It goes quite tight - this is normal.
- Press out the drive gear shaft.
- Remove the rail itself from the housing.
- Remove the support sleeve, then lubricate it and insert it into place (this will need to be done with force)
- Replace all bearings. Some will be difficult to get (very difficult), so you can simply chop them with a chisel and pull them out with tongs.
- Inspect all parts for defects, replace broken ones with new ones (from the repair kit), lubricate all moving parts.
- Reassemble the rail in reverse order.
- That's all, if you did everything correctly, then the rack works with a bang. All that remains is to put it in place.
Putting the rack in place
- First, you need to enlist the help of a partner; without him, you won’t be able to do everything quickly and accurately.
- We install the rail in the same place and attach the fasteners.
- With the help of a partner, we insert the rail into the spitz.
- To loosen the clamp, use a chisel.
- We tighten the mounting bolt.
That's all, now the rack is in place, then we put the wheels on, tighten the nuts and remove the car from the jack. Now you know everything you need to repair your steering rack in a timely manner. The main thing to remember is that you shouldn’t delay repairs.
Steering rack bulkhead
1. Using side cutters or any other suitable tool, cut off the plastic clamps on the sides of the protective casing.
After this, the casing can be easily removed. We inspect it for damage. The presence of tears or cracks is unacceptable, since water and dust enter the rack and pinion mechanism through them.
2. The side protective caps are also secured with plastic clamps. After cutting the clamp, the caps can be easily pulled off. They are visually inspected for damage.
3. It would not be superfluous to check the steering rack for wear in the gear-river pair. To do this, hold the rail with your hand at the place where the rods are attached and try to rotate the mechanism shaft left and right. The presence of play may indicate wear or incorrect adjustment in this unit.
4. For further work you will need a specialized key for VAZ cars. It is usually sold as a dual-use device: on one side there is an octagon for adjusting the rack or unscrewing the adjusting screw, and on the other side for tensioning the timing roller.
If this key is not available, then you can use any suitable octagon.
If the steering rack has not been adjusted or disassembled, it is quite difficult to turn the adjusting screw for the first time. In the factory conditions, after adjustment, this screw is cored.
5. After unscrewing, remove the sealing and retaining rings, the spring and the stop. The stop is one of two points of support for the rack itself in the body. Therefore, the performance of the entire mechanism directly depends on its condition.
The working surface must be smooth, without burrs or other damage. The sealing ring should also not be damaged.
6. To further disassemble the steering rack, it is necessary to remove the steering gear boot. It fits tightly on the body; there are no special fastenings. We also inspect it for cracks or any other damage.
7. Remove the lock washer. Unscrew the bearing nut. To do this you will need a special octagonal key.
- Then remove the O-ring and washer.
- Next, you need to remove the steering shaft. It is not set very tightly, so a little effort is enough.
- The condition of the ball bearing is checked.
- If the bearing is worn, it must be replaced. It fits tightly onto the shaft.
- The old one can be knocked off using a tool or by carefully hitting the outer ring with a hammer.
- Press the new one through a tubular adapter in a vice or on a press.
- It is not recommended to hammer a new bearing, as this will negatively affect its service life.
8. Remove the support needle bearing. To do this, use a screwdriver or an awl to carefully lift it and pull it out of its seat. If it also shows signs of wear, place a new bearing in the groove.
9. Take out the rail itself. After disassembling the steering mechanism and removing the stop, it easily comes out of the housing. Here it needs to be cleaned of any remaining old grease and carefully inspected.
The teeth should not have chips or other damage. There should be no burrs or areas where metal-to-metal friction occurred on the rack shaft itself. If such defects are present, the steering rack needs to be replaced.
There are options for grinding the shaft, but not all car repair shops undertake this. And the economic feasibility of this procedure is questionable.
10. The bushing is dismantled. To remove it, you must first move it from its seat. Using a flat-head screwdriver, hook it onto the edge from one of the edges of the case and apply light pressure until it detaches from the mounting groove.
After this, the bushing can be carefully crumpled in the body and pulled out through the hole for attaching the rods.
The bushing is one of the weakest points in the steering rack design. Plastic material wears out more intensively than metal, and backlashes appear.
11. Replacing the steering rack bushing begins with installing rings on the new bushing. After this, the sleeve is pushed through the side hole into the body until it rests against the locking lip.
Next, use a screwdriver to carefully twist the bushing through the hole for attaching the rods until it is installed in its working position. Most often, the steering rack knocks precisely because of a broken bushing
12. After disassembly, all elements are washed in a solvent or any other liquid composition to wash oily parts.
When using a repair kit, it is better to replace all elements rather than individual parts. Assembly is carried out in reverse order.
Dismantling and disassembling the electric amplifier
Before removing the amplifier, you need to remove all the steering column switches. Remove the steering rack cover and dismantle the devices, remembering to disconnect the connectors from the power supply.
How to remove the EUR with your own hands:
- After removing the switches, you will need to dismantle the lower cross member of the dashboard. To do this, you need to press the fasteners that secure the connector with wires, and then disconnect the wiring from the control module. Once these steps are completed, you can disconnect the connector from the switches.
- The system bracket is secured with nuts; you will need to unscrew them with a wrench.
- After this, the steering rack will need to be carefully lowered down. To do this, you will need to find the bolt that secures the driveshaft to the booster shaft. This bolt must be unscrewed, but when unscrewing, you will need to fix the nut, this will prevent it from turning. When the bolt is removed, the fastening will need to be loosened, after which the intermediate shaft will be carefully removed. At this stage, we recommend marking the position of the shaft and gears; you can use a marker for this. This step is very important because doing it will prevent possible installation problems in the future. If the marks on the shafts do not match, this may cause problems with the amplifier. When dismantling, be careful not to damage the wiring, as this will also lead to the inoperability of the ESD.
- When the unit is dismantled, it will need to be disassembled and the failed elements replaced. Further editing is done in reverse order (the author of the video is Murzik Bely).
Replacement procedure
Replacing steering wheels will require not only your hands, but also a couple more to help. So, agree in advance with a friend that he will help you solve the problem of faulty steering.
In addition to a helper and new slats, you will also need a set of tools and materials. Be sure to include in this list:
- Set of wrenches;
- Jack;
- 17mm hex wrench;
- Balloon wrench;
- Bricks or similar materials (to support the front of the car without wheels);
- Puller for steering rods (not necessarily needed, you can do without it);
- Dry rags;
- Litol type lubricant;
- The almighty WD40.
Now you can proceed directly to replacing the steering racks. We strongly recommend that you follow the established procedure for conducting operations.
- Place the car on a level surface. No, a simple floor in your garage is enough, it is not necessary to level it with cement.
- Apply the parking brake to keep the car from moving.
- Raise the car on a jack, place logs or bricks under the front, and then remove the wheels.
- Remove the negative cable from your battery for safety reasons. Nobody needs electric shocks today.
- On the driver's side inside the passenger compartment, near the pedal block, unscrew the locking fastening bolt of the cardan of your steering shaft.
- Remove the adsorber directly from the engine compartment. You can put it aside for now.
- Remove the cotter pins, which will allow you to then remove the mounting nuts from the tie rod ends.
- Using a rod puller, the ends are removed from the racks. If for some reason the puller is missing, it can be replaced by gentle, successive blows to the tips. Don't damage their threads just by doing this. They usually lend themselves, so many people do without pullers.
- Treat the rack clamp fixing nuts with an anti-rust agent. Now we are talking about the almighty WD40. Wait a while for the composition to be absorbed.
- Using a wrench, unscrew the fastening nuts. Processing with a Vedash should greatly simplify this task for you. There are four nuts in total.
- Remove the rack by pushing it through the passenger side, that is, the right side of your VAZ 2114.
- We recommend replacing the boot at the same time as replacing the racks. Over time and during the period of operation, the steering boots seriously wear out, so it is hardly worth trusting old boots to work with new racks.
- The tips are removed from the slats. At the same time, try to count the number of turns with which the nuts were tightened. This will allow you to fasten them back as close to precision as possible at the reassembly stage and, with peace of mind, go to the service station, where they will adjust the wheel alignment.
- Take your new rail, remove the plugs from it.
- Next, take Litol or a similar lubricating liquid into your hands and fill the body with this composition as much as possible.
- The ends are mounted back onto the rods. Try not to mix up the places of the nodes, although they are different from each other. However, as practice shows, this does not prevent many do-it-yourself repairmen from confusing them.
- The new rail is placed in its rightful place. To do this, the nuts are attached to the studs of the clamps.
- Now you will need your friend, comrade, assistant. Ask him to help guide the shaft drive gear to the seat located directly on the rack housing. The splines must line up exactly. Be sure to check this moment.
- A locking bolt is fixed on the cardan.
- You can safely perform all other work in the reverse order of the dismantling described above. In this case, each thread must be treated with Litol. This event will allow you to more easily deal with disassembling the elements during subsequent repairs. Or it will be a pleasant surprise for the new owner of your VAZ 2114.
Obviously, replacing steering racks yourself is not the most difficult task, but it must be done clearly, consistently and accurately.
Loading …
Table 1. Main characteristics of sealing lubricants produced by Dow Corning and
| Replacing the steering rack of a VAZ 2114 Type of material | Brand | Base oil | Filler | Load-bearing capacity (welding load), N | Working range temperature, °C |
| Plastic lubricant | EFELE SG-311 | PJSC* | — | — | -60…+120 |
| EFELE SG-391 | PJSC | Composition of white solid lubricants | ≥ 2000 | -40…+160 | |
| EFELE SG-393 | Silicone | PTFE | — | -40…+160 | |
| PJSC | Composition of white solid lubricants | 3924 | -40…+149 | ||
| PJSC | Composition of white solid lubricants | 2200 | -50…+140 | ||
| PJSC | PTFE | 3140 | -60…+130 | ||
| PJSC | PTFE | 5500 | -50…+150 | ||
| PDMS | — | 1600 | -50…+190 | ||
| PDMS | PTFE | 1180 | -40…+200 | ||
| PFMS | — | — | -65…+175 | ||
| FS | PTFE | 3924 | -40(-31)…+232 | ||
| Compound | PDMS | Silica gel | — | -40…+204 | |
| PDMS | Silica gel | — | -40…+200 | ||
| Paste | PJSC | PTFE | 5500 | -50…+150 | |
| Mineral | Composition of white solid lubricants | 4800 | -25…+125 |
*Interpretation of abbreviations: PAO – polyalphaolefin; PDMS – polydimethylsiloxane; PFMS – polyphenylmethylsiloxane; FS – fluorosilicone; PTFE – polytetrafluoroethylene.
Synthetic greases EFELE SG-311 and EFELE SG-391 with NSF H1 food grade approval are based on PAO oil. They are compatible with plastics and elastomers, resistant to water and have excellent anti-wear properties.
EFELE SG-393 sealing grease with food grade NSF H1 approval is based on PTFE-thickened silicone oil. It has high sealing properties, is operable in water, steam and chemically aggressive environments and is compatible with plastics and elastomers.
Synthetic PAO greases Molykote G-1502 FM with food approval NSF H1 (Fig. 4), Molykote EM-60L (Fig. 5), Molykote G-2003, Molykote YM-102 are characterized by a wide range of operating temperatures, compatibility with plastics and elastomers , high water resistance.
Molykote EM-60L (Fig. 5) and Molykote YM-102 contain highly dispersed PTFE in high concentrations, which allows these lubricants to provide the lowest friction and high load-bearing capacity. These greases are most common in valve manufacturing for water and gas supply systems.
Molykote PG-21, Molykote G-5032 and Molykote 55 O-Ring greases contain silicone oils (PDMS, PFMS) and have a high viscosity index. This allows them to be used equally effectively both at low (up to -65 °C) and high (up to +200 °C) temperatures. Lubricants based on silicone oils are more resistant to chemical attack and oxidation. In many cases, low friction in metal-polymer systems can be ensured by lubricants with silicone base oils, even without an antifriction filler in their composition.
If the working medium in the pipeline is petroleum products (kerosene, diesel fuel, etc.), then it is necessary to choose fluorosilicone lubricants with a polytetrafluoroethylene thickener. Molykote 3451 and Molykote 3452 greases are resistant to liquid hydrocarbons, isopropanol, methanol, toluene and other chemically active substances that dissolve conventional lubricants.
Dow Corning 4 and Molykote 111 silicone compounds (Figure 6) are the most versatile sealing compounds. They simultaneously function as lubricants and sealants. Possessing high sealing properties, resistance to steam, water, oils, alkali and acid solutions, methanol and ethanol, they simultaneously keep the joints mobile and effectively reduce friction in them. Compounds are used in ball valves for gas and water supply, as well as in chemical production.
Molykote DX Paste and Molykote E Paste are lubricating pastes for solving the most acute problems in metal-polymer friction pairs. These lubricants are capable of operating under extremely high loads. The highly dispersed PTFE filler contained in the pastes fills micro-irregularities in the surface and forms a lubricating film on it with very low friction.
The nuances of replacing the assembly assembly
In the case of replacing the VAZ-2114 rack assembly with rods, we proceed somewhat differently.
There is no need to unscrew the rods from the rack during the work. But you will have to disconnect the tips from the stand. This operation will not be difficult if you have a puller.
If it is not available, you can use the folk method;
- Unbend and remove the stopper;
- Unscrew the tip nut;
- We take the pry bar and place it between the rod and the protrusion of the stand, to which the tip is attached;
- We use a pry bar to create a pressing force and at the same time apply sharp blows with a hammer to the protrusion (usually 2-3 blows are enough for the tip to “pop out”).
Next, we do everything identical to what was described: unscrew the fastening nuts and the fixing bolt on the column shaft. Afterwards all that remains is to remove the mechanism and replace it with a new one.
After replacement, it will be necessary to adjust the camber/toe angles of the VAZ-2114 steering, even if the rods were not removed. This operation will definitely not be superfluous.
Causes of leaks
There are several common reasons why the steering rack leaks:
- The main thing is driving with torn rubber covers. Moisture penetrates through the holes and gets onto the shaft, causing corrosion. The rusty surface becomes rough and begins to rub the seal lip. The slightest gap is enough for oil to escape under pressure.
- Failure to comply with the rules for handling the hydraulic booster. Holding the steering wheel in the extreme position for a long time leads to an increase in pressure inside the chambers and squeezing of the seals. If the driver constantly repeats the mistake, oil leaks from the rack will inevitably appear.
- Adding unsuitable hydraulic fluid or other composition that destroys the rubber of the seals.
- Long-term operation without replacing fluid that accumulates debris and small chips. In this case, the oil seal leaks due to abrasion.
- Critical wear of the hinge joints of the steering tips with the shaft. Due to the dangling rod, air and moisture penetrate under the boot, causing corrosion. The process then proceeds according to the scenario described in the first paragraph.
Steering rack repair is possible, and the cost of the event depends on the degree of wear. In some particularly advanced situations, the unit cannot be restored.
Steering rack adjustment
The steering rack can be adjusted either directly on the vehicle or by removing a spare part. The first method is usually used after car repair. But the second one is used to slightly adjust the rack. For this work you should have the following tools:
- adjustable wrench;
- universal octagon 17 mm.
Any work related to the steering rack must be carried out while the car is either on the inspection pit or on a lift.
The procedure is as follows:
- The car is put on the handbrake. If the car is in a pit, it is necessary to install a stop under the rear wheels.
- The steering wheel is locked.
- The car's on-board network is de-energized (to do this, you need to remove the negative terminal from the battery).
- Find the nut with which the steering rack is adjusted. It is located on the rail mount on the trunk side.
- The bottom of the car is washed. It is best to use a special device for this. This is done to clean the nut responsible for adjusting the rack from dirt.
- Next, use a wrench to tighten the nut to the desired position. The nut rotates clockwise.
After this, the steering rack adjustment can be considered complete. If this procedure does not bring the expected result, it is necessary to check the condition of the tips. It is likely that they will have to be replaced.
Causes of EUR failure
Why does the electric power steering on the Lada Kalina not work, turns off and refuses to work, what are the signs of a steering wheel with power steering knocking, jamming, biting or squeaking? To repair the system yourself, you need to know how diagnostics are carried out and what causes precede the breakdown. Most often, the failure of the amplifier is caused by a breakdown of the unit itself and the amplifier fails. Problems of this type are resolved by thoroughly checking the system to identify the exact problem.
As practice shows, often the inoperability of the electric amplifier (failure) is associated with a breakdown of the speed controller.
Consequences:
- the steering wheel is jammed,
- jams
- becomes tight
- and others
Because the speed controller sensor ensures activation and deactivation of the electric power steering under different driving modes. The amplifier on Kalina works if the car is moving at low speed. When the speed begins to increase, the booster automatically turns off, allowing for safer machine control when driving at high speeds.
So, briefly about the reasons for the inoperability of the EUR:
- The speed controller has failed or the control unit does not receive or disappears a signal from it. In this case, the reason may lie in either a breakdown of the sensor, damaged wiring, or poor contact of the controller with the on-board network.
- The voltage in the vehicle's electrical network has decreased. The reasons can be different, ranging from a dead battery and an inoperative generator to the use of inappropriate electrical equipment in the car.
- The permissible crankshaft speed has been exceeded.
- Incorrect operation or failure of the control module. Depending on the cause, the control unit may need to be repaired; more detailed diagnostics need to be done.