When AvtoVAZ decided to install modernized transmission units on its progressive Lada Granta and Kalina models, most car enthusiasts looked at these products of the domestic automobile industry in a new way.
The updated transmission, a cable-driven gearbox, has gotten rid of the vibration that previously occurred during driving. At the heart of the design of the switching unit, instead of the previously familiar rods with the scenes, there are now connecting cables. This made it possible to eliminate the negative impact on the vibration stability of the unit.
Operational and design features
Among the main innovations of such a development as a cable-driven gearbox is a reduction in the volume of oil used in the box. Previously, the manufacturer assumed the use of mineral fluid in a volume of 3 liters, but now the unit requires semi-synthetic fluid with the amount reduced to 2.2 liters.
Many Lada Granta owners are concerned about the question that has arisen: what type of oil should they choose when replacing a progressive gearbox to ensure its normal functionality? The manufacturer continually recommends using fluids with a viscosity parameter of “75W-85” in accordance with the “GL-4” specification.
A distinctive feature of the new cable-driven gearbox from its ancestor (VAZ-2108) is the modernized switching circuit. This confirms the fact that the fifth speed is not located to the left of the first stage, but opposite the 5th gear. This design has managed to acquire serious popularity among Grant owners. It also allows you to eliminate the moment of accidental engagement of reverse gear when moving forward.
Also among the advantages of the new transmission of the Lada Grant are the following points:
- the ability to operate in severe frost (down to minus 42 degrees) while ensuring free manipulation of the lever;
- availability of the procedure for removing the switching unit without completely dismantling the transmission unit;
- quick gear changes with a minimum of effort;
- increased reliability and protection of 1st and 2nd gears due to the use of cone synchronizers;
- the fact that the intermediate segments of the synchronizers were coated with a special composition, which made it possible to improve the quality performance of the unit.
The use of a set of improvements allowed the new cable box to get rid of some previously pressing problems and acquire the ability to function stably in any conditions and modes.
The reliability and enviable functionality of the box was ensured as a result of the designers using a progressive approach to building the unit, based on computer modeling. The maximum loads exerted on the vulnerable components of the unit were correctly determined, which made it possible to improve their design and provide them with sufficient strength.
Dismantling the secondary shaft of the VAZ 2170 Priora gearbox.
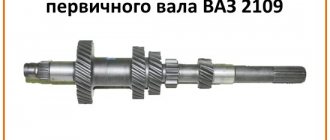
After disassembling the gearbox, we proceed to disassembling the secondary shaft. For gearboxes that have been installed on cars since 2010, a shaft with catalog number 21120-1701105-30 is installed.
Photo of the secondary shaft VAZ 21120-1701105-30:
The same shafts are installed on Grant and Kalina cars.
To disassemble the shaft, we fix it in a vice, and then press the bearing using two strong screwdrivers. Usually this is successful, but sometimes the bearing is seated so tightly that there is a risk of breaking the screwdrivers. Then we use a suitable puller.
We remove the bearing, washers, 4th gear gear and under them the hub with the 3-4th gear clutch, which is secured with a retaining ring. Remove retaining ring 1:
Using two screwdrivers, pry off the 3rd gear gear and remove the gear together with the clutch:
Under the gear we see retaining ring 2 with two half rings and a ball. Let's take them off:
Now you can remove the second gear:
Remove the double-cone synchronizer 3, then remove the retaining ring of the 1st-2nd gear hub 4:
The 1st-2nd gear hub is usually easily removed, but still, in order not to pull the clutch off the hub, it is better to pry the 1st gear gear with two screwdrivers and remove the hub together with the gear.
So, the shaft has been disassembled, now you need to wash it, carefully inspect all the parts and replace it if necessary.
What should you pay attention to?
About the uniqueness of the cable unit for Granta
Replacing the rods and rockers with a cable system in the Lada Granta was intended to reduce the impact of vibration. At first, the developers were inclined to build a hydraulic circuit for the switching unit, similar to many foreign cars. Such a decision would have caused an additional increase in cost, affecting the price of the car, so the manufacturer chose a path that would take into account the financial capabilities of a wide range of buyers. The final increase in the cost of the car due to the use of a progressive cable unit reaches 5 thousand rubles. This is quite acceptable, since the price increase is insignificant, and the transmission unit is reliable.
Note that the cable gearbox has acquired more durable forks enclosed in the shift mechanism. Previously, the manufacturer used steel parts coated with bronze. Over time, abrasion of the protective layer was observed, leading to the penetration of dust into the unit with a subsequent harmful effect on the properties of the oil.
New analog forks are endowed with increased strength and have reduced weight. Aluminum is used as the material for their manufacture. An additional measure was the use of plastic linings to protect the forks from premature wear.
Also, the manufacturer of the Lada Granta mercilessly replaced the outdated lockers and springs present in the design of the switching unit. Now the main component here is the plate, which allows you to quickly “sort out” the steps. A latch moves along the surface of this element, which conveys the “intentions” of the owner to the unit (activation of the desired gear).
The cable gearbox allowed the LADA Granta gearbox to become an attribute of comfortable control of the vehicle's driving modes. Discomfort will be guaranteed to be absent due to the leveling of vibrations.
Perhaps the future promises LADA Granta the installation of a hydraulic shift mechanism, but in the present, such a solution as a cable gearbox allows you to get maximum comfort at minimal cost. The functionality of the updated box has made it possible to sufficiently get rid of annoying problems that bring frustration and discomfort to LADA Granta owners. The differential has undergone virtually no changes (with the exception of synchronizers, as already noted). This made it possible to minimize the increase in the cost of a car with such a transmission.
The cable gearbox is very simple not only to operate, but also if repairs are necessary. This is confirmed by a separately removable switching unit, a reduced volume of lubricant and its less frequent need for replacement (after 200 thousand km or a five-year interval).
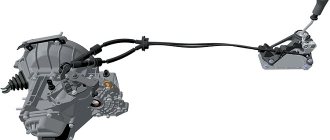
AVTOVAZ’s developments do not stand still, and in 2013 the company’s management, together with the design department, decided to switch to a new type of cable-driven gearbox. These gearboxes are installed on Lada Granta and Kalina 2 cars.
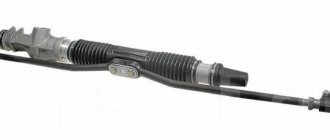
Appearance of the gearbox
"Remont-MKPP.ru" - best prices, guarantee, discounts
We eliminate all types of gearbox, transmission, and clutch malfunctions. We repair Lada Granta manual transmissions at the most affordable prices in Moscow. Understanding that you need your car every day, we will restore the mechanics on the day you arrive at the service center. As a result, you will not only get a working car, but also save money due to inexpensive spare parts and company discounts. The quality of the result is backed by a guarantee.
Phone Remont-MKPP.ru for inquiries, consultations and appointments.
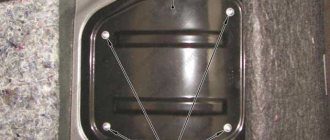
Photo report on manual transmission repair Vaz 2180
Design and differences of a cable-driven gearbox
Unlike a conventional gearbox, the cable-driven gearbox has received some improvements and upgrades.
VAZ-2181 gearbox with cable drive
In order to understand how everything works, let’s compare a standard gearbox labeled VAZ-2180 and the new VAZ-2181:
- To reduce the vibration generated by the traction drive gearbox, cables from the manufacturer Atsumitec were installed.
- To reduce the effort for shifting 1st and 2nd gears, the manufacturer installed multi-cone synchronizers.
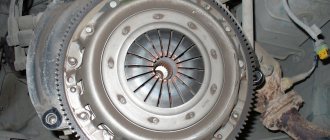
- The clutch size has increased to 215 mm.
- Due to changes in the transmission design, the starter had to be positioned along the engine rather than the gearbox.
- To facilitate gear shifting, it was necessary to reduce the bevel angle of the synchronizer teeth from 125 degrees to 100.
- To eliminate oil leaks, the designers moved the gear selection mechanism to the top. But this nuance gave impetus to the development of a new switching scheme and design changes.
- The volume of lubricant poured has decreased from 3.3 liters to 2.2 liters.
- A selector plate is installed, which allows you to change gears more clearly.
- The transition from mineral oil to semi-synthetic oil has been completed.
- To prevent accidental reverse gear, a special lock was developed.
Regulations for changing gearbox oil from AvtoVAZ
It is necessary to change the oil in the gearbox-2181 in one case - if the mileage exceeds 200,000 km.
In theory, the entire service life of the car is indicated here, and the numbers are taken from the regulations.
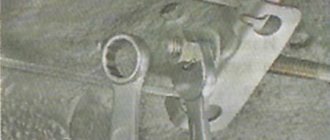
The first two dismantling steps
The thin clamp that secures the expansion tank hose is also removed (see photo).
The video shows how to change the oil
do it yourself in the gearbox
with cable drive
LADA Granta
Liftbek.
Changing the gearbox oil on a Lada Granta
Change of oil
with your own hands.
Disconnect a couple of connectors: the mass air flow sensor and the adsorber valve connector. The first of them is oval (photo below). And the second one is turned off like this: tighten the tongue, remove the terminal block.
Down with all terminal blocks!
The filter housing can be moved to the side in the final step. There is no need to disconnect it from the corrugation.
Rubber fasteners can be defeated this way: the rubber band is held with pliers, and the body is pulled back (to the left, forward). Start with the right front support.
Reconnaissance in force
We are trying to remove the reverse switch. We look for a plastic connector on the crankcase (see photo) and immediately disconnect it.
View of the gearbox housing from under the hood
Using a 22mm round wrench, try to unscrew the switch housing. Cancel the replacement if nothing can be done - neither unscrew the “top” plug, nor remove the switch.
When the switch is returned to its place, the threads are treated with sealant. The tightening torque should be 28-45 Nm.
Detailed algorithm for changing the oil in a CABLE gearbox
The oil from the Lada Granta gearbox is drained through the “bottom” plug. It is unscrewed with a 17 key.
The simplest thing is to drain the oil
You need to unscrew the cap like this: make 1-2 turns with the key, then substitute the container. And then unscrew the plug by hand.
When the liquid flows out, wipe the surface of the crankcase. We tighten the plug back (torque – 29-46 Nm). Getting ready to refuel.
Hose and funnel are ready for use
Interesting Facts
Let's look at the interesting facts that we managed to learn about the new Lada Granta gearbox:
- The VAZ-2181 gearbox will not be installed on the Priora, since the designers considered that it would not be cost-effective to redo the entire design of the power units.
- The cost of Lada Grant and Kalina 2 increased by 5000-7000 rubles. with the introduction of a new gearbox into the car.
- According to reviews from car owners, the first copies of cable-driven gearboxes were not entirely successful and had quite a lot of flaws: vibration became audible after 70-80 thousand mileage, howling of the gearbox, increased wear of parts, etc. Based on this, the manufacturer made adjustments to the design and improved the characteristics, but many car owners had a negative impression of the VAZ-2181 cable-driven gearbox.
- The AVTOVAZ plant continues to develop and modernize a new gearbox, which will become the second generation of cable gearboxes. It is planned to install it on the 2nd generation Lada Granta, which is currently under development. The designers promise to take into account the experience gained during the development of the first generation and not allow such an oversight a second time.
What cars were fitted with the VAZ 2181 gearbox?
This transmission is installed on Lada models only with eight-valve engines:
Lada
| Granta sedan 2190 | 2012 - present |
| Granta hatchback 2192 | 2018 - present |
| Granta liftback 2191 | 2014 - present |
| Grant station wagon 2194 | 2018 - present |
| Granta Cross 2194 | 2019 - present |
| Priora sedan 2170 | 2013 — 2015 |
| Priora hatchback 2172 | 2013 — 2015 |
| Priora station wagon 2171 | 2013 — 2015 |
| Kalina sedan 1118 | 2012 — 2013 |
| Kalina hatchback 1119 | 2012 — 2013 |
| Kalina station wagon 1117 | 2012 — 2013 |
| Kalina 2 hatchback 2192 | 2013 — 2018 |
| Kalina 2 station wagon 2194 | 2013 — 2018 |
| Kalina 2 Cross 2194 | 2014 — 2018 |
conclusions
It becomes clear that the cable-driven gearbox of the Lada Granta has become better than its younger brother with rigid rods. Modernization of components has improved performance, reduced vibration and improved gear shift quality. At the same time, many car owners still express dissatisfaction with increased wear and frequent breakdowns, although the plant promises to correct this deficiency.
Many people know that the new VAZ-2181 gearbox has a cable drive, some have heard about multi-cone synchronizers. And some claim that this is an old Renault box, which was given to AVTOVAZ engineers to be torn to pieces. The author has collected enough information to dispel myths and talk about interesting details of the new unit. Computer graphics by Dmitry Gorev.
LADA > Granta
LADA > Kalina
REQUIREMENTS AND SUGGESTIONS
The new product, which is installed on the “Norma” and “Lux” versions, is based on the same gearbox that appeared on the VAZ-2108 and, with minor upgrades, has survived to this day. Its weaknesses are well known: difficult activation, large lever strokes, smeared switching pattern, low vibration comfort.
Figuring out what and how we could improve, we agreed on one thing: not to touch the gear part, namely the shafts, gears, and synchronizers. Otherwise, huge financial costs will be required to launch a new gearbox into production - without high-precision equipment, it will not be possible to ensure the proper quality of engagement, operation and synchronization.
So what's new in the box with the VAZ-2181 index?
Main elements of the VAZ-2181 gearbox:
Theory of gearbox operation
At the moment, all modern gearboxes are equipped with synchronizers, which are important elements of the gearbox. The essence of how synchronizers work is that they equalize the operation of the gearbox shafts.
Every driver, when switching from second to first gear, has encountered a situation where some kind of obstacle was felt. What prevents you from engaging first gear while driving. This is the synchronizer.
If you have a fairly new transmission, then when switching from an upshift to a downshift you will not find yourself in such a situation. Switching will be carried out without problems. This manifests itself as the components of the unit are used and worn out.
If you have problems with switching, come to Ankara for diagnostics and repair of transmissions of Mitsubishi, Toyota, Lexus, Land Rover, Jaguar, Infiniti, Mercedes, BMW, Audi and other brands.
Watch a video about the design and operating principle of the gearbox:
Share this page
ALL RIGHTS TO THE COPYRIGHT MATERIALS RESERVE TO THE SITE AND THEIR AUTHORS. REPRINTING IS POSSIBLE ONLY WITH THE PERMISSION OF THE AUTHOR OR SITE ADMINISTRATION. WHEN QUOTING MATERIALS, A REFERENCE TO “dalnoboyshiki.eu” IS MANDATORY (HYPERLINK IS MANDATORY FOR ON-LINE PROJECTS).
Truckers of all countries - unite! June 16, 2004 – Birthday of the forum.
In general, reliable, mechanical gearboxes produced at the Yaroslavl Motor Plant sometimes still fail. Repairing these units is quite labor-intensive and often requires significant financial costs. Troubles can be avoided by knowing the main causes of manual transmission breakdowns. Many malfunctions are directly related to the human factor. They can be completely avoided or eliminated when the first symptoms appear.
1_no_copyright
1 - main gear drive gear;
2 - secondary shaft;
3 - input shaft;
4 — fifth gear fork;
5 — fork for selecting third and fourth gears;
6 — reversing light switch;
7 — clutch housing;
8 — gear shift mechanism;
9 - central lock.
Assembly of the secondary shaft.
We assemble the secondary shaft in the reverse order of disassembly
In this case, you should pay attention to the following points. If you removed the coupling from the hub, then put it back together, to do this, use a screwdriver to insert a cracker so that it is between the hub and the coupling as shown in the photo
We orient the coupling so that the ball is opposite the groove in the coupling during assembly. Usually, when disassembling, it is recommended to mark the coupling with the hub so that it can be reassembled in the same way as it was before. If you haven’t marked it, then in general there won’t be anything wrong with it.
Please note that the reverse gear ring must be positioned upward. Retaining ring copper-plated, increased diameter
Do not confuse it with what is installed after the 3rd-4th gear hub.
When assembling, orient the synchronizers so that their protrusions are located opposite the coupling nuts:
The thinner washers are placed first, immediately on the 4th gear gear, then the bearing, then the thick washer.
SYNCHRONIZER
So, the gear part remains the same. Almost the same: in first and second gears, we still had to install multi-cone synchronizers. Firstly, for the sake of reliability: the second stage is the most loaded, and the multi-cone will undoubtedly extend its life. Secondly, to reduce the effort when shifting gears. In addition, they plan to install the VAZ-2181 gearbox on models with more powerful engines. Therefore, a clutch with a larger diameter (215 mm) is required, which naturally has a larger moment of inertia. This is an additional argument in favor of a multi-cone synchronizer. A more powerful clutch required a different housing, because the previous one accommodated a maximum of 200 mm disc. The starter also had to be moved; now it is located not along the box, but along the engine.
The first samples were equipped with a three-cone synchronizer. But calculations have shown that double-cone, cheaper ones, can withstand the required torque with a margin (see pictures). Among other advantages, they made it possible to get rid of the problematic cone on the gears of the first and second gears, which is in contact with the synchronizer ring and requires high precision in manufacturing. The ring set now creates two friction surfaces for smooth and efficient synchronization. In addition, the German manufacturer (Ho¨rbiger) applies an additional coating to the intermediate ring, which reduces wear and ensures stable operating parameters, including the required coefficient of friction.
To make shifting easier, the bevel angle of the synchronizer teeth was reduced (from 125 to 100º) and the preload force (from 150 to 70 N). If the developers had kept the same single-cone assembly with these changes, it is possible that a crunch would have appeared when the second stage was quickly implanted (especially at low temperatures) - the so-called synchronizer breakdown. This will not happen with a multi-cone due to the larger working surface.
Step-by-step replacement instructions
Let's assume that we will change the oil in the VAZ 2181 gearbox in an ordinary garage, which does not have a pit or a lift.
- Using a knife, cut out the side surface of the canister.
Canister with cut side surface
- Before starting work, we properly warm up the VAZ 2181 gearbox. That is, you must first warm up the engine, and then drive ten kilometers so that the gears have time to disperse the oil throughout the entire transmission.
- We raise the right side of the VAZ 2181 car using a jack. We put a stand or some reliable and durable block and then lower the car. Under no circumstances should you work under a car that is supported by only one jack.
Car raised with a jack
- If the floor is cold, you can put a sheet of plywood under the car.
- If crankcase protection is provided, then it must have a cutout under the oil plug. The plug is located on the left flange of the gearbox from the bottom; if it is missing, you will need to remove the engine protection. Clean the cork with a metal brush. Wipe the surface around it with a rag. Using the “17” key, unscrew it, after placing the canister under it. The liquid that drains should be warm, not hot. We wait approximately 10-15 minutes for complete drainage, and then tighten the plug.
Location of the plug on the gearbox flange
- Using a knife, cut out the bottom of a plastic bottle.
Plastic bottle with the bottom cut off
- The air filter must be removed along with the intake pipe. To do this you need to remove the terminal from the air flow sensor.
Removing the air flow sensor terminal
- Unscrew the clamps at the throttle body and pipe and remove the intake unit completely.
- Remove the oil dipstick from the gearbox. It is located at the top.
Probe location
- We place the neck of a 1.5 liter plastic bottle to the hole for the cork. Using the bottle as a funnel, fill it in (a little less than 3 liters). Let's see if oil is leaking from the plug under the car. To do this you need to wait about ten minutes.
Use of a plastic bottle for filling liquid
- Having made sure of the tightness, we install the engine protection (if it had to be removed), and lower the car from the stand. Next, you need to top up to the “MAX” level using the dipstick. In total, the box should contain 3.2 liters.
Unscrewed dipstick
- We install the inlet pipe with filter.
It is necessary to check the oil in the gearbox of a VAZ 2181 every 15,000 km. The level is checked only when the gearbox has cooled down, with the engine turned off, and the vehicle position must be strictly horizontal.
To make it easier, you may have to remove the engine air filter. In order to find out how much fluid is needed in the VAZ 2181 gearbox:
- take the dipstick;
- wipe it with a rag and then insert it into the crankcase hole;
- Pull out the dipstick again and check the level.
It is imperative that the fluid level in the gearbox must be between o and “MAX”.
SWITCH MECHANISM
In the old box it is located at the bottom and bathes in an oil bath. After spending the night in the cold, the oil thickened, making it difficult to change gears for the first few kilometers. In addition, at the bottom of the box there were clamps for the rods and reverse forks, a reverse light switch, and a gear selection seal - all of these are potential sources of leakage. Sealants and other materials, of course, helped, but the problem was radically solved only by moving the mechanism upstairs.
The new mechanism is a separate module. It can be installed last and removed if necessary without disassembling the box. This is technologically advanced not only in production, but also in repair. Already at the concept stage developed by the VAZ team, a selector grill appeared in it, clearly repeating the gear shift pattern and setting the lever stroke when selecting gears. The mechanism includes a lock against accidental reverse gear, which is only accessible from neutral.
Having embodied the concept in metal and made it work correctly, the unit was sent for fine-tuning to the German company (Scha¨ffler), which has long been engaged in the engineering and production of engine, transmission and chassis parts. One of the most interesting changes proposed by foreign experts is the so-called three-dimensional central plate instead of several return springs and locks. Its spatial shape is calculated by a complex computer program, and the manufacturing equipment requires high precision. After all, the central locking ball walks along this plate, and it is this plate that sets the necessary forces when turning on and selecting speeds.
The characteristics of the mechanism were selected on the original simulation stand. The tester sits down on the seat and begins to go through the gears, while the automatic system imitates the shift pattern, forces and lever strokes implemented on a specific production car. You can also upload your own settings. Don't like an overly tight lever? A couple of taps on the keyboard and the effort is reduced. So, step by step, we selected the optimal settings for the “eighty-one”. The computer processed the data and produced parameters for constructing an accurate mathematical model, according to which those very tricky central plates were made.
ROPE DRIVE
Despite the simplicity and low price, almost all manufacturers abandoned the rod drive, like on the old box. Today, designs of several rods with complex scenes are used to dampen vibrations on the lever, or a more expensive and convenient cable drive. AVTOVAZ experimented with the latter back at Samara, purchasing parts from. But with the switching mechanism located at the bottom, the performance of such a circuit is problematic, and the price of components was scary at that time. Work on the cable-driven gearbox continued as part of other projects, but the production model could only be realized now.
Which transmission is better?
AvtoVAZ has really done a huge amount of work in order to provide motorists with a popular model with various types of transmission. Both mechanics, automatic machines, and robots have their advantages and disadvantages. The manual transmission model has become widespread partly because it is the most affordable. Despite the occasional hum and noise, a car with a 5-speed manual remains a good choice. But for residents of big cities, a car with an automatic transmission is best.
An automatic transmission with a torque converter will ensure comfortable control of the car and will not cause serious trouble. The version of the model with AMT is considered technologically advanced, modern, but at the same time the most problematic. There is a possibility that in the future the manufacturer will abandon the robot, giving preference to a CVT variator, as was done in the Lada Vesta. A sedan with a robot can be bought either new or second-hand on the secondary market. The second option is the most dangerous and unpredictable: often on manual transmissions, even before 100 thousand kilometers, the servomechanisms fail and the clutch wears out. It is extremely expensive to maintain and repair such a unit.
Lada Granta
Lada Granta
Interior of Lada Granta with automatic transmission Jatco JF414E
Interior of Lada Granta with robotic transmission
4_no_copyright
The single-rod gear shift drive was replaced by a cable. The unpleasant vibrations on the lever are gone, there is less play, and shifting is clearer.
It is curious that in the clutch drive, on the contrary, they planned to abandon the cable in favor of hydraulics. Unfortunately, for economic reasons, they left the previous design, although the hydraulic drive has better characteristics. In particular, the clutch pedal works more logically and clearly with it. The advantages in the layout are also obvious: it is easier to lay tubes and hoses. But the cable for the new box had to be lengthened. These are unnecessary mechanical losses, which means additional effort on the pedals and worse information content.