Comments: no Published: 06/02/2016
Rating:
Tags:Classic 2101/2103/2106/2107
Improving optics is a very common phenomenon among VAZ car owners. Many car enthusiasts argue that purchasing products from the domestic automobile industry is justified only if the owner is willing to subsequently work hard to make changes to the design. This allows you to get a good, functional vehicle without spending money on a foreign car.
Tuning headlights VAZ 2107
Tuning a VAZ 2107 can be done either at a car service center or with your own hands. In the first case, you must be prepared to incur certain financial losses, while doing the work yourself will help reduce costs.
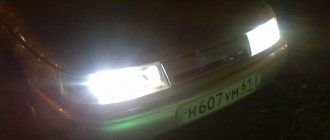
Do-it-yourself installation of LEDs in VAZ 2107 headlights
Modern technologies offer many new, more serious opportunities in the automotive industry. Experts say that using LED lamps instead of halogen lamps provides higher quality light and is more economical.
You can install LEDs with your own hands in both the front and rear lights of your car. To complete the work you will need the following materials:
- LEDs;
- resistors;
- mounting space for LEDs in the front and rear lights;
- electric drill and drill with a diameter the size of the LEDs;
- wires;
- sealant.
Once you have stocked up with everything you need, you can get to work:
- We adjust the dimensions of the seats to the front and rear lights where we are going to install the LEDs;
- We drill holes in a circle at the same distance in the seat and install the LEDs there. We select the quantity experimentally;
- We connect the contacts: positive and negative - separately;
- We put a resistor on each four diodes: we select its characteristics depending on which LEDs we chose;
- We place the seats with the entire “kitchen” in the front and rear lights, and connect them to the power supplies.
By installing LEDs on the front and rear lighting sources on your car, you will be able to appreciate the following advantages:
- the efficiency of LEDs will make it possible to significantly relieve the on-board network of your car;
- this type of lamp provides an even and diffused light - it will not dazzle drivers of oncoming cars and at the same time provide a good view of the road;
- long service life;
- reliability;
- high external aesthetics.
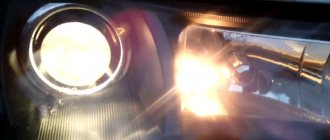
Some car enthusiasts install xenon headlights in place of halogen headlights: they shine brighter than LEDs. However, xenon strongly dazzles oncoming drivers. This is one of its significant disadvantages.
If the problem is cloudiness
The glass of the lampshade may become cloudy over time due to frequent driving. This problem, as a rule, indicates the advanced age of the device. Cloudiness occurs due to constant exposure to dust and sand. Upon closer inspection, the “haze” that has shrouded the once transparent surface looks like hundreds of small scratches. They prevent light from reaching its target by scattering it everywhere.
There are ways to prevent this unpleasant phenomenon. In order to properly care for your headlights, you need to know what material is used to create them. Glass, for example, requires virtually no special care. But soft polycarbonate, which is increasingly used in the assembly of such devices due to its lightness and safety, will require attention from the car owner.
There are special mixtures that can be used to treat polycarbonate lamps. However, the most effective way to protect headlights made of any material is a protective film. It sticks to a transparent surface without scattering light and protects it from damage.
How to do the tuning of VAZ-2107 headlights yourself
Domestic cars that were produced several decades ago are unlikely to be able to impress with their exterior. Of course, foreign cars are in a better condition in this regard.
However, recently a trend has become noticeable when some car enthusiasts deliberately purchase domestic cars from previous years. It is quite simple to explain such actions.
It’s easier to buy a car at a low cost, “forgiving” its unsightly appearance. But later, you can apply your extraordinary skills and maximum efforts and get not just a luxurious, but certainly an original and unique “horse”, which definitely has no analogue on the road.
Tuning can help in modifying the car, which can be carried out by highly qualified specialists, as well as car enthusiasts on their own if they have the desire and familiarize themselves with some practical recommendations.
Do-it-yourself LED tuning of VAZ 2107 headlights
For the “Seven” you can easily find, buy and install non-standard headlights or individual lighting elements. The cheapest solution is to install LEDs instead of standard lamps or in addition to them. This allows you to transform the appearance of your car at a minimum cost.
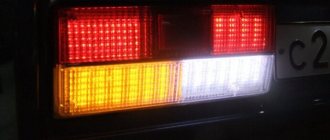
Tuning the rear lights of a VAZ 2107 is also often done by changing lamp lighting to LED.
For tuning with LEDs you will need:
- resistors;
- panel or box for mounting lighting elements (LEDs);
- drill;
- drill;
- sealant;
- wires;
- LEDs.
Important: when connecting LEDs, polarity must be taken into account. In addition to the original appearance, tuning with LEDs has other advantages:
In addition to the original appearance, tuning with LEDs has other advantages:
- low power and, as a result, low load on the on-board network;
- durability and reliability;
- diffused light that does not blind other road users.
tuning headlights VAZ 2107
Why bad light may occur on a VAZ 2114
To solve the problem, you need to understand all the nuances of the headlights. Simply replacing headlights may not give the desired effect. In some cases, changing lamps will be a waste of money.
Improving headlights
Causes of headlight malfunction:
One of the most common reasons is dirty windows. Dirt, which may appear on the headlights after prolonged use, can reduce illumination by approximately 50%. It also happens that it is quite difficult to notice any dirt on the headlights. This is due to the fact that they may not be noticeable. How to remove dirt from headlights? This may not be so easy to do, because using a dry rag is prohibited. It leaves small and unnoticeable scratches on the glass that can ruin the glass.
Recommendation. In order to wash the headlights, you need to use a special cloth and detergents. Only in this case will the car owner be able to effectively clean the headlights of all kinds of contaminants. Another way to keep your headlights clean is to install a washer.
- Minor scratches are another common cause of dim headlights. Scratches can appear for a variety of reasons. The thing is that by wiping the headlights with a regular rag or even a glove or some item of clothing, you can actually clean the surface of the headlight, but small scratches will also appear on it. As long as the number of scratches is small, this will not have any serious effect on the performance of the headlights, but after a long time there may be so many scratches that the headlights will be exceptionally dim.
- In some situations, the glass may even burst. There are many reasons for this. In Russia and other CIS countries this can happen due to temperature. If a car enthusiast notices any crack, he needs to remove the headlamp as soon as possible and replace it with a new one. If this is not done, the headlight may stop working while driving. The consequences of unexpectedly turning off the lights can be unpredictable.
- Another reason for deterioration in illumination is the age of the headlight. Over time, the headlights become increasingly cloudy. This is due to the fact that while driving, various small debris, as well as sand and dust, fall onto the surface of the headlight. As a result, very small scratches begin to appear on them. Despite the fact that they are practically invisible, these scratches are capable of refracting light according to the principle of a prism. This is an extremely unpleasant effect. It is because of this that the glass has to be replaced. How to protect the headlight from such unpleasant consequences? In this case, it is recommended to cover them with a special protective film, which can be purchased at a car store.
Tuned headlights VAZ 2114
Or maybe just change the light bulb to a powerful one?
One of the options for solving the problem of poor light on domestic cars is to install high-quality lamps. And if cars of foreign origin have quite good light bulbs installed from the factory, then our cars are equipped with something cheaper. Almost every buyer has to face this problem. Choose one of the following options:
- replacing with a new one is one of the easiest ways, but even to do this work you need to know how to properly disassemble the headlight on your car;
- gluing the working part with metallized tape from one of the well-known manufacturers is not the best option, but a temporary solution to the problem;
- glue the working part with metal foil - it is very important that the foil lies as evenly as possible, nothing prevents it from reflecting light, there is no refraction;
- painting with chrome paint is not the best option, since no paint will give the desired reflection, but in general you can partially solve the problem or drive around with restored headlights for a while;
- purchase and install mirror film, which is sold in various stores, but you need to choose the highest quality material.
How to adjust fog lights on a VAZ 2110 car
Fog lights (FTL) help to move quite comfortably on dark roads, in conditions of thick fog or heavy rain. In order for fog lights to effectively illuminate the road, they must be adjusted correctly. On a VAZ 2110 car, we make adjustments as follows:
- set the headlight range control to the zero position;
- place the machine on a flat area, at a distance of 5 meters from the wall;
- on the wall we mark a horizontal line that is on the same level as the fog lights on the car;
- using a laser on the wall we mark the center of each headlight;
- since the lifting angle of the PTF should be 2 times less than that of the low beam, the second horizontal stripe is drawn 2-3 cm lower (the tilt angle of the VAZ 2110 headlights is 1.3%!), and not 5 or 6 cm ;
- We carry out the adjustment for each PTF, at this moment closing the second headlight so that its light does not interfere with the adjustment;
- We adjust each headlight first in the center, and then in height.
Just like when setting the low beam, it is important to set the same pressure in the tires; ideally, you can put a person behind the wheel to create the same load as would be when driving a car. In the instructions that come with the headlights of the VAZ 2110, it is recommended to install the PTF at a distance of 30 centimeters from the ground; when adjusting the height of the light 5 meters from the wall, the strip for adjusting the fog lights is at a level of 29 cm
In the instructions that come with the headlights of the VAZ 2110, it is recommended to install the PTF at a distance of 30 centimeters from the ground; when adjusting the height of the light 5 meters from the wall, the strip for adjusting the fog lights runs at 29 cm.
The industry produces fog lights that are installed not only on BA3 2110-2112, but also on Lada Priora. The fog lights of Lada Granta, Kalina-2, Lada Largus, Datsun Mi-Do and On-Do have the same design; the main manufacturers of VAZ optics are AvtoSvet (Kirzhach), Bosch.
Allowed tinting: myth or reality
As of February 2016, the law established that a car owner can apply tint only if, after applying it, the light transmission of the windshield is at 75%, and the side windows at 70%. As for the rear windows, they are allowed to be tinted “tightly”, that is, until completely opaque, but only if there are rear-view mirrors on both sides of the car.
There is an exception to the rules, and the driver of the car has the right to apply a light protection strip on the windshield, the width of which will not exceed 15 centimeters. This exception was introduced so that drivers can similarly protect themselves from direct sunlight coming into their eyes.
Given that the law specifies the required light transmission of 70% and 75% for side and front windows, it may seem that drivers have the right to apply light tint, but this is not the case. The fact is that the car comes from the factory with glass, the light transmission of which is at the level of 80-85%. Considering that during operation dust, dirt and various elements of the road surface settle on them, their absorption of light increases, and even without tinting, car glass does not always comply with traffic regulations.
Based on the above, we can conclude that any darkening of the glass using a third-party film will lead to light transmission falling below the standards required by traffic regulations. Accordingly, permitted tinting simply does not exist.
How to adjust headlights, work progress step by step
If the headlights are not adjusted correctly, this can cause headlight problems. Correctly adjusting headlights is a very delicate process, however, it is very important and extremely necessary. Very often, it seems that small differences in the angle of the light flow are not capable of creating discomfort for the driver, even when driving on unlit roads. However, as practice shows, not only the health, but also the life of the car owner can depend on the correct setting of the headlights.
If your headlights are not adjusted correctly, you will dazzle motorists passing you, often leading to head-on collisions. Most drivers do not notice that the headlights are scattered; this can occur even with completely invisible damage to the bumper, although it is difficult to notice visually.
To check the direction of the light, just drive up to the wall in the dark. Deviations from the norm can be determined by eye. If there are discrepancies, adjustments should be made. Of course, you can contact a workshop or specialized service center, however, you can adjust the headlights yourself.
What does that require? A flat area, for example, the area in front of the garage is suitable for this. One side of this platform should rest against a vertical wall without corners or various irregularities.
On the wall you need to draw a line with chalk dividing the vehicle into two identical halves. The easiest way to do this is to drive the car close to the wall and determine the middle. Then you need to turn it back. For subsequent marking of the wall, you will need to know the distance from the lamp to the ground and from the center of the vehicle to the lamp. Now we draw another line on the wall, but five centimeters lower than the first. We measure the distance from the center of the car to the lamp and from the center of the lamp to the ground. The center of the headlight is the intersection of both lines.
Now let's move on to the adjustment. To do this, we drive the vehicle seven meters back and turn on the headlights. It is necessary that the angle of the headlights coincides with the line we drew. In addition, the place where the light spot goes up must coincide with the lines that intersect.
Problems with the reflector - causes and solutions
Halogen headlights, installed on the vast majority of cars in our country, have a reflector in their design. This is a piece with a fully reflective shiny metallic finish. Very often, the headlights in a car dim due to the burnout of this very reflector. The reasons for such burnout may be the installation of headlights with a higher operating temperature than standard ones. For example, you should not install 100-watt lamps in cars that have 50/55-watt options. This will cause the reflector to burn out.
You can restore it using several methods:
Each case has its own problems. For example, matte paint with a chrome tint will cause the color to be completely absorbed rather than reflected. Pay attention to the quality of disassembly and assembly of the headlight. If certain leaky areas remain, water will get inside and condensation will form. This combination of factors will quickly destroy the headlight and force you to buy a new one. Sometimes the best solution is to purchase a new reflector and have it replaced at a service center.
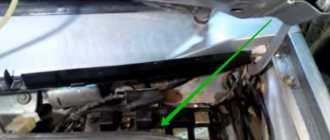
Modification of the stove - installation of a pump from a GAZelle
The material was provided by a user of our forum “Olezhek”, for which many thanks to him. For a long time, the noise of the stove was disturbing and the poor airflow of the left driver's window irritated me. On the advice of members of the forum (from autolada.ru), I completely disassembled the stove and cut out the third engine support for the stove (the one that is directed towards the engine), leaving the motor on bushings (about which later I literally regretted it for a couple of months and had to disassemble it again and replaced it with a bearing one) after this alteration, the blowing into the left air duct became much stronger, with the lid closed, but I think that I still need to cut off one jumper that I didn’t cut off the first time...
Tinting of headlights and taillights of VAZ 2107
Another common do-it-yourself tuning of VAZ 2107 headlights is tinting. It is used when upgrading both taillights and headlights. It is necessary to carefully choose the method of dimming the headlights - the quality of road lighting is a determining criterion for safety when driving at night.
Important: before tinting your headlights, you should take into account that tinted headlights may be grounds for imposing an administrative fine. You also need to understand that any tint reduces the brightness of the headlights, making night driving more dangerous.
In order for tinting to have a minimal effect on the quality of the car's headlights, it is worth tinting the glass surface only partially. This solution is safe and quite effective: narrowed headlights make the appearance more stylish. Partial tinting can also help avoid a fine - not the entire headlight is shaded, but a small sector.
To tint headlights, you must use only high-quality film. The order of work is as follows:
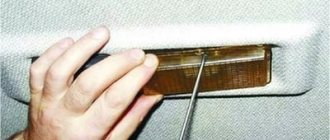
- remove the VAZ 2107 headlights;
- take out the glass;
- wash and degrease the surface;
- stick the film.
You can partially tint the headlights without removing and disassembling them - just wash the glass and stick on a strip of film. But this method does not provide adequate quality, and it is almost impossible to perfectly accurately cut and paste the film without removing the headlight unit.
When tinting the taillights, you should install brighter lamps in them so that the brake lights and side lights are clearly visible to other road users. To apply the film, it is also better to remove the rear lights from the car first.
This video shows a different car, but the principle of tinting is the same
Content
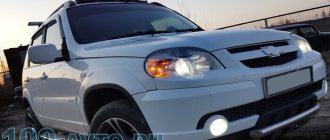
VAZ 2107 is a classic of the Soviet and Russian automobile industry. The car is easily recognizable on the road. The car is still in demand among car enthusiasts. And many owners of the “Seven” are happy to “go to great lengths” in order to change their “iron horse” beyond recognition.
In order to “modernize” the Seven, you can install various body kits, lower the ground clearance, install fashionable wheels, tint the windows, and work on the interior. But perhaps the most interesting touch is the head optics and rear lights. The strict and slightly angular design of the VAZ 2107 cannot be significantly changed. And is it worth trying? The body kits are quite enough. But you can work with headlights and lanterns. Moreover, if you have certain skills and knowledge, you can do it yourself, without turning to the help of professionals.
Tuning VAZ 2107 headlights can have many options. By the way, if you don’t want to engage in amateur activities at all, you can purchase ready-made options. Online stores sell a variety of headlights, including the famous “angel eyes”, which became popular after they appeared on some BMW models. By the way, if you decide to buy a ready-made version, you can find tinted headlights. This will save you from the need to contact specialists who professionally darken optics and glass. There are both pure black options and colored ones, like gold, chrome and so on.
Cleaning from dust and condensation
The first thing that may come to mind is to replace the headlights, improve or improve them. But initially it is necessary to perform standard manipulations.
Attention!
It is advisable to do this if the light from them was previously good, but as the vehicle’s mileage increased, it began to dim.
Car owners should check their lighting devices inside for dust or condensation. To do this, you need to check whether it is clean inside or not. If it turns out that the headlights still need to be cleaned, they should be removed carefully and washed with plain water. Before installing the devices back, they need to be thoroughly dried.
Condensation, as well as scratches, can affect the direction of light. If fogging occurs, then there is only one way out - contact the service station employees for repairs or replacement. After this procedure, the difference will be noticeable immediately.
What you need
Before starting work, we need to prepare everything we need, it will be much easier. We described above how to choose a film, now let’s look at the set of tools.
- Spray bottle with soapy water. You can use any spray bottle, even an old bottle of detergent.
- Rubber spatula (forcing). It is better to take one that is not very wide, this will allow you to work more accurately in the curves of the glass.
- Sponge. Preferably soft, it will better remove excess moisture.
- Knife. It should be sharp.
- Stationery knife or blade. The optimal solution would be a stationery knife. It's more convenient for them to work.
- Roulette.
- Powder. Regular talc powder.
- Skin. In some cases it may be necessary to clean the edges of the glass. It’s better to take “zero”.
- Construction hairdryer. Please note that only a model that can provide a not very high temperature is suitable.
This is the basic kit for tinting car windows, in some cases other tools may be required.
Preparatory stage
Before starting the adjustment, you need to go through a preparatory stage, which involves detecting defects. The latter can worsen the performance of optical devices and the cleaning of the headlights themselves:
- Initially, you need to thoroughly clean the headlights from various contaminants. To do this, it is recommended to use special detergents designed for cleaning optics.
- After cleaning the headlights with detergents, be sure to rinse the devices under running water and allow them to dry completely.
- Next, you need to check whether there are any defects on the reflectors and headlights. If the slightest cracks or chips are found on the glass, the glass will definitely have to be replaced.
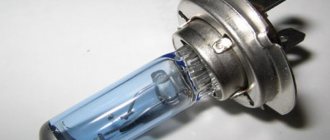
According to experts, headlights will illuminate the road better if you install xenon or halogen lamps in them. Car enthusiasts share the same opinion, having learned from their own experience that without xenon, the fog element illuminates the road much worse.
Buying halogen or xenon lamps for car headlights is quite simple by visiting a market or store.
Tools
The tools we need are:
- sprinkler;
- a special rubber “iron” (usually included in the kit);
- sharp blade (also included);
- glass cleaner;
- rags that do not leave lint (important);
- knife and scissors;
- some shampoos (any).
It is necessary to prepare a soap solution, for 1 liter of water - 20 ml (tablespoon) of shampoo.
Tinting the side windows of a VAZ will take a little time, so let's start with that.
What legal ways are there to improve headlight efficiency?
Replacing lamps
The first thing that comes to mind is replacing the standard light bulbs with lamps with increased luminous efficiency, such as OSRAM Night Breaker Unlimited or Philips X-treme Vision +130 (don’t consider it an advertisement). Yes, according to the manufacturers of these lamps, as well as many motorists who have experienced all the delights of these products, there really is an effect. Moreover, if you buy lamps with a white light spectrum, this will allow you to get less tired while driving and also put less strain on your eyes.
Headlight polishing
Constant temperature changes, sand and stones that fly from under the wheels lead to the fact that after several years of operation, the front optics become not only unpresentable, but also ineffective. The headlights become cloudy not only from the inside, but also from the outside, and the outside is much stronger and more intense. Polishing the exterior of your headlights is an opportunity to restore your headlights to their former attractiveness and efficiency. This work can also be done by each of you, you just need to have the necessary tools and materials. Read how to properly polish headlights here.
If polishing does not give anything or the headlight glasses are very cloudy, there are cracks and other defects, you will have to replace the glass or headlight assembly.
Allowed xenon
Often, automakers produce several configuration options for one model, as well as according to the requirements of a particular country. Therefore, for the same car, the same model and year of manufacture, the manufacturer can install different types of optics. If you wish, you can find original headlights with standard xenon specifically for your car, which are simply installed without any complicated manipulations. However, not everything is so simple; there are some difficulties. Firstly, the cost of the headlights, and secondly, legalization, that is, approval of the changes made to the design with the traffic police. All this, whatever one may say, will entail serious expenses, and besides, not every car has an original xenon alternative.
Read with this
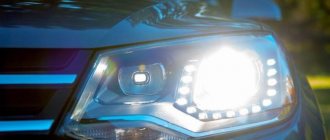
- How do Audi LED matrix headlights work?
- Features of self-adjustment of headlights on a gazelle
- Troubleshooting low beam lamps on the Lada Kalina
- Types of car lamp bases and their markings
- How to repair headlights yourself? Let's look at different ways
- DIY taillight tinting
- How to polish headlights with your own hands? polishing headlights at home
- Where is the wiper relay for VAZ 2107?
- Headlight adjustment
- Clutch drive maintenance technology for Lada 2110
General recommendations
To be able to remove window tinting with minimal time and the highest quality result, you should take into account the following recommendations:
- If you have chosen a removal method that involves exposure to high temperatures, and you have to work in the winter, first leave the car in a heated garage. There is a risk of glass cracking if the temperature difference is too high. Stick to a gradual increase in temperature and don't rush it.
- The flow of warm air should not be directed at the plastic parts of the machine for a long time, otherwise they may become deformed.
- Make sure that the film does not melt; for this you do not need to heat it excessively. The melted film cannot be removed without using sharp objects, which, in turn, can damage the glass.
- When choosing between a steamer, a household and an industrial hair dryer, give preference to the latter option, especially if we are talking about an old tint coating.
- If you decide to remove tint from your car using a soapy solution, use a cloth to protect the bottom of the glass to absorb any excess.
- Make sure that solvent or acetone does not get on the door panel trim.
- Be extremely careful when working with sharp objects; the blade should be directed towards the surface of the coating at an acute angle.
- Refrain from using abrasive materials.
- Peel off the film only after the glue has softened.
- When working with the rear window, be extremely careful, and if you are not sure of your accuracy, entrust the job to specialists.
- Always try to remove tint first with soap solutions; use chemical solvents only in extreme cases.