A couple of months ago I noticed that at the beginning of the rotation of the steering wheel there was a slight knocking sound, at first it was the steering tips, because... The anthers have been torn for a long time, I bought new steering tips, at the same time a set of front and rear silent blocks, bushings and stabilizer links. The other day before replacing the above elements, I decided to check the steering cardan, just in case, and yes, it turned out that it was loose, but everything turned out to be wrong with the steering tips Fine. I bought a new original one and replaced it in an hour or two. It’s inconvenient, of course, to change it, but there were no difficulties, I removed it by hand, and even straightened the steering wheel straight away (before removing it, I made marks everywhere and transferred them to the new part).
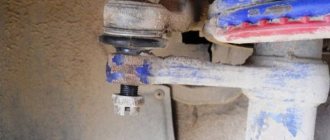
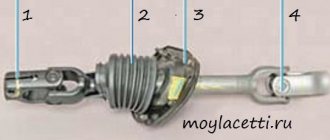
Here you can see the difference, on the old one (from below) the grease was squeezed out through the O-rings and wear began to appear.
After the replacement, the knocking sound disappeared when turning the steering wheel, and it also became quieter when driving over uneven surfaces, but I will still change the rubber bands in the chassis, even though they look even worse
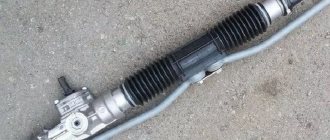
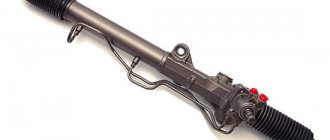
The steering crosspiece is the key to the control of the car; it is responsible for transmitting the rotation of the wheel to the rack and pinion assembly through the steering shaft cardan (the crosspiece itself is attached to it). Not just the ease of driving, but the safety and health of all passengers depends on its correct functioning. If the car has been in use for more than 100 thousand kilometers, it most likely needs repairs; it is worth studying in advance the question of when and how to change the crosspiece on the steering cardan.
How do you know when it's time to change the driveshaft?
Signs of its malfunction are noticeable, but have little effect on the quality of movement, which is why many car owners ignore the problem until the last moment, almost to the point of losing control of the car. You should not ignore signs of a malfunction; if at least two appear at once, you need to immediately carry out diagnostics. What are the signs of wear or breakage?
- When driving at a speed of more than 80 km/h, the steering wheel resists when turning, making it more difficult to turn.
- The steering wheel turns unevenly and jerks when turning, which puts additional stress on the hands.
- The steering wheel has become less sensitive, and the turning of the wheels responds to control late.
- The appearance of noticeable play (free movement of wheels with stable fixation of the steering wheel).
- Vibration of the driveshaft. Check with a tachometer to see if this vibration appears at one speed or at different speeds. Only vibration at different speeds indicates problems with the cardan; if it occurs at different speeds, but at the same frequency, then you need to think about how to change the steering cardan on a grant, because the speed of the cardan was different at that time.
- Knocking and grinding noises in the steering wheel, especially when driving on rough roads.
The last sign is the final one, indicating a serious breakdown; if brought to this stage, the mechanism will have to be completely changed, which will cost about 7 thousand rubles. If a breakdown does occur, you can carry out repairs yourself. The procedure is quite complicated, and given the importance of the mechanism, it should only be carried out if you have experience in repairing a car.
We have a knocking sound when the steering wheel is rocking in place
The most vulnerable connection is the ball joints in the tie rod ends. Inspect them out of turn. The remaining pairings are tested in order:
- Electric power steering – mounting bracket (pressure bolts are loose).
- Emergency folding system (on older machines).
- Cardan between the rack and the column.
- Rail.
- Rods are a rack and pinion mechanism.
Some nodes can be checked in alternative ways:
- Rod ends. Jack up the wheel, grab it at the 3 and 9 o'clock positions and rock it from side to side. There should be no backlash or sounds. Diagnose both sides one by one.
- A system that is triggered in case of an accident. Press the steering wheel down and jerk it left and right. If the noise stops, the cause has been found.
- Kardanchik. A slight wear in the needle bearing is indicated by a knocking sound when turning the steering wheel in motion; on a straight line there is silence.
- Rail. If when driving it knocks only on a straight line, but not when turning and turning, the middle position of the gear is worn out. For replacement.
Advice! Do not tighten a worn rack. The play will stop, but in extreme positions the steering wheel will rotate tighter. Its arbitrary return to the zero position will become impossible.
How to change the steering cardan
- It is better to roll the car into a pit (at least raise it in front of the car).
- Fix the steering wheel and steering wheel at a right angle. You should also not move or touch the wheels during repairs.
- Remove the front wheel, then unscrew the mounting bolt through the interior. If all operations are carried out correctly, the shaft should come off the steering wheel on its own.
- Remove both casings (top and bottom), make sure there is a boot on the steering shaft. If it is not there, it is better to install it after repair; the part costs no more than 200 rubles.
- Unscrew the bolt on the crosspiece, then the shaft will come off the steering rack on its own.
- Pull down and pull out the shaft. Before repairing, it is better to wash it from dirt and rust; it also affects the quality of movement.
- Secure the shaft in a vice. When it is secured, take the head and knock out the cross on one side to remove the bearing cup. Repeat the same action from the other end.
- Insert a new cross in the same order (one at a time on each side).
- Press in a new crosspiece with a vice (do not overpress).
- Align the cups and roll them with a hammer and chisel.
- Install the new part on the car in reverse order.
Many car owners note when they are looking for where and how to change the steering joint on a Toyota that steering crosspieces from the VAZ-2015 are very suitable for this brand. This greatly simplifies the process of finding parts and reduces the overall cost of repairs.
If we are talking about repairing a “workhorse”, a vehicle engaged in transportation or cargo transportation, repairs or replacements have to be made more often than once every 100 thousand km (due to the condition of most of the roads). Experienced craftsmen who give advice on how to change the driveshaft on the steering wheel of a gazelle note that it is better to install two boots at once so that the sound from the engine is quieter. At the same time, the anthers themselves can also be sealed with foam rubber rings, this significantly reduces squeaks and noise in the car interior.
The driveshaft part itself will cost from 650 rubles for domestic cars and higher for foreign cars. Plus - consumables in the form of boots and nuts.
Test before diagnosis: when does the murmur appear?
If it makes annoying noise while driving, find out where and when it happens:
- At low or high speed.
- On roads with good coverage or uneven areas, for example, when driving through potholes and various bumps.
- When turning with the steering wheel turned all the way or near the zero mark.
- In a sharp or smooth turn.
When the car is stationary, it is enough to pull the steering wheel, rocking the wheels from side to side. If there are knocks, there is no need to go anywhere. Take a partner so that you have someone to rotate the main control left and right, and you put your hand on all the joints in the “steering”. Now we’ll figure out what exactly to feel.
Why might the driveshaft break?
The most common reason is constant use of the car on uneven roads, driving over potholes and ruts. During such shaking, a large load falls on this moving part.
The second reason may be oil leakage due to a leaking oil seal. Because of the oil, the sealing ring https://podshipnik-mo.ru/koltsa-uplotnitelnyye hardens, and a gap appears between the oil seal and the rod. Or the mirror on the driveshaft connection is broken, and various roughness and burrs appear on the rod. In this case, the splines will have to be changed or sanded (but this is a temporary remedy).
A little theory: front suspension design
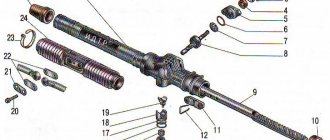
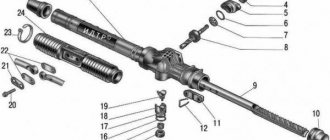
Before attempting to fix any problem, there is a tendency to look at the blueprints or repair manual. It is known that the VAZ-2192 parts catalog contains the following object:
This is what the steering rack looks like in the drawing
Whether the knock will remain in the steering rack of Kalina-2 depends on the following: how accurately element “14” is adjusted. The adjusting nut, marked “14”, looks almost invisible here. But first impressions are deceiving. In the catalog, by the way, the element is called “Stop Nut”.
It is important to know that the thrust nut has external threads. And it spins clockwise. And the words “tighten the rack” mean screwing in the specified nut, and nothing more.
Now let's move on to practice and see what the node in question looks like in reality:
How to avoid
To avoid the appearance of new knocks after repair, you must follow a few simple rules:
- Do not reach high speeds on uneven and gravel-covered roads, as well as when driving over potholes and potholes. And if you still can’t avoid this, be sure to ensure that the steering wheel is not in the extreme position at the moment the front wheels come into contact with the obstacle.
- Do not make sudden acceleration or braking when the steering wheel is in the extreme position.
- Do not drive onto curbs or high curbs.
Thanks to following these simple rules, knocks will not bother you for a long time, and the steering rack will last even longer.
Eliminating knocking noise from the Lada Granta steering rack
0:7 Installing the trawler spring
0:67
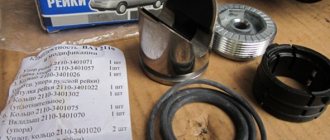
I noticed that when driving on gravel or crushed stone at 60-70 km/h, the steering rack began to tap (barely audible, but still). This knocking is not particularly annoying yet, but I started looking for a solution to the problem in advance. As usual, I turned to the great and mighty...Internet. The main cause of knocking is the so-called “disc spring”. The original one is of not entirely satisfactory quality and over time, under the influence of loads, it flattens. It is recommended to install a disc spring SS-20. I asked the consultant for a spring for the steering rack of the VAZ 2110 of the new model (it is the same as the Grantovskaya and Kalinovskaya ones), he hands me a box and it says “SS-20 Belleville Spring”. I look up at him in surprise, and he says: the best, they say.
0:1375
Photo of the minesweeper spring:
0:1424
1:1931 1:1941
2:2448
It is placed on the interior side. There are 2 hex bolts.
2:113
The knocking began to gradually increase and it was already starting to irritate. In addition, a barely noticeable rattling of something metal appeared in front of the car (the rattling was heard only on bumps and then barely, I was just used to listening to any knocks or clatters of the car and easily caught it). Over time, the rattling began to increase, but I could not understand what exactly was rattling: I shook the entire suspension, checked all the engine mounts, the gearbox trapezoid, the gearshift lever, looked through all the pipes, engine protection, etc. — nothing rattles and cannot make similar sounds (the sound is very specific).
2:1173
But after traveling 10,000 km, my gearbox began to howl, the differential began to bite, I had to urgently change the gearbox to a completely new one. Having decided that this rattling noise was coming from the gearbox, I thought that replacing it would solve the problem. But Alas, the rattling noise remained with the new gearbox. What can make such sounds? With this question, I went around a bunch of forums, each offering their own ways to solve it, even to the point of insanity. Everything turned out to be in vain. I decided to just ignore this ringing.
2:1990
But then I was finally finished off by a rattling sound in the steering rack when overcoming bumps. I was already in the mood to replace the steering rack and was mentally saying goodbye to 4500 rubles when I remembered the SS 2 disc spring I bought six months ago. I decided to try my luck, so to speak, and install it (it certainly couldn’t be worse).
2:2545
I bought 2 hex keys to loosen the bolts.
2:93
3:598
These 2 bolts are hexagon
3:660
I crawled under the panel, deciding to first rip off these bolts and only then, if they come loose, unscrew the steering cardan. But the bolts categorically did not want to turn away - the keys were just plasticine! They crumple, bend, lick off. Is there no normal metal left in our country at all? Then I remembered a set of star keys that I recently purchased:
3:1336
4:1843
they are made of good metal. And guess what, with one of these keys I unscrewed both bolts without any problems and with much effort.
4:2060
It's time to remove the driveshaft. I unscrewed it from the steering rod, unscrewed the bolt from the steering rack rod, and then, using a hammer, pressed it even deeper onto the rack rod (there the rod is long and there was a lot of free space, as if the designers specially left it for this purpose), the cardan shaft accordingly flew off the steering rod , after which, by inserting a screwdriver into the groove of the cardan shaft to loosen it a little, he forcefully removed it from the rack rod.
4:792
The point is very simple:
We unscrew 2 bolts (they hold the cardan joint at the steering rod, the second at the rack rod). First, we move the cardan as far as possible,
4:1061
5:1568
There is plenty of space on the rod and the cardan can easily be recessed lower (with the help of a hammer, only carefully)
5:1749
so that it flies off the steering rod, then remove it from the rack rod, i.e. pull up, because I’ll overthrow it, it no longer rests on anything. There is no other way to remove the cardan on the standard one. If only you remove the entire steering wheel along with the fasteners. But this is unnecessary trouble (firstly, a bunch of wires and chips will have to be disconnected, and secondly, this very fastening of the bolts to the body with shear bolts, i.e. there are bolts with torn heads and they will have to be twisted either with a gas wrench or with special clamps). I repeat once again: this method is applicable for the Standard configuration, for Kalina, tens is also suitable. With the EUR there is a different cardan and removing it is even easier.
5:2930
6:504
Cardan of a car with EUR. As you can see, it can be dismembered
6:608
Next, take out the crankcase cover, use a screwdriver to pry up all the contents and pull it out. Try not to confuse the order: When you remove the cover, you will see the upper part of the bearing with the rollers, below it is the ring and then the spring.
6:1006
7:1511
I changed the spring to SS 20. The old one is not flat at all, but a few tightenings of the steering rack and it will flatten (hence the biting) - the metal is damp. The new one is made of hardened steel and should be more elastic.
7:1894
I filled it with lubricant (I used lithol) and assembled everything in the reverse order.
7:2038
The reverse assembly principle is similar: We put the cardan all the way onto the lower shaft first, then using a hammer, lightly tap it, push it up and put it on the steering shaft. After which he tightens the bolt on the steering shaft (it must fit into a special groove; if it doesn’t fit, you won’t be able to push it through) and the bolt on the rack shaft.
7:573
Some people push rubber cubes into the kink of the cardan to get rid of vibrations in this joint. I don’t see the point in them, and I don’t have any vibration there.
7:876
Then I tightened the steering rack.
7:943
Result:
7:968
1.) The knocking sound on crushed stone and gravel has disappeared 2.) The ringing sound that I have been looking for for six months has disappeared. The ringing came from the rail, and I felt that it was somewhere in my feet.
7:1217
Many people write that this procedure is temporary, supposedly after a week or two the knocking returns.
7:1381
I will say this: I carried out this procedure in April, i.e. Two and a half months and 10,000 km have passed. The knock did not return. Maybe after 50,000-60,000 km it will return, but then the wear of the steering rack will be obvious.
7:1765
Guys, the photos posted are not all mine (some were taken from the Internet) in order to clearly explain.
7:1953
Yes, many describe a method for replacing a disc spring, but most simply remove the entire steering wheel, and this is unnecessary problems. My method will save your time and, partly, nerves.
7:2303
8:506
https://www.drive2.ru/l/1921413/, https://www.drive2.ru/l/4004527/
8:576 next article:
Steering rod Lada Granta
The content of the article:
Replacing the Lada Granta steering rod About installing plugs for the Lada Granta steering rod openings Plugs
9:1386
Rating 3.50 [5 vote(s)]
24349
Steering mechanism malfunctions and their elimination
The steering mechanism of the Lada Granta is quite reliable and rarely causes problems for the owner. However, this does not mean that problems do not occur at all. There are problems. And you need to know how to eliminate them.
| Cause of problems |
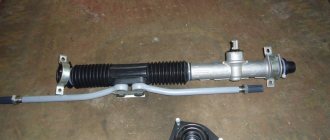
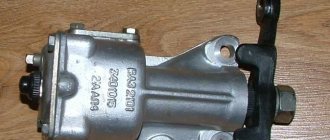
Like the braking system, engine operation and other important components and assemblies, the steering system must be periodically inspected for malfunctions. If there are no signs, protective boots and other smaller structural parts must be inspected. The steering rack of the Lada Granta is a key control mechanism. It is thanks to this that the car is controlled by turning the wheel.
Not only the comfort of control, but also the safety of the driver and his passengers depends on the serviceability of the steering mechanism. Unit problems must be diagnosed and corrected in a timely manner.
Basic steering rack faults
The main sign of a breakdown is a knocking sound when turning. At first it is almost invisible and appears when hitting potholes. If you ignore the first symptoms, the noise will not go away and will constantly get worse. Then the knock will be transmitted to the steering wheel. If you ignore this symptom, the rack will simply jam, and this risks getting into an accident due to loss of control. The rack knocks due to wear of the hinges, teeth or rubber-metal bushings (damper).
Removing the steering gear
If a knock does occur, the car owner will have to dismantle the mechanism. It is more convenient and faster to carry out this work when the vehicle is on a lift. To carry out the work you will need the necessary tools, which in this case include:
- socket wrench or socket wrench 13;
- flat screwdriver;
- durable knife;
- special 24mm wrench for the steering rack;
- hexagon 6 with wrench.
Before starting work, the battery is disconnected, thereby taking the necessary safety measures. At the initial stage, you need to first loosen the bolts securing the front wheels. The wheels themselves should be left in the “straight” position before lifting the car onto the lift. Next, the steering wheel driveshaft is disconnected from the rack and pinion drive shaft.
This work is carried out from the salon. Therefore, the car is not raised high. The swing rods can now be released by unscrewing them from the swing arms. And as soon as this work is completed, you can begin to dismantle the steering mechanism. Using a 13mm wrench, unscrew the nuts securing it and remove the mounting clamps.
The steering mechanism is removed along with the disconnected steering rods. The next step is to disassemble the removed device. Here you should free the steering rack from all protective covers that are put on the mechanism. For this purpose, cut off all the fixing clamps, which will subsequently need to be replaced with new ones.
Diagnostics, repair and reassembly
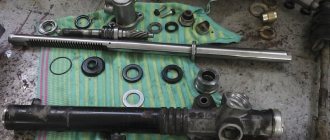
Before determining why there is a knock in the steering, you should completely disassemble the rack and carry out diagnostics for wear, destruction of components and connections. Disassembly is carried out in this order. Secure the steering rack in a vice, having previously installed spacers made of soft metal or other material. Unscrew the nut securing the mechanism crankcase pipe. The crankcase tube is removed. Remove the clamps securing the pipe bushings and remove them.
Unscrew the adjusting nut. Here you need to use a special 24mm wrench, which has external edges for unscrewing. Sequentially remove the rack stop spring, the sealing ring and the rack stop. Remove the crankcase cover. After removing the bearing cage and sealing ring, remove the rack. The second element of the steering mechanism pair - the gear shaft - is dismantled.
Now you can diagnose the condition of the bearings and sealing rings. After thorough cleaning, the wear of the gear sectors and the condition of the surface of the rack and shaft are assessed. After all, this is where the reason lies that causes the knocking that appears. If necessary, select the necessary parts and replace them.
Before reassembly, all critical connections are lubricated with a special compound. Very often, it is the insufficient amount of lubricant that leads to rapid wear of loaded parts, which violates the previously established clearance. Therefore, even a recently installed rack knocks again.
Assembling the steering mechanism is carried out in the reverse order. For dismantled bearings, you should select the required diameter for cutting pipes, which will help to correctly install the bearings in place. The assembled steering mechanism must be adjusted, since the size of the gap can also determine whether a knock will appear after reinstallation.
How to fix
The main reason for knocking is that the cardan located at the bottom of the engine shield is weakened.
The second driveshaft is not visible; it is located behind the cover of the electric power steering control unit. To make it easier to tighten and see the mechanism, you need to remove the steering wheel cover. The photo shows the electric amplifier and its electronics unit.
I removed the metal box that is held in place with screws. They were tightened very tightly; I had to use a special power screwdriver with a ratchet. Behind it you can see the second cardan, on which you need to check the tightness, which I did.
Surprisingly, nothing was loosened after 45 thousand miles. On other cars with lower mileage, the driveshafts usually weaken earlier.
Within a few minutes you can get rid of the knocking sound of the steering gearbox. Of course, this will not help in all cases. But before tightening the rack, try checking the cardans.
Write how you eliminated extraneous noise, squeaks and knocks. What was their reason and what happened. I wish you good luck and goodness!
Source
Preparatory actions, dismantling unnecessary parts
To remove the crankcase protection, you need to unscrew 4 screws located in one row near the bumper. Also, unscrew two screws having a standard size of M6 × 16. In some configurations, the protection consists of two parts, but in this case they are attached only with self-tapping screws. These words are illustrated by the following photo:
First, unscrew the “10” screws, and then the two “18” screws. In the second case, there will be more screws (eight).
Now let's look at how to remove the battery. First of all, disconnect its terminals. Then, you need to move the additional fuse box to the side. In general, actions are performed according to the photo:
You also need to remove the mounting platform itself, for which you unscrew 4 screws. You will need a 13mm wrench, as well as a 10mm spanner. We will repeat the entire sequence again:
- Unscrew the nuts holding the battery terminals using a wrench 10;
- Remove both terminals;
- Move the fuse box to the side by unscrewing 2 fastening screws;
- Unscrew the nuts with a 10mm wrench and remove the battery;
- Unscrew the screws with a 13mm and remove the metal plate.
