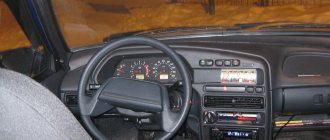
There is a saying: “When there are many diseases, there is only one problem – the spine.” Permanent curvature of the spine and pinched nerves lead to many chronic diseases. It is better to spend many hours driving in a comfortable seat. Unfortunately, the standard VAZ seats are designed for the average driver and cannot suit everyone. If you are planning to change the seats, which seats are suitable for the VAZ 2114?
Seats for VAZ 2114
Types of seats
There are three types of seats:
- racing;
- sports;
- seats of increased comfort (anatomical).
Racing seats are designed to withstand high loads. The single frame is made of high quality materials. Typically, such models are much more expensive than sports and anatomical options.
Racing seats
The sports seats consist of a single rigid frame. They are adjustable, provide hip and shoulder support, and are comfortable for long rides. But due to their rigidity, such seats are not suitable for every driver.
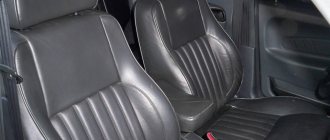
Sports chair
Anatomical seats provide lateral support when turning, correct back position and reduce the risk of musculoskeletal diseases.
In most cases, there is no need to install racing seats on your car. And seats with increased comfort and sports options can be selected quite inexpensively if you know exactly which model you need.
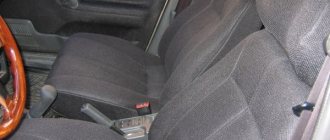
High comfort chairs
Reupholstery of seats and interior of VAZ 2110, 2111, 2112
Replacement of seat upholstery in VAZ 2110
Despite the fact that the standard upholstery was in excellent condition (especially for an 8-year-old car), there was a great desire to update the interior. I decided to start with the upholstery of the interior seats. There are two ways to do this: 1 - take the car/chairs to a workshop for reupholstery and 2 - do everything yourself.
Standard upholstery. Front seats.
Standard upholstery. Backseat.
According to the 1st method: You give the car to the masters, choose the style, material and color, pay the payment/advance payment and wait for a call to invite you to accept the salon. The cost of reupholstering all the salon seats, depending on the city/skill/greed/material/moon phase, is too different and even for an average city for jacquard-type material will be in the range of 5,000-10,000 rubles. (including material ~3000-5000 rubles and labor ~2000-5000 rubles), and should take about a week.
Method number 2: Firstly, you must be sure that you need to do it yourself, or simply do not have the money for method 1. Enlist self-support, then then choose the upholstery (you can order it in some online store or directly in a car shop from method 1) according to your interior (for 2110: 2 seat backs and an armrest, and for 2111 and 2112: one seat back with a 40/60 split), get it and change it.
Rear seat of VAZ 2110
Rear seat of VAZ 2111, 2112.
Professionals in this field will tell you more about the 1st method, I will tell you about the 2nd. As before, everything is simple. It's simple. Yes, it’s long, but it’s simple. It is not at all necessary to have hands sharpened at the desired angle, you just need to have them. I will rather reduce the entire review to a simple collection of tips on how and what to do better, and how and what it is better not to do. Let me make a reservation in advance, it took time: half a day on each of the 2 weekends (started on Sat), and 3 hours in the evening of the next 5 days. The salon was ready for the weekend.
For the operation you needed: - a set of tools (keys and screwdrivers), - wire cutters and pliers, - silicone grease, WD-shka, grease (CIATIM, Litol, etc.), - sandpaper, - paint (if you are going to paint the visible part of the front frames seats), - scissors or a sharp knife, - nylon cable ties (2.5x100 ~200 pcs are enough), - rags and napkins, - possibly double-sided thin tape (for installing or reinstalling heated seats).
I ordered jacquard upholstery in a dark shade from an online store, although I had previously planned a light one (I refused light colors, and also didn’t find a set I liked in terms of style), paid for it, and received it. I previously parked the car right in front of my entrance (I had to come back from work at lunchtime especially for this, then in the evening there would be a free space at least 150 meters away). And he started.
Received a set of new covers.
Jacquard material.
Relatively little space is required to reupholster one chair or seat: half a room or a garage. There is no need to dismantle the entire interior at once. You remove one seat, bring it home, retighten it, put it back in place, then the next one. Before you take them home and remove them, first clean them - their frames and backs will be covered in dust, dirt, and sometimes rusty.
I won’t tell you in detail how to remove and disassemble the chairs and upholstery. And in general, when replacing, the order of assembly is equal to the reverse order of disassembly.
So, you removed the front seat, brushed it off, and brought it home. Disassemble into 3 parts: seat, back and headrest. In order to simply familiarize yourself with the essence of a new operation for you and the properties of the upholstery material, start with something simple - with the headrests. We disassembled it, pulled off the old one, and put on new upholstery. Next is the back and seat.
Headrests.
All front seat upholstery is attached to the same places (special hooks on the seat frames) from where it was removed. In places where the upholstery material was attached to the frame with metal rings, we use nylon ties. Metal knitting needles are used as rigid elements of the covers (to give shape) - if the seller did not include them in the set of new covers, then take them from the old one.
Back side of the backrest. At the bottom you can see hooks - the upholstery is placed on them.
Seat back. Front side. The backs of the old style were made of straw. Later, they, like the seats, began to be made from foam casting.
Seat back. Backside.
Front seat seat. This was the state of standard heating. OK.
One moment. If your seats (like the car) are already several years old (more than 5-6), you can (better) order an additional “seat” (foam molding) in advance instead of the old driver’s seat. It is not expensive (300-500 rubles). Almost certainly, she is already in poor condition. I didn’t think about this in advance, so I had to repair the old one: I glued in a piece of thick foam rubber, trimmed it with scissors, and trimmed it. Or, as a last resort, swap the seats of the driver and passenger seats - they are identical.
Driver's seat. The left side edge was torn. Most often it is this part that suffers. This is a characteristic feature of landing in a VAZ. The reason: the lack of more or less serious lateral support for the seat, and the second is that we often sit on the edge with our feet facing the street.
If necessary, remove rust from the seat frame along with the slide elements, prime and paint. Tighten the rod (between the slide clamps) - most likely it is stretched, so it dangles and rattles - either bend the ears of the rod, or adjust the rod with the letter Z (I hope I explained it clearly), or it’s also good to put a heat-shrinkable tube on the ears and heat it up - the rattling will stop altogether. It is also necessary to clean the springs of the slide clamps from dust, then lubricate them with silicone grease, and wipe the residue dry. If in your Premiere the front seats are pushed all the way back (which is most likely, but unlikely for 2110/11/12), then you should not have problems with torsion bars (or you do not feel them). If the seats are pushed forward, then the torsion bars will probably rattle here too. The advice is the same - heat shrink tube. Slides: clean off rust, blow with WD-40, wipe dry, lubricate the inside of the gutter (where the roller runs along the slide) with grease.
Rear seats. The principle of attaching the seat and back upholstery is slightly different here, without hooks. Each cover has a hollow edging at the edges (like panties with an elastic band) around the entire perimeter, into which a rigid plastic cord is inserted. Again, if the seller did not include it in the upholstery kit, we remove it from the old one. The cover is tensioned using fastenings with metal rings that attract the cord (in the edging of the cover) to the seat/back frame. When reassembling, we replace the rings with nylon ties.
Rear seat sofa. Reverse side. The ends of the black plastic cord running inside the edging of the cover are visible, as well as the method of attaching it to the frame of the sofa.
Additional food for thought:
The new cases are thinner than the standard ones, and have the same thickness everywhere (i.e., without adding additional tabs). for example, the thickness of the “seat” part of the standard cover (both front and rear seats) is much greater than the new one, because has additional layers of ~8mm foam rubber and a thin fabric backing. I wish I could feel the heated seat through this whole sandwich. Of course. The new case has only one 2mm layer of jacquard. This is also why the seats in the new upholstery look thinner and slimmer, so to speak.
Standard thick seat upholstery with foam padding.
Despite the fact that the upholstery looked and felt (or rather seemed) absolutely clean. I was soon dissuaded of this. Because after half an hour of actively working with it, while I was taking it off, my hands became greasy and sticky, in general, not very pleasant. So, the upholstery can only be clean on the top. All the dirt, everything that once fell on it or was spilled - it’s all there, under the top pile. Still, it was not in vain that I wanted to take the car to the dry cleaner.
The reverse side of the seat. Dirt, it doesn't go anywhere. It is absorbed by the upholstery, and there is nowhere else to go - there is dense foam molding
Also, this is the most convenient moment for related work: - general cleaning of the interior, - replacement (front)/installation (rear)/repair of heated seats, - installation of lumbar support, - painting of rusted lower frames of the front seats, - replacement of broken elements (most often these are the guides of the headrests and the handles for the drive mechanism for reclining the front seats) - replacing/repairing sagging seats, - raising the front edge of the driver's seat (for those who get numbness on the right side of their butt on long trips - theoretically this should allow you to relieve the load from the muscles that hold your right leg in suspended on the pedal).
New upholstery. Accurate color reproduction.
New salon. The photo turned out to be highlighted.
New salon. The photo turned out to be highlighted.
Compare.
Installed the upholstery at the end of January. More than 6 months have passed since then and during this time I have driven almost 10 thousand km. Periodically, when I clean the interior, I inspect the upholstery: the seams are holding, there are no abrasions, it is not shiny, no pills are formed. In general, so far everything is great (pah-pah, so as not to jinx it). That’s what I answer to everyone.
But still, in order not to be unfounded, I am attaching a photo report. If someone thinks there are stains on the upholstery, it’s a dusty camera lens.
The most used seat is the driver's seat, so I only review it in detail.
There are folds visible on the left side of the seat - a consequence of the missing part of the foam seat, which I repaired - photo 12 of the article on replacing the upholstery. I'll replace the seat foam in the fall.
A slight swelling of the material is noticeable just to the right of the middle of the seat. So the heating fabric got a little lost - apparently it needed to be glued better. Again, I’ll fix it in the fall.
The folds and swelling of the material were eliminated by themselves when the seat foam was replaced.
Replacing the seat (foam molding) of the driver's seat of a VAZ 2110
This is what my seat looked like: folds and swelling of the upholstery material. This look does not suit the new salon. We should fix it.
The crease at the edge is the result of the destruction of the sidewall of the foam casting. Swelling in the middle - the poorly secured fabric of the seat heating element has slipped and become tangled.
The view is not as good as it should be.
And today I changed the seat in two hours. As before, I drove the car to the entrance, removed the seat and replaced it at home.
At that time, it turns out that I attached the heating sheet to just two strips of double-sided tape. And he couldn’t stand my fidgeting.
The heating sheet ran away.
It will be better this way.
Having previously smoothed the fabric with an iron, we put it in place.
Young woman and old woman.
Much better now.
Was - Has become
The new seat is a little harder and denser, because it has not been dented by time - I now sit 1-2 cm higher.
Interior reupholstery in Alcantara VAZ 2111
Well, finally finished with the bumper, now I can do less dusty work) I did it as always for the first time and only with my own efforts)
The entire salon did not require: - 3 full days. - 3 liters of glue. -4 meters of Alcantara. -brushes, scissors and a stationery knife.
Go. First, we dismantle the ceiling and all the plastic, bring it into the room and begin to remove the old upholstery.
Now we cut the fabric to the size of the upholstery, leaving a margin of 10-15 cm at the edges. I had a choice between gray with long pile, and brown checkered with smaller piles. I chose the checkered material.
Now we are starting to glue the whole thing, I did it in pieces, applied 40 centimeters of glue, glued it and then smeared it on.
We tuck the edges and glue them well so that in a month we don’t have to remove the ceiling and glue them again. Actually, that’s all, the ceiling is ready.
Then the bumper lit up, it was purely by accident that it got into the frame))
Now we begin to glue the plastic, there is nothing complicated, I won’t explain.
We install it on the car and HERE.
Disassembling standard seats
We need: 1. Ratchet 2. Driver 3. Sockets for: 8, 10, 13 4. Flat screwdriver 5. Some free time 1. Move the front seat as far forward as possible and remove the seat torsion bars (these are metal cables that are located under the seat and help us move them forward more smoothly and easily) Although the book says that the seat needs to be moved back as far as possible and removed with a screwdriver. What nonsense? Why remove stretched torsion bars, and even apply force, when you can calmly and effortlessly remove them with your hands. 2. Torsion bars have been removed. Now move the seat as far back as possible and use a 13mm head to unscrew the 4 nuts securing the brackets. 3. The brackets have been removed. Now we raise the seat and use a 8mm head to unscrew the 2 front bolts securing the slide.
4. Move the seat forward as much as possible and unscrew the 2 rear bolts securing the slide. 5. That's it. Now the seat can be easily removed. We carefully pull it out, trying not to scratch the door trim or panel with the sled, and take it home.
The seat has been removed, dragged home or to the garage... let's start disassembling it: 1. Using a 10mm socket, unscrew the 2 bolts on the left side and remove the plastic cover.
2. Next, we also unscrew 2 bolts on the right side. Now we need to remove the “twist” of the seat back. With a little effort, pull it towards you. It has strong latches, so don't be afraid to break it. Underneath we also see a 10mm bolt. Unscrew it and remove all the remaining parts.
If you look closely, at first glance it will seem that the seat and back are welded and riveted to each other.
I thought so too at first. But everything turns out to be much simpler. Thanks for the advice nairik. The seats are attached with these hooks. In order to separate the back of the seat from the seat, do the following: 1. Place the seat in approximately this position
2. We stand above him and grab the right hook with our right hand, and the left one with our left hand. 3. At the same time, pull the hooks away from you and press on the seat with your knee. That's it, the seat came off the hooks. 4. Take a large and long screwdriver and insert it as shown in the figure (on the right and left sides) and bend it towards you with a little effort. That's it, we separated the back from the “seat”
IMPORTANT: If you are not going to remove the upholstery from the seat for further washing and hemming, or you do not need to properly stretch the additional cover, then you do not need to disassemble the seat in half...
https://www.drive2.ru/l/2734975/, https://www.drive2.ru/l/1084060/, https://www.drive2.ru/l/2730681/, https://www .drive2.ru/l/1735494/, https://www.2114.ru/forum/showthread.php?t=14364
next article:
Interior ventilation of VAZ 2110, 2111, 2112
Contents of the article: VAZ 2110 interior air recirculation system Improving VAZ 2110 interior ventilation flows Installation
Rating 0.00 [0 Vote(s)]
General selection conditions
- Condition: new or used. New seats are more expensive, but they will last longer. Every year, thanks to modern technology, seats become more comfortable and have new functions. Used seats can be purchased at car dismantling yards.
- Manufacturing company. The 2114 fits both seats from other VAZ models and domestic brands, as well as seats from foreign cars.
- Additional options. Headrests, armrests, and lift make the seat more comfortable and safer.
- Completeness. Basically, the availability of fasteners and accessories needs to be clarified if used seats are purchased.
Choice of seats for VAZ 2114
The simplest options - almost without modifications
There are legends on the Internet that many seat models fit the VAZ 2110 without any modifications at all. But in fact, without any special modifications, you can only install Recaro from old Opel. All other options will have to be redone and digested. There are also arguments that this is not a safe process at all and could lead to disaster. Let's draw a definite line under all that has been said and give specific recommendations so that nothing bad happens:
- you will still have to weld the slides on the seats, but you don’t have to do it yourself, it’s better to order this work from a good welder, maybe not even a car mechanic;
- after welding, no further alterations are needed if you have chosen the seats correctly, that is, you have not bought too wide or high seat options because of beauty and cheapness;
- it is more difficult to change the rear sofa due to its rather specific size, but there are model options on the market with identical widths; you just need to look for offers at a disassembly site;
- you can keep all the functions of the seats from the foreign car - height adjustment, lumbar support adjustment, electrical adjustments (but they will have to be connected separately from the wiring);
- The conversion is not only possible, it is really worth it, since AvtoVAZ does not install the best seats, with the only exceptions being Vesta and X-RAY.
These are the conclusions that can be drawn from installing foreign-made seats on a VAZ 2110 car. This is a good idea that should result in positive emotions during the trip. In almost any foreign car, the seats are much more comfortable than in domestic cars. It makes no sense to install seats from Kalina or Priora in the Ten, you won’t feel a significant difference, and you’ll still have to struggle with modifications. So it’s better to find a good foreign car.
We invite you to watch a video of remaking seats for a VAZ 2110:
What seats fit on the VAZ 2114 without modifications?
The most budget option for replacing seats is to choose VAZ models. On 2114 they install seats from nine, ten and other models.
The UNP company produces anatomical and sports seats for VAZ models. The seats are made of quality materials and are sold complete with mountings and accessories.
UNP seats in VAZ
If you install a UNP seat for the driver, there will be no legroom for the rear passenger.
The Viller company offers sports and anatomical seats for all VAZ models, including 2114. The seats are certified according to GOST. They relieve stress from the spine and have enhanced lateral support. There are heated seat options.
Viller seats for VAZ 2114
Comfortable and high-quality seats from foreign cars for the VAZ 2114 can be supplied from Audi A4, Hyundai Lantra, Opel Vectra, Opel Astra and Ford. If you are going to disassemble, you need to measure the dimensions of the seats and photograph the mounting points so that you can compare and make the right choice. It is better to select seats from a donor car with the same external dimensions as 2114.
Ford seats are sometimes too wide. If you install such seats on a car, it may be difficult to pass inspection.
Ford seats for VAZ 2114
If the seats are adjustable, you need to check their condition at the place of purchase.
When considering the options for which foreign car the seats for the VAZ 2114 are suitable for, keep in mind that for a comfortable fit it is better for a fist to fit between your head and the ceiling of the cabin.
Before making the final choice of a seat, you can try it out and check for ergonomics by sitting in the cabin of the same car as the donor car.
Seats from which foreign cars can be viewed for the Tens?
What seats are suitable for the VAZ 2110? You can install almost all seats from cars of a similar size. This could be a B or C class car, which is famous for its comfort. Thanks to the abundance of disassemblies, buying used chairs will not be a problem. All that remains is to choose the chair model directly. For such a selection, it is worth focusing on already successfully completed projects, which car owners are happy to brag about in in-flight magazines. Here are just some popular examples:
- BMW E60. The seats in these models of Bavarian cars were mostly leather, and also equipped with an electric drive and other additions that the car owner would obviously like.
- Hyundai i40 or Hyundai i30. The seats are very comfortable and well thought out, and the ones from the i30 are preferable, as they leave more space in the cabin. The appearance is good and the side supports also work very well.
- Skoda Octavia A5. The seats are very comfortable and compact, there are the necessary adjustments, and well-defined lumbar support. The quality of the upholstery in this model is also pleasing, so you will definitely be satisfied with these chairs.
- Ford Focus. The alterations will be quite complex, but nevertheless, you will get excellent results. Especially if you can find seats from more expensive trim levels of this car, they are very comfortable and beautiful.
- Recaro. Many sports style lovers would like to see Recaro seats in their car. The easiest way is to find Opel proposals, but there are also solutions from other models; altering them will not be difficult even with your own hands.
This list goes on with most compact models from Volkswagen, Mercedes and other brands. There are a lot of interesting ideas on the market. But before buying chairs, you should find out if anyone has performed such an operation on their Ten before you. This can be found on the Internet, since most owners will definitely boast about such a change. However, you can try something new by posting your experience on the Internet to help others.
Heated seats
Heated seats are relevant for most Russian regions. Sitting on a frozen seat in winter is not always comfortable and safe for health. Many people neglect this option, believing that heating consumes a lot of energy.
In fact, the heating option uses the same amount of energy as the parking lights. The seat warms up quickly and then remains comfortable down to -30 °C outside the car. If you have a choice of options and you have not yet decided which seats can be installed on the VAZ 2114, it is better to install heated seats.
Set for heated seats VAZ 2114
In the 2114 model, the heating option is controlled by the on-board computer. If you independently connect the heating to the network, a short circuit may occur.
Let's sum it up
The procedure for installing more comfortable seats in the VAZ 2110 is quite acceptable. This is a good opportunity for every car owner to make their vehicle more comfortable, beautiful and enjoyable to use. But for this you need to find smart products and a good craftsman. Seats on disassembly do not always inspire confidence. Many of them are smoked, some have broken plastic adjustment knobs, frayed fabrics or altered shapes. Therefore, you should buy seats carefully, checking all the factors. It is better to agree with the seller that you will return the seat if it turns out to be of poor quality.
The process of installing a new seat on a VAZ 2110 is quite complicated. But the most difficult process will be the digestion of the fastener. If you entrust this work to a specialist, you will not experience any significant problems with further actions. The choice of chair is important. Don't go for the width of the back and leather trim. It is better to buy simple and practical products from a reputable manufacturer. Such products will serve you for a long time and will not cause trouble in the future. What kind of seats would you like to put in your car?
Seat covers
The upholstery of standard VAZ seats, as a rule, is not reliable and durable. Covers will help preserve it. You can choose covers from any material, from genuine leather to micro-suede, and in a color scheme that suits the interior and the car as a whole. When choosing covers, it is better to pay attention to options with padding polyester inserts for back support.
Seat covers
Rear sofas - what to replace them with in the VAZ 2110?
If everything is approximately clear with the front seat options, then the rear sofas require a special approach. We are talking about an unconventional size and rather strange types of fastening of a sofa from AvtoVAZ. If you are far from automotive, it is better not to modify the rear seats yourself. For this you will need the help of specialists. It is important to find a car of the same size, as wider cushions and backrests will have to be redesigned. The installation process is quite complicated:
- you need to choose good rear sofas from models such as Volkswagen Polo, Hyundai Solaris, KIA Rio, Renault Logan, and you can also pay attention to Toyota Corolla;
- Next comes the dismantling of the seats of your car, which is not particularly difficult - just unscrew a few fasteners to get all the structural parts without any difficulties;
- Next, you should try on new seats, it is quite possible that you will have to order their re-upholstery at a studio, since it is very difficult, and sometimes impossible, to guess the size perfectly;
- the next step is the installation of fasteners, it is necessary to remove the fastening parts from the VAZ seats and rearrange them on the purchased pillows and backrests for high-quality fastening;
- after that, all that remains is to install the finished seats in place and enjoy the updated interior of your car, also don’t forget to take a photo and share it on the forums and in the logbook.
Of course, this sounds much simpler than it is done. The process may take more than one day, especially if the seats need to be altered, shortened or lengthened. When choosing seats for the rear of a car, it is best to buy a whole interior set. This will help significantly reduce the cost of further alterations. After all, if you install chairs of different colors, you will have to sew covers or change the upholstery and spend extra money.
Principles of installing covers
Putting on the second upholstery is quite easy, and you can handle this task yourself. As a rule, covers are sold as a set for all car seats or only for the two front seats. The kit includes upholstery for seats, backrests and headrests. Before you start working, you need to go through all the elements and determine where each of them is intended.
When reupholstering the interior with covers yourself, it is worth keeping in mind that the left and right seats can differ significantly from each other, therefore the covers on them must be worn accordingly. Installation begins with the front seats. There is no need to dismantle them, only the headrest, if there is one. First, the back is stretched and the folds are smoothed out.
Then the elastic bands located along the central seam are secured with hooks. They must be threaded through the gap between the back and the seat. After this, the lower part of the car cover is put on. The head restraints are installed last. To put the covers on the rear row of seats, they must be dismantled and pulled out of the car.
The cover with a zipper is intended for the backrest, without it - for the chair. If the factory upholstery of VAZ seats has already become unusable, then before putting on the covers, it should be completely replaced. The procedure for completely reupholstering the interior involves dismantling the seats, and it is better to entrust it to professionals with special skills and tools.