Car body
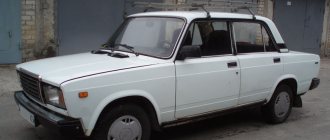
The body of the VAZ 2107 car is a rear-wheel drive four-door sedan. The assembly diagram of its frame is standard and has the following elements:
- Front parts;
- Front fenders with reinforcements;
- Roofs with glass frames;
- Reinforced floor and rear panel;
- Side parts;
- Hind wings.
Each element is cast from mild steel. Each part has not only its own number, casting pattern, but also its own thickness. For example, for the roof it is 0.9 mm, and for the rear wheel arches - 1.0 mm.
Most parts are connected using non-contact welding, but parts that bear a large load are additionally strengthened by arc welding.
Among the mounted parts it is worth highlighting:
Price list
- Special offers
- KAMAZ spare parts
- Spare parts KAMAZ-5490
- Spare parts MAZ, YaMZ
- ZIL spare parts
- Spare parts ZMZ, for GAZ vehicles
- Spare parts for Volzhanki cars
- Spare parts for Gazelists
- Spare parts for trucks Lawns
- Spare parts for GAZ-71 caterpillar
- Spare parts UAZ, UMZ
- Spare parts KrAZ, BelAZ
- Spare parts URAL
- Spare parts BUSES
- AMAZ spare parts
- IKARUS spare parts
- KAVZ spare parts
- LAZ spare parts
- LIAZ spare parts
- NEFAZ spare parts
- PAZ spare parts
- Other buses
- Tractors, computer equipment, attachments
Dimensions and specifications
Regardless of the configuration, the VAZ 2107 has the following dimensions:
- curb weight (how much is the weight of the car with equipment and materials) - 1030 kg,
- total weight (how much does a loaded car weigh with passengers and cargo) - 1430 kg
A motorist needs to know not only the standard parameters of his car, but also the control dimensions.
Control dimensions (points) are usually necessary when restoring a car after an accident. If you buy a used car, knowing these control dimensions, you can easily find out whether the car has been in an accident. This geometry will help in restoring the body, as well as other important parts.
The main control dimensions are described in detail in the diagram below:
The linear dimensions are clearly defined by the following diagram:
Identification data
The VAZ 2107 car, like any other car, has specific passport data, the liver of which is indicated in the table located under the hood on the air box.
The plate contains information about the vehicle model, engine number and body number, weight data and spare parts number. Above it is the vehicle identification number - VIN.
— The first 3 letters are responsible for the manufacturer’s code;
— 6 subsequent digits are the decoding of the car model;
— A letter or number of the Latin alphabet indicates the year of manufacture of the VAZ 2107 model;
— The last 7 digits are the required body number.
You will find the exact same number in the trunk.
This section is not under development
autodelo. info
autodelo. info Passenger Motorcycles Trucks and Commercial Engines
“Car catalog and all the news from the world of car lovers”
ALFA ROMEO AUTO UNION AUDI AUSTIN BEDFORD BMW CHRYSLER CITROËN DAF DAIHATSU DAIMLER DODGE FIAT FORD GMC HONDA INNOCENTI ISUZU IVECO JAGUAR LADA (VAZ) LANCIA MAN MAZDA MERCEDES-BENZ MG MITSUBISHI MORRIS NISSAN NSU OPEL PEUGEOT PORSCHE RENAULT ROVER SA AB SEAT SKODA SUBARU SUZUKI TALBOT TOYOTA TRIUMPH VAUXHALL VOLVO VOLKSWAGEN ZASTAVA AVIA BARKAS BORGWARD CHEVROLET DACIA EBRO GAZ SANTANA SSANGYONG STEYR TATA PIAGGIO HYUNDAI KIA DAEWOO WARTBURG TRABANT AC RENAULT TRUCKS FERRARI LAMBORGHINI ROLLS-ROYCE MASERATI RELIANT PONTIAC FSO FORD USA PROTON BUGATTI AUTOBIANCHI HOLDEN LOTUS MORGAN FORD OTOSAN ALPINE GLAS MOSKVICH BENTLEY BUICK CADILLAC GEO LEXUS MEGA PLYMOUTH PREMIER TVR ALPINA ASIA MOTORS ASTON MARTIN JEEP WESTFIELD SMART ZAZ OLDSMOBILE LINCOLN MAHINDRA ARO LDV AIXAM BERTONE BITTER BRISTOL CALLAWAY CARBODIES CATERHAM CHECKER DALLAS DE LOREAN DE TOMASO GINETTA HINDUSTAN HOBBYCAR ACURA HUMMER INDIGO IRMSCHER ISDERA JENSEN LIGIER MARCOS MCLAREN METROCAB MIDDLEBRIDGE MINELLI MINI INFINITI OLTCIT OSCA PANOZ PANTHER PAYKAN PERODUA RANGER RAYTON FISSORE BOND AUSTIN-HEALEY RILEY WOLSELEY SAO SHELBY SIPANI SPECTRE STANDARD TOFAS UAZ UMM VECTOR WIESMANN YULON PUCH LAND ROVER MAYBACH ASHOK LEYLAND ASKAM (FARGO/DESOTO) AMC LANDWIND (JMC) GEELY SUN BEAM SPYKER KTM HILLMAN YUGO DONGFENG ( DFAC) EUNOS FORD ASIA / OCEANIA FOTON GREAT WALL MITSUOKA PININFARINA LTI IRAN KHODRO (IKCO) FPV MAXUS (SAIC MOTOR) TESLA TAZZARI ARTEGA THINK NOBLE FISKER KING LONG ABARTH MIA DS (CAPSA) STREETSCOOTER RUF MICROCAR DFSK DS ZENOS CARS IZH
autodelo. info
autodelo. info Passenger Motorcycles Trucks and Commercial Engines
Famous pickup truck
For those who were looking for a spacious, convenient option, a pickup truck in any color was produced based on the VAZ 2107. It is called the VIS-2345 pickup, but it is also no longer produced. But despite this, it is still popular.
This subcompact pickup truck is easy to drive, giving you plenty of flexibility to haul as much stuff as you need. Even a refrigerator will fit into the wide isothermal booth.
The two-seater pickup truck has a fuel-injected engine. It reaches speeds of up to 110 km/h. Due to its convenience and original design, this body type is very common in America and Europe - so it’s a shame that production of this model was stopped.
Video of BMW M760Li xDrive
Technical specifications BMW M760Li xDrive (2017)
- Body type: Sedan;
- Engine: 12 cylinders, 6.6 liters, Gasoline;
- Engine power: 600 l/s;
- Torque: 800 Nm;
- Maximum speed: 250 (305) km/h;
- Average fuel consumption: 12.6 l/100 km;
- Acceleration from 0 to 100 km/h: 3.9 s;
- Drive: Full ;
- Gearbox: 8-speed automatic transmission;
- Length: 5238 mm;
- Width: 1902 mm;
- Height: 1485 mm;
- Wheelbase: 3210 mm;
- Ground clearance (Clearance): 135 mm;
- Wheels: 20-inch;
- Trunk volume: 515 liters;
Review of VAZ 2106: Soviet classic
Body replacement
The VAZ 2107 sedan or pickup truck has not been produced for several years, but drivers can still purchase bodies for their cars if necessary. If you suddenly get into an accident, or the body of your car is in disrepair, you can easily order a new one.
The action plan is simple. First, you will need to decide on the necessary equipment, as well as what type of body you need.
One package includes a new “body assembly”, which includes electrical appliances, wiring, glass, front and rear bumpers;
The other configuration is called “body in metal”. It includes a new body painted in the desired color and treated with anti-corrosion agents.
The factory provided various colors for the VAZ 2107. Each of them has its own name. For example, pale yellow is “melon”, classic red is “viburnum”, and marsh green is “Sochi”.
When ordering a body in the third configuration, you can make it in any color. It may take longer than if you had stuck with plain white paint. But a car with a bright, noticeable color will always be fun to drive.
The style of the classic AvtoVAZ 2107 model is quite elegant and strict. “Seven” is a symbol of an entire era, when, after the fifth and almost identical sixth model, car enthusiasts experienced a long-awaited update of the series. As a tuning item, the car is in great demand. This applies to the technical interior as well as the exterior. Selecting a roof rack for the VAZ 2107 is no exception.
History of creation[ | ]
In the early 1970s, AvtoVAZ Design Bureau began work on the creation of a second generation of rear-wheel drive passenger cars designed to replace the existing models VAZ-2101, VAZ-2102, 2103. Just as in the case of previous models, it was planned to create a car with a sedan body as standard. (model 2105), a station wagon (2104) and a luxury sedan (2107). The seventh model was almost identical to the fifth, but was distinguished by an improved appearance (slightly different configuration of rear lights and a chrome false grille), a more comfortable interior, largely due to new comfortable aircraft-type seats and a more powerful engine [ source not specified 193 days
]. The first running prototypes of the VAZ-2107 were built in 1978. Serial production of model 2107 started in March 1982. In fact, the VAZ-2107 pushed aside the VAZ-2103 model in terms of comfort and significance, which was soon discontinued (in 1984), but the more luxurious version of the “troika”, the VAZ-2106 model, continued to be produced as a cheaper and alternative option, Moreover, an even more luxurious “Seven” did not follow, since at the end of 1984 the production of the more modern front-wheel drive “Sputnik” family began, the first-born of which was the VAZ-2108.
The VAZ-2107 is a modified luxury version of the VAZ-2105, which, in turn, traces its origins to the Fiat 124, a subcompact family sedan from 1966 (winner of the 1967 European Car of the Year). The VAZ-2107 was exported under the names Lada Nova, Lada Riva, Lada Signet, Lada 1500
The designer of many classic cars is Vladimir Stepanov[4]
From 2002 to 2012, the VAZ-21070 (modification of the VAZ-2107) was produced in Ukraine (LuAZ, ZAZ and KrASZ[5]). In May 2008, the assembly of LADA 2107 was launched at Argun in the Chechen Republic[6]. Since March 2011, the production of LADA 2107 has been mastered by the Izhevsk Automobile Plant.
Production of the 2104 station wagon, unified with the sedan in terms of power plant, exterior and interior of the front part of the body, continued until September 17, 2012[9].
In March 2022, the analytical agency Autostat conducted a study[10], according to the results of which the LADA 2107 sedan became the most popular passenger car in Russia. In 2012, the VAZ-2107 was completely discontinued. At the time of the study, 1.75 million Russians operated this model[11].
Features of cargo transportation on a VAZ 2107
On the farm, the picture is a little different, since in addition to well-deserved love, the machine accepts and performs hard work:
- Tows trailers. But if we take into account that the plant does not equip cars with a tow bar, then each driver buys or designs a tow bar according to the weight of the payload. In cases where the traction load of the frame is not taken into account, the car suffers.
- Carries building materials sticking out of the windows. But this is not the best option, since the load blocks the visibility area in the side mirrors.
- Carries things in the internal trunk. This compartment on the “seven” requires special consideration. As in all Zhiguli cars, the skin fits the technical components: the gas tank, wheel arches, rear suspension cups and side members, creating a labyrinth. Rational use of the trunk is sometimes difficult.
- Transports long and oversized cargo. For such transportation, only the VAZ 2107 roof rack is suitable.
Types of roof racks for VAZ 2107
The VAZ-2107 car is equipped with drains. This is the original roof design. Moreover, plastic cambrics, which are called moldings, are installed from the factory. Among the well-known designs of luggage racks, the following are common:
- Railings.
- Universal racks.
- Supports installed in standard holes behind the doorway seal.
Option 2107 is a trunk with a rack attached to the gutters. Their convenience is similar to roof rails in that the gutters are quite long, and when using two crossbars on four pairwise connected support posts, the possibility of spatial movement of pressure points opens up. This is a major advantage when transporting cargo of varying lengths. A cargo basket with static supports has less travel. But when it comes to transporting boards over 3 meters in length, the distance on the gutters of 20–35 cm for moving the basket and, accordingly, the center of gravity plays a big role. By the way, it can be added that a length of 4.5 meters or more, protruding behind the bumper at the front and rear, is marked as oversized cargo using a red reflector and a flag. The sign is installed at the rear end of the load, since the front end is adjusted by the driver himself. For optimal operation of the VAZ 2107 roof rack, you will need knowledge about the permissible load and carrying capacity:
- Roof VAZ-2107 – 60 kg.
- Luggage equipment – 50–150 kg.
An asymmetrical layout results. But since the value on the roof is fixed, you need to build on it. On a perfectly flat road in the absence of strong side and head winds, as well as proper weight distribution, it is allowed to load the trunk by 75 and even 85 kg. But if you forget about the load-bearing capacity of the roof and prioritize the weight values of an expensive trunk, which are much higher, then deformation of the body support pillars is inevitable. As a result, the doors are not closed properly.
Luggage rack manufacturers
Gutter racks have been produced since USSR times. But due to the bowl-shaped shape and the small number of points of contact with the load, Soviet designs have sunk into oblivion. Although they can be found today as a rarity or an “unkillable” platform for transporting agricultural products.
- A typical representative of that era is the BelAZ gutter rack, which is still produced in Belarus to this day. Options for four and six supports differ slightly in load capacity. The total figure is 50 kg. Dimensions 1.3x1.05x0.21 m. Cost 1,200 and 2,500 rubles depending on the number of supports. Consists of 4 single and 4 paired black metal tubes. They occupy transverse positions. Perforated silver plates are screwed to the ends as side edges. The trunk's potential is limited by design.
Currently, luggage devices are made of lightweight, durable alloys using an anti-corrosion coating.
- from Rostov-on-Don is popular for its universal designs, but does not shy away from mounting on gutters. The basic model consists of six parts:
- Paw. Part of the support from the roof side.
- Clamp. Second part of the support.
- Pipe crossbar. It is made of square steel profile.
- Plastic plug. Before threading the crossbar into the rack, the plug is removed from the crossbar.
- Wing with nut. Main fastener.
- Rubber backing. She puts it on her paw.
Load capacity 70 kg. Price from 450 to 900 rubles depending on the length of the crossbars. An excellent budget option, but at speed it shows poor aerodynamics - it is noisy.
- The Ant trunk is no different in appearance from the previous one. But the price of 1,750 rubles is explained by a 2-year warranty.
Luggage baskets are installed on the Semerka. They create the necessary volume for small-sized personal items. But boxes on 2107 are a rare phenomenon. If only this is a car that has undergone exterior tuning. Then the shape of the airbox is combined with the curves of the car.
Video about installing a roof rack on gutters
At the end, two main rules should be added for installing luggage accessories on the drains of a VAZ-2107:
- Maintain alignment from the windshield and rear window.
- Tighten bolted connections evenly.
And also take care of the roof and operate the trunk in accordance with the instructions.
Body parts of the VAZ 2107 are of welded and hinged type. The first ones are connected using welding points and additionally reinforced with an arc. Attachment parts can be connected using bolts. On the VAZ 2107, body parts conventionally belong to three zones of the car: the front, middle and rear. Let's find out what their purpose is, how they affect the geometry of the body, its aerodynamics and whether they can be modernized.
General view
ATTENTION! A completely simple way to reduce fuel consumption has been found! Don't believe me? An auto mechanic with 15 years of experience also didn’t believe it until he tried it. And now he saves 35,000 rubles a year on gasoline! Read more"
The exterior of the “Seven” generally copies other VAZ models, called “classics”. On the other hand, some parts and components of the frame are not the same. They simply will not fit the general exterior due to the fact that they differ in basic parameters.
Let's start with the front. This area of the car includes these components: the hood, the apron with the front bumper (they are considered more decorative elements) and the fenders.
As for the middle part of the car, this includes the roof of the VAZ 2107, sills, and doors.
Finally, the rear of the car includes the fenders, boot lid and rear apron.
avtoexperts.ru
Clearance
, perhaps one of the most popular car characteristics requested by car enthusiasts. People are interested in the level of ground clearance of cars immediately after they know the volume and power of the engine, consumption and dynamic characteristics. And this is correct, because in our Russian conditions there is high ground clearance
A car is sometimes more important than having rear windows or even air conditioning. How to increase
ground clearance, in order to make driving a car on domestic roads more comfortable, we will tell you in this material.
Before you begin the operation of increasing the ground clearance of your car, Honor needs several aspects. First: accurately calculate the ground clearance of your car (since its value may differ from the passport value, especially if it is a foreign-made car). Second: decide what ride height you want to achieve. The point is that just increase
Ground clearance is still half the battle, but you need to take into account such parameters as departure/entry angles and the vehicle's longitudinal flotation angle. They are different for all cars, and even if you increase the ground clearance of your sedan, it will not become an SUV, it will not be better to climb hills - and all because of its geometric cross-country ability specified by the factory designers. And, finally, you will have to decide on the budget for this operation, since there are several ways to increase clearance, and the labor costs for their use are different.
Hood
Part of the body of the “seven”, covering the engine compartment. This is the main purpose of the body element: to protect the “heart” of the car from the influence of the external environment and protect it from prying eyes. The hood also has another purpose, albeit a secondary one:
- The aerodynamics of the car to some extent depend on the hood;
- The hood improves air flow to the engine. The air flows directionally and better through special air intakes and additional type of slots made in the hood;
- The hood is able to absorb the hum and slight shaking that the internal combustion engine produces during operation. This is especially noticeable at high speeds.
The connection to the body of the VAZ 2107 is carried out with hinges and bolts. The hood itself consists of 2 panels connected to each other by edge rolling followed by welding. All seams and joints are carefully sealed with mastic.
Note. The hood on the VAZ 2107 can be adjusted. For this purpose, enlarged holes are provided in the hood hinges.
The price of a hood individually, as a rule, does not exceed 2.5 thousand rubles.
At the factory production stage, the inside of the hood is covered with soundproofing material. As a rule, on the “seven” it is a polymer.
One of the modernization methods: installing a deflector
The hoods of modern cars provide special protection for the windshield and the front of the car. It is called a deflector or simply a “fly swatter”. For the “seven”, the deflector can be purchased separately and installed with your own hands.
The deflector is able to protect the hood well from the adhesion of midges when the car is moving. Because of this, it is popularly called a “fly swatter.” This protection is especially important when driving at high speed.
But this, of course, is not the only function of the deflector. Upgrading the hood in this way can improve the aerodynamic performance of the car and protect the paintwork of the main part from damage. In particular, this applies to the following points:
- The flow of oncoming air after installing the “fly swatter” will go over the windshield, leaving the last element clean. The most important thing is that the wind will no longer interfere with forward movement so much, since most of it will go up;
- The hood itself will be protected from chips and scratches that previously occurred from small stones and grains of sand in the oncoming traffic.
You can easily install the part with your own hands on basic type fasteners, that is, metal plates. The latter, as you know, come with holes and are attached on one side to the deflector, and on the other to ready-made mounts on the hood of the “seven”. See the photo for a standard fastening with a self-tapping screw.
The hood of the VAZ 2107 has the following dimensions in mm: 950x70x1420. It weighs about 14 kg. It has one of the important meanings in the geometry of the entire body, although it is a hinged element.
Professional enhancement
Now about the professional way to strengthen the body. This implies an increase in weld seams. As a rule, on the conveyor, body parts of the “Seven” are connected using point technology. This makes the body weak and not durable enough. From the same spacers, it may not withstand and fall apart.
By welding additional metal-type plates and reinforcements into insufficiently rigid areas of the body, the overall reinforcement can be significantly influenced.
Front end reinforcement
It is advisable to boil the front end first. You can buy a TV consisting of 2 parts and weld them together carefully. Lay the welds, install the front engine support bracket, add a gusset, install strong crabs.
Front reinforcement
It also makes sense to weld the seams of the side members. From the inside, steel linings will have to be installed on the side members to further strengthen them.
You can make a window outside the spar, and then insert a piece of channel and boil it. Or simply cover the entire spar with metal cladding.
Spar reinforcement
Be sure to strengthen the cups. The seams are boiled, a plate is placed on top of the cup, which significantly strengthens the part, preventing it from tearing when driving over bumps. Both front and rear cups are upgraded.
Cup and its reinforcement
The suspension mounting elements are strengthened. The seams of the slopes are boiled and a gusset is added.
Such professional modernization gives the same significant effect as installing a subframe. Only in this case the weight of the car does not increase and ground clearance is not lost. It is more convenient to carry out this work from the pit.
Reinforcement of the rear body
Now about how to strengthen the back
Particular attention here should be paid, of course, to the beam. This is what should be strengthened first.
In principle, the fastening itself does not raise any doubts about its strength, but welding with the body leaves much to be desired.
We do the following:
- We climb into the salon, where we find this same triangle;
- Cut it out by indenting 5 mm inward;
- Drill out the studs;
- We make an additional steel triangle from 2 mm iron;
- We weld it into the body;
Triangle attachment
We make holes in it for the bolts, on which we place the beam.
Now you don't have to worry about secure fastening. The beam sits firmly, is held on by bolts that can be removed if necessary and replaced. The connection with the car floor is significant, the triangle is reinforced.
As you can see, it is not necessary to contact professional services regarding body strengthening, where the price of the work may seriously surprise you. The instructions presented above, video review and photo materials will give a clear understanding of doing the work yourself. Be patient and careful and you will definitely succeed!
Facing panel (apron) and front bumper
The facing panel or front apron on the “seven” plays more of a decorative role. But besides giving a stylish appearance, an apron also provides many benefits. In particular, thanks to it, during rain, water does not fly directly onto the windshield, but is cut off by this element.
The apron is located directly under the bumper and is a flexible shield that also serves to prevent damage to the front of the car from splashes from under the wheels.
This structural element of the body has special holes for the front bumper brackets and the radiator grille (the latter is attached to it). The apron, due to its “extreme” location (bottom and front), becomes vulnerable to impacts and corrosion. Connected to the body by spot welding.
The design of the "seven" apron must be thought out carefully and correspond to the shape and geometry of the entire car body, otherwise it will simply vomit at high speed. In addition, non-compliance with geometry and design will lead to increased fuel consumption at high speed.
The price for a front apron for a VAZ 2107 individually starts from 600 rubles. The part may be of different workmanship, have a different color and different design features.
Front aprons, sold as a separate element of body decor, come with special mounts to the bumper. As for the original Semerovo ones, they are welded, as mentioned above, to the car body.
The rear apron is also required and must have special fastening plates that ensure its immovable condition and prevent it from coming off on the road.
Front bumper
The bumper is not only designed to retain the energy of a frontal impact first, but also plays a significant role in the exterior design of the Seven. In other words, this is a beam located in front and protects the body from damage in minor collisions.
Thanks to modern synthetic-based materials, bumpers have become much lighter and more beautiful than they were before. Thus, elegant bumpers with bent edges also serve as spoilers, increasing the downforce of the car.
The front and rear bumpers on the VAZ 2107 are made of plastic or thin metal and have chrome trim. They are mounted using special brackets.
The front bumper is equipped with a platform for attaching a license plate and for this reason is 5 cm wider than the rear one.
Today, the owner of the “Seven” is offered three options for bumpers for the VAZ 2107: plastic, plastic with chrome lining, and with brackets for fastening. The price starts from 600 rubles.
Front bumper tuning
Modernizing the front bumper of the “Seven”, first of all, means improving the appearance. To be honest, the factory bumpers of the VAZ 2107 family look, to put it mildly, fake. They do not carry any visual, or even more importantly, high-quality functionality.
Logbook VAZ 21074 (2006)
Hi all! So, let’s finish with the bottom; before all the work, I jacked up the car and washed it with a mini pressure washer with chemicals. In general, the factory plastisol coating is still in place, but is already cracked in places and there are small chips with rust.
In the back, where there are niches for the spare tire and the gas tank, not everything is so rosy; under the previous owner, the rear was involved in an accident. At the very least, the wing and tailgate were replaced, although, judging by the tacks from welding, it seems even both. On the right, where the gas tank is basically intact, there are only a couple of “extra” holes.
On the left, where the spare tire is, corrosion has noticeably taken its toll, you can see the wheel through the gap, and the “skirt” is well caught (more on that next time). I had already processed the inside of the niche for the spare tire a year earlier.
Since there was no time left for repairs, I decided to leave these places for next year; I may have to weld another patch or even completely cut out and change the wheel well.
First of all, I decided to paint over the burn marks by welding - there are four of them: two in front and two in the back near the jacks, one more in the rear left wheel arch.
I cleaned everything with a grinder with a petal wheel,
I degreased it and, since the metal was clean, painted it according to the scheme: epoxy primer - insulating primer - rust paint, although ordinary enamel would have been suitable, but I had a can of green paint lying around.
After complete drying, instead of anti-gravel and plastisol, I coated these places with a hybrid sealant, which was used in the anti-corrosion test: it resembles a thick paste, has good adhesion, let’s see how it behaves on the bottom.
Well, in addition I went over it with bitumen mastic from a spray can.
At the rear left, the threshold had rotted outward at the place where the jack was welded, so it was only possible to weld it from the inside of the cabin, but there was no way to get through from the outside unless you cut off the jack itself. Therefore, I decided not to touch it for now, and also paint it, maybe I can cover it with something later so that the dirt doesn’t get into the threshold.
Since touching up every chip on the bottom is a futile exercise, and everything is covered in microcracks, I decided to treat it with fully heated gun lard, in theory it should soak the whole thing.
I’ll say right away that it’s a rather dirty task, and since the lard hardens quickly, it’s better to warm the bottom with a hairdryer or heat gun, but they weren’t available. I think it’s normal, it should spread.
Then I removed the rear fender liner and also processed the arch. Oddly enough, the butyl tape with aluminum tape that was glued two years earlier to the hole in the threshold did not come off, so I did not remove them.
Here, too, the rust began to take its toll; I didn’t paint it, I just removed the loose rust and also coated it with pushsal.
A wheel rubbed a hole in the fender liner - I degreased it and sealed it with the remaining piece of vibra from the gluing.
Well, to prevent dirt from getting clogged again in the cavities of the bottom reinforcements, I inserted rubber plugs from the “8” with a diameter of 3 cm into the holes, they fit perfectly.
I moved the spars last year, so I didn’t process them.
I will write separately about the “skirt” and body work.
So, let's do the math:
- Pushsalo 1kg - 50rub
- Brush - 40 rub.
- Paint, sealant - 200 rub.
- Bottom plugs 2108-5112090 2 pcs. — 30r
Total: 320r
Subscribe! Good luck on the roads!
Wings
The front fenders on the VAZ 2107 are a separate body element with an arched cutout for the wheel. They are fastened by welding, although on most modern cars the fixation is carried out using plastic or metal fastening elements.
The main task of the wing is to protect against dirt and stones from under the wheels getting into the interior through the open glass when the vehicle is moving. The front wings are located along the engine compartment.
In addition to these functions, the wing plays an important role in the aerodynamics of the vehicle. It is not for nothing that designers working in factories and factories of famous automakers constantly subject this body element to restyling. They try to give the wings the most streamlined shape in order to reduce the rate of counter resistance or CRL.
The rear fender is also attached to the body by welding, just like the front fender. Fixation is carried out to the side of the body, the rear panel and to the floor of the fuel tank (right). To strengthen the wing, amplifiers are standardly installed on the part from the inside. The right wing is equipped with a filler flap for the fuel tank.
Instructions for replacing the front and rear wings on the "seven"
The front wing, due to its location, is often exposed to external influences and is soon damaged. Find out how to replace it yourself. Here's what to do:
- Remove the hood, bumper and other body parts that impede access from the car;
- Identify by eye the spots of spot welding. They are located in the following areas: at the installation site of the headlight, near the engine compartment on the gutter and in the door connection area;
- Take a drill and cut off the welding spots.
Advice. If the drill does not “take” welding, you can use the welding method of tearing off points.
- Using a chisel with a sharp end, disconnect the points connecting the part to the front of the car, the bottom and the pillar;
- Remove the wing;
- Using a grinder or the same chisel, knock off the remaining parts on the body.
The new wing is installed like this: first it is secured with a clamp and welded in spots, temporarily. The clamp is removed, compliance with the gaps is checked, and only then the part is finally welded to the body.
With some differences, the wing is castled from the rear:
- First, the trim in the trunk is removed, in the cabin the rear seats are dismantled;
- The wing is cut off with a grinder. In this case, it is recommended to deviate from the factory seam by 1 cm;
- Use strong pliers to grab the remaining metal on the body and remove it;
- Carefully inspect the arch and, if necessary, repair it, with mandatory primer treatment;
- The new wing is installed like the front one.
After welding work, be sure to grind the seams with a grinder and cover them with materials with high protective properties. It is advisable to coat the inside of the wings with anticorrosive.
The cost of a wing usually starts at 850 rubles.
Video on how to repair an apron and replace a wing
Part two. Corrosion
Causes of corrosion and sources of its damage Corrosion is the process of self-destruction of a material in the process of interaction with the environment. In our case, metal corrosion occurs due to:
- Winter “urban” operation;
- Cheap body restyling, under which all kinds of dirt accumulates;
- Storing the car in damp, unventilated areas.
Places of the VAZ 2101 body most susceptible to corrosion
As the experience of most car owners shows, parts of the VAZ 2101 body that are most susceptible to corrosion are located in hard-to-reach places where moisture does not evaporate for a long time (gaps, bends, flanges), namely:
- wheel arches;
- hinged elements and places of their attachment (hood, trunk, doors, sills, fenders).
And if no measures are taken, then it can move to other, more significant power elements (spars, joints of the sub-engine frame, central pillars, etc.). Depending on the degree of surface destruction, it depends on how we will restore the damaged part.
Stage one
The oxidation process is in the initial stage (chips, scratches), only a slight color change has occurred. At this stage, you can get by with small losses - cleaning the surface with a fine abrasive wheel and then polishing the surface.
Stage two
Both the color of the paint changes and its swelling occurs, that is, the destruction process occurs evenly over the surface of the element.
Corrosion of the rear wheel arch of a VAZ 2101
This type of corrosion is not so terrible; it most often occurs due to poor preparation of the element for painting. It can be relatively easily cured by repeated stripping and subsequent filling with cold-set epoxy mastic. This type of mastic has high strength, sufficient adhesion, and is easy to apply to the damaged area. It contains plasticizers and hardeners, which increase the plasticity of the resin and its impact strength, as well as fillers that reduce the shrinkage of the resins and ensure that the coefficients of thermal expansion of the metal and the resins are brought closer together.
Stage three
In this case, the destruction process already goes deep into the metal (spots, cavities, holes), which requires deeper cleaning of the affected element followed by soldering (tinning) or replacement of the entire element or its individual parts.
Tinning the body of a VAZ 2101 with tin
By the way, if you heat the metal with a torch flame to a light red glow and at the same time it does not begin to crumble into gushing sparks, then it can still be used for welding. Well, when the VAZ 2101 body parts cannot be restored at all, I replace them with new ones using resistance welding and electric welding operating in a gas environment (semi-automatic). Most often, the front and rear fenders with panels require replacement. Methods for repairing and replacing these parts can be taken as basic; to do this, you just need to find out the location of the seams for joining the elements:
Welding seams of the front tail
Welding seams of the rear tail
Front and roof welds
Rear and roof welds
To obtain optimal rigidity of elements with minimal deformation, it is best to weld parts every 50 millimeters, using small ties of 20 millimeters. As you have already noticed, do-it-yourself body repair of a VAZ 2101 is a very labor-intensive and responsible process, the quality of which directly affects the safety and service life of the car.
Roof
It is part of the metal body - the basis of the body. The task of the roof is not only to protect the interior from above, closing it, but also to absorb impact energy in an emergency. On the VAZ 2107, the roof is reinforced with cross members that act as stiffeners.
The roof of the “seven” is directly related to the overall geometry of the body. After an impact or accident, it is imperative to check whether the roof has “slipped.” To do this, the dimensions of the door diagonals are measured as follows: from the bottom of the rear corner to the top corner of the front. In addition, for things to be more convincing, the diagonal of the roof itself is measured.
The cost of the roof, as a separate element of the body, starts from 3 thousand rubles. Dimensions, mm: 1290x100x1550. Weight – 15.6 kg.
Thresholds
The main purpose of the thresholds is to protect the vulnerable sides of the car body. For this reason, thresholds are often susceptible to damage. In addition, when getting in or out of the car, passengers and the driver periodically come into contact with them, scratching the elements with their shoes. As a result, the paintwork comes off from them, which causes corrosion and rotting.
On the “seven”, the classic replacement or repair of a threshold begins with adjusting the door hinges. If this is not done, then it will not be possible to replace the threshold correctly due to the gap.
After this, the following is done:
- The doors are removable;
- The threshold is cut off (first the outer part, then the amplifier);
- The new amplifier is welded through the holes on it, as in the photo below;
- A new threshold is set.
The price for a set of thresholds for VAZ 2107 starts from 200 rubles. The thickness is usually 2-3 mm.
The remaining body parts of the VAZ 2107, such as doors and trunk lid, also have a significant place in the design of the body and its geometry.
Each of the body elements of the “seven” has its own ID number, casting pattern and thickness. So, for the roof - 0.9 mm, and for the rear wheel arches - 1 mm.
Tuning
LADA-2107, along with other “classic” models, is one of the most tuned Russian-made cars. Its cheapness, on the one hand, and outdated design, on the other, force many owners over time to make efforts to modernize the car.
For example, installing hydraulic compensators on the engine results in a noticeable reduction in engine noise and an increase in timing belt life. We also offer ready-made kits for replacing rear drum brakes with disc brakes.
Due to the large volume of classic cars in use, manufacturers of spare parts offer a lot of finished industrial products to improve consumer properties, and even conveyor suppliers offer “improved” products to replace their own components (for example, a heater motor on bushings from the factory - change to a motor with bearings). The “classics” segment probably has the widest selection of spare parts that differ from the factory equipment.
Dimensions of VAZ 2107, regardless of configuration
| Length, mm | Width, mm | Height, mm | Curb weight with equipment and materials, kg | Gross weight with passengers and cargo, kg |
| 4126 | 1620 | 1435 | 1030 | 1430 |
The body parts of the “Seven” simultaneously perform important roles, giving the entire car frame strength and functionality. You can learn more about the elements and how they are replaced from the video (one of the reviews is given above) and useful photos. Valuable information can also be found in other articles on our site.
Forget about fines from cameras! An absolutely legal new product - Traffic Police Camera Jammer, hides your license plates from the cameras that are installed in all cities. More details at the link.
- Absolutely legal (Article 12.2);
- Hides from photo and video recording;
- Suitable for all cars;
- Works through the cigarette lighter connector;
- Does not cause interference to radios and cell phones.
