The front suspension is the weak point of any car. Many owners of domestic cars are interested in how to replace the front suspension of a VAZ 2106 with their own hands. There is nothing difficult about this if you follow the instructions and use a good set of tools.
The quality of roads in our country has always not been of high quality, and it especially deteriorates after winter. After the snow melts, numerous potholes and cracks are found in the asphalt. As you know, the VAZ 2106 suspension is designed to soften vibrations transmitted from potholes on the road to the vehicle body. Over time, the chassis wears out and requires repairs, which you can do yourself.
Front suspension device for VAZ 2106
Smooth movement and maneuvering in corners depend on the front suspension of the car. Periodic inspection and maintenance are required to ensure safe driving. If while driving you hear any extraneous sounds and knocks, grinding or feel swaying - all these are signs of a malfunction in the front suspension of the VAZ 2106.
Suspension diagram
It is recommended to carry out diagnostics every 15 thousand kilometers. In this case, it is important to inspect in detail the hinges of the levers, check the condition of the lower and upper ball joints, springs and shock absorbers, as well as the levers themselves. If there are no defects, just do a wheel alignment.
How is the repair carried out?
Do-it-yourself repair of a VAZ 2106 chassis can include a wide range of works, including:
- Adjusting the bearings on the hubs.
- Replacement of grease and bearing seals.
- Replacement of front suspension shock absorbers.
- Replacing springs in pairs.
- Installing new joints on the upper and lower control arms.
- Replacement of arms, both upper and lower.
- Replacing anti-roll bar cushions on a VAZ 2106.
- Installing new upper or lower supports.
After completing all of these or one of the listed works, it is necessary to have the wheel alignment done in a specialized workshop.
Replacing the front cross member
To replace the front suspension cross member of a VAZ 2106 you will need a small set of simple tools:
- keys for 13, 17, 19 and 22;
- screwdriver;
- hammer;
- extension cords
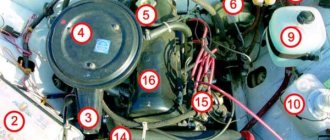
Jumper under the hood
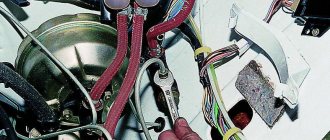
Having prepared all this, get to work. First, remove the lower front suspension arm from the car (we'll tell you how to do this below). It should be removed assembled with the ball joint and silent blocks. After this, open the hood, remove the carburetor air filter and cover this hole with something to protect it from the penetration of contaminants during operation.
Prepare a cross member that will be needed to support the engine in a suspended state when dismantling the front suspension cross member. The material used is an ordinary construction board 5 cm thick. The length of the crossbar should be made equal to the distance between the flanges of the front wings. In the middle of the traverse, make a hole into which a long bolt or pin with a bracket is inserted.
Supports under the cross member
Install a traverse on the flanges of the front wings of the VAZ 2106 under the hood and insert a long bolt and bracket into its hole. The latter should be connected with a bolt to the eye of the power unit. By slightly tightening the nut on the stud, you need to remove the gaps in the connections between the bracket bolt and the motor eye.
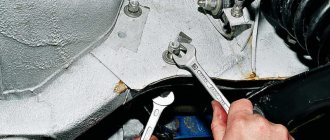
Using a socket, through the hole in the cross member on both sides, you need to unscrew the nuts holding the motor mounts and remove the nuts with spring washers. Next, place supports under the cross member and lower the car onto them so that the cross member lightly touches them.
On each side it is necessary to unscrew the horizontal and vertical bolts that secure the cross member to the side members. When jacking up the car, the cross member will remain on the supports. At this point, the process of dismantling the VAZ 2106 front suspension cross member with your own hands is completed: replace it with a new one and reassemble everything in the reverse order of disassembly.
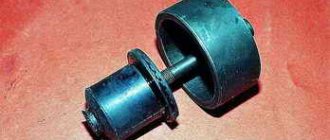
Diagnostics of silent blocks in the front arms
Why do silent blocks need to be changed over time? There are several reasons for this:
- Over time, rubber loses its elastic properties and begins to crack.
- During use of the machine or during its maintenance, oil got onto the silent block.
- Incorrect installation of the part.
- Driving on very bad roads, of which there are a great many in Russia.
Everything is diagnosed quite simply. The first thing that should alert you is the deterioration in the responsiveness of the steering wheel. But this may not be the case only, let’s look further. The second sign of dead silents, the wheels are standing like a house. On the pit or on the lift, check the integrity of the rubber bands (they should not have cracks and they should not be squeezed out). You can take a crowbar or a pry bar and try to move the levers. They should not have free movement (should not dangle).
Replacing ball joints
Sometimes self-repair of a VAZ 2106 chassis requires replacement of ball joints. First you need to diagnose the element as follows:
- hang the wheel;
- place something under the lower arm;
- lower the car.
When lowered onto the stand, the lower arm will stop putting pressure on the suspension. Grab the wheel with both hands from below and above, and make several sharp movements: the top towards you, and the bottom away from you, and then vice versa. If at the same time you hear a knock and feel play in the hub and caliper in the area of the ball joints, the front suspension of the VAZ 2106 requires repair.
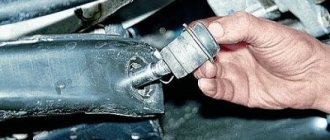
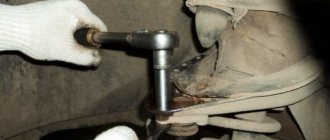
To replace, you will need a jack, a hammer and a regular set of wrenches. First you need to dismantle the wheel and unload the suspension, and then use a 22mm wrench to unscrew the nut of the lower or upper support. Give a few blows with a hammer to the protrusion of the steering knuckle, releasing the ball joint, and then release the support from the lever.
Using a 13mm wrench, unscrew the 3 nuts on the bolts securing the ball to the lever. When removing the ball from the lever, be careful. It is better to dismantle the plate along with it, not forgetting to put it in place when installing the ball joint. Don't forget that the lower and upper supports are different from each other. Assembly is carried out in the reverse order of disassembly.
Steering knuckle and front wheel hub
1 – bearing;2 – nut, 73–90 N•m;3 – stand;
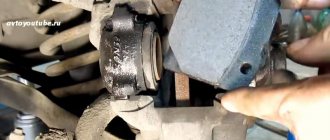
4 – steering knuckle;5 – tie rod end;6 – nut, 15–34 N•m;7 – front wheel hub;8 – brake disc;9 – nut, 220–260 N•m;10 – brake shield;11 – nut, 60–72 N•m; 12 – bolt, 65–75 N•m; 13 – retaining spring ring. Removal PERFORMANCE ORDER 1. Raise the car and remove the front wheel.2. Unscrew the drive shaft securing nut.3. Remove the caliper and secure it to the front strut with soft wire.4. Remove the speed sensor from the steering knuckle.5. Remove the cotter pin and unscrew the nut securing the tie rod end ball joint to the steering knuckle. Using a puller 09568–34000, press the ball joint pin out of the steering knuckle.
6. Mark the position and remove the bolts securing the lower part of the front suspension strut to the steering knuckle.
7. Use a nylon hammer to knock the drive shaft out of the front wheel hub. If the drive shaft is tightly seated in the front wheel hub, spray impregnating spray solvent into the spline area and then rethread the flange nut until it is flush with the end of the shaft. Using a brass hammer, hit the nut to knock the drive shaft out of the hub.8. Using puller 09568–34000, disconnect the ball joint of the lower arm from the steering knuckle.
9. Remove the steering knuckle along with the front wheel hub.10. Installation is carried out in the reverse order of removal. Disassembly PERFORMANCE ORDER 1. Remove the brake disc from the front wheel hub.2. Remove the snap ring.
3. Install special tools as shown in the picture.
4. While turning the special tool, remove the front wheel hub from the steering knuckle.5. Remove the special tool and dust ring.6. Using a special tool, remove the inner bearing race from the hub.
7. Using a special tool, remove the outer bearing race from the steering knuckle.
Check PERFORMANCE ORDER 1. Check the hub for cracks and wear.2. Check the brake disc for wear and damage.3. Check the hinge for cracks.4. Check the spring ring for cracks or damage. Assembly PROCEDURE 1. Apply a thin layer of grease to the steering knuckle bore and to the bearing outer race.2. Using a press with a mandrel of the appropriate diameter, press in a new wheel bearing.
Warning Do not apply pressure to the inner race of the bearing.3. Install the dust ring.4. Using a press with a mandrel of the appropriate diameter, press the hub into the wheel bearing.
WarningDo not apply pressure to the outer race of the bearing.5. Install the brake disc.6. Using a special tool, screw the hub to the steering knuckle, tightening the bolt of the device to a torque of 240 N•m.
7. Rotate the hub several times until the bearing elements are in place.8. Measure the torque that must be applied to rotate the bearing. Torque: 1.3 N•m9. If the torque is 0 N•m, measure the end play of the hub bearing.
10. If the torque exceeds the required value, it means that the bearing is not installed correctly in the steering knuckle and on the hub. Disassemble the steering knuckle and reassemble it. Bearing endplay: 0.08 mm
11. Remove the special tool.
Replacing the upper arm
Removing the upper arm
To replace the upper arm of the VAZ 2106 front suspension yourself, you will need keys 13 and 22, a jack, a support, and a wheel wrench for removing the wheel. To dismantle the upper front suspension arm, you must follow the instructions:
- Raise the car on a jack and remove the wheel, then place a support under the lower arm and lower the car. This is necessary to load the suspension to the point that the car is standing under its own weight. The levers will then be aligned.
- Secure the upper arm axle with a wrench and loosen the axle nut by unscrewing it until it aligns with the end of the axle.
- Unscrew the bolts that hold the upper ball joint in place, and then move the lever up a little and completely unscrew the axle nut, pulling the axle out of the lever.
- Remove the lever together with the silent blocks without dismantling them.
Next, carry out all the work that required you to remove the front suspension arm of the VAZ 2106, and install it in place or replace it with a new one. The assembly process is the same as disassembly, but in reverse order.
Removing the lower arm
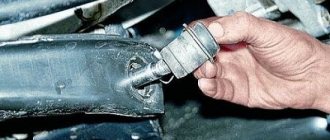
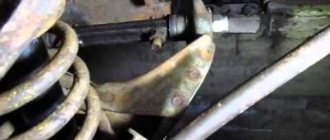
When a VAZ 2106 chassis is being repaired, it may be necessary to replace the lower front suspension arm. To work, you will need wrenches 13 and 22. First, remove the front suspension spring, and then, using a wrench, unscrew the two nuts that hold the arm to the cross member. Remove it from the cross member bolts without removing the silent blocks, axle and ball joint. If necessary, replace the ball joint or change the lever. Reinstall it in the reverse order of disassembly.
Diagnostics of rubber-metal joints
To check the condition of silent blocks, you need to use a pit or overpass. Without such amenities, it will be problematic to drive the seven, so there should be a pit in every garage. therefore, it can be repaired by hand without any problems. But you need to determine whether the VAZ-2107 silent blocks need to be replaced; the price of one is approximately 50 rubles. For a set of 8 silent blocks you will pay 400 rubles.
Carefully inspect the suspension on the lever, evaluate the appearance of the rubber-metal hinge. If the rubber has obvious damage - it has begun to become cracked, or there are any cuts at all, then all elements must be replaced. When carrying out repairs, try to do as much work as possible. Therefore, you not only change all eight silent blocks, but also, after assessing the condition of the balls, replace them if necessary. It is also worth looking at the condition and tightening the nut if necessary.
