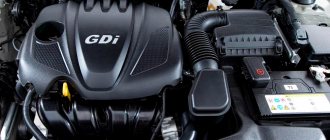
Each motorist adjusts his transport in a way that is convenient for him. For some, this is limited to adjusting the seats and steering wheel, while others begin to “tuning” their car. Many people install various spacers in their car.
Some people add struts to their car just to decorate it and show off to others. Only a small part of car enthusiasts understand what exactly spacers are for. This article will examine this element, its purpose, as well as its pros and cons in more detail.
Front strut brace: what is it and why?
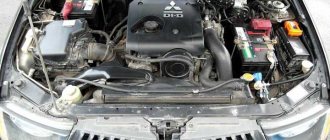
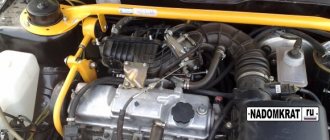
Stretching the A-pillars is not only a decorative element of the engine compartment, but also an improvement of the car, tuning its technical part. Thanks to the installation of this element, the rigidity of the body increases.
There is an opinion among car enthusiasts that the body is a solid element. In fact, this is not the case, because it consists of individual parts that are fastened together by welding seams, and in some cases, bolts.
Over time, deformations may occur in the weld areas. This process is observed even in premium segment cars. Most often this occurs due to frequent use of vehicles on uneven asphalt roads and rough terrain. The result of such processes is a decrease in body rigidity. Also, because of this, the car’s handling deteriorates, which in turn can lead to a sad outcome, even an accident. The front strut brace is needed to ensure a safe and comfortable ride.
Modern car production technologies do not provide for a frame body structure. It is made from metal no more than 1 mm thick. For this reason, body deformation increases, which leads to a change in the car's handling for the worse. This process occurs faster if the vehicle is often driven at high speeds.
Some motorists like to “take turns” at high speed. It looks impressive, but the rigidity of the body suffers greatly from this. On a new car such changes will not be noticeable, but after some time the deterioration in rigidity will be very noticeable.
Purpose of stretching the front struts:
- More stable vehicle movement on the highway;
- Improving the quality of control when entering corners;
- Maintaining the integrity and rigidity of the body, regardless of the quality of the road surface on which the car is moving.
When is an engine mount needed?
Any engine braking, sudden starting, hitting various bumps - all this is smoothed out by additional support, limiting the maximum movement of the motor. It can also prevent the gears in the box from switching off automatically.
This can happen when approaching a roundabout, when the throttle begins to be released, while the gear remains engaged. Having assessed the situation, you suddenly decide to press the gas again in the hope that you will have time to overtake the person in front. The engine howls and there is no traction on the wheels due to a gear slipping out. There is no need to talk about the consequences, they will be disastrous. Therefore, installing additional support will be the right decision. In addition, it is easy to install it yourself.
In the case of an eight-valve injection engine, it is worth purchasing a bracket designed to transfer the ignition module. This will have a positive effect on the module, raising it higher and also protecting it from road moisture.
Varieties
Most often, 2 types of spacers are used for tuning - adjustable and non-adjustable. In practice, it turned out that a spacer with a control mechanism is worse than without it because it consists of 2 parts. Such a spacer will not bring much benefit after installation and will not achieve the desired success.
There are also differences in fastenings. The most commonly used spacers are 2-hole and 3-hole spacers for installation. The hardware with 3 mounting points will last the longest, but to install it, sometimes it is necessary to drill holes in the body. It is also worth noting that its installation is more complicated.
Non-adjustable strut extensions are mainly made for a specific car model. Adjustable ones are most often universal; they can be installed in any car, even if the holes do not fit.
Spacers also differ in the manufacturing method. Some of them are made from solid material using hot stamping technology. There are also spacers consisting of previously manufactured parts that are connected by welding. The first option is more reliable, but the second can also bring a lot of benefits after installation, increasing the rigidity of the body.
Some car owners increase the rigidity of the body by installing rear strut struts, but this option is not common, since the part reduces the free space in the trunk, which is often not enough.
General overview
The body of any vehicle is assembled from many elements that are connected to each other by welding, bolts, rivets, etc., so if a certain load is applied, they gain some degree of freedom of movement in relation to each other. Most likely, anyone who has gone through extreme driving school knows this firsthand.
And the lower the degree of such freedom, the more integral the body becomes, approaching the state of a single whole. In other words, it becomes more rigid, and the higher this parameter, the better its control. This is especially felt when performing various maneuvers at high speed.
Advantages and disadvantages
The mechanism has both pros and cons. It’s better to start with the good, namely with the advantages:
- Preservation of welds in vulnerable areas of the body;
- Improved control, namely, more stable movement of the car in a straight line and sharper turns;
- The car is controlled more accurately;
- “tolerance” of the car during an aggressive driving style and increased loads;
- The body is subject to minimal risk of deformation, even when used on poor quality surfaces.
Many motorists think that if they don’t like an aggressive driving style, then they don’t need a spacer. However, this is not always the case. Thanks to the spacer, you can enter a turn at speeds higher than normal without losing control. This saves a lot of time and makes movement less difficult.
There is only one drawback to installing rack extensions, but it is very significant. Because of this, in the event of an accident, the damage is more severe. If the blow falls on the side where the spacer is installed - into the wing, then not one “glass” will be damaged, but two at once. In this case, it will be necessary to replace not just one side, but the entire front part at once, which in the future may also compromise the rigidity of the body. However, if the blow is delivered exactly in the center of the front part, then the strut can save the life of the driver and passenger, as it will prevent the body from folding towards the passenger compartment.
Recently, the production of spacers with notches has begun, thanks to which, in the event of an accident, it is not the body that will bend, but only the spacer, which will reduce costs in the event of repairs after an accident.
Due to the design of some vehicles, the spacer may reduce access to the brake fluid reservoir.
Purpose of the rear beam stabilizer
Suitable for installation on front-wheel drive models, placed on the rear beam. This helps to increase its angular rigidity. The tilt of the car is also reduced. When cornering, the tires will have better grip on the road surface. Another advantage is the even distribution of the load on the shock absorbers if one of the wheels runs over an uneven surface.
Life situations are different, and falling into holes is a common occurrence. You can hit the rear wheel so that it hangs out a lot. Even minor contact with an obstacle leads to the breaking of the shock absorber rod. Catching stones and bricks is a common thing. Reinforcing the beam with a stabilizer will help avoid such unpleasant moments. Extends the life of the shock absorber.
To summarize, we can recommend that those who are going to do something to think about their driving first. Do you really drive so aggressively that you have to suffer while driving? If everything is in order with the ride, it is calmer and more measured, you can continue to drive a production car.
Installing the front strut strut yourself
Once you purchase the spacer, you can install it yourself. However, if you do not have the necessary tools, then it is better to resort to the help of professionals. The whole process is as follows:
- The car must be on a level surface;
- With the hood open, it is necessary to unscrew all the nuts on the “glasses”;
- Now you need to put on the spacer. This should happen without difficulty;
- You also need to install washers;
- At the last stage, you need to tighten all the nuts back. They don't need to be retightened. If the spacer is adjustable, then it needs to be adjusted.
That's it, the installation is complete. As it turned out, there is nothing complicated about this.
Advantages
Many car owners doubt the effectiveness of such tuning. They treat metal guy wires with doubt and are in no hurry to install such products. Inexperienced drivers should consider a number of advantages that these stretchers have. Among them it is necessary to highlight:
- affordable price;
- ease of use;
- ease of installation;
- increasing vehicle maneuverability;
- improved body rigidity;
- increasing driving stability;
- stopping body rocking.
In addition, metal braces act as additional engine support. When turning, they reduce lateral roll. These products have different designs and fastenings - the functionality of the stretch marks depends on these parameters. Therefore, it is necessary to choose the type of such devices with the help of a specialist.
Making a spacer with your own hands
The first thing to do is to make flanges. To do this, unscrew the nuts securing the stands to the glasses and, placing cardboard on them, mark the future holes with a marker. Then cut them out in paper and put it on the pins. Now all that remains is to outline the outline of the flange according to the shape of the glass and trim off the excess cardboard. Inside the template, make a round opening corresponding to the protruding part of the support.
Ready cardboard template with holes
Important point. Make the outer edge of the template facing the engine not round, but straight, since a rib for attaching the pipe will be welded to it.
Perform further operations in this order:
- Attach the cardboard template to the sheet of metal, outline it with a marker and cut out the steel flange using a grinder. Round all edges and sand to ensure there are no burrs.
- Mark the centers of the holes and drill them according to the diameter of the studs. Use a small drill first and then a large one. Bevel both sides of the holes and try the part in place. If a discrepancy is found, widen each hole slightly with a round file.
- Cut a 4cm wide strip of steel and weld it at a 90° angle to the straight edge of the flange. To prevent the strip from bending back under pressure from the pipe, make triangular stiffening ribs and weld them along the edges.
- Place the flanges on the studs and check for distortions. Press them with two nuts and carefully measure the distance between the strips to cut the pipe as accurately as possible.
- Disconnect the battery and cover the engine compartment with a damp cloth. Attach a pipe cut to size to the flange brackets and securely weld it at both ends. Check the gap between the hood cover and your structure.
- Unscrew the nuts and remove the brace from the car. Boil all the seams thoroughly, remove the slag and try to put it back. If the structure has been welded so badly that the flanges do not fit on the studs, file the holes again.
- Remove the finished spacer again, clean it with a brush from rust, degrease it and paint it in 2 layers, after applying a primer. Place the jumper in place and finally tighten it with nuts.
Advice. If you plan to bend the spacer, do it before cutting the pipe to size.
The coupling for regulation is placed in the pipe gap
If you are a specialist in welding, then you can easily make the stretch adjustable. To do this, buy a ready-made threaded coupling of the required diameter and weld it in the middle of the cross member, having previously cut it into 2 parts. After welding, twist them together, secure the coupling with a locknut, and only then cut the pipe exactly to size between the flanges.
Note. The described method is quite suitable for making a back stretcher, if you want to do it yourself. In this case, think carefully about the design so that the jumper takes up minimal space in the luggage compartment and does not block it in the middle.
Successful design of the stretcher - it stands right behind the seats
How to make a spread with your own hands - photo
A workpiece cut from metal The workpiece must be rounded and cleaned The part is tried on in place Strips and stiffeners are welded to the homemade flange The pipe must be carefully grabbed to the flange Correct design - the pipe goes around the tank with liquid After painting, the spacer is finally attached To distribute the load, a gusset must be welded to the pipe Last fitting spacers before painting First you need to unscrew the fastening nuts
What other stretch marks are there?
In addition to non-adjustable and adjustable spacers, there are other types, it all depends on the attachment points of the spacer:
- Two-point - ordinary tubes that are attached to the shock absorber strut cups.
- Three-point – usually this design has the shape of a triangle. Such spacers are attached in the same way as two-point ones, but there is one more point for mounting on the body. Because of this, the rigidity is even higher.
The fact that the 3-point bracing gives a lot of extra rigidity to the body is definitely a plus. However, the large time investment required to install this type of structure is a clear disadvantage.
Benefits of purchasing body shop equipment from:
It’s worth buying equipment for car body repairs in, and here’s why:
- All equipment for auto body work presented in the catalog is available in stock, and you do not have to waste time waiting for delivery.
- For all products sold, we provide a full package of documents, including a warranty from the manufacturer.
- If necessary, you can order not only delivery (across the Russian Federation, Belarus and Kazakhstan), but also installation of the purchased equipment.
- Customers of the master-tool company can take advantage of a flexible system of discounts, as well as various payment methods for purchased products. It is also possible to purchase products on credit or in installments.
That's why, if you need body equipment, you should buy it on the best terms, namely in. Tel.
0 0 vote
Article rating
Clear benefits
Car body struts have both their advantages and disadvantages. But perhaps it’s worth starting with something pleasant. The obvious advantages include:
With regard to cars with high mileage and at least a shorter service life (15 years or more), one thing can be said: after the procedure of retracting the side members (and with such a long history it is necessary to do this in any case), it is recommended to install stretch marks. This is due to the previously mentioned reason – metal “fatigue”. Without proper reinforcement, the car body can quickly become unusable.
Driving on uneven or dirt roads
In addition to the above advantages, it is worth considering the behavior of the car when driving on uneven roads, as well as when cornering. Let's start with the peculiarities of moving on uneven terrain: in this case, the wheels are constantly subjected to heavy loads.
Here is another argument for those who doubt the question of why the front strut strut is needed: as the speed of the vehicle increases, the impact force will also increase. Because of this, the lower suspension arms suffer, which can lead to their deformation. Thanks to the installed spacer, shocks are absorbed by it. As a result, part of the load is removed from the main suspension elements, which helps protect them from harmful effects.

