From time to time, any car owner needs to paint his car with a raptor. Regardless of what kind of painting is required, and it can be partial or complete, such work is done strictly according to the rules. A carelessly executed coating very soon makes itself felt with chips, scratches and a very sloppy appearance of the car.
The main function of the raptor is to protect the car body from rust , mechanical damage and ultraviolet radiation. For tourism enthusiasts and truck drivers, this issue is especially relevant, because on off-road routes the car is constantly exposed to gravel, water and more. Raptor, like wax, creates a special polyurethane coating that makes the car virtually invulnerable. It is worth noting that the appearance of the body after such treatment acquires a matte, bumpy surface, which some find not very aesthetically pleasing. If you make a choice in favor of the reliability of the car, such a drawback is easier to accept.
DIY raptor painting
p, blockquote 7,0,0,0,0 —>
- After stirring, the bottle is screwed to the gun, which, in turn, must be connected to a compressor. You need to adjust the pressure to 2.5–5 atm, depending on the desired texture. Lower pressure will produce a coarser texture, and higher pressure will produce a finer texture.
- The distance and speed of the gun will also affect the texture.
- Adding thinner (up to 10%) will give a smoother finish. For this, it is better to use a special thinner, but a universal acrylic thinner will also work. It is not recommended to use solvents as they will weaken the properties of the coating.
- Experiment with pressure settings and do a test spray on cardboard to find a texture you like.
- Recommended distance is 40–45 cm (up to 150 cm). A closer distance will produce a larger texture.
- You can read about how to make passes with a gun when spraying and about the basic principles of painting in the article “Car painting technology.”
- The time required to spray diluted Raptor is 60 minutes.
- If more than 5 hours have passed since applying the layer, then before applying the next layer you need to sand the surface a little.
- U‑pol recommends applying 2–3 coats of Raptor. More than 3 layers are not recommended.
- Subsequent coats can be applied with a 60 minute drying period between coats.
- Between changing bottles, the gun must be washed for trouble-free spraying. Immediately after use, the gun must also be washed. The gun can be washed with either solvent or acetone.
Drying the Raptor coating
Raptor dries touch-free in 1 hour. After 2-3 days you can use it with caution. After 7 days, the surface painted with Raptor is completely ready for use. Drying can be accelerated by increasing the temperature (60 degrees), but complete hardening will also occur no earlier than 7 days.
p, blockquote 10,0,0,0,0 —>
It is not recommended to infrared dry the Raptor.
p, blockquote 11,0,0,0,0 —> p, blockquote 12,0,0,0,1 —>
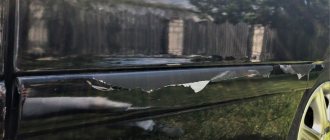
Paints for coating the bodies of modern cars have excellent characteristics and a glossy appearance. However, on jeeps, pickups, and trucks operating in harsh natural conditions when transporting goods, ordinary paint can very soon become covered with scratches from branches or abrasions from transported goods. As a result, rust appears at the site of the scratches, and the car loses its attractive appearance.
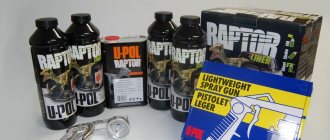
There are many products on the market for repairing car bodies. We suggest you choose products from the U-POL brand, which has more than 60 years of experience in this field. Polyurethane raptor coating and consumables for it from U-POL are specially designed for application as a protective coating on the bodies of pickup trucks, SUVs and trucks.
Paint application area
Raptor U-POL paint is a two-component paint and varnish material (LCM) that creates a protective coating of increased strength. This characteristic makes Raptor very different from conventional car paints.
The material restores even the most worn-out body coating, creating a film resistant to the following damaging factors:
- extreme temperatures, harsh climate;
- rust (corrosion);
- salt;
- mold;
- scratching, friction;
- ultraviolet radiation;
- dirt.
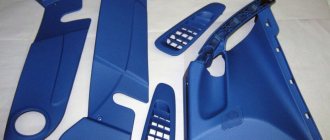
Raptor is also suitable for creating sound insulation, because after applying paint, the insulation characteristics of the car are significantly increased. The scope of application of auto enamel is varied. Its application is indicated on bumpers, plastic body kits of cars, especially SUVs and other off-road vehicles.
This material should be used by car enthusiasts who often go outdoors, hunting, or fishing. After painting, the car will not be afraid of curbs, roadsides, or icy surfaces - scratches will no longer appear.
After an accident, it is recommended that all car owners use Raptor. With higher quality, painting costs will be similar. As a result, a durable coating 2–3 mm thick is guaranteed, which will mask all surface defects. To update the appearance of Raptor U-POL is used on ATVs, bicycles, boats, and any equipment for outdoor activities.
Advantages and disadvantages of Raptor
ATTENTION! A completely simple way to reduce fuel consumption has been found! Don't believe me? An auto mechanic with 15 years of experience also didn’t believe it until he tried it. And now he saves 35,000 rubles a year on gasoline! Read more"
When applied to a car body, raptor polyurethane coating forms a protective film, which has a number of advantages over conventional car paint, namely:
- high strength of the material;
- resistance to friction;
- resistance to most chemical elements;
- easy to clean;
- does not fade in the sun;
- reliable surface protection against corrosion.
Despite all the positive aspects of the coating, the raptor is not without its drawbacks. The following points can be highlighted from them:
- the coating cannot be varnished, so it will always be matte;
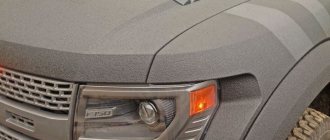
- the surface has the appearance of pebbled leather, which does not always look aesthetically pleasing;
- If the Raptor painting technology is not followed, it may chip.
Talking about Raptor, Preparing the car for applying RAPTOR protective coating
Preparing a machine for RAPTOR and applying material, a universal scheme or what needs to be done...
Sandpaper circles P80-P120 (if you don’t have it, rent a vibratory grinder for circles with a diameter of 150), open each “spider”. You coat the entire body with this abrasive, some areas of increased corrosion, loose rust, a drill with a brush and a rust converter, you spray it on the rust, wait a minute and clean it with a brush. On baked rust, it will remain dark, black growths, you can tap it with a small hammer with a chisel sharpened to the tip, and then repeat, etching the cartsovka, etc. To speed up and improve the activation of the converter, you can warm up the treated areas with a hairdryer, then after finishing the work, again dry the treated surface with a hairdryer so that not a drop of moisture remains. We pre-sand the transitions from carving to paintwork on P80, removing burrs...
After the corrosion area, cover with acid, buy a can of BODY960 or Sikkens Washprimer 1K CF ( I use Reoflex CF1+1 phosphating primer
), Then putty, Glass or hair filler, polyester putty with fiber filler, and Soft leveling putty. Use according to technology, well, or according to the principle, large dents, deep wormholes of rust, hair, abrasive, then software, we use software to level out small dents, abrasive... You can mix soft and glass, and thereby achieve some advantages, stretches well, stronger than just soft, you can apply a larger layer, it’s easier to sand than just a hair...
Next, the places where the rubber-rubber sealant has peeled off at the joints of the parts, it must be replaced, and it is better to apply the sealant to all the joints of the welded parts, before doing this, clean it well with a carving tool, for this use a brush sealant, or in a BODY992 tube
Then ACID#8 ( Acid, although translated as acid, I would not call it a full-fledged acid primer, and to be more precise, I would not call it a cold phosphating or metal passivation primer
), instead of ACID#8, you can use any etching or one-component primer, which can be applied according to the wet-on-wet principle (
that is, apply the primer, wait until it dries, and without using an abrasive, immediately apply a protective coating
). If they tell me that there are protective coatings directly on metal, or even more so directly on rust, then I hardly believe it, rust cannot be stopped with paint, it can only be preserved, and rust under any paint, like metal under plastic film, will continue to develop stronger!
Next, we dilute the raptor with a hardener according to the scheme 750+250, add 100 grams of colourant material, a special pigment, or base, or acrylic paint pre-mixed with the hardener ( the latter will take a little longer to rise in total than the pigments, until the Raptor is completely crystallized
)
Well, we actually paint... That's it!
Yes, don’t forget, we pickled it, degreased it, treated it with a phosphating compound, degreased it, finished puttingtying and sanding, degreased it, primed it, if we decided to repaint the soil, degrease it, and then paint! It is better to use two types of degreaser, the so-called anti-silicone, which works well for removing oils and other chemical compounds, and an alcohol-based degreaser that removes organic fats ( Seven sweats of a tinsmith))))
) Well, if you really bother, there are degreasers that eliminate efflorescence from water spots
And the result depends on the experience of the painter, and this determines complete coverage of the surface, smooth shagreen, no sagging or overspray, no streaks or halos, no paint marks, etc. You can get used to it and paint it yourself, especially since there are no secrets in this, and be content with the result obtained, they say, what the hell with it, it’s a little untidy, but at least you yourself, but I like to say this, a baker should bake bread, a tailor should sew pants , doctor - to treat, etc. In short, trust the work to professionals, regardless of whether it is a professional technical center, or Vasily’s acquaintance from a neighboring garage. Most often, there is a guy sitting in the next garage who is more experienced than a painter with a crust from some technical center
