The heating problem in the interiors of VAZ Samara cars is not particularly acute, since the heater is designed quite well. Sometimes the assembly and quality of components are upsetting, which nullify the entire structure. With the VAZ 2109 heater working completely properly, the microclimate in the cabin is within normal limits and there is no need to particularly complain. But as soon as one part fails, a series of dismantling works begins, which takes a lot of time and effort.
Containment:
- Heater device VAZ 2109
- About the reasons for the malfunction of the VAZ 2109 heater
- How to choose a heater radiator 2109
- Replacing the heater radiator 2109 without removing the panel
Troubleshooting
To find the source of a leak in a stove radiator, pay attention to the following points:
- The primary sign of a leak in the interior heating system is an increased frequency of adding antifreeze to the expansion tank. At the same time, it is impossible to guarantee that the problem is in the radiator itself;
- Examine the condition of the heater valve and pipes;
- If the culprit is a faucet, it is not difficult to determine. If there are no unpleasant sweetish odors inside the cabin and the floor is not covered with traces of coolant, then this is definitely not it. The presence of such signs indicates that the stove tap needs to be replaced;
- The presence of deformations and cracks in the pipes can only be determined by visual inspection. Therefore, dismantling work will have to be carried out;
- Having discarded the options with pipes and tap, there is only one option left - damage to the heater radiator itself.
You should not delay repairing the radiator, as this will first lead to the need to spend extra money on antifreeze. A liter of coolant costs about 100 rubles. And over time, the problem will worsen, antifreeze will fill the interior, begin to corrode the floor covering, and cause a lot of other troubles.
Some useful tips
Finally, here are some tips to ensure that your car heater serves you for as long as possible.
- When deciding to replace the heater core, do not skimp. It is better to buy a high-quality original part once than to bother with its repair or replacement every year.
- Never use products of dubious origin and composition as coolants.
- Do not allow the radiator to remain idle for long periods of time without fluid. Even in summer, open the heater tap at least once a month to circulate coolant through it.
The heating problem in the interiors of VAZ Samara cars is not particularly acute, since the heater is designed quite well. Sometimes the assembly and quality of components are upsetting, which nullify the entire structure. With the VAZ 2109 heater working completely properly, the microclimate in the cabin is within normal limits and there is no need to particularly complain. But as soon as one part fails, a series of dismantling works begins, which takes a lot of time and effort.
Choice
When choosing a new radiator for the stove of your VAZ 2109, you should understand what exactly you want to achieve and what budget you have.
Today, consumers are offered two types of units to choose from.
| Radiator type | Peculiarities |
| Aluminum | A relatively inexpensive radiator option, which is characterized by high thermal conductivity. However, such a device cannot be repaired, which is its main drawback. But in practice, repairs are not carried out so often, so few people pay attention to this disadvantage |
| Copper | If necessary and a leak is detected, the copper radiator can be repaired - soldered. Thermal conductivity indicators are slightly higher when compared with aluminum analogues. But at the same time, the price is quite high - both for repairs and for the radiator itself |
Due to unprofitability and high cost, most VAZ 2109 owners choose aluminum radiators. But it all depends on your personal decisions and preferences. When actively using a car in harsh winter conditions, a copper radiator is fully justified.
Copper stove radiator
High Panel Radiator Replacement with Dashboard Removal
Replacing the radiator on a VAZ-2109 with removing the dashboard will take a little longer than without, but the shelf for magazines will remain intact.
Progress
- Move the front passenger seat as far back as possible.
- Find the dashboard fasteners on the right and unscrew them.
- Pull the instrument console towards you and insert a spacer into the resulting gap; you can use a block of wood for these purposes.
- Close the heater valve and place rubber mats or old rags where coolant may leak.
- Open the hood and unscrew the expansion tank cap. To reduce pressure, close the lid.
- The radiator is located between the glove compartment and the lower shelf. To avoid spilling the coolant, perform all actions very quickly. In addition, you will need 2 rubber plugs or champagne corks to plug the holes in the hoses.
- Place your hands through the gap in the retracted instrument panel towards the part that needs replacing.
- Remove the lower pipe and immediately plug its hole with the thumb of your left hand, then insert the plug into the hose with your right hand.
- Drain the coolant from the pipe into a prepared container.
- Disconnect the heater element and replace it with a new one. Remove the part carefully: first lift it up, then move it a little and pull it down. This will make it easier for you to remove it.
Preparing the car
Before you begin repairs, the car must be properly prepared for it. First you need to drain the coolant from the system. Warm up the engine to operating temperature and place the machine on an inspection pit or on an overpass. Carefully open the radiator cap and expansion tank cap. This is necessary so that the coolant drains faster. Now place a previously prepared container under the drain plug, and only then unscrew it with a key. It may take 7-10 minutes for all the coolant to leave the system.
Replacing the radiator on the low panel
The progress of work on replacing the heating system of cars with a low dashboard is similar to models with a high one. However, replacing the radiator does not require moving or removing the front seats.
Also, before starting work, be sure to remove the cover from the steering wheel so as not to damage it when bending the instrument console. The most reliable replacement option is a copper stove radiator; it is the most expensive of all existing ones, but it is the most reliable and in case of damage or leakage, it can be repaired by soldering the resulting hole.
When removing the heater radiator on a VAZ-2109, do not forget about safety, the coolant is hazardous to health, try to protect your hands with at least gloves, and wash them thoroughly after work.
If you have doubts that you will not be able to cope, it is better to seek help from a car service center. But it’s much more pleasant to figure it out yourself and save a couple of thousand rubles.
Cooling system features
It turns out that almost all domestically produced cars have a cooling system that functions the same. The thermostat is located on them at the bottom, where it ensures the temperature of the coolant within specified limits. The thermostat must perform its duties properly even in the most severe frost, until the heater turns on. But why don’t we feel this while sitting in the cabin? Let's try to figure it out by inspecting the entire system. As you know, the radiator itself is an air heater that goes into the cabin and at the same time, it functions as a cooler for the liquid going to the engine. As for the heater, it is the same radiator, but smaller. The already cooled liquid enters the thermostat from the radiator, and then goes to the engine and to the water pump. This is where it mixes with the fluid coming from the heater. Thus, the temperature of this very mixed liquid becomes even lower. And the stronger the frost outside, the lower the temperature of this water will be. The thermostat in this case is an unnecessary part, since it essentially does nothing. Therefore, some experts recommend placing a cover or cardboard on the radiator so that the liquid cools less.
Interesting. When the heater is turned on, liquid enters the engine, which has a temperature 10 degrees lower than necessary. It turns out that the engine is operating under abnormal conditions and malfunctions in the carburetor and even increased fuel consumption are possible.
Covers and cardboard boxes somehow cope with the task in some modes and warm the engine, but sometimes even too much. They, in essence, limit the heat exchange in the radiator and allow the thermostat valve to open completely and supply liquid with a temperature above 95 degrees. On its way, it mixes with a liquid that has a lower temperature and the engine receives more or less normal cooling. But this is only possible under light loads. And when the motor is running at full strength, the threat of overheating increases and cardboard boxes, covers and other devices, in this case, do a disservice.
Conclusion. If there is an imbalance in the operation of the cooling system, which is associated with the heater radiator, then it should either be modernized, or only replacing the heater radiator with a VAZ 21093 will help.
Replacing the stove VAZ 2109 high panel replacement
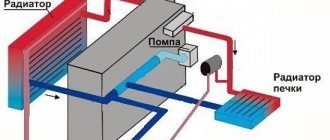
Heater device VAZ 2109
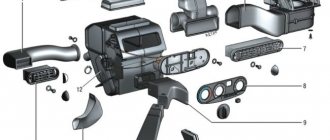
The VAZ 2109 heater is made according to the classical design, without additional recirculation hoses and electronics. It consists of a radiator, heater motor, air blower, intake air duct and cabin air ducts with deflectors. The operation of the engine is regulated by a handle on the panel, where it is also possible to adjust the amount of external air supplied and the ability to distribute the flow of warm air along the contours of the air ducts.
Most often, the heater radiator pipes and the radiator itself fail. A signal to replace it may be an antifreeze leak in the cabin, but this is not a definite verdict. It is quite possible that the pipes were to blame. they have the unpleasant property of leaking at the most inopportune moment, when it is 25 degrees below zero outside the window. But not only leaks can cause poor stove performance. Before removing the radiator of the VAZ 2109 heater, it is worth checking the intake air duct and making sure there is no debris and dust. The car does not have a cabin filter as such, so anything can get into the air duct. In this case, there will be insufficient air pressure and the heating will not work efficiently.
About the reasons for the malfunction of the VAZ 2109 heater
Air locks also became a fairly common occurrence during the first winter starts of the stove. Antifreeze simply does not circulate through the heating circuit, since it is blocked by an air lock. In this case, you need to take measures to remove the plug, and at the same time change the antifreeze and flush the cooling system for the company. It may happen that after 60-80 thousand, the amount of scale in the heater radiator simply does not allow coolant to circulate normally, in this case, if obvious symptoms of a malfunction are not visible, you need to make a decision depending on the mileage of the nine.
If the antifreeze still begins to leak, then first of all it is worth checking the heating system pipes. It's not as easy as it seems, but it's still better than removing the heater completely. In principle, even when replacing the stove radiator, it is recommended to change the hoses for preventive maintenance, so it’s worth buying them too. Since we are already in the store, then we will choose a suitable heater radiator.
How to choose a heater radiator 2109
All commercially available heater radiators are divided into three groups:
- Copper stove radiators. An excellent opportunity to tune the stove, because copper has good thermal conductivity, but the most valuable thing about copper radiators is that they can be restored. If you approach the process of repairing and cleaning a copper radiator correctly, it will last almost forever. I don’t dare call it expensive, because with a difference in price from the standard one of 500-800 rubles, the effect and subsequent operation will confirm its unconditional superiority over aluminum models. A copper radiator is a little heavier than an aluminum one, but compared to the junk that we constantly carry in the trunk, this is not weight.
- Aluminum heater radiators 2109. A good replacement for a copper-brass radiator if the replacement budget is no more than a thousand. This money will also include a lightweight aluminum radiator and pipes with clamps. The bad thing about aluminum models is that they are prone to corrosion, heat up quickly, but cool down just as quickly. Okay - price. For 800 rubles you can buy an average quality radiator, the only caveat is Luzar radiators. In terms of price, they are in the middle range, and the quality of the enterprise floats, as does the equipment. In addition, judging by the reviews, they tend to develop microcracks that are invisible to the eye, but the antifreeze, which will invariably evaporate from their surface all winter, will give the interior a unique aroma and the eternal mystery of “where does the antifreeze go.”
Replacing the heater radiator 2109 without removing the panel
The instructions say that it is necessary to remove the entire front panel, regardless of whether the panel is installed high or low. Of course, we won’t do anything like that. If the car has a high panel, it is enough to simply unscrew all the screws that secure it to the engine shield and the power elements of the body.
You can’t do it yourself, so you need either an assistant or a log of a suitable size. It (he) holds the panel at such a distance from the engine shield that the radiator, previously disconnected from the pipes, just passes.
The radiator passes between the glove compartment and the glove compartment, and the entire operation takes no more than an hour.
Therefore, just in case, keep a couple of logs of suitable size and a good stove radiator in the garage. Don't freeze in the cabin, have a successful and warm winter trip!
How to remove heater radiator VAZ 2109
If for some reason you need to remove the heater radiator on a VAZ 2108-099 car, then the first thing you need to do is drain the coolant from the system; the interior heater valve must be completely open. Then we begin to remove the dashboard. You need to unscrew the bolt securing the damper rod clamp for the glass heating; it is located on the right side of the heater.
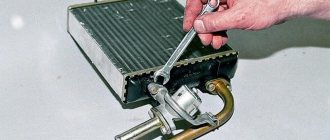
Now we begin to unscrew the three bolts securing the radiator heater, and then we can pull out the interior heater radiator from the housing.
Don't forget to loosen the hose clamps.
Then remove them from the heater radiator pipes. If the radiator is very dirty, it will need to be cleaned with any brush.
If the radiator leaks, it will have to be replaced.
Progress:
- Remove the lower console, which goes from the interior heating control levers to the gearbox housing.
- Move both front seats as far back as possible. If, in addition to the heater radiator, you also want to replace the faucet, then you will need to remove the plastic trim from the thresholds and lift up the carpet.
- File the magazine shelf under the glove compartment on one side; you can screw it back using self-tapping screws.
- After which you will see that you can easily remove the part into the resulting gap without any problems.
- Turn off the heater tap and prepare plugs that you will use as plugs and a container for the remaining coolant to prevent the remaining antifreeze that has accumulated in the radiator itself from spilling.
- Unscrew three bolts on each side of the radiator.
- Loosen only those clamps that fit directly to the radiator, but do not tighten them.
- Now the hardest part is that you need to drain the remaining antifreeze from the radiator. To prevent coolant from spilling on the floor, place waterproof mats or an old cloth under the faucet, at the front passenger's feet, and under the radiator.
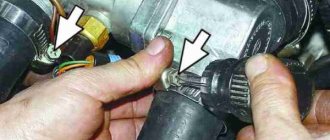
- Pull off the pipes from the radiator, the first one to remove is the bottom one, which is located below on the tap; it is closed. Place a container and drain the coolant from the radiator. Keep the cork ready. About a liter of liquid may leak out. You may need to drain the liquid several times, so you will most likely have to plug the pipe with a plug.
- Remove the outlet pipe from the radiator, but do not lower it down, as coolant may pour out of it, keep it at the level of the attachment to the radiator. There is no need to drain the liquid, just plug the pipe with a plug.
- Now you can pull out the radiator itself.
- Replace it with a new one.
- Plug in the top outlet pipe.
- Then the bottom one.
- Tighten the clamps.
- If necessary, remove the air lock.
Determining faults
We identify a radiator malfunction. The first signal that there is a malfunction is the frequent pouring of antifreeze into the tank. In this situation, it is impossible to say for sure that the problem lies precisely in the radiator. The culprits may be the pipes or tap of the heating system. To isolate the option with a tap, it is enough to check the interior of the car for an unpleasant odor and drops of antifreeze on the floor covering. If there are none, the problem is definitely not in the faucet. To determine the condition of the pipes, gain access to them to visually inspect them. This way you will understand whether they are leaking or not.
If there are no problems as such, the problem lies in the radiator. The problem must be solved quickly enough, since antifreeze can get into the interior and ruin the carpeting.
Step-by-step process for replacing a stove radiator
So, how to replace a radiator using the example of a VAZ-2109?
The work can be carried out using two methods – with removal of the dashboard and without dismantling the device. The first option involves an easier process that will take about 6 hours. In the second, everything will be somewhat more complicated, but the time spent will not exceed two hours. It's quick or easy - it's up to you. We will tell you how to replace it without disassembling the car dashboard.
To get started, prepare the following tools:
- two screwdrivers - cross and flat;
- ratchet with a set of heads;
- any container with a volume of up to 8 liters so that the coolant can be drained;
- rubber gloves to avoid chemical burns;
- spanners.
It is recommended to carry out work in a garage with an inspection pit.
After everything is prepared, you can begin replacing the heater radiator on a VAZ-2109 car. Following our recommendations, the process will not seem so difficult.
Let's start:
- Put on gloves and climb into the inspection hole. Unscrew the radiator cap and drain the liquid into a container. To simplify the process, take a hose 1 m long and 1 cm in diameter.
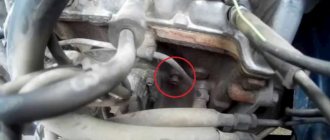
- After all the liquid has been drained, it should be about two liters by eye, it is necessary to drain the coolant from the engine cooling system. To do this, just find the appropriate plug on the engine and do everything in the same way as with the radiator. The button is unscrewed using a key with a diameter of 17 mm.
- At the next step, the pipes of the clamps are lowered and the remaining antifreeze is drained from the heating system. To do this, you need to get to these nodes from the salon and carry out this procedure. It's easier to do this from the front passenger seat.
- After draining all the antifreeze, proceed to dismantling the radiator. First, remove the screws that hold the front panel in place.
- The next step is to remove the screw on the back wall of the glove compartment and the screw located next to the passenger side rear view mirror.
- Once all the screws are removed, the front panel should move up/down freely. To simplify the work, lift it up to the maximum and place a 7 cm block under it.
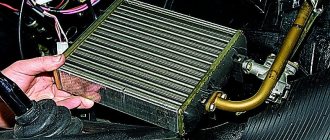
- Place your back on the passenger seat mat and unscrew the 3 screws that hold the heater in place and remove it.
- At this stage, cover the new radiator with rubber band and put it in place. Be sure to clean this area before installation.
- Final step: Reassemble the entire system in reverse order. This should no longer cause additional difficulties.
Once all work is completed, fill the system with antifreeze (coolant). It is advisable to fill in fresh liquid, but you can also use the one that has been drained. Fill to the “max” level on the expansion tank. After this, start the engine for about 15 minutes, then add more fluid.
This completes the process of replacing the heater radiator in the VAZ-2109 car.
How to change the heater radiator on a VAZ 2109 which has a high panel
The stove on any car, including the VAZ 2109, is designed to heat the car's interior during the cold season. Malfunctions of this unit will lead to less comfortable driving, so the driver in any case needs to be aware of possible breakdowns and how to eliminate them. We will tell you more about this below.
Where is the heating system on the domestic nine? How to disassemble and remove hoses for repair, for what reasons may the device stop working? If the VAZ 2109 stove does not heat up, first of all you need to understand the reasons why this is happening.
Radiator device for heating system
Causes
If the VAZ 2109 stove stops working, there may be several reasons for this:
- The stove fan does not work. According to the connection diagram, the problem may be an inoperative fan of the heating device. Sometimes the cause is a failure of the fan switch itself or broken and oxidized wiring.
- Another reason why the VAZ stove does not work may be clogged air ducts. They can become clogged with leaves and other debris that falls on the car while parked. Sometimes the VAZ stove does not heat up due to closed air duct dampers.
- On a VAZ 2109, the heater may not heat up due to the radiator; this problem is one of the most common. The heater radiator of a VAZ 2109 or VAZ 21099 may be clogged with dirt, which is why antifreeze cannot circulate through the system. In some cases, the problem is a heater faucet that does not open, or this may also be due to the refrigerant level in the cooling system being too low. If there is an air lock in the system, this will also lead to insufficient heating of the vehicle interior. If the radiator of the VAZ 2109 stove is working normally, it is possible that the power unit simply cannot warm up to operating temperature. Much less often, the reason for the inability to heat the interior is a broken pump.
Heater valve for nine
Remedies
How to disassemble the heater on a VAZ 2109 and how to fix the problem?
Basic recommendations:
- First of all, you need to check whether the ventilation device of the circuit is functioning; to do this, turn on the ignition and the interior heater, first at the lowest power. If the device is working normally, this will be audible. Before removing the stove for repairs and changing or blowing out the pipes, you need to make sure that the fan is out of order. Try cleaning the contacts connecting the power wires - sometimes their oxidation makes the element impossible to operate. If, through diagnostics, you have discovered that the ventilation device is working, but it still does not turn on, the problem should be looked for in the wiring.
- The next stage of diagnosing the VAZ heating system will be checking the air flow. Turn the heater on to maximum and check how well it blows from different air ducts - onto the windshield, side windows, and into the feet. If the fan is functioning and there is no good air flow from the air ducts, it is necessary to diagnose the blowers themselves - perhaps they are simply closed.
- The radiator may not work only because antifreeze does not pass through it. As a rule, this is due to the fact that the system is simply clogged due to the use of old consumables in it, in which sediment has formed, collecting in the stove pipes. So first you need to drain the consumables from the system and flush it, in particular the pipes, from sediment. Fluid for flushing pipes can be found at any auto store. The purchased product is poured into the cooling system, then the engine is started, which must run for a certain time in accordance with the instructions. If, after draining the flushing agent from the pipes, you notice dirt and sediment, this indicates the need to fill in new antifreeze. Replacement of pipes occurs in cases where the flushing agent cannot remove all the sediment from the system, which is firmly lodged in the lines. If the radiator device is clogged, there is no other way out other than replacing the radiator of the VAZ 2109 stove.
- The valve of the VAZ stove, as practice shows, is one of the weak points of the circuit. The heater valve is opened and closed by installing a regulator on the panel. This regulator is connected to the tap through a rod. If the thrust is very weak, you can try to adjust it. The VAZ stove valve is replaced if the element does not respond to adjustment.
- If the problem of unit inoperability is due to a low level of antifreeze in the system, it simply needs to be replenished. But at the same time, you should determine the reason why the leak occurred so that this problem will no longer bother you in the future.
- As stated above, the problem may be that the engine does not warm up to the desired temperature, usually due to a failure of the thermostat.
- The unit's electric motor has failed. A breakdown of the VAZ heater motor will make it impossible to heat the car's interior. If the mechanism fails, the issue can be resolved by replacing the heater motor (the author of the video is Pro Remont).
Principle of design and operation
- The stove includes a pair of plastic casings (left, right). They will be connected to each other with brackets around the perimeter. For sealing, a harness is placed in the grooves of the casings.
- An electric heater fan forces air inside the cabin. It is held in place by a pair of screws on top of the stove. The heater is designed in such a way that the fan can be easily removed through the engine compartment.
- An electric motor is attached to the fan casings. On its shaft there is a fan impeller with three speeds. This is possible due to the two coils of the resistor. To obtain the required wheel speed, there is an additional resistor. It is attached to the hole in the heater casing on the left.
- The radiator is located in the heater casings. Mounted to the right one using 3 fasteners and sealed with a polyurethane gasket. The radiator consists of two rows of tubes, cooling plates and plastic tanks. Also two.
- The heater valve consists of a housing, two pairs of pipes and is connected to the cooling system using rubber hoses.
- The liquid circulates through the radiator due to the operation of the cooling system pump.
- On the supply line in the heater faucet body, there is a faucet valve on the axis (it is plate-type), which has a hole for the passage of cooling liquid.
- The valve lever of the faucet is connected to the handle lever by a rod. The handle is responsible for controlling air heating. When the lever is turned, the valve hole opens the line and liquid begins to flow into the radiator.
- The stove is controlled using three handles. Their levers are located on the axes of a plastic bracket secured to the instrument panel with 4 screws.
- The heating control handle acts on the faucet lever by means of traction and on the damper drive lever. By moving the handle completely to the right, the valve and damper will fully open, and air will begin to flow with the help of a fan through the radiator, where the heated coolant is circulated.
- In the middle position of the handle, the valve and tap move to an intermediate position. Some of the air goes through the radiator, and the other part goes past it. This effectively ensures the degree of air heating required by the user at a given moment.
- If the handle is in the extreme left position, the valve and tap are completely closed. As a result, the air flowing into the cabin is not heated.
- The upper left handle is responsible for adjusting the air supply to the legs of passengers and the driver. It is connected to the damper lever by means of traction.
- By moving the handle to the left, the footwell heating flap opens and air flows through the casings into the corresponding windows.
- On the left and right, air is supplied to the feet of the front passenger and driver. Interior ventilation ducts allow air to be delivered to the rear passengers' feet.
- The handle that regulates the air supply to the windshield is connected to the drive lever for the heated windshield flap using a rod. It can close or open the path for air to pass through the ducts to the glass.
- To provide air supply to passengers and blow off the side windows of the car, the design of the stove provides 4 nozzles - a pair of central ones, left and right. The body of each of them is equipped with a damper with a seal. By closing or opening the damper, you regulate the intensity of air supply. Plus another lever allows you to control the direction of the air coming from the nozzle.
- The VAZ 2109 is equipped with an exhaust or exhaust ventilation system. With its help, air is sucked out of the cabin. In the case of the nine, the hood is located behind the body openings for the side windows. The exhaust also occurs through the vacuum that occurs at the deflectors while the car is moving.
If problems arise with the operation of the stove, you can visit a car service center. Either there is another option - remove the stove yourself and try to repair it, or entrust the work to specialists. In any case, by dismantling the device yourself, you will save a lot of money and gain important experience.
Removal
To remove the stove, follow the following algorithm.
- Loosen the tension on the clamps and disconnect the pair of hoses from the faucet connections. To do this, you will first need to remove the dashboard from inside the cabin.
- Loosen the clamps and disconnect the hoses from the stove tap pipes. Here the work is already done through the engine compartment.
- Unscrew the heater tap mounting nuts.
- Remove the tap from the front panel.
- Remove the heater tap rod holder.
- Disconnect the rod and valve lever.
- Remove the boot that protects the gear lever.
- Remove the floor trim.
- Unscrew the floor covering fastener at the rear.
- Remove the tunnel lining on the floor by sliding it backwards.
- Remove the internal ventilation air duct and disconnect it from the heater body.
- Disconnect the wires coming from the heater motor.
- Disconnect the wiring from the resistor.
- Unscrew the fastening nuts to the right of the stove.
- Remove the remaining fasteners and remove the stove, taking the control panel with you.
Dismantling work Further actions directly depend on the level of your training. For beginners, it is better to take the dismantled stove to specialists. If you have a good understanding of your VAZ 2109, you can try to carry out repair work yourself.
The stove is a complex but very important component in a car. Therefore, it is always necessary to monitor its functionality and detect malfunctions in time. It is unlikely that you will want to be left without heat in the cabin in winter.
