The brake system is the most important component of a car and is responsible for safety. Even minor brake malfunctions can lead to serious consequences for both the driver and other road users. To prevent malfunctions of the braking system, you need to regularly check the condition of all its elements (pads, discs, lines and, importantly, brake fluid). An important part of maintenance is bleeding the brake system. More details about the features of pumping brakes on VAZ cars will be discussed in this article.
Pressure regulator
It is installed in the rear wheel drive and not only distributes fluid to the mechanisms, it also prevents possible skidding due to different forces on the mechanisms. This is done by limiting the supply of pressure to the mechanisms, depending on the position of the car body relative to the bridge.
The regulator is driven by a rod, one end of which is fixed to the rear axle, while it itself is fixed to the body. As the load on the rear axle increases, the body changes position relative to the axle; as a result, the rod puts pressure on the regulator piston, which adjusts the pressure supplied to the mechanisms.
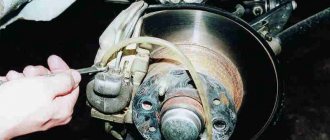
Rear brakes
On Zhiguli of the classic 2107 family and others, a drum brake system is used. Because its installation is explained by savings and a reduction in the overall cost of the machine. Moreover, the VAZ of previous years did not have high speeds, so installing rear disc brakes was not advisable, although their efficiency is higher.
Design
- Drum. It consists of two parts: the first is mounted on the axle (fixed), the second is on the hub and rotates with the wheel
- Brake pads
- Brake slave cylinder
- Tension springs
- Spacer plate
- Parking brake lever
Principle of operation
To fully activate the rear brakes, the driver needs to press harder on the pedal. In this case, the second piston of the GTZ starts working and another brake circuit is activated, which is responsible for transmitting force to the brake mechanisms of the rear wheels.
The pressure in the working cylinder (there is only one) pushes the pistons, which are located on the sides, apart. They rest against the brake pads, spreading their upper part to the side. The pads are seated on support posts. They can turn on them and move left or right. That is, the upper part moves to the side, the lower part, turning on them, tries to come together. But, the lower edges of the pads rest against the rivets, the force of the pistons moves them on the support posts towards the drum cover, and they evenly adhere with their entire surface to the moving part of the drum, which is connected to the wheel and, under the influence of friction, the rear axle slows down.
By releasing the pedal, the pressure in the brake line and cylinder decreases. The pistons return to their original positions (recessed inside), and the pads, under the action of return springs, converge, moving away from the drum cover. These springs do not allow the pads to move spontaneously, braking the hub.
Video of how the rear brakes work on the “seven”:
Malfunctions
The “sores” are the same as those of the front brake system. Due to the design features, new ones are added to them.
- Broken or stretched pressure springs. In this case, the rear axle will spontaneously begin to brake.
- Cracks, chips on the inside of the drum. Dirt can accumulate on it, rust can form, which can jam the wheels, although the pads will be brought together, since there is a miniature gap between them and the drum cover
Types of maintenance work
Despite the fact that the system is not so complicated structurally, it requires periodic maintenance, including:
- Checking the fluid level in the system;
- Checking the degree of wear of friction clutches, pads, discs, drums;
- Bleeding the system to remove air;
- Checking the condition of the handbrake cables;
- Adjustment of cable tension;
- Adjusting the rear brake adjuster;
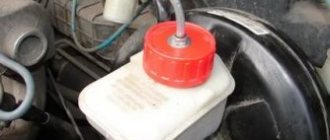
Before each trip, you must always check how much brake fluid is in the VAZ-2107 system. An insufficient amount of it can lead to the fact that the efficiency of the system can be significantly reduced due to air getting inside the pipelines. In addition, a decrease in level may indicate damage to pipelines and fluid leakage.
The elements of the mechanism should be checked every few months, this is especially true for the pads, since they wear out quite intensively. If necessary, worn elements are replaced.
If air gets inside the drive of the working system, pumping is performed, as a result of which the air is expelled from the system.
Loosening the tension of the parking brake cables can lead to its failure, so you need to periodically monitor it and, if necessary, restore the tension.
Tubes and hoses
Brake pipes and hoses of the braking system of the VAZ “kopek” are used both front and rear. Their purpose is to connect the GTZ and RTC to each other and supply brake fluid to them. Sometimes connecting elements become unusable, especially hoses, due to aging rubber.
Damage to the hose leads to fluid leakage and depressurization of the brake system.
The parts in question are attached using a threaded connection. There are no difficulties in replacing them. You just need to unscrew the fasteners on both sides, remove the worn element and install a new one in its place.
Video: replacing brake pipes and hoses on a “classic”
Features of work on models starting from VAZ-2108
Now let’s look at the specifics of the operation on other cars of the VAZ family. Starting with model 2108, the circuit diagram has changed, and therefore the sequence is somewhat different. And you need to know it before bleeding the brakes on the VAZ-2108, 2109, 21099.
These cars already use a diagonal arrangement of contours. That is, one of them combines the rear left and front right wheels, and the second - the other two.
Bleeding begins, as usual, from the farthest wheel, that is, from the rear right one. An operation to remove air from its brake mechanism is carried out according to the described sequence.
But there is one caveat. The design includes a pressure regulator for the rear wheel drive mechanisms. If the rear of the car is hung out before bleeding, this regulator must be unlocked. To do this, just install a screwdriver between the regulator rod and the thrust plate.
After all work it should be removed.
Then it is pumped to the second rear wheel, and the front left one, since it is the one that is combined with the circuit with the already pumped rear mechanism.
After pumping each mechanism, it is necessary to check the level in the tank. If you omit this point, then during operation the liquid will go into the system and air will enter it again.
A little theory
To transmit force, one of the properties of the fluid is used - its incompressibility. That is, when a force is created on a liquid, its volume does not change, and it acts as a transmitter.
A hydraulic brake drive is more practical than a mechanical or pneumatic one, but it has one drawback - if air gets into the fluid, the transmission of force will be significantly reduced. This is because air, like any gas, is compressible. As a result, the presence of air leads to a change in the volume of the liquid when creating force (due to gas compression). Because of this, the force is no longer transmitted to the actuators, since it is absorbed by the volume change.
It turns out that effective operation of the brakes on a VAZ occurs only until air enters the drive system. And this can happen for several reasons.
VAZ 2107 brake system diagram
Classic VAZ models 2101-2107 use a dual-circuit brake system. The first circuit is responsible for braking the front wheels, the second - for the rear. They are not related to each other. This is necessary to ensure traffic safety. If the first circuit fails, the second circuit will help you stop, or vice versa.
Design and main components of the system
- Master brake cylinder
- Brake fluid reservoir
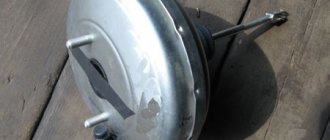
- Vacuum brake booster
- Hoses and tubes
- Front brakes: caliper, cylinders, pads, disc
- Rear mechanism: slave cylinder, drum, pads
- Hand (parking) brake: lever in the cabin, cables, shoe drive lever in the rear drums
Let's look at each element in detail.
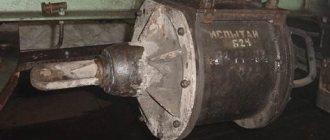
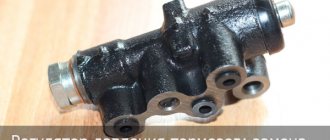
Replacing the brake pressure regulator
The replacement of the sorcerer on VAZ-2110 cars and other vehicles equipped with an RTD is carried out on an overpass. You need a 13 mm spanner, a powerful screwdriver and a special 10 mm wrench designed for unscrewing brake pipes. Before starting work, the assembly must be cleaned of dirt and rust, doused with WD-40 or another penetrating compound, and then wait half an hour.
Work begins by unscrewing the bolt securing the bracket to the spring. Afterwards, the brake pipes are dismantled, the position of which is recommended to be pre-marked.
You can also unscrew the tube fittings with a regular wrench. However, using a special tool makes the job easier and reduces the likelihood of “licking” the edges. After the fittings, unscrew the two bolts securing the sorcerer to the body and remove the part. » alt=»»> It is necessary to install the new VAZ-2110 sorcerer in strict reverse order. After installing it and before adjusting the RTD, you should bleed the rear brake circuits. Next, the above-described procedure for setting up the sorcerer is performed.
How to bleed the brakes on a 2110 model
The main feature of the described process is its versatility. The conceptual similarity of the brake systems makes it possible to use it for cars of other brands. In order to avoid some subtleties and force majeure, on the eve of the procedure it is worth studying the technical documentation of the car being repaired. If you do not have enough knowledge and skills, it makes sense to hire an experienced assistant.
The VAZ-2110 brakes need to be pumped in the prescribed sequence:
- right back;
- front left;
- left back;
- front right.
In order to check the brakes on the 2110 model, you need to prepare the following:
- brake fluid;
- stops and jack;
- heads for 8 and 19;
- 8mm wrench for brake pipes;
- transparent tube and container.
If possible, do not mix liquids from different manufacturers. Available additives are sometimes incompatible, and this leads to the appearance of sediment or an altered state of the substance.
- First you need to check the fluid supply. If there is a need for this, it should be filled to a level not lower than the maximum mark on the tank.
- It is necessary to block the pressure regulator of the rear brake system devices. Next, the tires should be hung in such a way that they do not come into contact with the ground. It is advisable to use two jacks. The pressure regulator should be blocked with a screwdriver, which is inserted between the plate and the piston. Once pumping is complete, remove the screwdriver.
- Clean the exhaust valves on each wheel (brake device) from dirt and foreign particles.
- Install the protective cap from the outlet valve by attaching the hose. The opposite end of the tube must be lowered into a prepared container with a small amount of liquid so that the tip of the hose is below the liquid level. It is better to use transparent containers, which will make it possible to see the condition of the composition, and if the quality is appropriate, reuse it.
The next stage of work is to involve an assistant. The latter presses the brake to create pressure that displaces fluid from the system. Press the lever 3 to 5 times every 1-2 seconds. Then you need to fix it in the lower position. Now you should unscrew the air valve half or ¾ of a turn, after which liquid and air will begin to flow out of the hose. When the leak stops, the exhaust valve must be screwed back in and the brake released.
The previous step should be performed until all the bubbles have disappeared from the liquid. At the end of each cycle, the amount of working medium in the tank should be monitored. If necessary, the volume must be replenished so that the level does not drop beyond the minimum level. When the air in the system runs out, you can remove the hose. It is necessary to thoroughly wipe the valve fitting and then close it with a protective cap. This sequence of actions must be followed to pump all tires (brakes) in a VAZ-2110 car.
And in conclusion, I would like to advise you to pay attention to any little things that are unusual for your “ten”. Tapping, humming, stiff/soft pedal, rough movement, clicking - all this requires diagnostics and, possibly, repair
Functions and purpose of the brake force regulator
“Sorcerer” is used to automatically change the brake fluid pressure in the rear brake cylinders of a car depending on the load acting on the car at the moment of braking. The rear brake pressure regulator is used in both hydraulic and pneumatic brake actuators. The main purpose of changing the pressure is to prevent wheel locking and, as a result, skidding and skidding of the rear axle.
In some cars, in order to maintain their controllability and stability, in addition to the rear wheel drive, a regulator is also installed in the front wheel drive.
The regulator is also used to increase the braking efficiency of an empty vehicle. The adhesion force to the road surface of a car with and without a load will be different, so it is necessary to adjust the braking forces of the wheels of different axles. In the case of a loaded and unladen passenger car, static regulators are used. And in trucks, an automatic brake force regulator is used.
In sports cars, another type of “sorcerer” is used - a screw regulator. It is installed inside the car and adjusts the brake balance directly during the race itself. The setting depends on weather conditions, road surface conditions, tire conditions, etc.
Brake repair methods
Brake repair may include:
- installation of pads with new coating;
Before you start pumping a VAZ 2101, you need to make sure that such a procedure is advisable. The essence of the operation itself is to squeeze out air bubbles from the system. The presence of such air gaps is determined at the moment of braking. The brake pedal may go all the way to the floor
, or the wheels do not brake synchronously, and this will indicate that the fluid does not reach the brakes at the same time.
Checking and adjusting the brakes of the VAZ 2105 Zhiguli
8.2.1 Checking and adjusting brakes To prevent sudden failure of the brake system, carefully check the condition of all pipelines: – metal pipelines should not have dents, cracks and should be located away from sharp edges that could damage them; – brake hoses should not have cracks through them.
8.2.2 Checking pipelines and connections To prevent sudden failure of the brake system, carefully check the condition of all pipelines: – metal pipelines should not have dents, cracks and should be located away from sharp edges that could damage them; – brake hoses should not have cracks through them.
8.2.3 Checking the operation of the vacuum booster
8.2.4 Adjusting the brake drive
8.2.5 Adjusting the parking brake Since the end of 1995, the initial tooth of the gear sector of the parking brake lever has been made double. In this regard, for vehicles with a double sector tooth, differences in the parking brake adjustment have appeared, indicated below in parentheses. EXECUTION ORDER 1. If the parking brake is not.
8.2.6 Checking the functionality of the pressure regulator PERFORMANCE ORDER 1. Place the car on a lift or inspection ditch, clean the pressure regulator and the protective cover from dirt. 2
Carefully remove the protective cover from the pressure regulator, remove any remaining grease and clean the torsion bar-piston connection. 3
Ask for help.
8.2.7 Adjusting the position of the pressure regulator
8.2.8 Bleeding the hydraulic drive
Source
Brake system maintenance
Although the design of the brakes on a VAZ car is not so complicated, it still requires periodic maintenance, which includes:
- checking the brake fluid level in the reservoir;
- checking the wear of brake pads, drums, discs;
- bleeding the emergency air removal system;
- checking the parking brake cable;
- adjusting the pressure regulator;
- adjusting the tension of drive cables.
Remember that before each trip you should check the fluid level in the tank. Insufficient brake fluid can lead to ineffective operation of the entire braking system. It is worth noting that a decrease in the brake fluid level can be caused by damage to the pipeline and the appearance of a leak.
This type of brake system check should be performed every two to three months. If severe wear or some other problem is detected, it is imperative to replace the worn part or make repairs. Remember that the safety of all road users depends on the technical condition of the braking system.
This can't be done
There is one very important point regarding brake fluid. You should pay special attention to it, since it will be difficult to predict the result if the recommendations are violated.
Do not mix different types of brake fluid. If you simply need to add it to an existing one, choose only the one that was filled in earlier. Mixing fuel fluids from different manufacturers can lead to unpredictable consequences.
If you need to top up, but you don’t know what kind of fuel fluid is currently there, there is only one way out - a complete replacement of the brake fluid.
Educational program on how car brakes work (simple example)
There are pneumatic brakes and hydraulic brakes. Passenger cars use a hydraulic system. Let's talk about her.
On the axle of the car there are bearings on which the wheel hub is mounted, to which the wheel is screwed with bolts or nuts. In order for a wheel to slow down, there must be a braking element that is rigidly connected to it. This element is a brake disc, which is attached to the wheel hub. When the wheel rotates, it also rotates with the hub.
To stop it, they use brake pads with friction linings that clamp it together. The more they press against the disk, the stronger the friction force between them, which slows down the disk, and therefore the wheel, until it comes to a complete stop.
The pads press the pistons located in the brake cylinders. There are two cylinders per wheel. They are located on the sides of the disk and compress it, like clamping a workpiece in a vice. The cylinders are located on the caliper. It is attached to the car axle, the steering knuckle.
To move the pistons in the cylinders, a fluid is used, which transmits force from the brake pedal to them. Therefore, brake pipes through which fluid “flows” and a master cylinder with pistons that compress it were added to the system.
Advertising:
When to bleed the brakes
With working brakes, all channels for brake fluid are completely sealed, and possible leakage occurs only if they are damaged. If a brake fluid leak occurs, it will need to be drained, the overpasses repaired, and then filled with air removed from the system by bleeding. There should be no air in the brake system a priori, since its presence there can lead to a tragic outcome when an emergency occurs on the road and the brake pedal sinks instead of activating the brake pads.
Drivers usually feel the occurrence of play in the corresponding pedal, when pressed, the brakes do not immediately respond properly. This behavior of this vehicle control is simply called “cotton brakes” in garage parlance. And the reason for this condition can be various situations:
- interference with equipment operation;
- low quality brake fluid;
- damage to system hoses;
- replacing disks without proper bleeding;
- water content in brake fluid.
When bleeding the brakes, you need to add the same brake fluid that was used previously. If this is not possible, then all the liquid is drained and a new one of a different brand is poured into the system.
In this case, it is necessary to anticipate the occurrence of such problems and stock up on a certain amount of the exact product that was used previously.
Parking system
Although it engages the mechanism of the rear axle wheels, it is in no way connected with the working mechanism. It uses a cable as a drive connected to the handbrake located inside the car.
Under the car, this cable is divided into two parts, going into the rear axle mechanisms. Inside, the ends of the cable are connected to the drive lever, which in turn is connected to a spacer bar. The drive lever is connected to one of the pads.
When the handbrake is engaged, the cable pulls the lever, and since it rests against the bar, the pads are released. The toothed sector of the handbrake fixes the position of the lever when the pads are spread apart.
Bleeding the brakes with a rubber tube
To implement this very simple method, you will need the simplest tourniquet, which is usually used to stop bleeding. Let us clarify that this is a low-elastic rubber tube.
It is necessary to tie one end of the tube into a knot and make a centimeter incision at a distance of 10 mm from the site of the ligament. A fitting is put on the untouched end of the tube, and the second one, the one with the cut and the knot, should be lowered into a container with brake fluid.
Next, unscrew the fitting and press the brake pedal. This way, you will see that the brake fluid will enter the bottle through the cut made in the tube. When you release the gas pedal, you can observe how the brake fluid begins to be absorbed from the reservoir, and not from the bottle. This happens due to the fact that the cut on the tourniquet will close and play the role of a check valve.
This simple method allows you to bleed your car's brakes without changing the brake fluid.
Replacing brake fluid
If a replacement is needed, then you should study the structure of the brake system of your vehicle. Changing ABS brake fluid is very different.
Suppose without an ABC or a hydraulic accumulator, the pump and the ABC hydraulic valve block are located in one unit, then you can replace the fluid with your own hands. With integral ABC, it would be more correct to go to a service station.
Work must be carried out on each circuit of the brake system. The tools you will need are an empty bottle and a flexible hose. Additionally, you need to have a set of keys to work.
It all starts with the wheel that is furthest from the brake cylinder. First you need to drain the fluid from the brake reservoir and pour new one into it. Next, unscrew the fittings on each brake cylinder and wait until the old brake fluid drains out.
When a new one starts to leak, tighten the fitting. If the car has a diagonal system of contours, the process must begin with the right rear wheel, then the left front, then the rear left, and finally the front right.
With a parallel circuit, the sequence is:
- Right rear.
- Left rear.
- Right front.
- Left front.
Replacement must be carried out on removed wheels. If there is a hole, the work will be much easier. As a last resort, you can do all this with a jack, removing the wheels one by one.
At the same time, you can visually check the condition of the car, check the suspension elements and shock absorbers.
Be sure to bleed the brakes after all work. Look in the reservoir; you may need to add new fluid.
It is necessary to check the effectiveness of the brakes after replacing the brake fluid. We carry out the test on a dry road at various speeds. The car should stop smoothly and maintain directional stability. Have a good trip and no breakdowns.
Sources
- https://luxvaz.ru/vaz-2114/199-zamena-tormoznoy-zhidkosti.html
- https://nadomkrat.ru/tormoznaya-sistema/zamena-tormoznoj-zhidkosti-na-vaz-2114
- https://remontavtovaz.ru/avto-sovety/zamena-tormoznoj-zhidkosti-na-avtomobile-svoimi-silami.html
We work independently
It is possible to carry out all the steps to rid the VAZ-2110 brake system of air yourself. This fairly simple method also allows you to complete all the assigned tasks alone:
- the brake fluid reservoir cap is replaced with an old clutch reservoir cap with a hole pre-drilled in it into which a car nipple is inserted;
- the compressor sets the pressure to 1.5-2 atmospheres and supplies it to the installed nipple on the tank lid;
- the second hose is put on the fitting through which the brakes are pumped, and its other end is lowered into a container (for example, a bottle);
- When air stops coming out of the hose, the fitting can be closed.
This operation is repeated on all wheels of the car. It is worth noting that in camping conditions the compressor can be replaced even with a regular bicycle pump, which will be somewhat more difficult than working with a compressor, but with due diligence it is also effective.
Diagnostics of the pressure regulator
How to check if the VAZ brake pressure regulator is working? This procedure is quite simple:
Place the car above the inspection hole (lift it on a special lift).
Thoroughly clean the regulator body and protective cover, as well as the junction of the torsion arm and the piston, from dirt and old grease.
After pressing the brake pedal, the movement of the piston (with simultaneous tightening of the torsion lever) of a working regulator should be 0.5-0.9 millimeters.
Repeat the described procedure several times. This will allow you to verify the stable functioning of the pressure regulator.
The immobility of the piston after pressing the brake pedal suggests the presence of corrosion processes in the area of contact between the housing and the piston, which indicates the need to replace the regulator with a new one. Upon completion of the performance check, a layer of lubricant (“DT-1”) is applied to the working elements of the regulator and a protective cover is installed.
see also
- How to correctly install the rocker on a VAZ 2109
- VAZ 2107 correct lowering
- Repair of VAZ 2101 distributor
- VAZ 2107 silent block
- How to install trunk lock from viburnum to vaz 2109
- How to raise the rear suspension of a VAZ 2107
- VAZ 2107 adsorber purge valve
- VAZ 2107 how to make the headlights shine brightly
- How to make the trunk on a VAZ 2107 open with a button
- Expansion tank plug VAZ 2109
- Why does the clutch on a VAZ 2107 move?
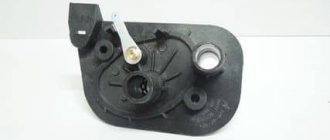
Design and principle of operation of the regulator
The VAZ brake pressure regulator is included in the drive circuit, which ensures the activation of the brake mechanisms of the rear wheel pair. Its main functional task is to correct the pressure in the drive circuit of the rear brake mechanisms, depending on the position of the car body relative to the rear axle, or on the vehicle load. The nature of its operation is similar to the operation of a limit valve, since it also interrupts the flow of brake fluid to the rear brake mechanisms, thereby minimizing the likelihood of “skidding” of the rear wheel pair.
The main structural elements of the pressure regulator are:
Torsion lever (item 1).
The regulator is mounted using a bracket and is connected to the rear axle beam using a torsion lever and rod. In addition, in the internal space of the regulator housing there are two cavities, one of which (pos. A) is connected to the main brake cylinder (hereinafter referred to as the GTZ), and the other (pos. B) is connected to the wheel brake cylinders.
The inoperative state of the regulator assumes the following positions of the main elements:
The torsion lever and spring (pos. 9) exert pressure on the piston (pos. 10), which rests against the plug (pos. 6).
In this case, gaps are formed between cavities “A” and “B”, which makes it possible to equalize the pressure in them and in the hydraulic brake drive.
During the braking process, under the influence of inertial forces, the rear of the vehicle moves upward, which helps to reduce the pressure from the torsion arm on the piston. Due to the larger area of the upper end of the piston, the pressure force acting on it will exceed the counter pressure force, which will lead to the lowering of the piston. At the moment the piston reaches the lower position and enters the seal, the communication between cavities “A” and “B” is interrupted, which initiates the occurrence of a pressure difference in them. The pressure in cavity “B” will decrease by an amount that determines the balance of the piston, that is, the amount of braking torque in the brake mechanisms of the rear wheel pair is adjusted.
Question answer.
Why don’t you use and recommend using Russian brake fluids?
I have already spoken about the lack of GOSTs. Another important fact. There are industries in which we are not very far behind others, and I am completely on the side of our manufacturers. But as far as chemistry is concerned, and this includes oils, lubricants, cuffs, rubber, the lag is very serious. I don’t want to fill in the “semblance” of brake fluid and put my reputation and the client’s LIFE on the line. Bad brake fluid is not the same thing as windshield washer with a bad smell. Once again, let me remind you of a well-known phrase from the world of sports: car tuning begins with the brakes.
The brake system on a VAZ 2121 and Niva 2131 is bled when air appears in the system, which usually occurs in the event of depressurization of the latter due to temporary wear and damage, as well as after replacing various elements of the system. To carry out repair work, you will need an empty plastic bottle, a silicone hose (the internal diameter of the hose must be equal to the diameter of the brake cylinder fittings), brake fluid and a standard set of tools, you will also need the help of an assistant, since this work is quite difficult to do alone at home.
If you have everything you need, do the following:
Having driven the car onto a viewing hole or overpass, we loosen the fittings on all brake mechanisms, having first removed the rubber caps. If some of the fittings do not have caps, then upon completion of the work they must be installed to prevent clogging with dirt.
We put an assistant behind the wheel and, pressing intensely on the brake pedal, create pressure in the system, that is, you need to pump until the pedal is blocked and without releasing, but continuing to press on it, you thereby put a hose on the fitting, and its other end Place it in a bottle that has been previously filled with brake fluid. Loosen the fitting and release the pressure in the system. If there is air in it, the liquid will come out with characteristic air bubbles. Then tighten the fitting and repeat the operation.
We pump until only liquid without air comes out of the system.
Similarly, we pump each wheel of the front and rear circuit. During the work process, do not forget to add liquid to the tank.
Upon completion, tighten the fittings on all cylinders and put rubber protective caps on them.
At this point, the repair work on bleeding the brake system on the VAZ 2121 and Niva 2131 has been completed.
We bleed the hydraulic clutch on a Niva 2121 and 2131 when there is air in the system, which is accompanied by deterioration of the clutch, provided that the remaining elements of the system are in good condition. To carry out repair work, the car must be driven into an inspection pit, overpass or lifts, then prepare a standard set of tools and perform the following sequence of actions:
- Check the brake fluid level in the clutch hydraulic reservoir and add if necessary.
- Prepare an empty plastic bottle into which you need to fill the brake fluid; you will also need a silicone tube with an internal diameter that should match the diameter of the clutch slave cylinder fitting.
- Next, remove the protective cap from the working cylinder fitting. If it is not installed, then it is necessary to clean the hole in the fitting and, upon completion of the work, be sure to install a new one so that it does not become clogged.
- We put one end of the tube onto the fitting, the other end of which is lowered into a container with brake fluid.
- Using an eight key, loosen the tightening of the fitting.
- Now the assistant should press the clutch pedal sharply and release it smoothly. At this moment, brake fluid with air bubbles will come out of the hose. We repeat this operation until the air in the system runs out.
- We tighten the cylinder fitting with the clutch pedal depressed.
- During the pumping process, do not forget to monitor the fluid level in the tank and add it if necessary.
At this point, the repair work on bleeding the hydraulic clutch on the Niva 2121 and 2131 has been completed.
https://youtube.com/watch?v=sZtLYrdpbpg
Sources
- https://niva-fr.ru/tormoza-obshhaya-statya/tormoznaya-zhidkost/
- https://remladavaz.ru/kak-prokachat-tormoznuyu-sistemu-vaz-2121-niva-2131
- https://remont-vaz2106.ru/niva-2121-2131-prokachka-gidroprivoda-scepleniya
How to bleed the brakes on a 2110 model
The main feature of the described process is its versatility. The conceptual similarity of the brake systems makes it possible to use it for cars of other brands. In order to avoid some subtleties and force majeure, on the eve of the procedure it is worth studying the technical documentation of the car being repaired. If you do not have enough knowledge and skills, it makes sense to hire an experienced assistant.
The VAZ-2110 brakes need to be pumped in the prescribed sequence:
- right back;
- front left;
- left back;
- front right.
In order to check the brakes on the 2110 model, you need to prepare the following:
- brake fluid;
- stops and jack;
- heads for 8 and 19;
- 8mm wrench for brake pipes;
- transparent tube and container.
If possible, do not mix liquids from different manufacturers. Available additives are sometimes incompatible, and this leads to the appearance of sediment or an altered state of the substance.
- First you need to check the fluid supply. If there is a need for this, it should be filled to a level not lower than the maximum mark on the tank.
- It is necessary to block the pressure regulator of the rear brake system devices. Next, the tires should be hung in such a way that they do not come into contact with the ground. It is advisable to use two jacks. The pressure regulator should be blocked with a screwdriver, which is inserted between the plate and the piston. Once pumping is complete, remove the screwdriver.
- Clean the exhaust valves on each wheel (brake device) from dirt and foreign particles.
- Install the protective cap from the outlet valve by attaching the hose. The opposite end of the tube must be lowered into a prepared container with a small amount of liquid so that the tip of the hose is below the liquid level. It is better to use transparent containers, which will make it possible to see the condition of the composition, and if the quality is appropriate, reuse it.
The next stage of work is to involve an assistant. The latter presses the brake to create pressure that displaces fluid from the system. Press the lever 3 to 5 times every 1-2 seconds. Then you need to fix it in the lower position. Now you should unscrew the air valve half or ¾ of a turn, after which liquid and air will begin to flow out of the hose. When the leak stops, the exhaust valve must be screwed back in and the brake released.
The previous step should be performed until all the bubbles have disappeared from the liquid. At the end of each cycle, the amount of working medium in the tank should be monitored. If necessary, the volume must be replenished so that the level does not drop beyond the minimum level. When the air in the system runs out, you can remove the hose. It is necessary to thoroughly wipe the valve fitting and then close it with a protective cap. This sequence of actions must be followed to pump all tires (brakes) in a VAZ-2110 car.
And in conclusion, I would like to advise you to pay attention to any little things that are unusual for your “ten”. Tapping, humming, stiff/soft pedal, rough movement, clicking - all this requires diagnostics and, possibly, repair
Why do you need a brake force regulator?
The function of the regulator is to temporarily reduce the braking force during heavy braking. The fact is that force evenly distributed on the rear and front axles can lead to a skid of the car. If the rear brakes start working a little later and weaker than the front ones, this does not happen.
Based on the above, we can conclude that the sorcerer is an element of the car’s safety system, partly preserving its stability on the road when the brake pedal is pressed in an emergency. On modern models, this function is performed by ABS. That is why there is no need today to use a technically outdated device in production.
Tools
But it is important to know how to properly bleed the brakes on VAZs of different models and what is required for this. The operation itself is not complicated, so you can do it yourself. But it’s better to do this with an assistant - it will be both faster and easier.
Not many tools are required:
- Key for 8 (10);
- Silicone transparent tube according to the diameter of the fitting;
- Capacity;
- Brake fluid;
As for the wrench, you should use the cap type. There are also special keys on the market for unscrewing fittings, clamping. The fact is that the fittings often stick to the thread and are very difficult to unscrew. Using a regular open-end tool, you can easily “lick” the edges and then it will be completely impossible to unscrew the fitting.
The essence of pumping work is almost the same for all cars - VAZ-2101, VAZ-21099, and VAZ-2121 Niva. But the sequence of operations is affected only by the design features of the models.
"CHEVROLE-NIVA"
By the way, before testing tires on cars without ABS, each time we slightly adjust the regulator taking into account the road condition (snow, ice, asphalt), ensuring that the rear wheels lock a little later than the front ones. Let's not break tradition. Our Shniva found the gap between the cheeks of the regulator to be 16 mm, which was adjusted using a stop screw.
Several brakings, and the braking distance from 80 km/h for a car with a partial load is determined: 34.4 m. With a full load... 33.6! Almost a meter shorter! At the same time, the driver noted a heavier pedal and rapid heating of the brakes, which required cooling before each measurement. Let’s remember these parameters and make adjustments to the “sorcerer” adjustment. First, let's reduce the gap to 8 mm. Now the regulator significantly limits the pressure in the rear brakes, transferring almost all the hard work to the front ones.