Why does the car jerk when starting off?
If the car starts to jerk while starting from a stop, the reason is usually due to a malfunction of the clutch or CV joints. In such cases, it is imperative to carry out diagnostics in order to immediately determine the breakdown and begin to eliminate it.
The main thing is not to panic, you need to make sure that before you start driving, the engine is warmed up to operating temperature, there are no problems with the ignition and the fuel supply system. If everything is normal here, then we need to further look for the cause.
Driving style
Inexperienced drivers often abruptly release the clutch pedal, causing the car to start jerking away. There are no malfunctions, you just need to change your driving style, learn to smoothly release the clutch and add gas at the same time.
It is necessary to determine the moment of clutch actuation on the car. To do this, start off without adding gas and smoothly release the clutch. Having determined in what position the clutch begins to engage, you can move away smoothly. On a car with an automatic transmission there is no clutch pedal. In order for such a car to move without jerking, the gas pedal must be pressed smoothly.
Problem with CV joints
In front-wheel drive cars, the force from the gearbox is transmitted to the wheels using internal and external CV joints. If these parts partially fail, the car will jerk when moving away.
Signs of CV joint failure:
Replacing CV joints can be done at a service station or independently. These are relatively inexpensive parts that require little time to replace. Having an inspection hole and a set of keys, you can replace the CV joints with your own hands.
Procedure for replacing the CV joint:
Clutch faults
Very often, problems associated with car jerking at the start occur when the clutch breaks down.
Main clutch malfunctions:
Replacement of the clutch driven disc is carried out in the inspection pit. You can raise the front of the car using jacks or a winch.
Work order:
Video: the car jerks when starting due to clutch problems
Gearbox failure
When the gearbox is faulty, in addition to jerking at the beginning of movement, difficulties may arise with shifting gears, and extraneous noise may appear. It will be possible to diagnose and repair the gearbox only at a service station. It will be easier with a manual transmission, since it has a simpler structure and its repair is usually inexpensive. To restore the automatic transmission you will have to spend more money.
Steering faults
The steering rack is responsible for transmitting force from the steering wheel to the front wheels. If there are certain malfunctions, jerking may occur during start-up; in addition, vibrations can be felt in the steering wheel. If the tips are worn out, they begin to loosen. This leads to vibration of the front wheels, so jerking occurs at the start, as well as when accelerating and braking. Worn steering elements are not restored, but replaced with new ones. It is difficult to do this on your own, so it is better to contact a service station.
Problems with engine operation or mounting
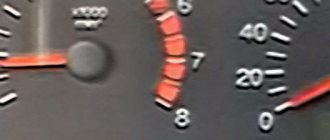
Jerking of the car at the beginning of movement may be associated with irregularities in the operation or mounting of the engine. There are many options here. One of them is floating speed, which can be determined by the tachometer readings; they will either increase or fall. If there is no tachometer, then by the sound of the engine you will hear how the revolutions change. As a result of unstable speed during start-up, the car may jerk. Some injectors may become clogged, causing fuel to flow unevenly into them and the engine to operate incorrectly.
Incorrect mixing of air and fuel leads not only to jerking at the start, but also while driving. Often the reason is associated with damage to the rubber flange of the air duct, which is popularly called the “turtle”. Another reason may be failure of the engine mounting mounts. If this happens, the engine lock is broken. When starting to move, it will vibrate, as a result of which shocks are transmitted to the body and the car twitches.
Video: why the car jerks at the start
If a beginner experiences jerks when starting a car, then it is usually enough to change the driving style and learn to smoothly release the clutch. In other cases, when such a problem occurs, the cause must be immediately determined. This will eliminate the problem and prevent more serious damage. Steering faults can lead to accidents and should only be repaired by a professional.
Source
Incorrect use of the car's clutch
Beginners do not immediately learn how to smoothly depress the clutch, and when released abruptly, the car begins to drive jerkily. In this case, regular driving practice will help, when the car enthusiast can press both pedals at the same time.
It is important to correctly determine when the mechanism is triggered. As a training technique, use the following technique - set the car in motion without adding gas, gently pressing the clutch. This method is only suitable for machines with mechanical gearboxes.
Automatic vehicles have no clutch at all. Therefore, smooth driving is achieved by gently squeezing the accelerator.
Checking VAZ-2107
Now let's take a closer look at how to identify the cause of such a malfunction on different car models.
The first will be the carburetor VAZ-2107; there are plenty of cases when the car suddenly starts to jerk while driving.
If actions with the fuel system did not help, we proceed to checking the ignition system.
We unscrew the spark plugs, check their functionality, and replace them if necessary; We check the system wiring for breakdown. This can be done this way - in the dark or in a closed garage (the main thing is that it is dark), open the hood and start the engine. If there are voltage losses on the wiring, they will be immediately noticeable by the sparks that form. Next, we replace the wiring that “breaks through” and check the wire connections; Next, we check the distributor, there should be no signs of critical wear, it should be dry under the cover. Be sure to inspect the centrifugal regulator, and also check the vacuum regulator. You should check whether there is a vacuum in the pipe leading to it. Then the Hall sensor, coil and switch will be checked for functionality. You can do this yourself if you have the necessary equipment at hand, but you need to know how to check them
But you can contact an auto electrician. It is also important not to forget to check that the ignition is installed correctly.
This is in general and all the features of identifying the cause of uneven running on the VAZ-2107.
Steering Troubleshooting
If the type of mechanism is a screw-nut, then during long-term operation the wear of the rubbing parts increases the gap between the worm and the driven gear. It can be eliminated by tightening the adjusting bolt in the steering gear housing cover and using high-quality lubricant. The main thing is not to overtighten the bolt while tightening. Otherwise, rotation of the steering wheel will be difficult and wear of parts will only increase.
If the type of mechanism is rack-and-pinion, then severe wear increases the gap between the rack and pinion. The malfunction can also be eliminated by tightening the adjusting bolt. However, there are mechanisms where there is no gap adjustment. They are replaced assembled, or disassembled and polished on machines. Poor fastening of the steering linkage supports is caused by poor tightening of the bolts. This is also a breakdown of the bracket or, in rare cases, the spar. Eliminated by tightening the bolts and welding broken parts. What to do if vibration occurs when starting off (VAZ 2101-2109)? Let's take a look below.
Typical faults
Let's look at the most classic injuries.
A clogged injector nozzle is unable to inject the required amount of gasoline or diesel fuel. As a result, a significant amount of fuel burns out in the manifold, and this leads not only to an increase in consumption, but also to other malfunctions - loss of power characteristics, increased load on the electronics, failure of the ignition module, spark plugs, armor wiring, etc.
Normal and clogged injector nozzle
When little fuel enters the system, this may indicate a failure of the fuel pump. The latter, in many cases, is simply installed crookedly in the process of amateurishly carried out repair work. In many cases, the fuel pump simply becomes clogged and needs to be cleaned.
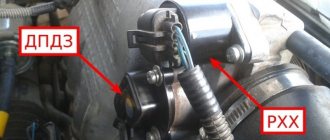
The most compelling reason for unstable operation of the idle mode is a malfunction of the IAC sensor. In some cases, the throttle surface may become clogged.
Engine starting problems are usually caused by a lack of spark. To quickly check this, it is recommended to use a spark gap. Experts do not recommend checking the spark for a break, as this may negatively affect the operation of the ignition module and controller.
What to do if a VAZ car jerks when driving, troubleshooting
On various automobile forums, the question is often asked: “What should I do if my VAZ car twitches?” Experts distinguish three main types of such jerks. Firstly, this is when the car begins to twitch at the beginning of the movement, secondly, jerking begins as soon as the car begins to accelerate and, thirdly, the car continues its smooth, steady motion, and suddenly begins to move with jerks.
In the first case, most often the cause of the problem is a loss of power (not counting the fact that the car may jerk due to a cold engine). Most often this happens either due to problems with the accelerator pump, or you need to check the condition of the vacuum corrector of the ignition distributor. In order to do this, it is necessary to remove the accelerator pump nozzle and thoroughly blow it out. If a fault is found in the vacuum corrector, you will simply have to replace it. If these steps do not help, you need to turn out and check the spark plugs, and if necessary, replace them.
If the car begins to twitch during acceleration, there may be several reasons. This could be a clogged engine, a faulty fuel pump, or a clogged additional fuel filter. Another reason could be a malfunction of the ignition system. Low gasoline levels can also cause the car to jerk when accelerating. First of all, you need to remove the air filter and carburetor cover. After this, you need to check the fuel level (in normal condition it should be 22 millimeters below the partition line of the carburetor cover and body).
If the fuel level is not on this line, then it needs to be adjusted by bending the float. Thus, it is necessary to increase the gap between the floats and the cover gasket to 2 millimeters. Be sure to rinse and strongly blow out the carburetor filter. If it turns out that it is very dirty, it needs to be replaced. Also, the additional fuel filter must be checked; if necessary, it must also be replaced. After all that has been done, you need to try to drive, but if the jerking does not stop, then the reason is a malfunction of the fuel pump or ignition system. You can replace the spark plugs and change the fuel filter yourself.
If jerking suddenly occurs during steady-state driving, the first cause of this problem may be a malfunction of the ignition system. There are only a few things you can do on your own. You need to start by inspecting the space under the hood to check the integrity of the connectors and the condition of the connectors. After which you need to start the engine in the dark and carefully look to see if there is a spark somewhere, that is, if there is a breakdown in the high-voltage wires to ground. In addition, you need to replace all spark plugs, even those that look normal or were installed not so long ago.
Replacing the upper arm
- jack the car;
- remove the wheel;
- unscrew the protection;
- unscrew the bumper mounting bolt;
- We unscrew the nut and squeeze out the ball joint bolt with a puller (you don’t have to touch the bolt, but unscrew the ball joint itself);
- unscrew the lever axis;
- remove the upper arm;
- fix the lever in a vice and remove the silent blocks with an extractor;
- We install removed or new silent blocks onto a new one.
We assemble in reverse order.
Check the condition of the silent blocks and ball joint in advance; it is better to replace them immediately. Check the size of the old and new parts. It happens that after such a replacement the upper arm touches the spring, since the new one has a difference in size (false). I purchased it during repairs, after assembly the spring clings to the part. After starting, all the springs died.
Removal and installation of distributor VAZ-2107, 2104, 2105, 2106
Preparation
Before installing a new VAZ-2107 distributor for a contact ignition system, you need to adjust the gap between the contacts of the breaker. It is more convenient to do this with the device removed from the car. We check the gap with a flat feeler gauge. The value is set from 0.35 to 0.45 mm. In this case, the protrusion of the cam should move the moving contact away from the stationary contact as much as possible. We adjust by slightly loosening the screws, and then tighten them more firmly and check the gap again. Contacts that have worked hard may have a protrusion on one and a depression on the other, which interferes with adjustment. You can get around this problem by grinding off the protrusion with a needle file. It is better not to use sandpaper, because... small particles of abrasive will definitely “eat” into the surface and interfere with the operation of the contacts.
Before removing the old distributor, mark its position relative to the cylinder block with a marker. You also need to accurately mark the position of the moving contact (slider) relative to the body. If all this is not done, the settings will be violated and the engine will not start.
Installation
Having established exactly the same position of the roller in the body on the new distributor, carefully insert it into the hole in the block, slightly turning the roller to align the splines. Having “planted” the device in place by rotating the body relative to the block, we set the approximate advance angle, as on the old distributor. Secure with a washer and nut, but not too tight. Now you need to plug in the high voltage wires. This is easy to do - each contact on the distributor cover has the number of the cylinder to which it needs to be connected. We connect the wire from the ignition coil to the central terminal. The wires should fit tightly, with a slight tension, the protective caps should be pushed all the way down. Don’t get carried away, don’t bend the petals of the wire tips too much, otherwise later, when you try to remove them, you’ll tear off the wires “with their roots”! A wire goes from the contact wire to the “K” terminal of the ignition coil, usually it is green. If your VAZ-2107 is equipped with a contactless ignition system, then you need to connect a connector with three wires. Having plugged it into the socket, check the fit of the wires; it happens that they “crawl out” from their places and the device does not work. Everything is done, the new distributor is installed and ready to go. Let's try to start the engine. Started up? Great, that means everything was done correctly, all that remains is to check and slightly adjust the ignition timing.
Spring
To replace a damaged or sagging spring, you will need to remove the shock absorber and disconnect it from the stabilizer bar arm.
Then you need to loosen the nuts securing the lower arm axle to the cross member. The lower arm is pressed with a jack, but without loading the suspension. The ball joint pin is removed from it using a puller.
After which the jack is slowly lowered, weakening the spring. The weakened spring is removed from the lower support cup with a spatula.
Before installing a new spring, it must be compressed using special spring ties, otherwise the spring will not fit into place.
The new spring is placed in the lower support cup, after which the lower arm is pushed up with a jack to insert its ball joint into the steering knuckle.
Having secured the support, remove the ties from the spring. The remaining parts of the suspension are assembled in the same sequence as they were removed.
To summarize, we can say that repairing the front suspension of a VAZ 2107 may not seem difficult at first glance, but as a rule, it can cause difficulties for an inexperienced driver.
And this is connected not only with the presence of certain knowledge, which, we hope, you received from our article, but also with the presence of a certain skill, without which you are unlikely to be able to repair any domestic car.
Why the engine jerks during acceleration: the main reasons
Let's start with the fact that most of the reasons why such deviations occur in the operation of internal combustion engines are often associated with the following systems:
The culprit may be either the carburetor itself (dirty jets, incorrect settings, etc.) or the fuel pump. At the same time, we should not exclude the possibility that excess air is being sucked in somewhere, which causes the carburetor engine to jerk when accelerating the car.
As for modern injection engines, a number of common problems will be similar to engines with a carburetor. At the same time, problems that are characteristic exclusively of units with injection injection are also added to the list.
Let's focus on the possible causes of dips and jerks
First of all, let's start with the ignition system. As a rule, if problems arise in this system, there is a loss of power and the unit consumes more fuel. Usually spark plugs, high-voltage armored wires, and ignition coils fail. We also note that on injection cars the problem may lie in a faulty camshaft position sensor (CPR).
If no breakdown is detected, you should unscrew the spark plugs and inspect them. The electrodes must be intact, excessive carbon deposits are not allowed, the insulator must not have cracks, etc. Checks may also require armored wires. In some cases, after replacing the spark plugs and spark plug wires, the engine stops jerking during intense acceleration.
However, it happens that these methods do not bring the desired result. In such a case, it is necessary to check the camshaft position sensor separately.
Let us also add that the ignition timing (ignition timing, ignition timing) also deserves special attention. If the car jerks when accelerating, the ignition may be too early. On carburetor internal combustion engines, it is necessary to manually set the specified angle. On the injection unit, adjustment occurs automatically. However, we should not forget that interference with the factory firmware of the ECU (especially on cars with gas equipment) or problems with sensors can lead to malfunctions of the ignition system.
Malfunctions of the carburetor and other systems
The second most popular system that fails in the VAZ-2107 is the carburetor.
After checking the fuel system and carburetor, you need to pay attention to the distributor. Be sure to check the quality of the ignition contacts that distribute the impulse to the spark plugs
If the contact burns out, the engine will “triple”, “double”, and jerking will be felt while driving.
In the rarest cases, the car may move jerkily due to the spark plug failing soon. Typically, this behavior is unusual for this element of the ignition system, but car mechanics sometimes encounter this problem. The fact is that before failure, the spark plug begins to spark randomly, creating failures in ignition. The engine reacts to this with jerks and uneven running. Modern spark plugs most often do not behave this way; spark problems occur with inexpensive options with low quality.
Characters without spaces – 4468
Uniqueness of ETHT – 98%
Uniqueness of Text.ru – 100%
Academic nausea Advego–7.5%
Advego word frequency – 1.61%
Sometimes it happens that when driving, the car begins to twitch when the speed increases or when driving at a steady pace. At these moments, the driver can “boil” no worse than the engine itself. Moreover, when stopping and externally inspecting the engine, everything may look absolutely normal. The only correct behavior in this case is to drive and listen to the engine.
But for an inexperienced motorist, it is difficult to understand from the sound of the engine what is wrong with it. Therefore, below are the main reasons for this engine behavior and methods for eliminating them.
Suspension upgrade
The standard suspension of the "seven" is considered soft and imperfect. That's why many people decide to do tuning and modifications. This helps significantly improve handling and overall comfort, as well as extending the life of springs, balls, bushings and other components.
Reinforced springs
Springs are the main element that ensures a smooth ride, directional stability and good handling. When they are weakened or lowered, the suspension cannot compensate for the load, so failure of its elements and other problems occur.
Owners of the “Seven” who often drive on bad roads or drive with a loaded trunk should definitely think about upgrading the standard springs. In addition, there are two main signs by which you can judge that the elements need to be replaced.
- After a visual inspection, the springs were found damaged.
- The vehicle's ground clearance has decreased significantly because the springs have dropped over time or due to excessive load.
Spacers are the first thing that comes to mind for VAZ 2107 owners. But this is not an entirely correct conclusion. Yes, they will restore the stiffness of the springs, but will negatively affect the service life of the elements. Soon cracks will appear on the springs reinforced in this way.
Therefore, the only correct solution would be to replace conventional springs with reinforced or modified ones from the VAZ 2104. In this case, the shock absorbers must be replaced with more powerful ones, otherwise the reinforced springs will easily damage the standard system.
Before you begin the replacement procedure, you need to equip yourself with the following tools.
- Lift up.
- A set of various keys, including a wheel wrench.
- Scrap.
- Bruscom.
- Wire hook.
Now more about the replacement.
- Place the car on a jack and remove the wheels.
- Disassemble conventional struts or shock absorbers.
- Loosen the shoulder clamps.
- Place a block under the car and lift the lower arm with a jack.
- Unscrew the stabilizer bar mount.
Then you need to release both springs from the seals and check the condition of the latter. If they are in good condition, install them onto the new spring using electrical tape. Install reinforced springs in place of the standard ones.
Air suspension
The “Seven” has great potential in terms of modernizing the front suspension. And many car owners decide to install an air suspension with an electric compressor, hoses and a control unit.
This is a real electronic assistant that allows you to change the ground clearance depending on driving conditions. Thanks to this innovation, the car's stability at high speeds increases, long trips become comfortable, the car overcomes bumps more smoothly, in a word, it looks like a foreign car.
The system modernization goes like this.
- VAZ 2107 is installed on a pit.
- The battery is de-energized.
- The wheels are removed from the car.
- The front suspension was completely disassembled and air suspension elements were installed in its place.
- The control unit, compressor and receiver are located under the hood. Then the elements are connected to each other by pipes and hoses.
Video: air suspension on a VAZ, is it worth it or not?
Electromagnetic suspension
Another upgrade option involves the use of an electromagnetic suspension. This is a set of mechanisms and components that act as a link between the road and the body. By using this suspension setup, a smooth ride, high stability, safety and comfort are guaranteed. The car will not “lower” even during long stops, and thanks to the built-in springs, the suspension will remain operational even in the absence of commands from the on-board network.
Today the most famous manufacturers of electromagnetic suspensions are Delphi, SKF, Bose.
The front suspension of the VAZ 2107 requires timely maintenance and inspection of the main components. Remember that road safety depends on this.
Hospitality! Upper arms: a ball joint is installed on them, in addition, thanks to them, it also holds the spring (Located inside, between the lower arm and the body, but the upper arm also plays an important role, if you remove this, the springs will fly out of their place after the first impact ), all classic levers are used in the front suspension, if we are talking about PP- “Front-wheel drive”, then they have a suspension design, then the rear one, the one that has been radically changed in the front, there are already telescopic struts, thanks to which the car is better It stays on the road and the spring and shock absorber eliminate unevenness as much as possible, because they are very, very close to each other (the shock absorber is located inside the spring).
Note! To replace the upper control arm you need to remove the wheel, ball joint, and to remove the ball you will need a puller and a lot of time, so immediately be patient, pick a day and get to work you will need to do. : Also, horn keys, caps, connecting rods with heads would be nice, and you will also need a balloon and a jack to hang the front of the car!
Summary:
Where is the upper arm? Below is a photo in which the arrow indicates the upper lever. Today we are disassembling this lever, unlike the lower one, it is not difficult to replace it, because everything is done to a minimum, that is, we unscrew the three small nuts that attach the ball joint and then unscrew the large nut, the bolts of the upper arm and after that it will be necessary to remove it, and if the lower one changes, then it will be a hemorrhoid, firstly, it is inconvenient to crawl the nuts, secondly, the spring must be tightened with ties and thirdly, the upper ball will need to be unscrewed before anything becomes possible, because that the upper lever will interfere and by unscrewing the ball and pressing on it with a special puller, the upper lever can be easily tilted back, that's how many more actions need to be done, so drive carefully, most often it is not possible to turn the lower lever (usually when you get into a deep hole , if you drove the car for more than a year, q so most likely they got into such a situation and since the lever is at the bottom and the car falls into the hole, all the weight falls on it, in other words, the car falls on the lever, which means it is deformed and must be replaced).
When should you change your shoulder? It should be replaced only in case of deformation, if it was accompanied by a crack and similar defects, there are those who change the levers when the bushings break, but some of these bushings themselves are changed in the old levers and put everything in place, without special tools these bushings cannot be replaced, they press hard, and new ones go even worse, therefore, in order not to bother, motorists immediately buy a new lever assembly, the price of which is 200-400 rubles, you can find it for 100 rubles for disassembly in normal conditions.
The main components of the distributor and a description of its operation
VAZ classic distributor device
Device.
The distributor is assembled in a housing. Inside it, a contact group is mounted on a bearing: moving and fixed contacts or a Hall sensor (for contactless ignition). To correct the advance angle, the vacuum regulator can rotate the contact group at a small angle relative to the housing. The capacitor is attached to the bottom of the case with screws. A drive roller is mounted on bushings in the center of the body. Its bottom has splines with which it engages with the drive gear. In the upper part of the roller there are contact drive cams (for contact ignition) or a steel cup with four slots - a screen (for contactless ignition). At the very top, on a steel platform, two weights and two springs of the centrifugal ignition regulator are installed. A plastic housing with a moving contact and noise suppression resistance of the high voltage distributor (slider) is screwed onto the top with two screws. The entire structure is closed with a lid on two spring latches. The body and cover have a tongue and groove so that they fit together in only one position. The cover contains contact terminals for high voltage wires from the spark plugs and from the ignition coil. The distributor is secured to the engine block using a stud, nut and pressure washer. To adjust the ignition timing, the housing can be rotated relative to the block.
Job.
The distributor is connected through the drive to the engine crankshaft and rotates with it. For two full revolutions of the crankshaft, the distributor shaft makes one revolution. This is due to the fact that our engine is four-stroke. When installing the distributor in place, the roller is oriented in strict accordance with the operating order of the engine. This is done so that the contacts open and the spark jumps on the spark plug when the piston of each cylinder, compressing the combustible mixture, does not reach top dead center (TDC) by a few millimeters. This is called ignition advance. When the number of revolutions increases, the distance must be increased, and when it decreases, it must be decreased, which is what the centrifugal regulator does. Its weights, under the influence of centrifugal force, which is greater the higher the engine speed, diverge to the sides and move the cams relative to the roller, making ignition “earlier.” When the engine speed decreases, the springs return the weights to their place and the ignition becomes “later”. This is necessary to increase engine power and efficiency. In addition to the centrifugal one, a vacuum ignition timing regulator is also installed on the distributor. Its function is to fire “earlier” at low throttle opening angles and “later” at sharp throttle opening angles. At idle and at full throttle, the vacuum seal does not work. The regulators are adjusted only at the stands, so there is no need to change the settings yourself.
Causes of clogged injectors
Poor quality fuel is one of the main reasons for injector failure. A huge amount of resins that settle inside the injectors reduce the throughput, they do not allow the valves to close hermetically, and thereby the angle of the injected fuel jet changes. When starting the engine in winter, a failed valve causes the mixture to become over-rich, resulting in increased fuel consumption and increased toxicity of exhaust gases. If fuel is sprayed incorrectly, disturbances occur in the mixture formation process, and this is the first reason for the deterioration of almost all engine performance. Clogging of injectors occurs when using fake fuel filters, or if the car owner simply forgot to change the filter. With pressure in the fuel system, the filter may simply rupture, and dirt will naturally enter the injectors.
Why does the VAZ 2107 jerk?
When the driver discovers that the VAZ 2107 car is twitching, first of all there is a feeling of wariness and, of course, this is terribly annoying.
Usually, a visual inspection of the engine does not bring any results. To identify the cause, it is necessary to determine under what conditions the car jerks.
The most common options are:
If the VAZ 2107 car jerks periodically in the 2nd and 3rd cases, then you need to pay attention to the operation of the clutch and its condition. Other cases may be harbingers of a wide variety of malfunctions
Main reasons
Most often, the VAZ 2107 jerks due to low-quality gasoline. If fuel was poured into an almost empty tank, the first jerks will begin almost immediately. If there was already a certain amount of gasoline, then the car will be able to drive relatively calmly for some distance.
Also a sign of poor fuel quality is the black color of the exhaust when driving. The engine loses power, but the car continues to drive. There is a small chance that when driving, all the low-quality gasoline will be used up. Alternatively, you can dilute it with a better one, for example, at the nearest gas station.
Fuel quality
In the case where such a problem arose shortly after refueling and it is not relatively hot outside. Almost one hundred percent the root of evil lies in the quality of the fuel poured in. If low-quality gasoline was poured into an almost empty tank, such symptoms appear almost immediately. In this case, to compensate for the negative effect, you can add high-quality fuel to the tank and thus dilute the surrogate. Then you can continue driving on this “fuel” until it is completely used up.
If this method does not help, you will need to drain everything in the tank and completely flush the fuel system. Flushing the system is performed as follows. Initially, all fuel is completely drained (including from the fuel lines). The gas tank is removed and washed, and the lines are purged. Next, you need to completely download all the gasoline from the fuel pump and rinse it too. The carburetor is rebuilt and purged. Also, do not forget about timely replacement of gas filters. If they become clogged, fuel may not fully enter the engine and cause a breakdown.
After the system is completely flushed, high-quality gasoline is poured into the tank and the engine is started.
The next reason for inadequate operation may be the presence of condensate in the gas tank and its entry into the engine. This problem usually occurs in the spring after the car has been idle for a long time. The fact is that when the car is stored in winter with a full tank of fuel. Water condensation forms in it, which in turn accumulates at the bottom of the tank and remains there until the motor starts working again. After starting the engine, water enters the fuel and disrupts engine operation. This trouble usually goes away quickly and, as a rule, on its own.
If the quality of the fuel is beyond doubt, the essence of the problem should be sought in the carburetor and ignition system.
Problems with the fuel pump
During diagnostics, you should take into account the conditions under which engine malfunctions occurred - when was the last refueling, air temperature, duration of the trip, time of year. All these factors can play a decisive role in further diagnostics, save the technician from unnecessary work and significantly save time.
For example, problems with the fuel pump can occur if it overheats during a long drive or very high temperatures outside, or when driving at very low speeds. In such cases, vapor locks may form in the pump, which can only be eliminated by cooling the unit. The resulting blockages interfere with the operation of the vacuum fuel pump and prevent it from fully pumping gasoline into the engine. This is one of the most common diseases on similar VAZ models and only replacing the unit will help eradicate it. In the case when a problem arose in what is called “in the open field” and you need to get to the nearest populated area. Regular cold water will come to the rescue. She should water the gas pump or wet a piece of rag, wrap it around the knot and wait a little. After the unit cools down, the car will start and behave absolutely normally.
VAZ 2107 jerks on a cold engine
Hi all. I have a VAZ-2107i. I began to notice that when you drive with a cold engine (even in summer), the car jerks, it feels like the engine torque is constantly changing. Especially when overclocking
There is no problem. Any car with a cold engine will jerk like this, regardless of whether it has carburetor power or injection. Don't fool yourself.
Any car with a cold engine will jerk like this, regardless of whether it has carburetor power or injection.
So, does it also twitch in neutral, or only under load?
For me personally, it works great in neutral. It twitches a little when starting, and I only noticed it a few times.
When starting off there are jerks, it's the clutch you're looking at, not the engine. You don’t know what to expect from our machines
A friend's seven came from the factory with the check engine light not connected, he didn't even change the Enegels spark plugs, he thought everything was fine. And the car was shaking at the beginning of the drive due to the fact that when starting, out of habit (after switching from the carb), he pressed the accelerator. The spark plug controller was flooded and at least one did not work until you drove about five hundred meters and cleaned the spark plugs. He went there to straighten the red plastic (he says it askance), and discovered this nonsense. In general, it starts, the SE lights up, after a while it goes out, the accelerator doesn’t touch - the SE doesn’t light up and everything is ok.
The light is always on when you turn the key and goes out when the engine starts, but you can’t touch the accelerator pedal when you start it, it’s all written in the manual
By the way, I didn’t change the spark plugs from the factory and everything seems ok.
