The pump is an important element of the automotive cooling system. It affects not only the performance of this unit, but also the operation of the engine. If it fails, serious problems with the engine may occur. That is why it is so important to know where the pump is located on the VAZ 2114, what it is used for and what are the signs of its malfunction. This will help you notice the problem in time and replace the broken part. All this is discussed in our material.
Signs of breakdown
There are several main signs of a pump malfunction that you can easily check with your own hands. We invite you to familiarize yourself with them in the corresponding table.
| Malfunction | Verification method |
| Engine overheats | To check, turn on the stove. If the air enters cold, then coolant does not circulate in the system. The pump needs replacing. Most often, failure is associated with a violation of the integrity of the impeller. |
| Timing belt wears unevenly | The belt becomes loose due to wear of the bushings and bearings. To check the water pump, you will have to dismantle it and examine its current condition. |
| Coolant leaks | This problem occurs when the water pump operates for a long time. The gasket may be worn out or it was simply installed incorrectly during a previous repair. |
Regardless of what kind of problem you have to face, the only correct solution is to replace the water pump. It’s quite possible to do this kind of work with your own hands. To do this, you will need a little time, tools and a new high-quality pump that is suitable specifically for your VAZ 2114.
Results of the work carried out
After the work is completed and the time allotted for the sealant to harden, we start the car (VAZ-2115) and conduct a test drive a short distance, preferably on an uneven section of the road. If you don’t smell antifreeze in the car’s interior, and there are no extraneous noises or knocking coming from the engine, then the work to replace the cooling system pump has been carried out efficiently.
Thus, you have gained experience in replacing the water pump of your own car 2115 and saved about one thousand rubles, which would have been required when replacing it at a service station.
There is a special offer on our website. You can get a free consultation with our corporate lawyer by simply submitting your question in the form below.
Is it possible to independently replace a VAZ-2114 pump with 8 valves?
If the car owner has repair skills, he will be able to independently replace the damaged pump with a new cooling element. The operation is carried out in stages:
- It is best to install the machine on a special overpass or pit for inspection and repair;
- Be sure to turn off the power to the car by disconnecting all terminals from the battery;
- you need to remove the cap from the expansion tank;
- place a previously prepared five-liter container in the area where the cylinder block is located;
- Using a 13mm wrench, unscrew the protective drain plug and drain the remaining coolant into the container. After all the liquid has drained, the plug must be screwed back into place;
- using a 10mm wrench, unscrew the bolts in triplicate that secure the timing case;
- the unscrewed casing is carefully removed;
- The crankshaft must be installed exactly relative to the fixed point of the first cylinder. To carry out this process, use a 19mm wrench to turn the connecting bolt of the generator pulley. It is carried out until the special mark located on the camshaft coincides with the mark of the rear drive casing. Before starting a turn, you should turn off the gear transmission;
- Next, you need to check the coincidence of the marks located on the housing related to the clutch in the flywheel. For easy checking, it is recommended to remove the crankcase plug, which is located on the right side of the cylinder;
- if the marks coincide, you need to fix the shaft in this position. As a latch, you can use a special slotted screwdriver, which must be inserted between the teeth of the flywheel;
- Using a 17mm wrench, slightly unscrew the nut that holds the tension roller, turning it counterclockwise. This will also reduce the timing belt tension;
- the tension roller and timing belt are removed;
- unscrew the five fasteners holding the lower drive casing and three connecting bolts that secure the pump, carefully remove the casing;
- Insert a long screwdriver into the pump housing and pull the pump out. The permanent location of the pump is thoroughly cleaned of all kinds of contaminants;
- the removed gasket is carefully treated with special sealants for cars, and installed on the body of the new pump;
- a high-quality new pump should be installed in a permanent place;
- all subsequent assembly work is carried out in the reverse order that was used during disassembly.
We recommend: How to set the ignition using a strobe?
Chevrolet Niva
Perform steps 2 through 6 for adjusting belt tension. Reinstall the crankshaft position sensor.
Shniva: belt replacement
As an option, one serpentine belt can be installed on the vehicle, which drives all auxiliary units of the water pump, generator and power steering pump. In this case, the generator is installed to the left of the engine at the top.
The new product is first put on the crankshaft pulley, then on the generator pulley and partially on the water pump pulley. Then you need to rotate the wheel until the belt is in place. Next, you should return the generator to its previous position.
Then check the belt tension and tighten the fastening nut.
Tags: 2014, kia, panel, instrument, LED
« Previous entry
Purchase rules
When purchasing a spare part, visually inspect it, evaluate the condition of the metal and connections. Visually compare several options from different manufacturers for the quality of rotation of the blades and the clearly set angle on the side where the pump is attached to the engine block. Because an unevenly located pump will lead to belt wear. Below, we have selected the most popular models of water pumps, which are characterized by stable and long-lasting operation.
Choosing a pump (which is better for VAZ-2114)
- Gates.
- Luzar.
- TZA.
- HEPU.
Pump from TZA
Pump from Luzar
Pump from HEPU series R 620-625
pay attention to how to determine the originality of the product.
It is very difficult to definitively answer the question of which manufacturer or company is better, because a large number of devices have both negative and positive reviews. Therefore, you should make your choice from the most popular models among car enthusiasts.
Skf
Swedish manufacturer, known in many countries around the world. Its production workshops are also located on the territory of the former CIS countries. The product is very durable. It usually lasts at least 130,000 kilometers, which is considered an excellent indicator for water pumps. All products at the factory undergo strict quality control. Therefore, the defect rate is negligible. Spare parts of famous brands are often counterfeited. Therefore, when purchasing, you need to be extremely careful. Original pumps have the workshop mark, and there is always a marking on the box. Even the absence of one of these signs indicates a fake. Pros:
- Excellent quality;
- Durability;
- Availability;
- Acceptable price.
Minuses:
- Lots of fakes.
The cost is about 2800 rubles.
Replacing the pump on VAZ 2114 and 2115. Everyone can do everything
A fairly common job is to replace the pump on VAZ 2114 and 2115. This is due to the low quality of this unit. When operating at high speeds, the water pump cannot cope with its duties, which leads to problems with the bearing. Its wear and tear is noticeably accelerated. Therefore, for each owner of any of these models it is simply necessary to know all the signs of pump wear, as well as the technology for replacing it. This will allow you to significantly save on visiting a car service for repairs. In addition, this work is usually done independently with a higher quality, which extends the mileage between repairs. Diagnostics Replacing the pump on a VAZ 2114 and 2115 may be required in a variety of situations. At the same time, it is extremely important to promptly determine that the problem is in the pump. The first and main sign of problems with the pump is increased heating of the engine. When such a phenomenon occurs, a simple diagnosis can be made. To do this, start and warm up the engine. Then we touch the pipe that comes from the pump; if it is working properly, then you will feel the movement of liquid at your fingertips. Otherwise, you will have to change this unit. In addition to this, there is another pump breakdown, which first warns of failure. This is bearing wear. At first, a howling or knocking sound will be heard when the pump operates. After a while the bearing will simply jam. To prevent this from happening, it is necessary to respond to such sounds in a timely manner. Everything is clear with the howling, just open the hood and it will become clear what is howling: the generator or the pump. Knocking is more difficult. People often confuse the knocking noise of the pump and the camshaft. You will probably be able to determine the cause of the knocking only by removing the pump. It is recommended to regularly inspect the pump for leaks. If there are visible leaks of coolant, the gasket under the pump, as well as that located between the halves of its body, should be replaced. Choosing a pump Repairing the cooling pump on a VAZ 2114-15 does not make much sense. Its design does not involve replacement of parts. Of course you can change the bearing. But it will probably have to be repaired again soon. Therefore, the easiest way is to purchase a new part, install it, and forget about it for a long time. Fortunately, the cost of spare parts is low. It can range from 600 to 1000 rubles. Moreover, cost is not always an indicator. Try to purchase parts only from trusted stores. When purchasing, always check the completeness and presence of holograms. Replacement In principle, the work of repairing the pump is not difficult. To do this you will need a minimum number of tools:
- Keyset(10,17,19);
- Head for 10;
- Slotted screwdriver.
It is most convenient to carry out all manipulations in the inspection hole; you should also not carry out work on a hot engine. The replacement process itself occurs as follows:
- Remove the crankcase protection. Otherwise, it will interfere with our further actions;
- Drain the antifreeze. To do this, open the valve on the radiator. Find the drain bolt on the engine and unscrew it. Sometimes it's easier. Simply unscrew the pipe clamp and drain the liquid through it;
- When using the “10” key, unscrew 3 bolts securing the timing case;
- We set the tags;
- When using the “17” key, the camshaft pulley mounting screw breaks off. To do this, jam the pulley with a screwdriver. Be careful not to lose the key;
- Unscrew the belt tensioner and remove it;
- The belt is removed from the upper pulley and from the pump;
- Remove the camshaft pulley. Usually it can be removed without problems; in extreme cases, you can lightly tap it on the back side with a hammer;
- Unscrew the protective cover and then remove it;
- The rear casing nuts also secure the pump. Therefore, to remove it, it is now enough to simply pry off the edge with a slotted screwdriver. Next, the pump is carefully removed;
- We clean what is left of the gasket from the cylinder block. The better you clean the pump landing area, the better. The slightest piece of the old gasket will lead to uneven installation of the new unit and fluid leakage;
- The new gasket is lubricated with sealant; this must be done on both sides. Carefully install it in place;
- Reinstall the pump. Pay attention to the inscription. It should be at the top;
- We install the removed parts.
We recommend: Replacing front and rear brake pads on Lada Kalina
After assembly, wait a couple of hours for the sealant to cure. Then start the car and drive on a flat road. Correct assembly will be indicated by the absence of extraneous sounds and the smell of antifreeze. Conclusion. The cooling system is extremely important for the proper operation of the engine. Therefore, in case of any malfunctions, the problem should be resolved as quickly as possible. Replacing the pump on VAZ 2114 and 2115 is the most frequently required work. In principle, this process should not cause any difficulties. Most importantly, do not forget to align the timing belt to the marks before replacing it. This will make assembly easier.
Replacement
Replacing the water pump is not difficult, the main thing is to follow the instructions and prepare the necessary tools in advance: wrenches 10, 17-19, socket 10, flat-head screwdriver.
- We drive the car into the pit. We remove the crankcase protection using a key 17-19. It is recommended to allow the engine to cool for one or two hours before continuing to operate to avoid getting burned during the process.
- Raise the hood cover.
- We unscrew the radiator valve located on the left side and drain the antifreeze.
- We look for the bolt on the cylinder block and unscrew it. Drain the coolant from the engine. You can simply unscrew the clamp from the radiator pipe and pour everything into a basin, and then simply add a new one, thereby renewing the liquid.
- Take a 10mm wrench and unscrew the three bolts holding the outer timing belt casing.
- Using a 17mm wrench, we tear off the toothed pulley bolt (do not lose the key, having previously set the marks).
- Using the same 17mm wrench, unscrew the belt tensioner roller nut.
- Remove the belt tensioner.
- Remove the belt from the upper toothed pulley and pump, and move it towards the radiator.
- We unscrew the bolt holding the toothed pulley and pull it out (do not lose the key, remove it immediately and set it aside).
- We arm ourselves with a small ratchet and a 10mm socket, unscrew several bolts and a nut that attracts the rear belt casing.
- We remove the protection.
- Take a flathead screwdriver, pry up the edge of the pump and remove it.
- In the cylinder block, remove the remains of the old gasket.
- We clean the pump landing site. It is important to thoroughly clean its place in the cylinder block; if this is not done, the pump will stand crooked, which will lead to new leaks.
- Using sealant, lubricate the new gasket on both sides and insert it into the pump seat.
- We insert the pump into place so that the inscription stamped on it is at the top.
- We assemble the parts in reverse order.
Valeo
World famous manufacturer. Its water pumps are installed on the assembly line on new cars of many brands. Pumps of this brand often last more than 150,000-180,000 kilometers. This is an excellent indicator. The cost of spare parts of this brand is quite high. In addition, fakes are often found on sale. Pros:
- Durability;
- High quality materials;
- Withstand significant loads.
Minuses:
- High price;
- Lots of fake stuff.
Cost – approximately 3000 rubles.
Replacement
The procedure for replacing a water pump differs depending on the number of valves in the engine.
This is due to the fact that for “fourteeners” with 8 valve engines, only one crankshaft pulley is provided, while 16-valve analogues have two. Therefore, the systems have slightly different designs.
Pumps for 8-valve and 16-valve engines are not interchangeable. When purchasing, be sure to ensure that the new water pump is compatible with your vehicle's engine.
Replacement procedure
Before you start replacing, check a few basic things.
- If a sign of pump malfunction is belt wear, check the condition of the tensioner roller. If there is rust, we recommend replacing it along with the pump.
- Check the quality and quantity of lubricant under the rubber seal. If there is a shortage, do not forget to add lubricant.
- Assess the degree of belt wear. If it breaks along the way, changing it is not the most pleasant experience. So think about the potential hazards before you decide to let a worn belt run for a while longer.
Faulty pump
8 valve engine
If your VAZ 2114 is equipped with an 8-valve power unit, then you need to change the pump according to the following algorithm.
- Remove the protective cover from the timing belt.
- Loosen the tensioner roller slightly. If its condition is questionable and the element needs to be replaced, then the roller is completely dismantled.
- Loosen the fixation of the generator, remove the generator belt and timing belt.
- Disconnect all hoses going to the water pump.
- Drain the existing coolant from the system.
- Disconnect the protective cover, and then remove the failed pump.
- After removal, be sure to clean the surfaces of the flange from the pump, and clean the cylinder block from accumulated dirt and rubber gasket residues.
- If you do not remove the dirt, then such growths will not allow you to install the new pump correctly and evenly. As a result, the timing belt will wear quickly and unevenly.
- When the replacement is made, do not forget to set the timing marks. Quite often the crankshaft moves relative to the camshaft.
To avoid possible coolant leakage, use red sealant and coat both sides with it - the pump and its seat.
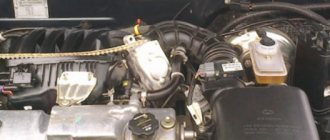
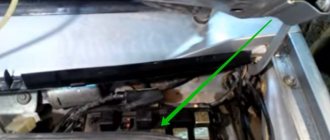
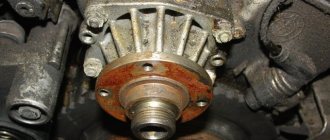
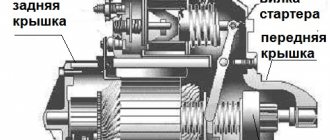
Device location
16 valve engine
If there is a 16-valve power unit under the hood of your VAZ 2114, then the sequence of replacing the pump will look slightly different. This kind of work has certain difficulties, but is done with your own hands. Additionally, we recommend watching the video instructions.
- Remove the plastic cover.
- Remove the cover from your timing belt.
- To remove the casing, you need to remove the timing belt, remove the camshaft pulleys, as well as two rollers - a support and a tensioner. Without these manipulations, it will be impossible to dismantle the water pump.
- Also remove the right front wheel. This way you can finally get to the lower casing mounting bolts.
- Now calmly remove the pump, following the algorithm of the 8-valve power unit.
Do not forget to follow all the subtleties of water pump replacement technology. If you assemble it incorrectly with a new pump, it will leak and show the same signs of malfunction as the old unit. Plus, improper repairs will lead to rapid wear of the timing belt. And this means additional financial losses.
We recommend: Replacing the fuel pump on a VAZ-2113, 2114, 2115
Metelli
This Italian manufacturer produces pumps not only for domestic cars, but also for well-known foreign cars. Many car factories cooperate with him. The products are subject to strict quality control and are practically not counterfeited.
Useful: Do-it-yourself pump replacement on a VAZ 2114 (step-by-step instructions)
Pros:
- High quality;
- Few fakes;
- Reliability;
- Durability;
- Rubber gasket included;
- Affordable price.
Minuses:
- Almost none found.
The cost is about 1300 rubles.
What happens if the pump fails?
Pump wedge, resulting in timing belt break
Inspection of the pump must be carried out regularly, since the entire circulation of coolant in the system depends on its condition. It is brought into working condition mechanically, that is, with the help of a timing belt, which is also connected to the generator. Accordingly, if it breaks down, the movement of the coolant stops and the antifreeze begins to boil in the tank. Not only does the car engine overheat very quickly, but problems may also occur with the transmission of voltage to the system.
Checking the functionality of the water pump on the VAZ-2114
If you have doubts about the fact that the pump is faulty, and an external inspection for the presence of coolant leaks did not produce any results, you can do the following:
- Place your hand on the upper hose of the radiator while the vehicle is running.
- Next, squeeze it with a little force and try to feel the pulsation of the movement of the liquid.
- If this is the case, it means that the fluid is circulating and does not need to be replaced.
If during such a test you still do not feel anything and one of the signs described below is present, then this will be the most important reason to check and replace the pump.
How to check for a malfunction
Having talked about which pump is better for the VAZ 2114 8 valves (and therefore which one will need to be purchased in the event of a malfunction), let’s also talk about what signs can be used to understand that the liquid pump has failed. The most likely factors indicating a malfunction are:
- rapid drop in fluid levels in the tank. It may indicate the presence of leaks in the system, which can form in a variety of places - joints, pipes and even the radiator itself;
- presence of liquid at the ventilation hole. It indicates that there are leaks in the pump seal area;
- humming sound when the liquid pump is running. Most often it speaks of partial wear or even complete destruction of the bearings;
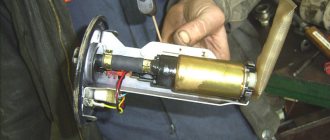
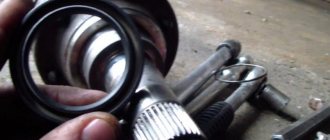
- destruction of the pump impeller (the most obvious factor, although its presence can only be established after dismantling and disassembling the old pump);
- presence of deposits on the oil seal. Plaque itself does not indicate wear or breakdown, but is one of the indirect factors pointing to it.
Old and new VAZ 2114 pump If you notice that at least one of the above signs has appeared in the car (except for the last one), then you should not wait until the pump completely breaks down - it is better to replace it as soon as possible.
It is worth noting that you can detect a malfunction of the cooling system right on the go - to do this, you need to turn on the heated air blowing into the cabin and wait a little. If the air starts to flow warm, then everything is fine, if it is cold, then there is no fluid circulation in the system.
Why does antifreeze leak out of the expansion tank? We solve the problem without a service station
Increased pressure or temperature in the cooling system and, as a result, knocks the antifreeze out of the expansion tank, and the car is covered in a cloud of steam. The situation is unfortunately familiar to many motorists. Regardless of the car brand, the principle of cooling the propulsion system is the same for everyone. Typical malfunctions are also similar. Antifreeze leaks from the expansion tank for many reasons, and most of them are directly related to the cooling system, but can also be caused by a violation of the vehicle’s operating conditions. Signs and consequences Signs of a malfunction in cooling equipment that manifests itself in the expansion tank: Both situations mean changes in the normal functioning of the system and primarily indicate a violation of the tightness state, which causes squeezing out of the coolant. Malfunctions and their causes The design of the expansion tank is simple. This is a plastic container in which a sensor is installed to detect changes in the nominal coolant level. The container is hermetically sealed with a lid with a pressure regulator valve, which is activated when the pressure in the system exceeds the standard one. Depressurization caused by the tank can only occur in two cases - either the tank material has cracked or the valve on the lid has failed and air begins to flow into the system .The problem can be much more serious if the breakdown occurred due to a burnt-out gasket under the cylinder head (cylinder head). It is not always possible to determine such a malfunction by eye, because burnout could pierce the gasket both outside and inside the cylinder head. Here we recommend reading our article - “Symptoms of a broken cylinder head gasket.” The next reason may be a malfunction of the pump, which caused the circulation processes in the system to stop, which also occurs when the circuit depressurizes and air locks form. A thermostat failure also leads to a change in the physical condition of the coolant, its temperature rises, and as a result, the pressure rises and knocks the coolant out through the check valve of the tank. To add to the problem, the antifreeze may also boil. Troubleshooting Troubleshooting must begin with an analysis of the characteristics of its manifestation. When the coolant in the distribution tank behaves normally at idle, and when the speed increases, it begins to rise and spill out, then we can speak with confidence about such causes of failure as:
- loss of tightness in the pressure relief valve;
- thermostat failure;
- pump breakdown;
- pipe rupture.
When the cylinder head gasket breaks, antifreeze will be knocked out even at idle, regardless of the engine operating mode. The easiest way to determine such a breakdown is to look at the smoke from the exhaust pipe. If smoke comes with white steam, you can be sure that antifreeze is seeping into the cylinder head. If liquid drips from the pipe, then the most advanced motorists taste it. If the water tastes sweet, then it is antifreeze; if it tastes bitter, it is antifreeze; the taste is neutral - ordinary condensation. The reasons for the situation when antifreeze is knocked out of the expansion tank may be a breakdown of any unit involved in engine cooling. If this is damage to the cover or the pressure relief valve built into it, then you can fix such a breakdown yourself by replacing the cover with a working one. Replacing the thermostat and pump in a garage can also be done, but will require special knowledge and skills. But replacing the cylinder head gasket definitely needs to be entrusted to a specialist.