Understanding nutrition
So, the radio does not turn on. The first thing that could be is the fuse. Any device is always equipped with a fuse in the positive network. Often the rating of such a fuse is 10 A. It is the one that burns out first. You just need to replace it and everything will work again.
If you replace that fuse and it blows again, then things aren't that simple. You will have to use a soldering iron or take the device to a service center if you do not have basic knowledge of electronics.
So, first the “music box” needs to be disassembled. This must be done from the board side. So, you need to inspect everything carefully. Some car enthusiasts connect the device directly without a fuse. This will sooner or later lead to the radio in the car burning out.
If burnt tracks on the board are visible, they can be restored. Swollen capacitors can be replaced. And then again enjoy music in the interior of your car.
Review of typical car radio malfunctions
On specialized forums, motorists write that the radios either do not turn on, or do not turn off, or do not play.
First on our list of typical faults is such a nuisance as the inability to read music CDs. Or the discs play, but with interruptions and failures. Here the problem is most often hidden in the drive mechanism. The drive has a huge number of different parts, which means they are all subject to wear. Since the radio in the car is used regularly, this is not a problem, but even a pattern.
Car radio screen (display)
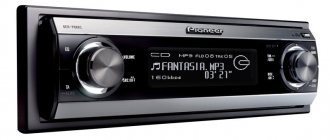
Also, the backlight of the screen (display) often goes out on radio tape recorders. Pioneer equipment especially suffers from this. So if your Pioneer brand car radio has stopped working, to bring it back to proper (working) condition:
- Disassemble the front part, gaining free access to the LEDs and detecting the faulty one. You can replace it with any of the commercially available diode lamps, not necessarily pioneer ones.
- Carefully remove the standard backlight (if you know how to perform such operations).
- Remove 2 LED elements and a resistor from the new lamp.
- Adjust them until they completely match the size of the hole.
- Insert into place, connect the diode and resistor into one circuit
- The connection must be made taking into account the correct polarity, or, more simply, in the same place that the faulty LED occupied.
- Reassemble the player panel to its original state and turn on the device.
- The display backlight may be even brighter than standard.
Kia Rio G4FA or still G4FC?
Hello everyone, my dear readers, there are more than 1500 of you, I am very pleased that I bring some benefit *probably*. So today we will talk about a non-standard, but quite interesting situation with a Kia Rio car with a 1.6 engine. An acquaintance of an acquaintance bought a car for restoration, as indicated above, a 2013 Kia Rio with a seized engine. Well, it seems like an everyday matter, well, I caught the wedge, we’ll fix it. We disassembled the engine, checked the condition of the crankshaft, connecting rods, pistons, block, and so on, the condition, as they say, is not standing. The diagnosis needs to be changed. He went to a good office, they twisted his knee and said the patient was more likely dead than alive. Well, what problem do you have with the crankshaft, he asked, of course there is, the master answered, and he asked the client from my car, of course from yours, I’m not a fool, the master answered. This is how this interesting story began. We ordered using the VIN number of the connecting rods and piston. And we started assembling the motor. The car was ready and running quietly and amazingly, but there was just one problem. Power. The car did not drive either from the bottom or from the top. These are the situations, of course, but then they started replacing a bunch of sensors, removing catalysts and similar actions that did not lead to any result. This Epic lasted for a year. A friend calls and says: There is an interesting case. I always like interesting cases and he tells me everything that was described above, I’m a little in a stupor, but I really want to make such a car. Upon arrival at the car, as always, I turn on the diagnostics and quickly examine the errors and parameters in real time:
Revolutions - 750 revolutions;
Short-term balancing - 1%;
Long-term balancing - 0%
Pulse to injectors - 2.3 m.s.
MAP (intake pressure sensor) - 60 Kpa
Lambda. What. I don’t understand 60Kpa. Once again I run 60Kpa again. There is a clue as to where this pressure in the intake comes from. I turn on the ignition 99Kpa, theoretically the sensor is working, and it’s already new here. I take about 3 devices and they all show the same thing. I think, well, how to measure compression, the car works smoothly. Let's go climb with the magnificent Postalovsky, I bow my head to its developers and creators. First I take an oscillogram of the crankshaft and camshaft, everything is fine.
I tighten the pressure sensor and do a sprint RX. And I start to think, why the hell is the compression ratio so low?
Okay, I’ll look at it on a working car since I save all the tests for myself. And everything is fine there. Here are two tests: on the right is a working motor, on the left is mine.
I couldn't believe my eyes. If the compression ratio is so low, what kind of compression is there? I pick up a compression meter. 6 points on all cylinders. Damn it, something like that. The car has been driven for a year with this compression, it starts up perfectly, runs smoothly, but does not drive. I catch myself thinking, maybe while I was driving, I was twisting the film, but no, adding oil, the compression did not increase. What could this mean? The parts seller says that the connecting rods and pistons are correct. The crankshaft seller says that the crank is exactly 1.6. I believe the numbers. We remove the engine and, lo and behold, the knee is not the same.
Let's summarize: The g4fa motor has a displacement of 1.4 and a short crank with a piston diameter of 73 mm and long connecting rods, and our g4fc motor of a displacement of 1.6 has a long crank with short connecting rods and a piston diameter of 73 mm. The G4FC engine belongs to the Gamma series and differs from the G4FA only in the crankshaft with an increased piston stroke from 75 mm to 85.4 mm, otherwise the engines are like two peas in a pod, still the same phase change system. Yes, I didn’t look, and I made a mistake, but remember, always check the spare parts. Have a nice day everyone and less breakdowns. Dimon Diagnost was with you until we meet again.
The radio in the car doesn't work
Every modern car is equipped with a radio receiver. It is difficult to imagine a driver who can do without this industrial achievement. Sometimes a car radio upsets us by poorly receiving the signal and completely stopping making any sounds. How to deal with such a problem?
As soon as you notice that the radio in your car has become worse at receiving a signal or periodically stops working, the cause of the malfunction does not necessarily lie in the vehicle itself. Sometimes the problem lies in the radio antenna mounted on the car body. Serious interference to radio signals is caused by high-rise buildings, mobile operator towers, solar flares and other objects emitting electromagnetic fields.
Let's sum it up
As you can see, if the radio turns off when starting the engine, then this can serve as a kind of additional indicator of the condition of the battery, as well as the quality of its charge from the car’s generator, the serviceability of the main unit itself and its connection, etc.
As a summary, we note that some devices (especially budget versions from the lower price segment) may not have any protection at all. It turns out that such power units do not react in any way to starting the engine, but this does not mean that a voltage drop in the vehicle’s on-board network does not occur.
How does the engine start button work? Available options and solutions for installing the starter button yourself. How to install the engine start button yourself.
The starter clicks and/or buzzes, but the engine does not turn over. The main causes of starter failures, diagnosing and troubleshooting them yourself.
Reasons for the smell of gasoline in the car interior, when starting the engine in the engine compartment, etc. What to do if your car smells of gasoline.
Why does the starter turn normally, but the engine does not catch and does not start? Main causes of malfunction, checking fuel supply and ignition systems. Adviсe.
How to remove the engine start lock. Checking for random activation of the immobilizer and how to disable it. Diagnosis of possible alarm malfunctions.
How to determine why the fuel pump does not pump or works poorly. Fuel rail pressure, pump diagnostics. Wiring, relays, fuel pump fuses.
Source
Working with the power connector
Using this connector, the device can be connected to power and an antenna. Of the 8 contacts on the block, only 4 are actually used.
For example, A4 is the power supply for volatile memory cells. When disconnected, the device returns to factory settings. A red wire is usually supplied here, which is connected to the battery through a fuse.
The antenna is connected to A5. Here's the blue wire. The current at this output is small, but if it is accidentally exceeded, then everything will burn out.
A7 is the yellow wire. It allows you to ensure that the entire sound system is turned on. Connects through a fuse to the ignition terminals.
Spontaneous shutdown
Reading the forums showed that this is a popular problem. For example, many people turn off the radio in their car when listening to music at a volume close to maximum.
Here, car enthusiasts with experience suggest that these are problems with the connection and the battery. If the battery is not charged to 100, then you just need to connect the radio directly from the battery through the fuse. And then everything will be very good.
So, sometimes when driving on our roads the device may also turn off. These are definitely contacts.
Motorists also write that the radio in the car turns off every half hour when the engine is not running. And the answer here is simple. This is not a problem, but an advantage. And this is normal operation of absolutely all devices to save battery.
This is not all that can be. However, here are the main problems that people complain about on car forums. Perhaps this article will be of help to someone and help solve problems with music.
What to do when the radio in the car does not turn on although there is power to it
A person who spends a lot of time on the road knows that the radio is an important part of the car. There are many types of such equipment, but any model is prone to breakdowns. Car owners often wonder what to do if the radio does not turn on.
The sensor or display does not work
If the display on the radio does not work, you need to look for internal faults. The cable connecting the screen to the main modules is often disconnected. Only a specialist can fix the problem. You should not disassemble the device yourself, as this can make the situation worse. Due to the displacement of the cable, the operation of the sensor may be disrupted.
If the sensor on the radio does not work, you can use the remote control to perform the necessary operations. Incorrect installation of the panel may also cause the touchscreen or screen to malfunction. Testing the device in a service center will help you understand why the radio does not work.
No sound or noise
This problem can be caused by several reasons, the most common of which are:
- No signal. In this case, the sound disappears or loses volume. Checking the high-level pulse supplied by the fourth pin of IC901 helps solve the problem. If there is no signal, the controller must be replaced. If the sound disappears when you start the engine and adjust the volume, you need to inspect the amplifier contacts.
- No voltage at the base. In this case, the sound fades or disappears completely when you try to increase the volume. This problem is determined by checking the bases with a voltmeter. If the tested parameter is zero, the transistors must be replaced.
- The Mute button is broken. The change in sound quality in this case is due to a controller malfunction. If you have problems with volume control, you need to check transistor Q802.
- Amplifier chips burn out. If there is no sound, you need to inspect all the cables connecting this module to the tape recorder. Repair involves replacing capacitors and microcircuits.
Does not read the disk, flash drive or the disk is stuck
When using the car radio, the following problems with reading information may occur:
- Inability to recognize the disc. Occurs when the laser head is damaged due to vehicle shaking. Replacing this part helps solve the problem.
- Inability to read flash drive. First of all, you need to check whether there is a light indication on the drive. If it is present, the connector is working. After this, check whether the type of flash drive matches the parameters of the radio. Older devices may not be able to read large storage devices. Problems also arise when the software is damaged. They can be solved by flashing the radio.
- Disc jam. Associated with a breakdown of the motor, pressure roller or sensors. It is recommended to replace parts.
Car radio repair and diagnostics
So, if you are at least a little familiar with the car radio that you intend to repair, then you can begin to solve the problems that have arisen in successive steps. Firstly, repairs always begin by searching for the fault that led to the failure of the car radio; this is not such a complicated process. Typically, in devices of this type, a burnt or electrically damaged part can be detected by visual inspection.
Next, in order for the car radio repair that you are going to do yourself to be successfully restored, in this case it is a car radio, for this you need to have a set of tools used in such cases. This is a soldering iron, solder and rosin, alcohol for cleaning the board after soldering, and a digital multimeter. If you have a device for determining capacitance, then that would be absolutely wonderful.
Signs of breakdowns most common during car radio repairs
In this article, we will not touch on complex car radio malfunctions, the elimination of which can only be done by an experienced specialist. This post mainly concerns the repair of radios by amateurs with little experience. Therefore, here we pay more attention, first of all, to fairly simple malfunctions that an ordinary radio amateur can independently detect and easily correct.
For example, it will not be difficult to cope with repairs if the following symptoms occur:
- The car radio does not respond when turned on.
- There is no sound on the output of one channel.
- There is no sound at all, but the sound is played on the car radio display.
- Music tracks sound distorted.
- The car radio's protection circuit is triggered when you try to increase the volume.
- There is a strong clicking sound in the car radio speakers when turned on.
- Musical compositions are reproduced in a limited range of low or high frequencies.
- There is a burning smell coming from the car radio vents.
- When you increase the volume potentiometer knob, crackling sounds appear or the sound disappears.
- The USB port in the radio does not work when a flash drive is installed.
In this case, such signs mean when all the acoustics in the car are connected correctly, the car radio is correctly configured. In other words, the music is being played, as indicated by special symbols on the display, the “MUTE” mode is disabled, the bass and treble range is moderately set.
We check the operation of the car radio without installing it in the car
It is much more convenient to look for the cause of a car radio breakdown in your home workshop. If the head has no problems turning it on, then power can be supplied to it from almost any voltage source that has an output from 12v to 15v and a power corresponding to the radio. In addition, you will need to connect home acoustics to the system, or just one dynamic driver, to control the sound during diagnostics.
First of all, we connect the supply voltage to the car radio, and you need to follow the purpose of each of the three wires by color:
- The negative wire always goes to black.
- The red wire is connected to the “plus”.
- The control positive voltage uses a yellow wire.
Now, the car radio that you will be repairing is connected to the power source in the following order: we connect the black negative wire to the negative wire, connect the red wire to the yellow wire and connect it to the positive wire. To test the radio, you can do without an AC power supply, but for example, you can power the “head” from a working battery.
After you have applied power, the next thing you need to do is look at what happens to the signals in the output circuit on all four channels. The check is very simple, it is performed using a separate speaker, which will need to be connected in turn to each output of the car radio you are repairing.
Car radio malfunctions that you can fix yourself
Next, we’ll go through the faults in more detail: diagnosing and fixing the problem.
- The car radio does not turn on; The main reason is that there is no power supplied to the circuit.
- There is no sound on any of the channels. The most likely malfunction may be damage to the microcircuit installed in the power amplifier.
- If there is no sound on all channels, the output chip may also be the culprit.
- If various distortions occur when playing tracks, the cause should most likely be sought again in the output stage of the amplifier. That is, it is necessary to check the components installed in the microcircuit harness or the microcircuit itself.
- When the volume increases, the protection is triggered and the car radio turns off, this indicates, first of all, that the temperature on the output microcircuit of the UMZCH is too high, which arose as a result of a heavy load in the acoustics circuit. The spontaneous shutdown of the device can be caused by a lack of supply voltage due to the loss of capacitance of the filter capacitor.
- When you turn on the car radio, a clicking sound occurs in the speakers, this indicates a malfunction of the electrolytic capacitors installed in the soft start circuit of the device.
- If there are no bass or high frequencies, then the reason must be sought in the microcircuits or components installed in the preliminary amplification stage.
Why the radio does not work: possible reasons and solutions
If the radio or cigarette lighter breaks down, you most often do not need to contact a service center; you can fix everything yourself. To do this, you just need to decide why the cigarette lighter and radio are not working, and how to fix this problem.
Basic malfunctions of car radios
In total, nine main problems can be identified that will answer the question: Why does the radio in the car not work, namely:
It doesn't even turn on. The main cause of this failure is lack of power. To check it, you need to use a tester. If it turns out that everything is fine with it, then it is necessary to carry out a full diagnosis of the car radio. No or intermittent backlight on the control panel. This indicates problems with the LEDs or light bulbs or in the power circuit. Why don't the buttons on the radio work? There are several possibilities for a malfunction to occur, namely: a fuse, a chip has broken, or the contacts or buttons have simply become clogged. This is possible if you often use polish, or spill some drink on the car radio. Also, over time, the buttons become clogged with dust. Disk reading problems. It may be due to damage to the laser head or shock absorbers of the radio. They can occur due to the car shaking, for example when driving on a rocky road. If the inscription “Please code” is displayed, it means that the settings have failed and you are on your way to a service center, where they will enter the code for the standard car radio. Why doesn't the flash drive work in the radio?
First of all, it is important to make sure that the indicator light on the drive is on. This indicates that the USB input is working properly.
After checking that the amount of memory on it is suitable for the car radio, older devices may not read flash drives with a large amount of memory. Next, you need to check its operation on another device or insert another USB drive into the unit, with which everything is absolutely fine. If the flash drive is in working condition, then you need to look for the problem in the music unit. Also, the software very often crashes, which is why the radio requires flashing. I can't insert or remove a disc. Very often this problem lies in the disk loading motor, or rather in the pressure roller, power supply, control and sensors. Why did the radio, or rather the radio, stop working? With this malfunction, the reason may lie in the chip, tuner or antenna. There are cases when the tuner does not have protection against voltage surges, and either the entire device or only the radio may stop working. If the car radio does not want to read the disc, then you need to pay attention to the motor that rotates it, as well as the laser head and control board.
In simple words about repairing TVs and home appliances with your own hands
Hello, friends!
This article is devoted to car radios, or more precisely, to the diagnosis of typical malfunctions of these devices.
The car radio is subject to constant vibrations while the car is moving, which only contributes to its rapid failure.
Typical car radio malfunctions include:
The car radio does not turn on at all. The reason for this may be lack of power. You can check the power yourself or by contacting a service center with an auto electrician. If the reason does not lie in the diet and everything is fine with it, it is necessary to carry out a diagnosis.
Lack or loss of control panel backlight. Reason: This malfunction may indicate that the light sources (LEDs or bulbs) or the power circuit of the control panel are not in order.
The car radio does not read at all (NO DISK or ERROR appears) or reads CDs or DVDs poorly. The cause of this malfunction may lie in the laser head, the motor that rotates the disk, or the main control board.
When the car shakes while driving (on a dirt road, for example), disk reading gets lost. Reason: this defect may be associated with a breakdown of the shock absorbers of the radio or laser head. The malfunction can be eliminated by carrying out repairs in a workshop.
The car radio is working properly, but there is no sound on one or all channels. It is necessary to check the performance of the speakers in a hospital service center. If everything is in order with the speaker, then the malfunction may be associated with a failure of the power circuits or the pre-amplifier of the car radio, as well as its output stage.
The message “Please code” appears. This means that the problem lies in the settings reset. To eliminate this, you need to enter the code for the head unit. Contact the service center.
CD/DVD car radios do not load or unload the disc. The cause of the breakdown may lie in the disk loading motor, its control, power supply, or in the pressure roller. As a result, the disc may slip and fail to grip. It's also worth checking the disc sensors.
Many car enthusiasts do not pay enough attention to cleaning the car radio dashboard from dirt and dust. Severe contamination of this device can also cause frequent and unexpected breakdowns. Dust and dirt clog the holes and outputs of the car radio, so inevitable contamination of the optics and mechanics occurs. “Symptoms” in this case will be frequent freezes, playback failures and failure to load the disk or USB flash drive. You can fix the breakdown yourself: disassemble and clean the laser reader lens.
Failures associated with the supply circuits can lead to the fact that the device will not turn on at all or there will be no functioning of any modes (no display backlight or no sound or CD mode). The absence of sound may indicate that the UMZCH has burned out. In such cases, check the protective fuse, inspect the printed circuit board, inspect the microcircuits for damage to the housing (deformation, chips or cracks). The electrolytic capacitors may be swollen or the traces may be burnt out.
If nothing is found visually, then it is better to contact a specialist, since attempts to fix the problem yourself can lead to even bigger problems.
I wish you success!
What to check first:
- The first thing you need to do is check whether the information from the flash drive is readable on another device - another radio, computer, laptop, etc. If the computer does not see it, then the problem is clearly not in the car's stereo.
- Check the socket - USB input where the data drive is inserted. This can be done by inserting other flash devices. If the stereo system does not read these devices, then there may be a bad contact in the connector itself, but if the information is read, then the problem is probably not a broken connector.
In the case where these mechanical damages are absent, it is worth paying attention to some other aspects.
When starting the engine, the radio turns off: why does this happen?
Let's start with the fact that during operation of many cars, drivers notice when starting the engine that the radio tape recorder fails, the head unit turns off for a few seconds, then turns on automatically, etc. Note that this often happens with non-standard car radios, that is, when the head unit in a car is from a third-party manufacturer.
In this case, this situation in the vast majority of cases is not a malfunction, but the possibility of malfunctions should not be completely excluded. In this article we will talk about why, when starting the engine, the radio turns off and the dashboard lights dim.
Turns off during operation
It happens that the radio turns off during operation. This problem can be caused by a poor or unreliable connection in the power circuit, which occasionally becomes loose when driving fast on rough roads, resulting in an unexpected shutdown. To fix the problem, you need to connect the power cables of the car radio more securely. Connecting the negative wire of the car radio to the car body is carried out as follows:
- Find the stud closest to the radio
- Clean it from dirt and paint.
- Take a piece of wire with a terminal that has a hole of a suitable diameter.
- Connect one end to the negative terminal of the radio
- Place the terminal onto the stud and screw it securely.
Unreliable mounting of the car radio on the dashboard also leads to malfunctions, including shutdown. Another reason for sudden shutdown is the protective timer built into the radio. It is used to avoid draining the car's battery if the device is accidentally left on without pressing any buttons for a specified period of time. To deal with this problem, you just need to turn on the radio again.
Victory over turning off the radio when starting the engine.
If on Sony I was still not very annoyed by turning off the radio when starting the engine, then on the Pioneer MVH-x580bt it was already annoying. Firstly, I was tired of turning off the music when starting the engine, and secondly, the Bluetooth connection dropped, the phone did not always connect correctly. Replacing the wires with thicker ones did not help - the battery is not new, the discharge current has decreased. Something had to be done. Since after the tweak I said goodbye to the warranty, I decided to upgrade the radio further. There is no manual for 580 anywhere on the Internet yet, so I downloaded it for 560 - they are similar in the power circuit. Here is a diagram of what was done
Elements used: Schottky diodes NTSJ20120CTG (20A) and SB180 (1A), capacitor 22000uf 25v (panasonic) and 470uf 25v. And so, when we start the car, at the moment the starter starts, the largest voltage drop in the on-board network occurs - because of this, the radio turns off. To prevent the radio from turning off, we use Schottky diodes and capacitors. The main DC voltage (yellow wire of the radio) passes through the NTSJ20120CTG diode (20A) and constantly charges the 22000uf capacitor. When the ACC ignition is turned on (red wire of the radio), voltage flows through the SB180 diode (1A) and charges the 470uf capacitor. When the starter starts, the voltage of the entire network drops significantly for a split second (we noticed how the headlights go out when we start). It is at this moment that the diodes do their job - they do not allow the voltage that has accumulated on the capacitors to return to the network and all the accumulated voltage goes only to the radio. A 470uf capacitor on the ACC is enough for the radio to work for 5 seconds when the ignition is turned off, that is, the radio will work for another 5 seconds when the power is turned off on the ACC. But if you add another diode as in the following diagram (indicated in green), then when the ACC is turned off, the radio will work until it is turned off by pressing the button. It will then be possible to turn it on only when the ACC power is turned on again (not yet implemented).
In general, I decided to do all this. I soldered two wires to the connector in the radio:
Source
Buttons don't work
This malfunction is caused by poor contact or careless installation of the front removable panel of the head unit. The buttons do not work due to natural wear and tear caused by active use of the device. This problem will appear the sooner the harder you press the buttons. If the volume control encoder is worn out, control will not occur correctly. When turning the knob clockwise, the volume decreases instead of increasing, increases randomly, or does not increase at all.
To eliminate this problem, you should carefully remove the front panel and wipe the contacts on it and the radio itself, and then put it back in place. When installing, make sure that the panel fits tightly and evenly into place, and that the latch clicks into place. To replace worn or sunken buttons, you can take the panel to an electronics workshop. Regardless of the condition of the head unit, do not use excessive force when pressing the buttons, touch sensor, or turning the volume control to prolong the life of the controls.
How to improve your radio signal
There are several ways to improve radio reception on your car stereo. For example, you can install an active antenna with an amplifier. To eliminate interference, you can make a power filter yourself. To do this, wind several turns of thin wire around the ferrite core. One end of the resulting inductance is powered by the machine. The oxide capacitor and the positive plug of the radio should be connected to the other.
The entire structure is placed in a small box made of stainless steel or tin. The body is connected to the earth; You also need to solder the negative terminal of the capacitor to it. The higher the speed and the larger the capacitor capacity, the better the filtration. This filter suppresses electrical noise from the power supply. Now you can understand what to do to suppress interference from electric motors and gadgets. To do this, you need to bypass devices with a capacitor. Subsequently, the noise level should decrease.
Purchasing and replacing an antenna
This method is one of the simplest. Modern active antennas are small in size and mounted together with receiving elements on the windshield of a car from the inside, without being exposed to precipitation. The disadvantage is that if the glass is damaged, the antenna must be replaced along with it.
After purchasing an antenna, it must be properly connected and installed. To do this, the base along with the receiving elements is glued to the windshield from the passenger compartment. The distance from the body must be maintained. It must be at least 25 mm, otherwise reception may deteriorate. Then the active antenna module itself is installed. The power cable connects to the blue cable with the white stripe on your car stereo.
Amplifier installation
This method will help improve the quality of reception at a great distance from the transmitter. Using a standard whip antenna with an amplifier increases the sensitivity of the car radio. Disconnect the plug from the radio and insert it into the amplifier. Power is supplied via a blue wire with a white stripe or directly from the battery via a switch. The connector from the amplifier is plugged into the radio.
Replacing the radio
This method is suitable if the radio turns out to be of poor quality and does not have sufficient sensitivity even with an active antenna. Please note that Winamp can be used to listen to Internet radio in a car on an Android multimedia system.
If the radio or cigarette lighter breaks down, there is no need to contact a service center very often; everything can be repaired yourself. To do this, you just need to decide why the cigarette lighter and radio are not working and how to fix this problem.
If there is no sound
Modern musical and automotive technology has one weak point. This is a UMZCH microcircuit. This is an amplifier. It often fails due to incorrect connection of the speakers.
If you decide to install the device in a car, you should connect the power last, after checking all other connections. This microcircuit also crashes if there is a power surge in the on-board network.
The power supply of this microcircuit is not stabilized by anything at all. It can fluctuate within significant limits. Some microcircuits want more voltage than the network can supply. Here you only need to replace the microcircuit or go to a service center.
Also, sometimes the radio does not play in the car due to wiring problems. In this case, you need to check the AUDIO fuse. In most radios it can be found in the mounting block. If the fuse is intact, then you need to start the car, and then use a tester to check whether voltage is supplied to it.
If there is voltage, then you need to examine the car electrical system and the correct connection.
Car radio malfunction: looking for reasons
Car radio malfunction
Malfunction of the car radio, which has recently been almost the leader in the list of the most common problems, is associated with interruptions or lack of playback when the car radio reads various discs. Malfunctions of car radios of this nature are explained, first of all, by defects in the CD mechanism itself, inside of which plastic or metal elements are placed.
Why doesn't the car radio read the flash drive?
Causes
So:
- Both plastic and metal tend to “get tired”. Thus, all mechanical parts made of these materials are sooner or later subject to wear.
Car radio defects
- Another reason for car radio failure is dirt. Over time, dust and dirt accumulate between the parts due to the operation of the car radio in extremely harsh conditions. In this case, failure of the optical part or various mechanical parts becomes common.
Note. The first symptom that contamination is observed is the disks freezing or problems with their playback.
- Another common cause is mechanical failure, related in one way or another to the power circuit. Incorrect connection of the car radio or sudden surges in voltage in the on-board network are the root cause of such breakdowns.
Note. A symptom that a mechanical breakdown is possible is considered to be the absence of “start-up” of the car radio or the absence of display backlighting and sound.
Car radio fault codes
In some cases, it may be enough to simply completely disassemble the CD drive, then carefully clean the laser reading lens itself. The car radio then starts working as if nothing had happened. This ease of repair of car radios can be explained by the fact that during operation, dust settles on the lens, which ultimately affects focusing.
Note. In addition, it is recommended to first check components such as a fuse or protective diode. You cannot ignore the printed circuit board, as well as tracks that may burn out. Don’t forget about the microcircuits that will need to be checked for chips and cracks.
Other problems
Problems with reading storage media arise no less often than difficulties with turning on. You can eliminate them yourself.
No sound or noise
This problem can be caused by several reasons, the most common of which are:
- No signal. In this case, the sound disappears or loses volume. Checking the high-level pulse supplied by the fourth pin of IC901 helps solve the problem. If there is no signal, the controller must be replaced. If the sound disappears when you start the engine and adjust the volume, you need to inspect the amplifier contacts.
- No voltage at the base. In this case, the sound fades or disappears completely when you try to increase the volume. This problem is determined by checking the bases with a voltmeter. If the tested parameter is zero, the transistors must be replaced.
- The Mute button is broken. The change in sound quality in this case is due to a controller malfunction. If you have problems with volume control, you need to check transistor Q802.
- Amplifier chips burn out. If there is no sound, you need to inspect all the cables connecting this module to the tape recorder. Repair involves replacing capacitors and microcircuits.
Does not read the disk, flash drive or the disk is stuck
When using the car radio, the following problems with reading information may occur:
- Inability to recognize the disc. Occurs when the laser head is damaged due to vehicle shaking. Replacing this part helps solve the problem.
- Inability to read flash drive. First of all, you need to check whether there is a light indication on the drive. If it is present, the connector is working. After this, check whether the type of flash drive matches the parameters of the radio. Older audio devices may not read large storage devices. Problems also arise when the software is damaged. They can be solved by flashing the radio.
- Disc jam. Associated with a breakdown of the motor, pressure roller or sensors. It is recommended to replace parts.
The device is heating up
The radio overheats and turns off on its own if the power system is connected incorrectly. It is necessary to check the wire; it may have become loose or damaged. The cable needs to be completely replaced. The radio does not work in the car even if there is insufficient ventilation. This problem is typical for budget devices; it does not lead to significant malfunctions. If the system overheats frequently, you need to install a ventilation system.
- How to remove a disc from a car radio if it is stuck
- Where is the fuse for the Priora radio?
- Why does the radio stutter when the volume is turned up?
- Pioneer car radio repair
Malfunctions and ways to eliminate them
Before you remove the radio from the car and begin repairing it, read the list of faults typical for audio systems. Removing and repairing a car radio from a car is not such a problem, but before you take it out, you need to know exactly what to repair.
There is no display backlight or the system does not turn on
- Perhaps the problem is the lack of power at +5. If you decide to get the device out and repair it yourself, first of all you need to pay attention to diagnosing the second contact of the CN701 connector. It should have a positive voltage of 14 volts, this voltage should be transmitted to the collectors of the transistors. If there is no voltage, repairing car radios involves replacing transistors or a zener diode.
- There is no power activation signal. Before repairing car radios, you need to check the voltage of + 4.8 volts on the fortieth pin of the IZ901 controller. You should also check for the presence of a pulse on the third contact of the controller.
Testing the multimedia system with a multimeter
The car radio turns on, but there is no sound or noise
Car radios need to be repaired independently or by a specialist if there is no sound volume or if the volume is increased and tracks are played, the sound becomes loud.
There may be several options:
- There is no sound when starting the engine. If the sound disappears even when you increase the volume or there is no sound, this is usually due to the absence of the Stand.By signal. In this case, when the sound has disappeared and is not there, you should check the high-level pulse at +4.8 volts. We are talking about the fourth pin of the IC901 controller. If the sound disappears and there is no pulse, then car radio repair involves replacing the controller. If the sound disappears when you start the engine and increase the volume, you need to diagnose the four contacts of the power amplifiers.
- When starting the engine the sound is loud. If the sound is loud when the volume is increased, check for voltage at the bases; the resulting parameter should not be equal to zero. It often happens that the sound becomes loud when the volume is increased due to zero voltage - if this is the case, then car radio repair will be based on replacing transistors. Also, the sound sometimes fades when the volume is increased due to the Mute button not working - there is a possibility that the problem lies with the controller. If there are problems with sound volume, you need to diagnose transistor Q802.
- Volume problems may be caused by one or more circuits in the amplifier not working properly. If there is no sound, you need to diagnose the entire “path” from the input to the output of each circuit. Repair of radio tape recorders comes down to replacing transition capacitors or circuits.
Doesn't turn on
One of the reasons why the tape recorder in the car does not work, although there is power, is a blown fuse. This can happen due to overload caused by listening to music at high volume for a long time or a short circuit in the speaker wiring. As a result of this malfunction, the radio refuses to turn on.
To fix the problem, remove the device and remove the fuse. Its rated current is 5 or 7.5 A. Since it is impossible to accurately determine by appearance whether the fuse is intact, the serviceability of this part is checked using a tester or multimeter.
If the car radio was connected through a car mounting block, then the integrity of the fuses in it should also be checked.
The next reason why the radio does not turn on is a break or chafing of the power wires. The contact in the standard block could also come loose due to contamination or loose connectors. To fix this problem, you should carefully inspect the wiring and connectors. Particular attention is paid to the connection of the receiver to ground or the car body. Broken wires should be replaced and connected as securely as possible.
The terminals on the connector must be thoroughly cleaned of dirt and securely crimped with pliers.
Incorrect connection also leads to the fact that the radio in the car does not turn on. To resolve this problem, you should carefully inspect the wiring. You can identify the wires coming from the battery using a test lamp. Wiring to speakers is often done with two-core cables.
Reason #2
Another very popular reason why the radio in a car refuses to “move the drive” is that the device is quite dirty. After all, this device is often used in difficult conditions. Here, dust on optical and mechanical parts is common. Usually, if the mechanical insides are dusty, the driver will notice failures when playing discs, freezes, and the inability to read the disc at all.
This disease can be cured. This is done in the same way as in the case of home appliances. It is necessary to disassemble the drive and then clean the lens. In most cases, this is enough to listen to your favorite music on the road again.
The sensor or display does not work
An internal fault in the car radio results in the display not working. The cable connecting the display to the head unit may have come loose. This problem can only be fixed at a service center. You should not repair the display yourself to avoid causing more damage.
For the same reason, the sensor on the radio does not work. If this device is equipped with a control panel, then using the latter you can turn it on, off and perform other operations. Inaccurate installation of the front panel with a display or sensor also leads to incorrect operation of these components of the car radio.
- Mystery radio pinout
- Setting up the Ford Focus 2 radio
- Car radio volume control repair
- No sound on the radio
Basic radio settings
Before tuning the radio to the radio, you need to make sure that the antenna is installed on the car. Your choice depends on the admission conditions. In large cities where powerful transmitters or repeaters are present, a cheap and simple whip antenna can be installed.
If the radio mast is located at a distance of 20-70 km from the receiving location, it is necessary to install an active antenna with an amplifier in the cabin to improve radio reception. Japanese radio tape recorders receive stations in the range of 76-90 MHz. Before connecting the radio tape recorder to such a device, a converter is installed. The accessories included with Pioneer radios help you set up and connect the device to any vehicle.
To auto-tune most radios, press the “right” button. The tuner will scan the band until it finds a station with a strong signal. All radios have memory cells into which you can save your favorite radio stations. To do this, press and hold one of the buttons on the front panel with numbers from 1 to 6. The display will show the number of the saved radio station.
If the radio signal strength is not strong enough to find the desired station during automatic search, you can use manual tuning. In some radios it is activated through the settings menu, in others - by pressing and releasing the “left” or “right” button. You can determine which stations will be well received in the car, at home, or in the stereo. You can also perform an automatic memory search. On a Pioneer player, to perform this procedure, press the Func button until BSM is selected. Then press the up or right key.
In this case, the tuner will scan the entire range in search of stations with a strong signal. Each of them will be written to its own memory cell, starting from the first. On many radios, stations found in this mode are played for 2 seconds, after which scanning will continue until the end of the range.
Backlight repair
This method is suitable if the radio display is blinking or the backlight has stopped working altogether.
Keys for removing the radio
To solve the problem with our own hands, we will need to resort to the method described in the list below:
- First, let's take a special tool for dismantling the radio to pull it out of the panel. You can also use knitting needles or something with similar characteristics.
- We take out the radio and take the ammeter in our hands. We check that all wires are in good condition (the voltage on them should be about 6V). If you notice a strong voltage fluctuation on one or more wires, then we already know where the problem lies.
- We replace the defective wire and check the operation. If nothing has changed, then we follow the list further.
- We disassemble the front part to get to the diode that blinks. Next, we dismantle it and replace it with a new one.
- Next we need a soldering iron. You will need it to desolder the standard backlight of the device, since the problem lies there if you have reached this stage.
- From the new lamp we will need to get one resistor and two LEDs.
- The next step is to grind, as we need them to fit into the required holes. After they are placed in their inputs, we insert them and connect the diode to the resistor.
Unraveling the radio
Important: make sure that you maintain the polarity to avoid malfunctions. Connect where the lamp was installed.
Now we have to put everything back together the way it was originally. At the end we connect the power and admire it.
Now you know how to repair a flashing radio that constantly distracts you from the road or listening to music. Or you just don't want the problem to go any further. I hope the article was useful to you and answered all your questions. If your JVC, Kenwood, Sony or any other radio is blinking, the detailed instructions in the article should have solved the problem.
