Any car cigarette lighter, including the VAZ-2110, was initially designed only for use for its intended purpose. However, over time, “necessary” car gadgets began to appear that needed to be connected somewhere. Since the factory did not provide for the installation of a 12-volt outlet in the car, the cigarette lighter is the power source for vacuum cleaners, refrigerators, televisions, video recorders, compressors and phone chargers. This does not benefit him and quite often he breaks down at best.
At worst, a connected gadget left unattended can lead to a fire.
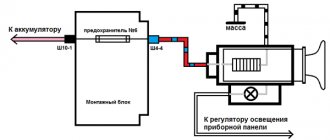
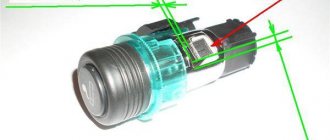
Cigarette lighter diagram for VAZ-2110
Cigarette lighter connection diagram.
When starting to search for any malfunction, you first need to understand the operating principle and structure of the mechanism or circuit. With the cigarette lighter everything is relatively simple. We look at the device connection diagram and look for the weak link.
Troubleshooting
In any case, the breakdown can be either mechanical or electrical in nature.
Mechanical damage to the cigarette lighter socket is quite rare, although it can be damaged by a poor-quality or incorrectly selected plug. Based on the diagram shown above, the cigarette lighter is standardly connected to one power output from the mounting block with the glove compartment lighting lamp.
This is the first clue - if the cigarette lighter does not work, but the glove compartment lamp is on, the problem is either in the cigarette lighter mechanism itself (spiral, contacts, resistor), or in a broken wire in the area from the power terminal to terminal 25 of the mounting block.
>
Circuit breakers
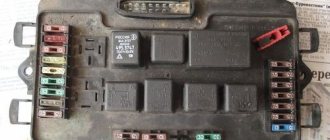
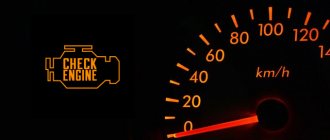
Cigarette lighter fuse 25A, marked with arrow
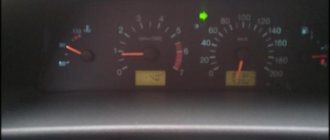
However, fuses are the first to come under suspicion. If the cigarette lighter does not heat up within 20 seconds and the glove compartment lamp does not light up, most likely the 25A fuse F18 has blown. It is located in the mounting block to the left of the driver.
There is another 15 A fuse that is connected to the cigarette lighter circuit. There is a socket on it and this may also be the cause of the malfunction. This fuse is marked with the symbols F6. In some modifications of the VAZ-2110, depending on the year of manufacture, both the cigarette lighter and the heater motor are connected to one circuit of fuse F18.
Therefore, checking the integrity of the fuse in these cases is also simple - the motor does not spin, which means the fuse has burned out.
Why do fuses burn?
Each consumer of electricity on board the car is designed for a certain power and a certain current consumption, measured in Amperes. If we plug in a video recorder, navigator, or charge a phone into the cigarette lighter through a splitter, it is not surprising that the fuse simply fails. Saving our wiring from overheating and short circuit, it melts, breaking the circuit.
That is why it is important to take into account the current consumption of additional devices - a compressor, a refrigerator and other architectural excesses. Both the power and the current consumed by the device must be indicated on the body of the device.
It is highly undesirable to include powerful devices in the cigarette lighter circuit, as well as use splitters and plugs of dubious quality.
This could ultimately lead to a fire in the wiring.
Melted cigarette lighter wires.
It is not for nothing that in many imported cars the manufacturer has completely abandoned the cigarette lighter, and instead installs 12-volt sockets in the front part of the cabin (as is done in the same second-generation Ford Focus).
>
Checking the wiring
If the fuse is intact and we haven’t plugged any vacuum cleaners into the cigarette lighter, most likely the problem is in the contacts or wiring.
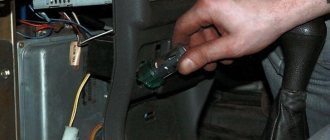
To check the cigarette lighter power wiring, we need to remove the center console by unscrewing several screws. Most often, the contact disappears in the contact chips, which are located to the left of the passenger behind the console casing:
- Unscrew the console cover.
Remove the cover from the passenger seat. - We take out the wiring harness.
We take out and check the blocks with wires. - We check each terminal for the presence of oxide and clean it if necessary.
Check the cigarette lighter for a break or short circuit. - We check the contacts on the cigarette lighter itself; if they are oxidized or burnt, we also put them in order.
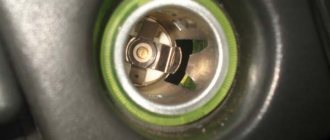
Cigarette lighter inspection
Lastly, we inspect the cigarette lighter itself.
It rarely fails, but if it does, we won’t disassemble it, it’s not the king’s business. We buy a new one.
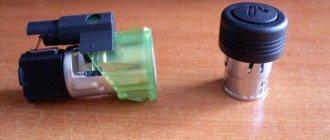
New cigarette lighter assembly.
Its price is about 400-500 rubles, and the catalog number is 2123-3725010 or 2123-3725/111.3725, the manufacturer is usually SOTE.
Good luck with your search and stable operation of electrical equipment!
Maybe the fuse has blown?
Before removing and replacing the VAZ 2110 cigarette lighter, you should check the serviceability of the protective element. This is a fairly common failure. The car circuit in this area is protected by a 25 ampere fuse. This means that devices with a total power of more than 300 W (12 volts * 25 amperes = 300 watts) cannot be connected to the socket.
Otherwise, the fuse on the VAZ 2110 will blow out. A hint that it was he who “gave up” is the failure of the heater fan. If the device does not work, the fuse should be replaced. The location of the mounting block is to the left of the steering column, behind the decorative panel trim.
To make it easier to pull out the fuse, you should use tweezers. It is necessary to change the part with index F-18. The fuse rating is 25 amperes. It is prohibited to install parts designed to carry high current. An unsuitable fuse may result in a short circuit, damage to wiring cables, or fire.
Installing an additional cigarette lighter
The cigarette lighter on the Priora does not work reasons
VAZ 2110 how to connect the cigarette lighter
For some people, one cigarette lighter is not enough, so they need another one - an additional one. You can install it under the cover of the on-board control system connector, since there is enough space there. Of course, you can do this in another convenient place.
VAZ 2110 does not work from the cigarette lighter
Instructions:
Make a small hole under the connector cover.
Note: It is important that you have access to the factory cigarette lighter wires. It will be much less hassle if you combine the additional one with the standard one. If it is located far away, then you can use a long wire to connect them
Connect the wires of the additional cigarette lighter with the wires of the standard one. The colors must match each other.
VAZ 2110 no cigarette lighter light
Note: you definitely need to put it through a fuse, which will protect against spontaneous combustion. In principle, a 10 A fuse is enough. Even it will prevent a short circuit.
Place the additional cigarette lighter in the hole already made and secure it.
How to connect a device to a cigarette lighter without a plug
VAZ 2110 connecting the cigarette lighter
You don’t always have a plug at hand that will allow you to connect an electrical device to your car’s cigarette lighter. However, you can make a plug yourself:
Remove the case from the phone.
Note: the case must be leather.
Take two wires and insert them inside the case.
Note: there are usually small holes in the corners of the case. If there are none, you will need to make them yourself. The wires need to be inserted exactly there.
- The plus is located in the center of the case, so the positive wire must be twisted towards the center.
- In this case, the negative wire should be clamped in the opposite direction (when the cover is completely screwed in).
- Insert the resulting plug into the cigarette lighter.
How to connect a cigarette lighter not from the ignition
VAZ 2110 cigarette lighter illumination
https://youtube.com/watch?v=FL3LBZDs8QI
You don't have to start the car to use the cigarette lighter. To do this:
- You need to cut the red wire that comes standard with the panel.
- You should dismantle the trip computer, after which you will have access to two blocks: one for the trip computer, the other for the clock.
Note: Only the first block will be needed. However, if it does not have the required wire, you will have to connect the wire to the clock block.
- The block from the trip computer must be turned counterclockwise.
- The red wire cut from the cigarette lighter must be connected to this block.
Note: it must be inserted into the second lower right hole.
Now you need to connect to the orange wire, which is located on the back of the block.
Note: everything must be insulated.
Replacing the cigarette lighter will not be difficult even for a novice car owner. Therefore, there is no need to go to a car service center, where the price even for such a simple job will be high. Moreover, after reviewing various photos and videos on the Internet, you can easily change the cigarette lighter with your own hands. Perhaps even any similar instruction described above will help.
The cigarette lighter is an element that is found in all famous brands of cars. Not so long ago it was considered just an ordinary element in the car interior and was used for lighting cigarettes. However, due to technological progress, it became possible to use the device for other purposes:
- Electric outlet. A very convenient function, as it is possible to connect a phone or laptop charger.
- Power supply for DVR and radar detector, navigator.
- Connecting a vacuum cleaner or compressor.
This is not a complete list of cigarette lighter uses.
However, you should not exaggerate the capabilities of the device. Since many motorists sometimes use non-standard plugs, which sometimes negatively affects the operation of the cigarette lighter. In most cases, the device may stop working altogether.
Reasons why the cigarette lighter does not work in a VAZ-2110 car
Electrical equipment VAZ 2110 2111 2112 Cigarette lighter VAZ 2110 2111 2112
Any malfunction must have some explanation. In other words, in order to eliminate a problem, you must first find the cause that provoked its occurrence. In the case of a cigarette lighter, this should not cause any difficulties. Its design is quite simple, so understanding it will not be difficult for the driver. In other words, to identify the problem and fix it, you don’t need to go to a service center - everything can be done on your own.
This design is completely justified, and it takes into account the operating features of this device. The thing is that when the cigarette lighter is turned on, a fairly high current flows through it. Here it is appropriate to give an analogy with a starter.
If the cigarette lighter stops working, there may be several reasons for this:
- fuse;
- wires;
- malfunction of the device itself.
Let's look at them in a little more detail. The first step if the cigarette lighter malfunctions is to check the integrity of the fuse. In general, when looking for reasons, it is best to follow the path from simple to complex. The fuse we need in this case is located in the mounting block. You can recognize it by the marking - the corresponding image of F18. By the way, on the electrical diagram of the “tens” it is marked exactly the same. The current that passes through this fuse should not exceed 25 amperes.
However, there is an even simpler way. In this case, you don’t even need to open the mounting block and inspect the fuse. It will usually be enough to try to turn on the ignition and start the heating system fan. This is truly the simplest verification option. The thing is that the fan and the cigarette lighter are connected to the same fuse - the aforementioned F18. Accordingly, if it fails, none of these devices will work.
The problem is easily solved. Open the mounting block and change the faulty fuse. To make this operation more convenient, the designers provided tweezers. It is located inside the mounting block, and with its help it is really much more convenient to manipulate such a thin object as a fuse. All that remains is to check the operation of the cigarette lighter, and, if everything is in order, close the mounting block.
However, the fuse is not always the cause of the malfunction. If it is in perfect order, then the problem should be looked for in the wires that connect the mounting block and the cigarette lighter. Perhaps there was a break somewhere. There is probably no need to explain how to fix this problem. Just remember to carefully insulate the restored wire afterwards.
However, the reason may be even more serious - we are talking about a breakdown of the cigarette lighter itself. However, before you start disassembling the device, also inspect fuse F6. The thing is that if it burns out, it can also cause the cigarette lighter to malfunction. If the fuse is in order, then there will be no other way out except disassembling the cigarette lighter.
One point worth noting. In the vast majority of cases, the cigarette lighter fails due to the fault of the car enthusiasts themselves, who connect devices into its socket that consume a fairly powerful current. One example here is a powerful car electric pump. If you use the cigarette lighter socket carefully and strictly in accordance with the manufacturer’s requirements, then you are unlikely to have any problems with this device.
Causes of device malfunction
Generator VAZ 2110 2111 2112 Generator VAZ 2110 2111 2112
The cigarette lighter may need to be replaced if the product stops functioning. The reasons for mechanism failure are the following factors:
- The socket fuse has blown. Occurs in frequent cases if the outlet is used to connect several devices as a splitter. After all, a 10-amp fuse is not designed for large current overloads, so in frequent cases it fails. In order to repair the cigarette lighter, you simply need to replace the fuse with a new one.
- Oxidation of device contacts. To carry out repairs, you will need to remove the mechanism and clean the contacts.
- Closing the contacts of the product. Contact melting occurs when inept owners replace a 10A fuse with a 15A one. As a result, this leads to the wiring in the car “burning” or the contacts melting. To fix the problem, you need to remove the device and make repairs based on the breakdown.
- Faulty filament coil. In order to repair the product, it is necessary to replace the head with a new one. The cost of the product does not exceed 150 rubles.
If the product is used frequently, it may fail. According to the instructions, the cigarette lighter head should snap out when you press it after 10-20 seconds. Over time, this period of time increases, and at one point the product stops functioning altogether. Let’s find out in more detail what the connection diagram for the cigarette lighter on a VAZ “classic” is.
Cigarette lighter electrical circuit
The cigarette lighter socket of the “seven”, like any other inexpensive car, has the following connection diagram:
- “Power” is a red wire, one part of which powers the clock in the car.
- The yellow wire is the power supply for the backlight.
- “Ground” is a black wire.
The fuse, which is responsible for protecting the product, is located in the mounting block at number 6. In modern cars, power to the cigarette lighter usually comes not directly from the battery, but through the ignition switch. As a result, power is not supplied until the ignition key is turned. This is done in order to preserve battery charge during long periods of parking.
Let's find out how to change the cigarette lighter on a VAZ 2107, and what the procedure is.
Features of device replacement
Self-replacement of the mechanism is carried out as follows:
- First you need to remove the negative terminal from the battery. After this, dismantle the panel with the clock.
- Using pliers you need to tighten the metal rim on the cigarette lighter.
- Now you can dismantle the product.
- After removing the socket, it is necessary to inspect it and, if necessary, replace it.
- To replace a product, you need to switch the power wires to the new device, and then install it in place in the reverse order of removal.
After this procedure is completed, you can connect the negative terminal to the battery and turn on the product. After 15 seconds, the head should snap off, which indicates that the product is working properly. After making sure that the product is functioning, you can check the serviceability of the old head. If the old head does not snap off, then it cannot be repaired. Despite the fact that the product in question is not fancy, it requires periodic maintenance. In frequent cases, the fuse simply fails, so you should always have a couple of new products in stock.
DIY cigarette lighter repair
The windshield wiper does not work: possible causes and solutions to the problem
One of the most popular car
, is a failure
of the cigarette lighter
.
To repair the cigarette lighter,
I think you shouldn’t call
an auto electrician
, but you can do it yourself
.
Even those who don't smoke still use it.
The most common device plugged into the cigarette lighter
is a mobile phone charger.
Usually the battery runs out at the most inopportune moment, during a very necessary conversation, and what disappointment comes when the phone plugged into the cigarette lighter
says “no charging.”
To prevent this from happening and for the cigarette lighter
to work properly, you must follow some rules.
1.
Do not put compressors for inflating tires into the cigarette lighter socket. They are best connected directly to the battery. And other devices that consume a lot of energy.
2.
There’s no need to forcefully tamp down devices that don’t fit there.
3.
do not put metal objects into the cigarette lighter socket, and try not to buy devices that have metal rings on the body (they can come off and short the contacts inside the socket)
If, nevertheless, the cigarette lighter socket does not produce the desired voltage, then first of all you need to check the fuses, it is called CIG. If it burned out, and after replacing it the energy source began to function, you are lucky, don’t do that again.
If the energy flow is not restored, you will have to disassemble the cigarette lighter itself. If you have not yet believed me, and doubts gnaw at you, you can check the veracity of my words. Reach to the back of the cigarette lighter socket, remove the connector from the socket and connect the light bulb there, and turn the key to the ACC position. If it burns, then a showdown cannot be avoided, and in vain they didn’t believe me.
Repairs will require small pliers, hands, and a small file. We see the back of the cigarette lighter, and are in no hurry to unscrew the nut! Before unscrewing the nut and disassembling the structure, it is advisable to remember in what position the contacts are located and what is positioned. So as not to disassemble again when connecting the connector. After unscrewing the nut, we separate the metal parts from the plastic and disconnect the pieces of iron. And we see an incomprehensible semiconductor-mica plate that ruins our life. We tear it out, throw it away, and try to put everything back together. But we can’t put it back together, so we take a file in our hands and grind off the excess metal that is in our way. After removing it, put everything back together in reverse order, it should work. We put the cigarette lighter back in place and enjoy the fact that we were able to fix our car ourselves.
Let's summarize
Obviously, the procedure for replacing the cigarette lighter is quite simple, even a beginner can do it. But you need to understand that the cigarette lighter will have to be changed often if the current consumption increases above 25 amperes. Once this value is reached, the entire procedure described above will have to be performed again, since the node will inevitably fail. The most common reason for this is connecting multiple devices at the same time. You should not use tees, and you should always know exactly how much the device you want to connect to the cigarette lighter consumes. This will extend the life of both the unit itself and the fuses.
The window regulator does not work on Kalina List of possible breakdowns and their repair
- The window regulator on Kalina does not work, then prepare a car tool kit and we will begin. So, in addition to a toolbox, we will need a tester, which can be purchased at any auto store or market.
- Considering that we will have to run, spin, and twirl near the car, we need a spacious place, for example, an area near a garage or house;
- We clearly determine which glass unit is inoperative;
- We open the hatch on the left side of the steering column, as the fuse box is located there. To do this, just pry off the valve with a screwdriver;
- We find under the marking F2 (30), it is he who is responsible for the operability of the double-glazed window chain and remove it;
- We carry out visual diagnostics and test it with a tester. There are two options: either it is intact or it is burnt out. In the first case, the reason is not in him, in the second - in him;
- Based on the decision in point 5, we carry out further actions. Apparently the fuse is intact. Let's move on to the central control unit for double-glazed windows, which is located on the driver's door;
- Using a screwdriver, we very carefully pry off the polymer cover, since it can be scratched and it will lose its aesthetic appearance, and we take out the entire board assembly. We find the switch we are interested in and check the fit of the wire terminals and the integrity of the wiring itself. Using a tester, we ring the switch to make sure it is working properly; if it shows a short circuit, then it is faulty and should be replaced;
- Once the functionality has been confirmed, we move on to the last stage of the search, namely into the doorway. To do this, we remove the door trim, depending on which side we are looking for the cause. We will see a picture in front of us in the form of: the double-glazed window itself, the release and lifting mechanism and an electric motor with a bundle of wires.
AutoFlit.ru
Why doesn't the cigarette lighter in the car work?
Posted in: Uncategorized on: December 8
Surely you, as the owner of a Hyundai Santa Fe, have had to deal with the problem of the cigarette lighter not working in the car
And it doesn't even matter whether you are a smoker or not. You may use the cigarette lighter for other purposes. Charging your phone and other devices. Connecting a car compressor to inflate the wheels. Connecting various devices powered from the Hyundai Santa Fe cigarette lighter. Anywhere.
15Mar
We protect your car from theft and burglary
All car owners worry about their car in terms of theft. And since this problem is always relevant, we will devote this post to the topic of do-it-yourself anti-theft devices for cars, because sometimes homemade protection can help out not only as well as a professional, factory-made one, so to speak, but even surpass it in terms of protection power
13Mar
Hyundai Santa Fe fuses
We will devote this article to the topic of the Hyundai Santa Fe fuse box, an inconspicuous thing in a car hidden from view, but if at least one Hyundai Santa Fe fuse fails, then you will immediately find out about it due to the fact that some one will refuse to work for you -either the system, for example, power windows or the high and low beams will not work
10Mar
Choose a pressure gauge and what you need to know about it
Compliance with and maintenance of the tire pressure specified by the manufacturer for a particular vehicle is an important aspect when driving a car. To monitor the air pressure in the wheels, a car tire pressure gauge is used. Depending on the tire inflation, the comfort of driving a car, its handling and fuel consumption will depend. Choosing a car tire pressure gauge Every car owner should always have
10Mar
Checking the generator for serviceability using a multimeter
Surely all car owners have encountered the phenomenon of a car not starting due to a dead battery. As a rule, most started charging their battery or bought a new battery. But perhaps the fault was not the battery, but a phenomenon such as the car battery not charging from the generator, due to the failure of the latter, so in this post we will talk
09Mar
Auto scanner for car diagnostics
Everyone likes to drive a car when it is in good working order, but when breakdowns and operational problems begin, many car owners do not even know in which direction to look for a breakdown. Fortunately, now all modern cars are equipped with an ECU - an electronic control unit, and if you connect a special device to it that detects problems in the car, it will give you problem areas
09Mar
Car charger circuits
Compliance with the operating conditions of the car battery and its maintenance is the key to long battery life. And for this, sometimes it is necessary to fully charge the battery, so in this article, called homemade circuits for charging a car battery, we will look at the most common circuits of such chargers that radio amateurs can make on their own at home. Device diagram for
07Mar
The principle of operation of a car generator and its design
Our article today will be devoted to such a topic as an explanation of the meaning and design of a generator in a car. Surely everyone knows that the engine is the heart of the car, and the generator, in fact, is its blood, which distributes nutrients in the form of energy to all energy-consuming systems of the car. How does a car generator work and on what principle does it work? Let's first give the exact
07Mar
06Mar
We assemble a pulse charger for a car battery ourselves
Our article today is devoted to the topic of homemade pulse charging for a car battery. Most car owners use car battery chargers in their practice. But sometimes, for various reasons, it becomes necessary to assemble such a charger for a car battery with your own hands, the reasons are different There is no financial opportunity to buy The settlement is located far from the place where such devices are sold Required
Check and replacement
Replacing the cigarette lighter in a VAZ 2110
Simple check:
- Turn on the ignition.
- Insert the cigarette lighter into the socket.
- Wait 10-15 seconds.
- Take it out.
Note: if it has not warmed up during this time, then it really does not work.
Replacing the cigarette lighter for VAZ 2110
Of course, you can go to a dealership to have it replaced by a qualified automotive technician, but you can also replace and install it yourself to save money. Replacement Instructions:
First you need to find a fuse (see VAZ 2110: how to replace fuses) that protects the cigarette lighter from spontaneous combustion. To easily remove it, you need to break the chain.
Note: Removing the fuse is important because if the wiring located at the top is tangled, it can cause damage to other electrical things in the car. The wiring will simply burn out and will need to be replaced. Before you start replacing the fuse that protects against spontaneous combustion, you need to read the user manual of the machine
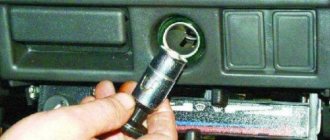
Now you have to remove the faulty device. To do this, you need to take a flat screwdriver and insert it into the slot (the cigarette is placed there). The screwdriver needs to be turned several times.
Note: this should be done extremely carefully so as not to tear out the socket, since in this case the other cigarette lighter is unlikely to function normally.
The process of replacing the cigarette lighter of a VAZ 2110
If this method does not work, you will have to try to release the metal clips that hold it in place.
Note: these clamps are very easy to unfold, but there is no need to rush. It is better to do the work longer, but with better quality.
VAZ 2110 how to remove the cigarette lighter
After removing it, you will have access to two wires with spade connectors. You need to remove both wires so that they are completely disconnected.
Note: if they are not turned off, they may short out and catch fire during operation.
Now it will be much easier to replace this device. It is necessary to connect the spade-shaped connectors to the peaks located on the back of the device. You need to insert the black into black and white into white wires accordingly.
Note: otherwise the circuit will not be closed and the device will not work.
After connecting the wires, you can install it in place by pushing it into the hole provided for this.
Note: Press it lightly and then twist it clockwise until it is secured by the two metal clips. He must be motionless.
Now all that's left is to replace the fuse in the fuse box (if it doesn't work) or install the old one.
Note: this is a prerequisite, since without it a short circuit is possible.
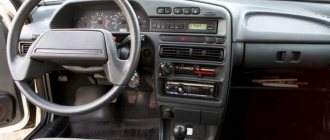
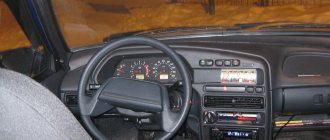
Disassembling the center console
Further diagnostics of the device requires its removal. But how to remove the cigarette lighter of a VAZ-2110? Some specialists manage to remove it from the facing panel without dismantling it by picking it out with a screwdriver, but why deform the plastic if it takes no more than five minutes to remove it? Yes, and for this you only need a Phillips screwdriver.
- Unscrew the screws securing the left and right trims of the center console.
- We disconnect the connecting blocks of the cigarette lighter wires and its backlight (it is recommended to disconnect the negative terminal from the battery in advance).
- Push up the front trim (under the handbrake lever). Remove the cover.
- We remove the gear shift knob, and then its cover.
- Unscrew the central screw securing the tunnel lining.
- Move the front seats all the way forward.
- We unscrew the screws for the rear fastening of the upper cladding and dismantle it.
Repairing a broken cigarette lighter
Sometimes replacement is not necessary. In some situations, you can carry out repairs yourself. Inside the car cigarette lighter itself is a small mica plate. This is a semiconductor that often fails. It needs to be removed. After this, it is worth assembling the device and then checking that it is working correctly.
Often you just need to treat oxidized contacts or solder fallen wires.
Instructions for replacing the backlight lamp
If you need to carry out this procedure, then you should act according to a certain scheme.
- Turn off the ignition, and then remove the wires from the battery.
- To get to the lamp, we dismantle the plastic lining inside the cabin.
- Disconnect the gearbox and parking brake housing.
- We take out the car cigarette lighter along with the backlight.
- Squeeze the screen to remove the metal tendrils.
- We rotate them 90 degrees, and then remove the lamp from its seat.
- We install the new element, and then carry out the assembly. When connecting, you should use A 12-4 lamps.
A detailed video on how to remove a VAZ 2110 model device with your own hands is presented above.
Required Tools
Before dismantling the cigarette lighter on a VAZ 2110, repairing it or installing a new device, or replacing a fuse, you will need to stock up on suitable devices. To work you will need:
- Phillips and standard screwdriver;
- protective gloves.
To fix a broken cigarette lighter or fuse, the following will be useful:
- multitester;
- blowtorch with solder;
- heat shrink tubes, electrical tape;
- wire cutters;
- needle file