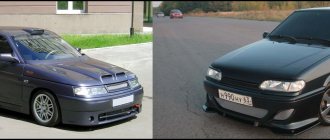
New domestic cars significantly exceed the previous, old-fashioned AvtoVAZ models in terms of quality and design. High wear resistance and excellent maneuverability make them popular in the modern automotive market.
Every car needs special care. Motorists should take care of the integrity of the components, and especially the safety of the engine. Potholes, holes and rocks can destroy the engine. To prevent this from happening, take care to protect the Priora engine. In our article we will study the purpose for which this is done, consider the types of protection and its installation.
Shipping and payment
Payment Methods
| 1.06018.1 | |
| Material | Steel |
| Brand | Auto armor |
| A country | Russia |
| Protection for ? | Engine and gearbox |
| Thickness? | 1.8 mm |
| Drive unit | All |
| Fasteners? | Not included, uses standard mounting hardware |
| Number of sheets? | 1 |
| Gearbox type | All |
| Engine ? | 1.6 |
| Changing the oil and filter without removing the protection? | Yes for (1.6) |
| Guarantee | 24 months |
| Note | deep stamp |
| Applicability: | Lada (VAZ) Priora sedan 2007-2018 Lada (VAZ) Priora hatchback 5 doors. 2007-2018 Lada (VAZ) Priora hatchback 3 doors. 2007-2018 Lada (VAZ) Priora station wagon 2007-2018 |
| Weight: | 7.5 kg |
| Cash to courier | You can pay for the order upon receipt to the courier upon delivery or at the pick-up point in your city |
| Cashless transfer | The order can be paid from the organization's current account for legal entities or from a personal account |
| Bank cards | Payment by bank cards is possible on the website or upon receipt |
For more information about payment, see the “Payment” section.
PRICES FOR CRANKCASE PROTECTION FOR LADA PRIORA
| Manufacturer | Material | Thickness, mm | Fastener type | What protects | Weight, kg | Price, rub |
| Steel | 2 | Standard fasteners | Engine crankcase, gearbox | 11 | 2500 | |
| CARbon from | Composite | 8 | Standard fasteners | Engine crankcase, gearbox | 6,5 | 6200 |
| Steel | 2 | Standard fasteners | Engine crankcase, gearbox | 9,7 | 1900 |
Installing motor protection
Installing armor is not difficult and does not require special skills. If you know how to use wrenches, then you can safely get started. Installing standard protection, which does not require any modifications, will take only a few minutes. Installation of protection yourself should be done on a pit or a lift. It is advisable to take an assistant with you.
Before starting work, make sure there are holes for fastenings. There should be a total of 7 mounting holes (5 in the front and 2 in the back). Installing the protection will not take much time. You should start by securing the corners with four bolts. The bolts should be tightened all the way to avoid vibrations of the pallet during operation. Then make sure that the pallet fits snugly against the bottom of the car; the edges can be folded if necessary.
Given our road conditions and frequent trips out of town, the Lada engine must be reliably protected to avoid puncture or deformation of the engine crankcase and cooling jacket. After all, repairing and restoring an engine is much more expensive than purchasing and installing protection.
Malfunctions: what can happen to a car without protection
The engine protection installed on the Priora performs two functions:
- Prevents dirt from the road from entering the engine compartment below, which is especially important in rainy weather and winter.
- Reduces the likelihood of damage to the engine oil pan and gearbox when falling into a hole or hitting hard objects.
Without engine protection, the following negative consequences are possible:
Contamination of the engine compartment, which not only harms aesthetics, but can also cause failure of electronic components and drive belts. Penetration of the engine crankcase or gearbox, which leads to oil leakage, and in the absence of timely measures - to serious damage to the engine or gearbox. Violation of the normal thermal regime of the engine during the cold season due to accelerated air exchange.
Aluminum crankcase guard
Mounting options for different types of protection may differ significantly. Some can be removed and installed when changing the oil in a couple of minutes, while others will require much more time. All other things being equal, it is better to choose the option that will have the simplest and most reliable fasteners. This is where the experience of other owners will come to the rescue. Otherwise, you will have to constantly resort to intricate techniques when removing and installing, so as not to break soured fasteners, which can be extremely poorly positioned. Sometimes there are protections with technological windows under the drain plugs and the oil filter, but more often than not it is easier to dismantle such protection, so as not to have to wipe off the oil that has spread over it for a long time and persistently.
Exchange and return
You can refuse the goods at any time before its transfer, and after its transfer within 14 days. Return of a product of proper quality is possible if its presentation, consumer properties, as well as a document confirming the fact and conditions of purchase of the specified product are preserved. If the consumer refuses the goods, the Seller is obliged to return to the Buyer the amount of money paid to the latter under the contract, with the exception of the seller’s expenses for delivery of the returned goods from the Buyer, no later than ten days from the date the Buyer submits the corresponding demand.
Returns and exchanges of goods are possible only if their appearance, integrity of packaging and documents are preserved.
For more information about payment, see the “Returns” section.
Protection installation process
Let's take a closer look at the process of installing engine protection. In fact, the cost of installing protection is low - from 1000 rubles. If you contact the specialists of a service station, then be sure that the installation of protection on your car will be carried out efficiently and in a short time. You will only need to choose what kind of engine protection you would like for your car.
You can also install the Lada Priora engine protection yourself. To do this, you need to place the car on a viewing hole or on a car lift. For tools, you will need a set of socket heads, a torque wrench, and graphite or other similar lubricant. It is quite possible to install engine protection yourself, without involving a large number of workers. The duration of the process of attaching this part is 30 minutes.
Procedure:
- Remove the standard boot.
- Remove the nuts and bolts securing the rear suspension arms.
- Unscrew the front bolts of the brackets that secure the guy wires.
- Place the rear guard onto the rear arm bolts.
- At the front, secure the protection to the standard bracket mounting bolts.
- Tighten the connecting threads securely.
Protection is installed at four points
Please note that the fastening of shields made of different materials may vary. Experts recommend choosing those options that have reliable fastenings
Improperly performed protection for the Priora engine reduces the safety of the car, in particular, interfering with other body elements.
Which is better
The auto parts market offers a huge variety of armor for the Lada Priora engine. Metal (aluminium, titanium and steel) and plastic armor are available for sale. The latter does not have a long service life, so they are in less demand. And, unfortunately, it is installed in basic configurations. But the metal one fulfills its purpose perfectly! Although it rattles when the fasteners are loosened or installed incorrectly. But this is easily fixed.
Priora engine protection: highlights
Such shields are sheets of pallets that are mounted on the bottom of the car, directly under the engine, so that the crankcase ventilation is open
Considering the state of domestic roads, it is important to take care of securing the Priora engine protection, since otherwise the power unit will wear out much faster. Therefore, many manufacturers make car shields from metal alloys
This part is mounted using special fasteners. The shields do not need to be removed in order to change the oil, because the protection device must have special holes with plugs.
Crankcase ventilation system
It is important to note several points regarding the crankcase ventilation system. It consists of the following spare parts: intake manifold, throttle assembly, large and small circle hoses of the ventilation system, air supply hose, exhaust hose, oil separator and oil deflector
In a car engine, the crankcase ventilation is closed. Crankcase gases are released through a separator, which is installed in the cover of the same cylinder head, into the intake pipe. These gases are then sent to the engine cylinders, where they are burned. At idle, gases from the crankcase pass through a calibrated hole in the throttle through a small circle hose.
System ventilation hose
Under engine load, the throttle valve opens slightly or completely and the gases pass through a large circle hose through the air supply hose into the intake manifold, and then into the chambers where they are burned. This is how crankcase ventilation is designed in Priora.
Removing and installing the decorative engine cover of the VAZ 2170 Priora
- Repair manuals
- Repair manual for VAZ 2170 (Priora) 2004+.
- Removing and installing a decorative engine cover
To improve the appearance of the engine compartment and reduce noise levels, a decorative plastic casing is installed on the engine. This cover must be removed for most engine repair and maintenance work.
The decorative casing is secured with four rubber clips placed on studs screwed into the intake manifold.
You will need a flat blade screwdriver.
| 1. Press the latch and remove the wiring harness block from the canister purge solenoid valve. | 2. Use a screwdriver to pry out the valve retainer. |
| 3. Move the valve along with the hoses away from the engine. | 4. Unscrew the oil filler plug. |
5. Pull the cover upwards by the edges and remove it by removing the clips from the studs.
| Warning Immediately after removing the casing, reinstall the oil filler plug to prevent foreign objects from entering the engine. |
| 6. Inspect the fasteners on the back of the casing. | 7. Replace the torn latch by using a pointed tool (for example, a screwdriver) to press the edge of the latch leg (shown by the arrow) and push the latch into the hole in the casing. To make installation easier, lubricate the retainer with engine oil. |
8. Install the decorative casing in the reverse order of removal, putting the clips on the studs and pressing the casing at the locations of the clips until it stops.
↓ Comments ↓
1. Car structure
1.0 Car structure 1.1 General information about the car 1.2 Passport data 1.3 Car keys 1.4. Controls 1.5. Heating and ventilation of the cabin 1.6 Ensuring a comfortable air temperature in the cabin 1.7. Doors 1.8. Passive safety equipment on the car 1.9. Seats
2. Recommendations for use
2.0 Recommendations for use 2.1. Safety rules and recommendations 2.2 Running in the car 2.3 Operating the car during the warranty period 2.4. Preparing the car for departure
3. Problems along the way
3.0 Malfunctions along the way 3.1. The engine does not start 3.2 Malfunctions of the fuel injection system 3.3 Idle speed has disappeared 3.4. Interruptions in the operation of the 3.5 engine. The car moves jerkily 3.6 The car accelerates poorly 3.7 The engine stalled while driving 3.8. Oil pressure dropped to 3.9. Engine overheating 3.10. The battery does not recharge 3.13. Knocks in the engine 3.16. Wheel puncture
4. Maintenance
4.0 Maintenance 4.1. General provisions 4.2. Inspection work 4.3. Lubrication and filling works 4.4. Diagnostic work 4.5. Repair and adjustment work
5. Engine
5.0 Engine 5.1 Design features 5.2 Possible engine malfunctions, their causes and solutions 5.3 Useful tips 5.4 Checking compression in the cylinders 5.5 Removing and installing the decorative engine casing 5.6 Removing and installing the engine splash guard 5.7 Installing the piston of the first cylinder to the TDC position of the compression stroke 5.8 Replacing the drive belt gas distribution mechanism and tension roller 5.9 Replacing the power unit supports 5.11. Replacing engine seals 5.13. Engine cylinder head 5.15. Engine repair 5.16. Lubrication system 5.17. Cooling system 5.18. Power supply system 5.19. Design Features
6. Transmission
6.0 Transmission 6.1. Clutch 6.2. Gearbox 6.3. Front wheel drives
7. Chassis
7.0 Chassis 7.1. Front suspension 7.2. Rear suspension
8. Steering
8.0 Steering 8.1 Design features 8.2 Possible steering malfunctions, their causes and solutions 8.3. Steering column 8.4. Steering linkage 8.5. Steering gear
9. Brake system
9.0 Brake system 9.1 Design features 9.2 Possible malfunctions of the brake system, their causes and solutions 9.3 Bleeding the brake system hydraulic drive 9.4 Removing and installing the vacuum brake booster 9.5 Replacing the brake pedal axle bushings 9.6. Main brake cylinder 9.7. Front wheel brakes 9.8. Braking mechanisms of the rear wheels 9.9. Pressure regulator 9.10. Brake hoses and tubes 9.11. Parking brake
10. Electrical equipment
10.0 Electrical equipment 10.1 Design features 10.2. Battery 10.3. Mounting block (relays and fuses) 10.4. Generator 10.5. Starter 10.6. Ignition switch (lock) 10.7. Electronic engine control system (ECM) 10.8. Ignition system 10.9. Lighting, light and sound signaling 10.10. Windshield cleaner 10.11. Washer reservoir 10.12. Electric fan of the engine cooling system 10.13. Electric motor of the heating and ventilation system fan 10.15. Cigarette lighter 10.16. Instrument cluster 10.18. Electronic anti-theft remote control system 10.19. Immobilizer 10.21. Replacing sensors and switches
11. Body
11.0 Body 11.1 Design features 11.2 Possible body malfunctions, their causes and solutions 11.3 Removing and installing windshield frame lining 11.4 Removing and installing soundproofing upholstery in the engine compartment 11.5. Removing and installing bumpers 11.6 Removing and installing the fender liner and protective wing cover 11.7 Removing and installing the front fender 11.8 Removing and installing decorative sill trims 11.9. Hood 11.10. Trunk lid 11.11. Doors 11.12. Seats 11.13. Seat belts 11.14. Rear view mirrors 11.15. Interior fittings 11.16. Instrument panel 11.17. Heater 11.20. Body care
12. Applications
12.0 Appendix 12.1 Appendix 1. Tightening torques of threaded connections, Nm 12.2 Appendix 2. Fuels, lubricants and operating fluids 12.3 Appendix 3. Nominal filling volumes 12.4 Appendix 4. Basic data for adjustments and monitoring 12.5 Appendix 5. Spark plugs used on vehicles 12.6 Appendix 6. Lamps used on a car 12.7 Appendix 7. What you need to have in a car 12.8 Appendix 8. Tools used when repairing a car
13. Electrical diagrams
13.0 Electrical Diagrams 13.1 Diagram 1. Instrument Panel Harness Connections 13.2 Diagram 2. Vehicle Front Wire Harness Connections 13.3 Diagram 3. Engine Electronic Control System (ECM) Harness Connections 13.4 Diagram 4. Vehicle Rear Wire Harness Connections 13.5 Diagram 5. Light Harness Connections license plate light 13.6 Diagram 6. Left front door wiring harness connections 13.7 Diagram 7. Right front door wiring harness connections 13.8 Diagram 8. Rear door wiring harness connections
Manufacturers and prices of analogues - list
Engine crankcase protection for Lada Priora is produced by many companies. Below is a list of the most popular models. ALF eco products are manufactured in Nizhny Tagil, a large metallurgical center.
Suitable for Priora:
- ALF.28.11 AL4 – part made of aluminum sheet 4 mm thick. It is attached standardly, the cost is 5800 – 6000 rubles. ALF.28.06 AL4 – made of 4 mm thick aluminum, but fixed to the cross member with clamps. Price – 5000 – 5200 rubles.
- ALF.28.11. AL5 – aluminum, thickness 5 mm, standard fastening. Costs just over 7,000 rubles. ALF.28.06 AL5 – aluminum 5 mm thick with fastening using clamps. Price about 6500 rub. ALF.28.23st – fastening with clamps, material – 2 mm steel. Costs about 1200 rubles.
- ALF.28.060st – two-millimeter steel boot, secured with clamps. Price – 1300-1400 rub. ALF.28.065st – mudguard made of 2 mm steel. Cost approximately 1500 rub.
- ALF.28.11st – steel 2 mm thick, installed with standard fasteners. Costs about 1200 rubles.
- ALF.28.11st – steel 2 mm thick, installed with standard fasteners. Costs about 1200 rubles. ALF.28.06st – parameters are the same as 28.11st, but is attached to clamps. Price - about 1500 rub.
From the range of the ECO brand of the Autofamily company, the model ECO.52.16.010 is intended for the Priora - 2 mm steel, standard fasteners. Price – 2000 rub. Another brand of this manufacturer is NLZ. NLZ.52.16.021 is suitable for Priora, the part is made of steel sheet 2 mm thick, the mount is standard. Cost – about 2300 rubles.
The “AutoStandard” part for the Priora is represented by model 52116. It is made of 1.5 mm thick steel, the price is about 1,400 rubles. Under another brand of this company - MOTODOR - a reinforced mudguard with article number 62102 is offered, the thickness of the steel sheet is 2 mm. Cost – 1700–1900 rubles.
offers engine protection under the AvtoBRONYA brand. These engine compartment boots are offered as original accessories. The following models are intended for Priora:
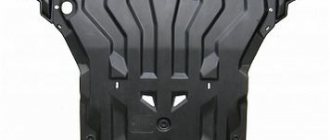
- 1.06018.1 – fastened to standard places, made of two-millimeter steel sheet. Price – 1000–1100 rub.
- 1.06019.1 – similar to 1.06018.1, differs in increased area. Costs about 1200 rubles.
Aluminum engine compartment protection from this manufacturer is sold under the brand name, article number 3.6018.01. The standard mount is used. Cost – 5500–5800 rubles.
Piterskaya has been selling Sheriff engine mudguards since 1995. Suitable for Priora: 27.1575 without side “wings”, material – two-millimeter steel, price approximately 1300 rubles. 27.1575 with “wings” that provide better protection of the engine compartment from dirt. Price – 1500–1700 rubles.
From the assortment on Priors, mudguard 6612, made of 2 mm steel, is used. Cost – 1200–1300 rubles.
Types of supports
The Lada Priora has 4 airbags installed on the left and right of the engine, as well as in the front and rear. It should be noted that only engines with 16 valves have 4 supports, while in an 8-valve engine there are only 3 supports.
Right
The right (upper) support is located near the gas distribution mechanism (GRM). Designed to connect the engine to the car body via rubber, to cushion it and dampen vibrations. This support also limits the longitudinal movement of the engine in the engine compartment.
Left
The left support (lower) is installed between the gearbox and the car body. It serves in the same way as the right one to dampen engine vibrations during its operation, as well as to limit its longitudinal movements during movement or work.
Top bar (guitar)
The top support is shaped like a guitar, also called a rod. This support is designed to fix the engine and prevent its lateral movements. Made from metal and rubber. This pillow was produced in several versions from a metal body (on new Prior models) and metal (on older versions).
The upper guitar is located near the right glass of the stand near the support bearing. It is bolted to the glass and on the other side to the engine bracket.
Lower rod
The lower guitar has the same structure as the upper one. It should be noted that the upper and lower supports are interchangeable with each other.
A lower support is installed under the power steering or air conditioning pump. Attach to the beam and on the other side to the engine bracket.
8-valve gearbox support
This support is installed only on 8-valve engines. Attached under the bottom of the car and to the gearbox housing. This support replaces two guitar supports.
Quite often, in order to more reliably fix the internal combustion engine in the engine compartment, such a support, as an additional one, is installed on 16-valve engines.
Basic moments
The engine is reliably protected
Engine crankcase protection is sold in specialized stores. Auto mechanics recommend buying products from these and Sheriff on Lada Priora. These manufacturers provide a warranty on their product. The rigidity of this structure is calculated taking into account the technical characteristics of the vehicle.
The engine for the Lada Priora car was created on the basis of the power unit for 2112. Its volume is 1.6 liters. The cylinder block is made of high-strength cast iron, which gives the structure strength and reliability. The engine cooling jacket is made in such a way that each cylinder is protected from deformation. The top of the system is open. This design has a positive effect on ventilation of the crankcase and pistons of the power unit.
The crankshaft bearing supports are installed at the bottom of the engine. Bolts are used to secure them to the base. The last element is made of cast iron and is protected from movement along the axis by half rings. This part is equipped with counterweights (8 pcs.), which are designed to reduce vibration.
At the front is a pump used to pump out oil and pulleys. On the other side there is a cast iron flywheel. Each working surface of the elements has undergone heat treatment, which significantly increases their wear resistance. The cylinders have 4 valves (2 intake and 2 exhaust). The block head has corresponding bushings with locking rings that keep the last parts from falling out.
The power system of the engine in question includes:
- fuel pump;
- filter;
- throttle assembly;
- hoses;
- injectors.
Priora engine characteristics
This is poor engine protection.
The engine for the Lada Priora was created on the basis of the unit for the VAZ 2112. Externally, it is very similar to the engine in the Lada Kalina, but internally it is significantly different. The engine volume is larger and is 1.6 liters due to the fact that the piston stroke is increased, but the cylinder diameter remains the same.
The cylinder block is cast from high-strength cast iron, making it hard and reliable. The engine cooling jacket is made in such a way that all cylinders are protected from deformation, because it is located along the height of the entire cylinder block and is open at the top. In addition, this has a positive effect on cooling the engine pistons, which protects it from overheating.
At the bottom of the engine there are crankshaft bearing supports, they are bolted to the base. The crankshaft itself is made of cast iron and is protected from movement along the axis by half rings inserted into the middle support. 8 counterweights, which are designed to reduce vibration, are also located on the crankshaft.
In front, at the end of the crankshaft, there is a pump that pumps out oil, a camshaft drive belt pulley and a generator drive pulley. At the opposite end of the crankshaft is a cast iron flywheel with a steel toothed rim. The Lada Priora engine pistons themselves are cast from aluminum alloy. The mass of the piston set as a whole is approximately 785 g, which is 32% less than in the engine of a Lada Kalina car.
Experimental version of the barrier
The camshafts, which are located at the top of the cylinder block, are cast from the same durable cast iron and bolted in place. The block head itself is made of aluminum alloy. The oil sump is bolted to it. All working surfaces of the parts are bleached, that is, they have undergone heat treatment, which significantly increases their wear resistance. Each cylinder has 4 valves - two inlet and, accordingly, two exhaust. The block head has valve guides. They are equipped with locking rings. These rings keep the valves from falling out.
The power supply system of the described engine consists of several parts. These include: an electric fuel pump located in the gas tank, a filter for thorough fuel cleaning, a throttle assembly, a fuel pressure regulator, hoses and injectors. Thanks to a special collection system, harmful fuel vapors do not enter the atmosphere. An engine ignition system consisting of coils is installed on the cylinder head cover. They are individual and controlled by the car's ECU.
Selection rules
Engine protection is installed on the car taking into account the crankcase ventilation scheme. It is presented in the form of the following elements:
- Intake manifold.
- Throttle assembly.
- Large and small circle hoses.
- Exhaust hose.
- Oil separator.
- Oil deflector.
The crankcase ventilation system in the Lada Priora engine is open. The gases from the main unit pass through a separator installed in the cylinder head cover and then enter the intake pipe. Gases burn in the engine cylinders. When cold, the elements pass through a special hole (in the throttle) along a small circle hose. Under engine load, the damper partially or completely opens, gases enter the intake manifold. The waste is burned in a special chamber.
The pallet protection is made of steel, aluminum or carbon fiber. The crankcase protection serves as an additional obstacle for intruders who want to get close to the engine compartment. There are 2 types of design:
Two protection options
The cheapest part is considered to be crankcase protection made of sheet steel. The characteristics of stainless steel protection coincide with the descriptions of its aluminum counterpart. The difference (1st unit from 2nd) is only in the original appearance and higher price. The crankcase protection is selected taking into account certain criteria
| № |
Creteria
Rules for choosing motor protection
The modern car accessories market is overflowing with offers of inexpensive options for protective shields. You can find samples made of steel, stainless steel and composite materials. Such products have both disadvantages and advantages.
The Priora carbon composite crankcase protection is considered the most practical and reliable due to its high strength, lightness and resistance to aggressive substances. The main disadvantage of such shields is their high cost.
The most affordable option is considered to be the engine protection option for the VAZ Priora, which is made of steel. Such shields perfectly withstand repeated blows, but have a decent weight. The price of such products is low. The protective structure made of stainless steel is comparable in cost to parts made of aluminum alloy. Factory protection that is installed on domestic cars is most often made of durable plastic. Of course, such an accessory cannot fully protect against a strong blow. In addition, plastic debris can deform cooling system hoses, wiring, etc.
The most important requirement for the mechanical properties of shields is that the protection must absorb and absorb high impact energy, which is directed directly at the engine. In addition, it should not itself be intensively deformed and not allow the car body to bend. The design rigidity of the shields to protect the engine must be such that it deforms under any influence only on the size of the space between itself and the engine. On average, this figure should not exceed 3 cm.
In addition to a certain rigidity, the Priora engine protection must have strength that would avoid damage to the engine crankcase when hitting any obstacles
And one more important requirement is the mass of engine protection. The weight of the shields should not overload the front axle of the car, but should also be sufficient to ensure high strength
The optimal weight today is considered to be from 7 to 15 kg.
Materials used to make engine (crankcase) protection for Lada Priora: features
Mud flaps protecting the engine compartment are made from:
- Regular black steel.
- Aluminum.
- Of stainless steel.
- Composites
Steel
This is a common material for motor boots, the best choice, good price and quality. Sufficient strength is ensured with a thickness of 2 mm; such a part weighs 8-10 kg. The advantages include good maintainability. The main disadvantage is susceptibility to corrosion.
Aluminum
Aluminum is softer than iron; parts with a thickness of 4 mm or more are used as mudguards, but such parts weigh less - from 6 kg. Aluminum parts cost 3-4 times more than steel parts. Their use is most justified in motorsports, where every kilogram counts.
Stainless steel
Stainless steel engine compartment boots are similar in quality to products made from ordinary steel, but are not subject to corrosion. This causes their higher cost.
Detailed description
Steel protection AutoBronya
- Thickness 2-4 mm.
- Computer 3D modeling technology.
- Technological hatches.
- Stiffening rib.
- Quick installation.
Protections are made using precision equipment. During production, the possible load, force and consequences of the expected impact are calculated. The temperature conditions of the engine are also tested.
Technological holes allow you to change oil and remove dirt without dismantling the product. To increase the reliability of the structure there are stiffening ribs.
Installation takes place in standard places without modifying the vehicle design.
How to replace the crankcase protection on a VAZ 2170-VAZ 2172?
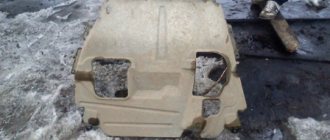
1) Any protection is attached to bolts at the ends of which there are also nuts, so crawl under the bottom of the car and look there for all the bolts (or nuts) that secure it; on the standard protection that is installed on cars from the factory, the nuts for its fastening are located in the front parts of the car (see photo 2, it is attached to the bottom of the front bumper), and the remaining bolts at the end of which there are nuts secure it in the rear part, to unscrew the remaining bolts you will need to hold the bolts themselves from turning with one key, and unscrew them with the other key the nuts themselves are as shown in the photo under number 1.
Where is the crankcase guard located?
Its location is probably known to everyone. The Priora engine protection is mounted under the bottom of the car's engine and is intended to ensure its safety. Many foreign car brands have factory protection installed on the entire underbody. That is, it starts from the engine and ends only at the rear, protecting at the same time the gearbox with the driveshaft and the gearbox. In the event of mechanical damage, the protection takes the full force of the impact and thereby becomes deformed.
Basic moments
The engine is reliably protected
Engine crankcase protection is sold in specialized stores. Auto mechanics recommend buying products from these and Sheriff on Lada Priora. These manufacturers provide a warranty on their product. The rigidity of this structure is calculated taking into account the technical characteristics of the vehicle.
The engine for the Lada Priora car was created on the basis of the power unit for 2112. Its volume is 1.6 liters. The cylinder block is made of high-strength cast iron, which gives the structure strength and reliability. The engine cooling jacket is made in such a way that each cylinder is protected from deformation. The top of the system is open. This design has a positive effect on ventilation of the crankcase and pistons of the power unit.
The crankshaft bearing supports are installed at the bottom of the engine. Bolts are used to secure them to the base. The last element is made of cast iron and is protected from movement along the axis by half rings. This part is equipped with counterweights (8 pcs.), which are designed to reduce vibration.
At the front is a pump used to pump out oil and pulleys. On the other side there is a cast iron flywheel. Each working surface of the elements has undergone heat treatment, which significantly increases their wear resistance. The cylinders have 4 valves (2 intake and 2 exhaust). The block head has corresponding bushings with locking rings that keep the last parts from falling out.
The power system of the engine in question includes:
- fuel pump;
- filter;
- throttle assembly;
- hoses;
- injectors.
Installing motor protection
Most crankcase guards are attached in two ways:
To regular places. In the front part - with the help of clamps to the transverse beam of the suspension, in the rear - standard. Before installing the accessory, you need to remove the factory boot of the engine compartment, which will require two “19” and one “10” keys. The mudguard is removed as follows: Unscrew the nuts securing the rear arms, which hold the rear part of the boot. The 5 nuts securing the mudguard in the front part are twisted. Afterwards the roof guard is installed. If it is installed in the normal way, it is enough to install the part in the place removed in the reverse order.
For models with modified fastening, as a rule, the necessary fasteners are included. For installation you need to: Attach the mudguard at the rear in the standard way, installing it under the nuts of the suspension arms. From the front, put mounting clamps on the suspension cross member, insert their ends into the holes in the protection and tighten the nuts. Such fastening is more reliable, but at the same time, as a rule, a smaller area of the engine compartment is covered, and the vehicle's ground clearance - the space between the body and the road - is reduced.
