Instructions for verification
So:
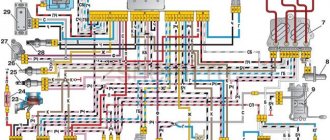
- First, check the serviceability of the electrical circuit going from the sensor to the instrument panel. Throw the wire going from the sensor to the engine to ground, the light will go out if the circuit is working properly.
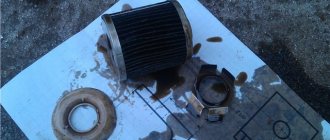
- The second reason could be the oil filter. Such a breakdown is determined by unscrewing the oil pressure sensor. It should be moistened with oil; a dry sensor means that the filter is clogged or its valve is stuck.
- When replacing the filter does not have an effect, open the pan and check the oil receiver itself and the condition of its rubber sealing ring.
- After these checks, one reason remains - a breakdown of the unit itself.
For your information:
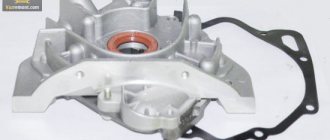
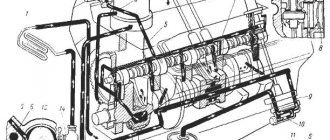
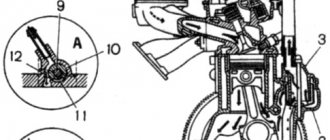
- The engine of the VAZ 2110 model is equipped with a combined lubrication system. On machines of this model there is a gear oil pump, which is located at the front end of the cylinder block.
- Special gears with trochoidal internal gearing reduce mechanical losses during rotation.
- The oil pump itself is equipped with a fully in-line, non-separable filter. With bypass and anti-drainage valves. This device ensures good oil circulation and lubrication through all components of the internal combustion engine (ICE).
- It works by rotating the crankshaft. The connection method to the crankshaft is direct, which is typical for all VAZ cars with front-wheel drive.
- On all-wheel drive and classic models, the system is supplemented with special transmission parts: a timing chain, an intermediate shaft, and a set of gears that transmit torque from the crankshaft.
- The service life of this pump is from 120 thousand km, it works properly when the engine has already undergone a major overhaul. However, during operation, breakdowns are not excluded.
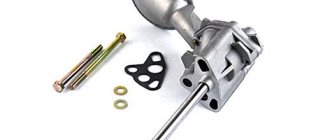
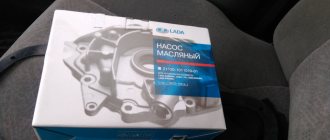
If replacement is still required, it is better for you to choose the VAZ 2110 oil pump from among reliable manufacturers.
Recommendation: If you still need to remove the oil pump, replace the front crankshaft oil seal at the same time.
Operating procedure
So:
- Disconnect the negative cable from the battery terminal.
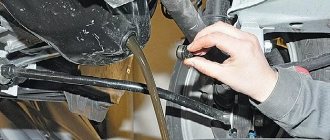
- Drain the oil from the engine (through the drain plug in the oil pan).
- We take out the camshaft drive belt.
Warning: After removing the timing belt (timing belt), do not try to turn the crankshaft or camshaft, the pistons may bend the valves. Then the price of repairs will increase significantly, as will the volume of work performed.
- Now remove the oil sump.
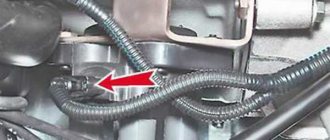
- On engines with a fuel injection system, disconnect the block with wiring from the sensor that counts crankshaft revolutions.
- Using two screwdrivers, remove the pulley from the crankshaft.
- If the key does not fit tightly in the crankshaft groove, take it out so that it does not get lost.
- We unscrew the bolts securing the oil receiver (there are three bolts, there are flat washers under the bolts) and remove the oil receiver.
- We clean the oil receiver mesh from dirt and wash it with white spirit. When the mesh cannot be washed or is damaged, we replace the oil receiver.
- We replace the lost elasticity or torn sealing ring of the oil receiver.
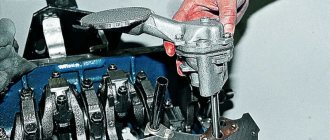
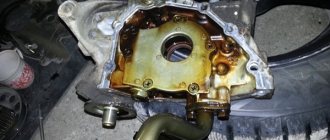
- We unscrew the bolts securing the oil pump to the cylinder block (there are six of them) and remove the pump along with the gasket. Be careful - there are flat washers under the bolts.
Helpful Hint: Every time you remove the pump, replace the old gasket with a new one. It is recommended to install only a factory-made gasket; a non-standard gasket has a different thickness and will cause problems with the operation of the oil pump.
- We turn the pump drive gear to ensure correct installation on the crankshaft: the protrusions on the gear should coincide with the flats on the crankshaft.
- Before installing the pump in place, lubricate the lip of the oil seal.
- When putting the pump in place, carefully tuck the working edge of its oil seal onto the crankshaft journal using a wooden stick.
- Only after this do we tighten the bolts securing the pump.
- Then install all the parts back in reverse order.
- Adjust the tension of the camshaft drive belt.
For VAZ 2110, replacement of the oil pump is completed. All that remains is to change the engine oil. We also recommend watching a video on replacing the oil pump.
Helpful advice: When installing a repaired or new oil pump, we recommend replacing the oil filter at the same time.
Oil pump repair.
I think there is no particular need to describe the high pressure oil pump and its importance in the engine lubrication system. To repair the oil pump, you will need a bench with a vice, a set of flat feeler gauges, a set of socket heads, and a ruler.
Place the oil pump previously removed from the engine in a vice; when clamping the pump in a vice, do not use excessive force so as not to damage the pump housing.
The image shows the location of the fastening bolts and the inlet pipe with arrows; unscrew the bolts and remove the pipe.
One of the fastening bolts of the inlet pipe differs from the other two in length; when assembling the pump, install each of the bolts in its place.
Repairs to the oil pump should be carried out with special care; the removed parts should be placed on previously prepared clean rags, so that in the future you will not have to look for what is where.
As shown in the image, remove the pressure reducing valve washer from the inlet pipe.
Remove the spring from the pressure reducing valve.
Remove the pressure reducing valve from its seat.
Remove the cover from the gear housing.
From the gear housing, remove the drive gear along with the shaft.
Remove the driven gear from the axle in the gear housing.
In order to troubleshoot the removed parts, first rinse with kerosene and blow with compressed air.
Using the results of measuring the diameters, calculate the gap between the axis of the driven gear and the gear itself.
The gap should be 0.017-0.057 mm, the maximum allowable gap is 0.1 mm.
Using a flat feeler gauge, measure the gap between the gear teeth, which should be 0.15 mm, the maximum allowable gap is 0.25 mm.
Using a feeler gauge, measure the gap between the oil pump housing and the outer diameters of the gears; the gap should be 0.15mm. The maximum permissible gap is 0.25mm.
As shown in the image, apply a ruler to the plane of the housing, and use a feeler gauge to measure the gap between the plane of the housing and the ends of the gears, the gap should be 0.161-0.166 mm, the maximum allowable gap is 0.2 mm.
Turn the drive shaft by hand until the gears rotate easily without jamming. Measure the diameter of the hole in the pump housing and the diameter of the roller, and also set the gap between the supporting surfaces of the roller and the oil pump housing. The gap values are as follows: 0.016-0.055mm, maximum allowable -0.1mm.
Carefully inspect the contact points between the pressure reducing valve and the pump cover; there should be no mechanical damage or dirt deposits that could subsequently cause the valve to jam.
Check the elasticity of the pressure reducing valve spring; the height of the spring in the free state should be 38mm, with vertical compression 20mm. And also the spring should not have mechanical damage.
Oil pump repairs can be caused not only by damage or wear to the internal mechanical parts, but also by the factors described below. Carefully inspect the oil pump cover; there should be no mechanical damage or dirt deposits at the points of contact with the body, inlet pipe and pressure relief valve, as this can lead to a decrease in pressure in the lubrication system.
If, when inspecting the engine crankcase, you find traces of dents in the area of the oil inlet pipe, inspect the pipe especially carefully. Deformation of the pipe is not allowed. Wash the metal mesh of the oil inlet pipe with kerosene or diesel fuel. Replace the mesh if it is damaged. Replace oil pump parts that are heavily worn or damaged. Reassemble all previously removed parts in the reverse order of disassembly.
Disassembly
5mm hex wrench
unscrew the six bolts holding the pump housing and cover together.
2. Separate the pump housing and the cover.
3. Remove the drive gear from the cover.
4. Remove the driven gear from the housing.
Recommendation: The pressure reducing (safety) valve plug is tightened with a large torque. When unscrewing it, you may accidentally damage the pump cover. Also, the turnkey edges on the cork itself are damaged. Therefore, do not disassemble the valve unless necessary. The valve can be washed without disassembling it.
5. We wash the pump parts with diesel fuel or kerosene, wipe them dry and lubricate the gears with clean engine oil.
How to Change the Oil Pump on a VAZ 2106
Replacing the oil pump on a VAZ 2101-VAZ 2107
Welcome! Oil pump. Usually called the "oil pump", it performs a very important function when the engine is running, namely, it supplies oil located in the oil pan, the crankshaft bearings and then through the air duct, distribution oil and the camshaft bearings, in most cases lubricating them.
Therefore, the oil pump plays a very large and important role in a car engine, and if it is damaged, then the lubrication system should not have the pressure it should have. (For more information about what will happen if the pressure in the lubrication system disappears, see the article “Useful information about oil pressure on a VAZ”).
The note! To replace the oil pump with a new one, you will need to stock up on: a basic set of wrenches, which will include a "10" and "13" wrench, and you will need to take the end sockets and extension cord to match the same heads, if possible, and pack your pockets with you!
Where is the oil pump located? It is located inside the engine so just by looking at the engine you won't see it, but to look at it you will first need to remove the crankcase, then you will need to remove the pan and only then will you see the oil pump with your own eyes.
READ How to Check Hall Sensor Audi 100 C4
When should I replace my oil pump? It can be replaced with:
1. Pressure drop in the vehicle's lubrication system at engine idle temperature, as shown by the oil pressure indicator.
2. As well as failure of the pump itself or its transmission, which, by the way, can be replaced individually without completely replacing the oil pump, see Article: “Oil pump repair.”
The note!
Sorry for the quality of lighting, this video shows the method of replacing the oil pump of you 2106
No.
Diagnostics and replacement of VAZ classic oil pump (LADA 2101-07)
Oil pump
the main part of any engine. And how much the engine depends on its condition. If you notice a drop in oil pressure after a hard blow to a bump that causes the crankcase to deform, it is likely that the oil pump, namely its intake pipe, is to blame for the drop in oil pressure! 3. And if your car's oil pressure is too high and outside the normal range, then most likely the culprit is a clogged relief valve, which can also be removed and replaced with a new one. (See How to remove this in the same pump repair article)
READ Knocking In Steering Rack Mazda 6
The note! What pressure in the lubrication system can you determine using a special indicator that shows the oil pressure in the system!
How to replace the oil pump with the same oil pump on a VAZ 2101-VAZ 2107?
The note! This job is time consuming, but it is still possible if you have the special tools, and this work should be done in a ditch or on elevators, otherwise the oil pump will need to be replaced!
Conclusion: 1) First remove any parts that prevent access to the pump, so first remove the crankcase from the car and then slide it to remove the pan. (For information on how to remove the deflector and oil pan, see the article “Replacing the oil tank on a VAZ”)
2) Next, remove the two screws that secure the oil pump to the car engine.
The note! Be sure to check which bolt you are going to remove as the two bolts are different lengths (one is shorter and the other is longer) so follow and then after installing the new pump, turn the same bolts in the correct places they were previously installed!
READ Replacing Oil Filter Nissan X Trail
3) Once the bolts are turned upside down, remove the pump and pay attention to it, as there should be a gasket on it, which also needs to be removed, and if it becomes deformed, replace it with a new one. The note! If you are going to install a new pump on a car, this gasket is replaced with a new one, because over time the old gasket shrinks and takes shape, and when you buy a new pump, it usually has a slightly different shape and can therefore oil leak through this place, the gasket does not fits its shape!
The note! If you are going to install a new pump on a car, this gasket is replaced with a new one, because over time the old gasket shrinks and takes shape, and when you buy a new pump, it usually has a slightly different shape and can therefore oil leak through this place, the gasket does not fits its shape!
Assembly: The new oil pump is installed on the vehicle in the reverse order before removal.
Signs and causes of oil pump failure
If the VAZ 2114 oil pump starts to malfunction, this immediately affects the oil pressure in the system (it drops sharply), as a result of which the warning light comes on. True, it’s not worth replacing the pump with a new one right away. You should first check whether the sensor itself is working? This is very simple to do - you need to take the wire coming from this device and press it to ground (motor housing).
If the sensor is working properly, the emergency light will go out immediately after pressing. In this case, the pump will still have to be repaired. If the lamp continues to glow, then the sensor itself is not working and will need to be replaced.
How is the pump replaced on a Priora?
Replacing the Priora water pump. Warning! Do not turn the crankshaft or camshaft after the camshaft drive belt has been removed, otherwise the piston may hit the valves. Wear of the pump bearing (indicated by increased noise during operation) and leakage of coolant from the pump are the main defects of the water pump.
As a rule, repairing the water pump does not lead to the desired result, so it is recommended to replace the pump assembly. Replacing the pump is a procedure for performing actions that you can do yourself.
- You need to disconnect the wire from the negative terminal of the battery.
- Next, you should drain the coolant.
- Then the piston of the first cylinder is set to the top dead center position.
- Then the tension roller is removed.
- The camshaft toothed pulley is removed behind the tension roller.
- It is necessary to unscrew the 4 bolts and the fastening nut and start removing the rear cover of the camshaft drive belt.
Water pump Luzar
Insert a screwdriver into the groove, carefully separate the pump from the block and remove it. Then you need to remove the gasket from the pump. If it is damaged, it needs to be replaced. Then, if the coolant leaks through the drain hole, then you need to replace the water pump (if the seal is damaged). If the pump shaft exhibits noticeable axial play (or the bearing is damaged), replacement is also required. If chips, cracks, or chipping are found on the toothed pulley, impeller and pump housing, it is also replaced. You need to check the tightness of the pump bearing locking screw. The screw must be tightened if necessary. Next, you need to install the pump in the reverse order of removal. In this case, the number on the part must be directed upward. And finally, you need to install the remaining parts in the reverse order of removal.
In this case, the camshaft pulley must be installed with the protruding part of the hub facing the engine. Then you need to check the alignment of the top dead center marks on the rear drive belt cover and the camshaft pulley. The last step is to adjust the tension of the camshaft drive belt, and only after that add coolant.
You need to rely on reviews, contact trusted stores or order the part directly from the manufacturer via the Internet in order to buy a pump for a Priora or another domestic car of good quality and avoid a collision with a fake. A survey of VAZ 2110 car owners on the question: “Which pump is the best for the VAZ 2110?” - shows that car owners mainly buy water pumps from 2 manufacturers: Tolyatti Automotive Unit Plant and Luzar.
Of course, the TZA pump is in greater demand than the Luzar and is considered more reliable and of higher quality. The main cause of belt breakage is usually considered to be the pump, but the catch may lie elsewhere. The reason may be the coolant, which is poured at the factory of poor quality, and after 20-25 thousand mileage it almost loses its ability to lubricate the pump seal.
The result will be an oak seal that is no longer elastic and leaks liquid. It washes the lubricant out of the bearing, which causes the pump to jam. In order to avoid such a problem and future complaints about the pump, it is necessary to change the coolant, even on a new car, to a high-quality one (for example, hepu). Coolant, when diluted with water, should remain sufficiently concentrated and be viscous and oily. In this case, there will be no problems with the pump.
Instrument cluster Lada Priora with navigation
VAZ 2107 and 21213 Niva with an engine from Priora
Functions of the clutch pedal of a Lada Priora car
A car water pump (or in other words, a pump) plays an important role in the normal operation of a car engine. Thanks to this device, coolant circulates through the channels of the cooling system without delay and reduces the temperature of all heated components of the power unit. A malfunction of the water pump can lead to unwanted overheating of engine parts and even completely render it inoperable. To avoid such an outcome, you must carefully monitor the condition of the pump.
Repair recommendations
If there are signs of a valve malfunction (for example, a pressure lamp on the dashboard lights up), you must promptly repair the problem.
To do this, remove and disassemble the oil pump. After opening you will see the pressure reducing valve and will be able to assess its condition.
If it's stuck, take it out, wash it in gasoline and don't forget to lubricate it. Similar flushing actions are done with the fuel pump.
Pay special attention to cleaning the valve channels and diagnosing the main elements. If the spring is faulty, it needs to be replaced.
Please note that the installation of a new oil pump (reducing valve) is required after each overhaul of the power unit.
Please note that the installation of a new oil pump (reducing valve) is required after each overhaul of the power unit.
In this case, you can avoid many problems with pressure surges or, conversely, lack of pressure. Once the repair is complete, be sure to check the system pressure to ensure the readings are accurate.
In the future, change the oil promptly, flush the engine and install a new filter at each replacement.
There are no small things in a car. Even the most insignificant at first glance node can play an important role in the overall “orchestra”.
This theory was once again confirmed by the pressure reducing valve, which requires special attention, timely diagnosis and repair. Good luck on the roads and of course no breakdowns.
To remove the oil pump from a VAZ 2109 car, prepare a standard set of tools and perform the following sequence of actions:
- First of all, we need to de-energize the car by disconnecting the “-” terminal from the battery.
- Next, loosen the generator mounting bolts and remove its belt.
- Prepare a clean container and drain the oil from the crankcase, then remove the engine protection and oil pan.
- Remove the camshaft drive timing belt. After removing the belt, do not turn the camshaft and crankshaft, as this can damage the valves due to the pistons hitting them.
Now we need to remove the crankshaft pulley. To do this, take two flathead screwdrivers and pull it off the shaft. Remove the key if it does not fit well in its seat.
Remove the oil pan. To remove it, you need to unscrew two bolts attaching to the main bearing cap and one bolt attaching to the oil pump.
Now you can remove the pump itself, which is secured with six bolts. We unscrew them, then use a flat-head screwdriver to move it away from the main bearing cap and remove it.
This completes the process of removing the VAZ 2109 oil pump. Carry out the necessary repairs or replace the pump and then install it in the reverse order of removal.
During the installation process, pay attention to the following points:
- Before installation, rotate the pump gear so that the lugs align with the flats on the crankshaft.
- Next, lubricate the working edge of the oil seal with engine oil so that it fits freely onto the crankshaft journal. Also during the installation process, adjust the edges of the oil seal with a thin piece of wood. After this, secure the pump and install all other parts removed.
After complete assembly, do not forget to adjust the tension of the camshaft and generator belts.
https://youtube.com/watch?v=ejhiqUN-WOA
Sources
- https://masteravaza.ru/dvigatel/maslyanyj-nasos/vaz-2109-maslyanyj-nasos-772
- https://remontavtovaz.ru/avto-sovety/redukcionnyj-klapan-maslyanogo-nasosa-dlya-chego-nuzhen-neispravnosti.html
- https://zubilovaz.ru/vaz-2109-kak-snyat-maslyanyj-nasos
Important points
There are a couple of nuances that you definitely need to remember when changing the oil pump:
- Before installing a new oil pump, you need to remove the plastic oil seal from it and generously lubricate its inner edge with engine oil. This will make it much easier to install the pump on the crankshaft;
The inner edge of the oil pump oil seal must be lubricated with oil.
The VAZ 2114 oil pump oil seal should be filled with a pointed stick or pencil
Replacing the oil pump on VAZ 2114 and VAZ 2115 cars is a task that seems impossible only at first glance. Upon closer examination, it turns out that you can cope with it on your own, saving a significant amount on the services of a qualified auto mechanic.
A device such as the oil pump on the VAZ 2114 performs one main function - it serves to supply oil to the moving elements of the engine and, thus, lubricates them. It is powered by the operation of the motor itself. On some VAZ models, the pump is mounted on the crankshaft, on others it has additional adapter units, including an additional shaft, a drive belt and other parts that serve to transmit rotation from the crankshaft to the pump.
Design
Today there are three types of pumps:
- 2-gear pumps, in which one gear is connected to a shaft, which starts working from the intermediate or camshaft of the VAZ. This pump is installed inside a sump located in the lower area of the cylinder block. Typically, the rotation speed of the element is ½ the rotation speed of the motor.
- A gerotor pump has a rotating small gear inside an outer gear. This pump is located in the lower area of the motor in the sump.
The internal pump is often installed on the front cover of the engine. It begins to function from the crankshaft. Structurally, such a mechanism is similar to a gerotor mechanism, but in this situation it replaces the front damper of the engine. As a result, it is possible to generate higher oil flow with higher pressure.
Oil pump on VAZ cars, operating principle and main malfunctions
Kamaz pump
The device that supplies oil to all components and assemblies of the engine is called an oil pump.
The life of the internal combustion engine as a whole depends on the correct operation of the oil pump, so it is very important to ensure that the operation of this unit is at the proper level. At the slightest sign of a malfunction in the oil pump, it is necessary to repair it, since if you do not pay attention to this problem, there is a high risk of engine seizure. The VAZ oil pump has two types of device: one type is typical for all front-wheel drive cars (the VAZ 2109, 2110, 2112 oil pump has an almost identical design), and the other type is typical for both classics and the Niva model
If we talk about the principle of operation of the oil pump, then on front-wheel drive cars it is driven directly from the crankshaft, but on classics the system is more complicated. For example, the VAZ 2106 oil pump is driven using a chain drive
The VAZ oil pump has two types of device: one type is typical for all front-wheel drive cars (the oil pump VAZ 2109, 2110, 2112 have an almost identical design), and the other type, typical for both classics and the Niva model. If we talk about the principle of operation of the oil pump, then on front-wheel drive cars it is driven directly from the crankshaft, but on classics the system is more complicated. For example, the VAZ 2106 oil pump is driven using a chain drive.
Having understood the differences, let's talk about the technical part.
The device of the oil pump on VAZ cars
So, the oil pump consists of a housing, an oil receiver, a drive and driven gear, an oil pump pressure reducing valve and other small elements, such as an oil pump gasket, oil seal, etc.
Consequently, given the design of the oil pump on domestic cars, the weak points are the oil seal and the oil receiver. As a result of using low-quality oil, the receiver grid quickly becomes clogged and the oil pressure in the engine system drops. The oil pump itself has a service life of 120–150 thousand km, but sometimes certain problems occur that may require repair or replacement of the oil pump. Of course, replacing the oil pump on a VAZ 2109, or on any other model, is a complex and costly procedure, so it is better to carefully monitor its correct operation and, if necessary, arrange for preventive maintenance in the form of more frequent oil changes.
In addition, periodic checks of the oil pump will not be superfluous.
How to check the oil pump?
The first and main sign of a malfunction in the oil pump will be a warning light that comes on, but it already indicates the presence of a serious malfunction. In order to check the correct operation of the oil pump, it is not at all necessary to remove it, as some experts advise. It is enough just to measure the engine oil pressure and compare it with the indicators that are considered normal for your car. Having received the number, you can already know what to do next - use the car with peace of mind, or prepare for repairs.
When replacing or repairing the oil pump of a VAZ 2109, 2110, and even 2106, be sure to use only original spare parts. The problem is that for domestic cars there is a large selection of parts from various manufacturers, and, as a rule, the bulk of these parts are of very low quality.
- Repairing a muffler with your own hands If the “X” day has come in your life, when the car stopped purring like a kitten and roared like a hungry bear, do not rush to look for options for an old, burnt-out muffler, because it is quite possible that you can improve the situation with the help of repairs that , besides, you can also make your own...
- Adjusting headlights with your own hands It is believed that adjusting car headlights can only be done at a specialized service center that has the necessary equipment, stands, etc. Of course, this is preferable, but no one ruled out the possibility of adjusting the headlights with their own hands, because most of us do just that...
- Flushing diesel injectors One of the most common problems with a diesel engine is a malfunction of the fuel injectors. The design features of a diesel engine, low-quality fuel - all this eventually leads to problems associated with injectors. The engine begins to operate unstably, fuel consumption increases, the engine starts reluctantly, and puffs of black smoke come out of the exhaust pipe. All …
Signs and causes of oil pump failure
If the VAZ 2114 oil pump starts to malfunction, this immediately affects the oil pressure in the system (it drops sharply), as a result of which the warning light comes on. True, it’s not worth replacing the pump with a new one right away. You should first check whether the sensor itself is working? This is very simple to do - you need to take the wire coming from this device and press it to ground (motor housing).
If the sensor is working properly, the emergency light will go out immediately after pressing. In this case, the pump will still have to be repaired. If the lamp continues to glow, then the sensor itself is not working and will need to be replaced.
