Print this article Font size 16
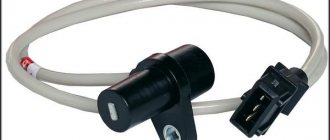
The crankshaft or crankshaft position sensor is an electromagnetic device that transmits data about the current position of the crankshaft to the electronic engine control unit. It is difficult to overestimate the importance of this device, since the correct operation of the injectors responsible for supplying fuel, as well as the entire ignition system as a whole, depends on its performance.
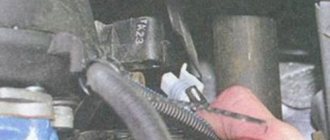
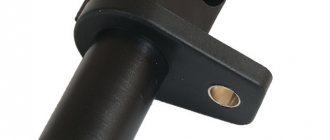
This is what the device looks like
Practice shows that the DC fails quite rarely. But experienced drivers note that such a malfunction can take you by surprise, at the most inopportune moment.
We advise you to always have a spare DC in your car. This is especially true for those who are going on a long trip.
Functions of the sensor and the threat of its breakdown
The purpose of the crankshaft position sensor (CPS) is to synchronize the supply of gasoline and engine start. The device sends a signal to the electronic control unit, which, in turn, regulates the operation of these systems. The working principle is given below.
When the crankshaft begins to move, a current pulse appears between the installed regulator and the shaft teeth. At this moment, the control unit begins reading pulses and sends a signal to open the injectors. It also sends a signal to the ignition module, after which the latter sends a spark to the spark plugs. Since two teeth are missing on the crank pulley disc, this allows the control unit to determine the position of top dead center. Accordingly, in this way he knows when to send signals to the injectors and a spark to the candles.
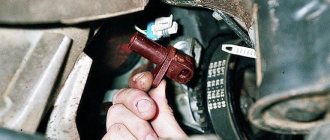
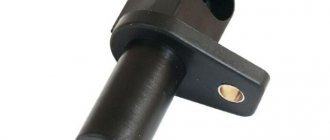
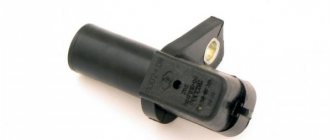
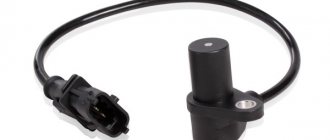
This is what DPKV looks like
The threat of device failure is fraught with the fact that if the DPKV fails, starting the engine will be impossible.
Symptoms of a problem
As for the main symptoms of a malfunction, they are listed below. This information will partially help you determine if the device is faulty.
- First of all, these are changes in the operation of the engine and the vehicle as a whole. In particular, while driving, dynamic characteristics are significantly reduced. Of course, in this case, the reasons for such a malfunction can be very diverse, but the controller will report this by turning on the Check light on the dashboard.
- While driving, the car may behave incorrectly, in particular, the speed may spontaneously either fall or rise. This can have a negative impact on your overall ride.
- When the engine is running at neutral speed, the speed may also drop and vary. In the case of an incorrectly functioning sensor, this will be observed constantly.
- When the car goes uphill, the engine power will drop significantly. It should also be noted that a drop in power will be accompanied by the appearance of detonation.
- And finally, the last symptom is the inability to start the engine. This happens when the device is completely out of order.
Diagnostic methods
Now let's look at diagnostic methods that involve checking the crankshaft sensor at home on your own. There are several of these methods and we will consider each of them in detail. But in order to carry out diagnostics, you must have at least minimal knowledge about using the devices, which we will discuss below.
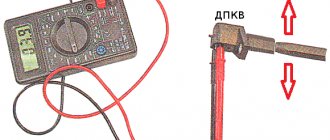
Checking with a multimeter (winding resistance)
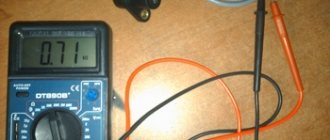
You don’t need any tools, just prepare a multimeter in advance, since diagnostics will be carried out with its help:
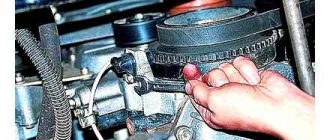
- First, you should dismantle the regulator, and then fix its original position on the motor. You can determine the location of the device from the service manual. So, you need to fix the regulator, while noting its position using the marks.
- After this, just in case, carry out a visual diagnosis of the sensor; perhaps the cause of its malfunction is damage to the housing or wires. The device itself, together with the contacts, must be cleaned and wiped; fuel can be used for these purposes.
- When you dismantle the device, pay attention to the distance between the synchronization shaft and the core. The best option would be if this gap is not lower than 0.6 mm and more than 1.5 mm. If no mechanical damage is detected, then you still have to use a multimeter. In particular, it will be necessary to diagnose the electronic component of the DPKV, namely its winding, since in most cases the problem lies precisely in it.
- The winding diagnostic procedure involves checking the resistance. If you know how to use a multimeter, then this process will not cause you much difficulty. The resistance value for a working sensor should be from 55 to 750 Ohms, however, before checking, we recommend that you read the service book for your car. As a rule, the working interval is indicated there. If, during diagnostics, the signal differs from what it should be, then most likely the problem is a malfunction of the DPKV. Change the regulator before it causes you to become unable to start the car.
Checking on an oscilloscope
As in the previous case, you will not need any tools. If you don't know how to check the crankshaft sensor, then this method is more accurate.
Prepare only an oscilloscope, and for more accurate readings you will also need an alligator clip:
- The clamp is connected to the ground of the motor, and one connector of the oscilloscope should be installed parallel to the signal output of the regulator, namely to terminal A. The second connector is connected to output number 5 of USB Autoscope II. All this must be done so that you can see the signal voltage at the input of the device.
- After this, you should select the operating mode. In our case, to read the voltage readings, you need to activate the “Inductive_Crankshaft” mode, after which you need to start the engine. If the engine cannot be started, you can simply turn the starter.
- If there is a signal from the DPKV, but its output signal does not coincide with the normal one, this may indicate a breakdown of the device. In addition, this may indicate not only a breakdown of the DPKV, but also certain malfunctions of the crank pulley or broken teeth. If the signals on the oscilloscope are incorrect, that is, they “jump” as shown in the photo, then you can safely change the DPKV.
Resistance check
The third tester diagnostic method is a comprehensive one, which allows you to measure insulation and inductance.
Functionality check
Checking the crankshaft sensor is usually limited to visual inspection. Open the hood and pay attention to:
- Frame. The main sign that it is time to change the sensor is cracks.
- Increasing the opening on the bearing. As a rule, a score is formed that widens the gap.
- There are scratches on components.
- Condition of the crankshaft bearings. If they are melted, this indirectly indicates a breakdown of the DPVC.
- The gap between the crankshaft and the liner. Also point out any burrs that have formed.
- Condition of the key. As a rule, if the DPKV malfunctions, it is cut off.
How to check the crankshaft sensor of VAZ 2115 and 2114 more accurately? Multimeter required:
- Check the resistance first. Normally, it should be from 500 to 700 Ohms.
- Then you need to measure the voltage. Select the 200 mV position and connect the probes to the contact group. Then move the screwdriver near the sensor. The sensor will react to metal, and the voltage should appear on the display. If this is not the case, the sensor needs to be replaced.
Checking with an oscilloscope
The most reliable way to check the crankshaft sensor on a VAZ is using an oscilloscope. It gives an informative picture by which you can determine: firstly, the performance of the DPKV; secondly, sensitivity.
The oscilloscope terminals must be connected to the contact group and the car must be started. Now follow the readings on the screen - there should be a picture like this:
Missing teeth are formed when the DPKV detects the passage of metal, i.e. sync disc. The remaining teeth, on the contrary, register the “rest” of the sensor.
Symptoms of a problem
How to check the crankshaft sensor? This issue is relevant for many car enthusiasts and requires attention to study.
It is impossible to imagine a modern car without a crankshaft position sensor. It is he who tells the computer where the crankshaft is now and which cylinder is currently running. There are a lot of malfunctions with which the DPKV on a VAZ 2114 car may be connected in one way or another:
- instability of speed;
- no readings on the dashboard when trying to start the engine;
- deterioration of vehicle dynamics;
- speed mismatch.
Taking into account all the above-mentioned malfunctions, we can conclude that the VAZ 2114 DPKV is an integral part in the operation of the engine. Thanks to its stable operation, driving becomes smooth, soft and controlled. But this is exactly what every car enthusiast wants, to have a reliable four-wheeled horse that is completely under control and in good working order. So that when you lightly press the gas pedal, it quickly executes all commands and picks up the required speed.
The on-board computer of the VAZ 2114 car displays only one accident associated with DPKV - an error in the crankshaft position sensor “CHENG ENGINE”
Today there are several types of crankshaft position sensors. But they both have almost the same device. There is a steel core on which the winding is wound. When a metal object is brought up and removed from the sensitive surface, an EMF is induced in the windings. But at the same time, a small constant voltage is applied to it, that is, a kind of permanent electromagnet is obtained. When the field is distorted, the EMF is distorted, which is recorded by the on-board computer.
Based on the operating principle and design of the crankshaft position sensor, we can list the following methods for checking it:
- checking the crankshaft position sensor by measuring resistance with a multimeter or pointer tester;
- measure the output voltage with the device when the engine is running in AC voltage measurement mode;
- using an oscilloscope.
Before you start checking the sensor, you should first make sure that the gap is correct and that there is no dirt on it. Especially metal dust and graphite lubricants. All this can replace a metal object, which will become a source of interference. The gap should be no more than 1 mm and the sensor should be clean.
After visual inspection of its condition and position in place, it is necessary to remove it. This is made even easier because it is secured with just one bolt in a special bracket, which in turn is part of the side cover of the engine of a VAZ 2114 car. Having removed the sensor from the mount, carefully inspect it for external defects, which could lead to its failure building. After you are convinced of its external integrity, you need to begin diagnosing using additional devices.
How to check DPKV
When it is suspected that the crankshaft position sensor is malfunctioning, it is necessary to dismantle the device and inspect it.
Causes and symptoms of sensor malfunction:
- the device body is cracked due to mechanical stress, the core or contacts are damaged;
- due to scuffing of the journal, the opening in the bearing has increased;
- the surface of the components is damaged, scratches or cracks appear;
- the sensitive element has failed over time;
- the crankshaft liners are melted;
- a manufacturing defect appeared;
- the gap between the crankshaft and the liner has increased;
- the working holes wear out or the key is cut off.
Checking the DPKV is performed with a multimeter. The device is capable of measuring the resistance of the core winding. This is done as follows:
- the multimeter switches to the required position, the switch is set to 2 kOhm;
- the contact group is located on the DPKV terminals;
- if the readings are from 500 to 800 Ohms, then the device is working properly;
- to obtain information about inductance, the multimeter is switched to the appropriate mode;
- If the sensor is in perfect order, then we remove the level of about 400 mH.
Often the terminals become dirty or oxidized. They are pre-cleaned with sandpaper. Multimeter readings do not give a 100% guarantee; a dismantled sensor may be faulty and give correct readings only in this form. While driving and the temperature rises, the readings may change. This happens if a short circuit occurs between the turns of the winding. We find the exact inductance and resistance indicators in the device data sheet.
The crankshaft sensor will also have to be replaced if the insulation is faulty. To check it, you will have to use a megohmmeter:
- the device is set to 500 V;
- one terminal is located on the contact, the second - on the body of the device being tested;
- The resistance of a working device fluctuates between 20–25 MOhm.
Replacing the position sensor can solve the problems that have arisen. These devices cannot be repaired, but quite often the cause of problems is contamination, which is not difficult to eliminate in a timely manner.
The car owner must ensure that the gap between the pulley and the device does not exceed one millimeter. A caliper is used for measurement.
Input impedance measurement
The easiest way is to check the dpkv with a multimeter and measure the resistance of its winding. To do this, you need to have an appropriate device that can cope with this. If there is no such device, then you will have to resort to amateur radio. So, having switched your multimeter to resistance measurement mode and set the limit switch to 2 kOhm, securely install the probes of the device onto the sensor contacts, and they must be clean.
To achieve this, you can wash it with alcohol or gasoline. This may be the cause of the problem. Having installed the probes on the contacts, we observe the readings of the device, which should fit into the range from 550 to 750 Ohms. If this is the case, then the sensor is most likely working. But this can be stated with a probability of 50%, because during breakdowns and short circuits the resistance may change. And if the new one had 750 Ohms, and when checked it turned out that it was 500 Ohms, then this means that it is faulty. And he had an interturn short circuit.
This leads to a decrease in the pulse level that is detected by the controller. Therefore, to be sure of its 100% serviceability, you need to refer to the passport data, which will indicate its exact resistance and inductance. Based on this, you can check the inductance of the sensor winding. To do this, you need to switch your device to inductance measurement mode, if of course there is one. The readings on a working sensor should be up to 400 mH with a resistance of 750 Ohms. If, according to the passport, the sensor has a resistance of 500 Ohms, then accordingly its inductance will be 200 mH. If so, then the sensor is working.
In addition, the condition of the sensor insulation should be checked. To do this you need to have a megohmmeter. Although the multimeter has a mode for measuring high resistance, it is measured with low voltage and high error, while the megohmmeter produces voltage up to 500 V and is a separate device. So, having set the measurement voltage on the device to 500 V and the measurement accuracy to 10% under normal conditions (20-22 0), we place one end of the probe on the sensor body, and the other on the contact. The resistance should not be less than 20 MOhm.
replacement
Replacing the crankshaft sensor on a VAZ 2109 is a very simple process, and any car owner can handle it in 10-15 minutes. Naturally, there is no point in doing this at a service station and paying extra money.
- First of all, you need to disconnect the system from this battery to disconnect the negative terminal.
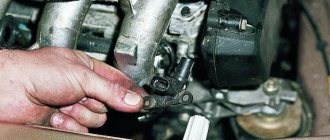
- Then everything is very simple: with one hand, take the cane and disconnect it from the device.
Individual pencil Unscrew the bolt that secures the device to the bracket.
Unscrew the bolt Now all that remains is to remove it from the bracket.
Remove the controller
We are checking this. If it is faulty, we buy a new one, if it works, then it can be installed back. A new device or a proven old one is installed in the reverse order. We placed the sensor and secured it with a bolt. We connect the wires.
This completes the work, all that remains is to start the engine and check the operation.
AC voltage measurement
Checking the VAZ 2114 dpkv by measuring the variable component of the output signal is as follows. In order to measure the alternating component of voltage, it is necessary to ensure the appearance and absence of metal at its sensitive surface with a frequency of at least 200 Hz. To do this, you can use an auxiliary motor with a disk and a slot or protrusion, depending on the type of sensor. And power the sensor winding with a constant voltage of 1 or 2 V. Then switch the multimeter to the voltage measurement mode with a limit of up to 2 V of the alternating type. Next, you need to take a capacitor with a capacity of at least 1 μF and connect it to one of the terminals of the crankshaft position sensor, and the other end to one probe. Place the second probe on the second contact of the coil and turn on our resulting stand. Voltage should appear on the device readings when the disk rotates, this indicates that it is working properly. But, unfortunately, you will not see this voltage rating in the passport data. Because it depends on the selected capacitance, the more you increase it, the closer the readings will be to the supply voltage.
What sensors are on the VAZ 2114
Sensors are installed to signal the status of systems, liquid levels, and emergency situations. They are located on the engine units, transmission, body and in electronic circuits. Almost all VAZ 2114 sensors are installed standard on production vehicles. However, some can be supplied by the car owner independently or during tuning of the car, as an additional option.
List of main measuring instruments located on serial VAZ 2114, this is the sensor:
- oil pressure;
- antifreeze temperature;
- antifreeze level;
- fuel level;
- idle move;
- mass air flow;
- fluid level in the brake system;
- throttle position;
- speed;
- crankshaft position;
- camshaft position, also known as phase sensor;
- oxygen;
- detonation;
- uneven road;
- ambient air temperature.
The list is quite extensive, but car owners are not complacent and are improving their cars by installing additional devices. The options most often set are:
- device signaling open doors;
- front brake pad wear gauge;
- light sensor device.
Using an Oscilloscope
This method is the most reliable and with its help you can be 100% sure of the current state of the sensor. To do this, you need to turn on the oscilloscope to a limit of 10 ms and an amplitude of 1 V/div. And try to start the engine with the starter. In this case, on a well-charged battery, the engine should be accelerated by the starter to 800 rpm, this will correspond to a frequency of 200 Hz and a corresponding period of 5 ms/div. You should observe impulses, one period of which occupies two cells.