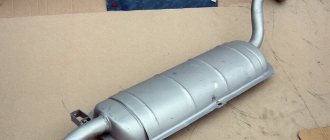
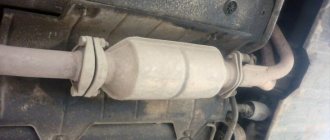
Many modifications are made to a car to attract the attention of others. Most often these are cosmetic changes, but there is one functional upgrade that is popular among car tuning enthusiasts. It allows the driver not only to express himself to others, but also to improve the power characteristics of the car. We are talking about installing a direct-flow muffler, which is commonly called a direct-flow muffler. In this article, we will look at how to install direct flow on a car, as well as what pros and cons it brings.
How to make a forward flow with your own hands
A good direct-flow system produced by sports car manufacturers costs serious money, and the desire to make a direct-flow system yourself is quite understandable.
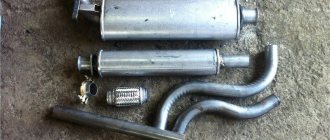
If you look at such accessories in detail, you will notice that they are a standard exhaust outlet with a modified design - smoothed bends and a small number of welds. Due to this structure of the exhaust system, it becomes easier for the car to cope with the emission of exhaust gases into the atmosphere. Making a forward flow with your own hands is not as difficult as installing it on a car, but you should understand that such interference in the design of the car has its own effect on different models. Most often, a homemade direct-flow system is installed on “weekend cars” that were purchased in order to conduct various experiments on them.
To make a direct flow yourself, you will need: a metal pipe with a wall thickness of at least 3 millimeters, a welding machine, a drill, a grinder (for cutting metal), stainless steel (metal sponges for washing dishes are most often used - about 50 pieces).
The process of self-production of direct flow is as follows:
- It is necessary to remove the installed muffler from the car and open the resonator. To do this, take a grinder and make a hole along the entire length of the resonator, and then spread the metal sheets to the sides, as if opening a tin can;
- After this, you will see all the insides of the resonator, which consists of two parts of a pipe and several stiffeners. All this has to be cut out of the resonator “to zero” so that its metal shell remains directly. The most convenient way to cut is with a grinder, but be prepared for the fact that it will take a lot of time. When removing pieces of pipes, leave 3-4 centimeters on each side to make it easier to weld modified exhaust options later;
- Next, we take a pipe of the same diameter as the pipes remaining sticking out in the resonator on both sides. We cut it so that it is long enough to be installed in the resonator between the cut pieces and welded using a welding machine. It is important to remember the rule here: “Measure twice, cut once.” If you change it incorrectly and the cut pipe size turns out to be shorter in length than necessary, you will have to cut a new piece - it is prohibited to fold this part from several pieces of pipe;
- When the pipe of the required length is cut, we must begin to modernize it. To do this, take a small diameter drill and make a lot of holes in this piece of pipe. At the same time, leave 3-4 centimeters of pipe on each side so that reliable welding can be ensured. If your drill cannot handle the pipe, you can use a grinder and make many cuts on the pipe every 1.5-2 centimeters.
- After this, it is necessary to weld the holey piece of pipe onto the parts of the pipes that remain sticking out in the resonator;
- When the piece of pipe is securely welded, it is necessary to fill the entire resonator with mesh stainless steel. To do this, take 50 purchased metal dishwashing sponges and start placing them in the resonator, filling all the free space.
Lada 2107 Mrx142 › Logbook › Cut-off for carburetor + direct-flow muffler for classics
No matter how it sounds, yes, it exists.
Once on YouTube I came across a video with a carb cut-off. Without hesitation, I googled the whole thing, many dubious sites came up, but my instincts did not let me down and I followed the link on VK. The link was to the profile of Vasily Trotsky, after studying the page, going to his group (vk.com/vaz_cutoff), I realized that there was no deception here. Moreover, the group has a lot of reviews from different people about this product.
I decided to order it, but what if I think about it, it’s a necessary thing, and I’m also interested in what it is.
The shipment from Yalta to Kemerovo took 7 days. I ordered a complete set for the classics: - Cut-off with output to a shift lamp, - Modified slider - Shift lamp with a built-in resistor
We install the modified slider in the distributor instead of the slider stock.
Next, we attach the cutoff to the ignition spit as in the photo. For convenience, I removed the ignition braid
Green wire on the spit (going to the hall sensor)
Green wire mode in the part where you plan to install the cutoff. I cut closer to the switch to make the cutoff more accessible.
They cut it. We connect the part of the green wire that comes from the distributor to the yellow cut-off wire (twist the wire, I recommend soldering it for reliability) and INSULATE it with electrical tape or heat shrink.
Next, we connect the green wire from the switch to the green cut-off wire, twist it (you can solder it for reliability), and insulate it with electrical tape or heat shrink.
Red wire (+) on the spit
We take the Red wire, just strip it and take the Red cutoff wire and twist it together. ISOLATE
White wire with black stripe (ground)
A white wire with a black stripe (for some it may be black), we also strip it, take the black cut-off wire and twist them together. ISOLATE
That's it, the ignition scythe can be put in its place.
Video on connecting the cut-off:
If you bought a cutoff with a wire for a shift lamp, install the lamp in a place convenient for you. We connect the black wire from the cutoff to the black wire from the shift lamp. We take the red wire of the shift lamp and look for (+) from the ignition switch. Connect the wires, isolate them and you’re done.
I immediately removed the drain plug because it bursts at the first operation of the cut-off. Something had to be done with the stock exhaust, namely, stick a straight pipe there. I bought a 51mm pipe at the Gas-Paz auto store for 630 rubles
That same evening I removed the muffler, took the pipe, froze 7 times, cut it off 1 time and went to good people with a welding machine
There they had already cut the muffler and pulled out all the slag from it. In the pipe I bought, they checked the holes as they should be in a direct-flow muffler, welded this pipe inside the muffler with the drain pipe and welded the muffler
Source
Pros and cons of installing direct flow on a car
Installing a direct-flow system has both pros and cons.
Each motorist decides for himself how appropriate it is to modify the car muffler in favor of direct flow. Pros of direct flow:
- If a pipe with a slightly larger diameter than originally installed is welded on, it is possible to increase the exhaust gas throughput. An increase in airflow leads to an increase in engine power, up to 15%;
- Increasing the service life of the muffler. Most often, the muffler “from the factory” is not made from the best materials, but with such a modification, the motorist can use good pipes, even titanium options. If you want to increase the “lifetime of the pipes,” then after welding the resonator, you need to remove the end of the muffler with a grinder and solder a new pipe in its place, having thoroughly cleaned and primed it in advance.
Disadvantages of forward flow:
- Increased noise. Many car enthusiasts consider this parameter a plus and install the direct flow with their own hands solely for the purpose of increasing the “rumble” of the car when driving;
- Reducing the vehicle's ground clearance if pipes of larger diameter are welded onto the muffler;
- Problems during maintenance. Increased noise and the absence of a catalyst will lead to problems during maintenance;
The method of installing a direct flow with your own hands, described in this article, can be called “collective farm”. In professional racing cars, the direct-flow system is much more complex and is designed primarily to improve engine performance. At the same time, such a forward flow is unlikely to bring much benefit, only changing the sound of the car, which, in most cases, is the goal of independent tuning.
Materials and tools for manufacturing: - pipe, diameter is selected depending on the brand of car (VAZ usually has a diameter of 52 cm); — welding; — grinder and discs for cutting metal; — iron sponges for washing dishes (50-100 pcs.).
Noise standards and liability for exceeding them
Responsibility for loud exhaust from a muffler is provided for under Article 8.23 of the Code of Administrative Offenses. The driver is charged for operating a vehicle with excess noise levels in accordance with the Technical Regulations of the Customs Union 018/2011 “On the safety of wheeled vehicles”, paragraph 9.9.
Table: dependence of the maximum permissible sound level on the vehicle category
| Vehicle category | Sound level (in decibels) |
| M1, N1, L | 96 |
| M2, N2 | 98 |
| M3, N3 | 100 |
Category M1, N1 and L are passenger cars with no more than 8 seats, trucks with a permissible maximum weight of no more than 3.5 tons, motorcycles/mopeds/ATVs. Category M2 and N2 are cars with more than 8 seats (except for the driver), but whose maximum weight does not exceed 5 tons, and trucks with a permissible maximum weight from 3.5 to 12 tons, respectively. Category M3 and N3 are full-fledged buses and trucks with a permissible maximum weight of more than 12 tons (trucks, most dump trucks).
According to 12.5.1 of the Code of Administrative Offenses, the driver (or owner) is charged for making changes to the design of the car without the permission of the supervisory authority - the traffic police.
So, the fine for a straight-through muffler can be either a warning plus a fine of 500 rubles, or two fines of 500 rubles each (in practice, two warnings cannot be issued).
The manufacture of a direct-flow muffler and its further improvement is within the power of most car enthusiasts. Despite the restrictions on the operation of such devices in our society, there are more and more people who want to make their own and install a direct-flow muffler on a car. Thanks to detailed instructions with photographs and videos, it will be much easier to make a forward flow.
Source
Car muffler tasks
Pipe. Exhaust, but a pipe. It’s a simple device at first glance, but a lot depends on the exhaust system. Not only the aesthetic sound of the exhaust, but also the dynamics of the car, fuel consumption, comfort in the cabin, and the presence of vibrations. Therefore, if someone asks in the middle of the night why a muffler is needed in a car, every self-respecting motorist will answer without hesitation:
- to reduce the noise level of the engine;
- to reduce the temperature of exhaust gases;
- to remove exhaust gases outside the vehicle;
- to reduce the level of harmful emissions into the atmosphere.
Although the last point is rather conditional.
The exhaust pipe works in hellish conditions. The temperature of the exhaust gases at the outlet of the exhaust manifold can reach 800 degrees, or even more. Therefore, the metal from which the muffler is made must not only be durable, but also have some heat-resistant qualities. In addition to temperature, enormous pressure acts on the walls of the exhaust system, and the high speed of movement of exhaust gases causes significant sound vibrations.
Why is this necessary?
It goes without saying that the modified exhaust system will give the car super-power, but the level of roar created by the engine can scare neighbors and passers-by who inadvertently find themselves next to the “swallow”. But on the highway, your car will be passed ahead and looked at with surprised glances by drivers of “cool” foreign cars, the engines of which have even more power than yours. But a conventional exhaust system that has not undergone modernization or so-called tuning does not allow the engine to operate at full power.
This is what a straight-through muffler looks like:
Direct flow muffler
Just two pipes of different diameters, placed one inside the other. But what an effect!
Sound absorption technologies
The exhaust system, and in particular the muffler, can use one or several sound absorption technologies:
- change in gas flow cross section;
- changing the direction of gas movement;
- surface absorption of sound waves.
Depending on which frequencies predominate in the engine exhaust sound spectrum, this sound reduction method is used. For example, to suppress low frequencies, it is effective to use several resonator chambers with different volumes. The use of different sections of input and output pipes combats high frequencies well. But in principle, a muffler, like a good musical instrument, is customized exclusively for a specific brand of engine. Then the noise reduction efficiency is much higher and there is less power loss.
Car muffler diagrams
A cross-section of a car muffler allows you to see exactly how the sound reduction function is implemented in each specific muffler. In direct-flow mufflers, for example, the method of changing the direction of gas movement is never used, and a standard muffler uses turns from 90 to 360 degrees. The change in the amplitude of sound wave oscillations is realized by perforating the internal pipes. It is these internal pipes, their diameter, diameter and frequency of holes that can drown out noise in almost the entire frequency spectrum.
But only the integrated use of these methods can guarantee high efficiency of the entire exhaust system as a whole. Therefore, modern cars use from one to six different mufflers. The main ones are the resonator and the main muffler.
Main elements of the exhaust system
The muffler resonator is installed immediately after the exhaust pipe and the catalyst, and its task is to level out pulsations of the gas flow. In cross-section, it looks like a perforated pipe placed inside a metal chamber of a larger diameter. The pipe can change its cross-section on the way from the inlet to the outlet of gases.
The main muffler may have a more complex design and has the main function of noise reduction. Modern systems can have almost all noise reduction schemes in the rear muffler can. The chamber through which the main pipe passes can have several sections, each of which has noise reduction at its own level. Typically, these chambers are filled with heat-resistant fiber material, which further dampens vibrations and absorbs sound vibrations.
The design of a car muffler is constantly evolving, and we try to follow the news from the design bureaus of the most progressive automakers and tuning studios. Stay with us, and let your mufflers only please the ears of avid motorists. Happy travels to everyone!
What is a silencer?
It is a plug that is installed to reduce the sound of forward flow. The dimensions of this part must coincide with the final diameter of the exhaust pipe. The silencer is taken a little smaller in size, because the plug is inserted into the “can” itself. In addition, several bolts are used for fastening so that, if necessary, it can be removed with simple available tools. And if you want to carry out this procedure on a car, then this process will not take much time.

