01/10/2022 17,551 Electrical package
Author: Ivan Baranov
Electric windows (EP) are one of the vehicle elements that contribute to more comfortable driving. Like any other electrical circuit component, EDs tend to break down periodically. What to do if a car window regulator does not work and for what reasons these components break - read below.
[Hide]
On what principle does the mechanism operate?
A window lift with an automatic mechanism is an electromechanical device that allows you to quickly open or close the windows of a vehicle. The main idea is the movement of the glass by transferring reinforcement to the glass from the gearbox of the structure.
The device has the following working units:
Drive (gearbox) - helps create the necessary force to organize the movement of glass in the car door. Functions in conjunction with a gear or worm drive. Such a tandem makes it possible to open the window to the required height without further falls.
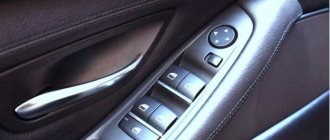
An on and off system, presented in the form of an ordinary button (with its help you can adjust the rise of the glass to a certain height).
Glass.
Lifting design. The mechanism transmits force from the gearbox to the glass.
The mechanism assumes the following working algorithm:
force is transmitted through a rack and pinion system;
the glass is lifted by a cable;
reinforcement through a system of levers.
Depending on which transmission system is used, one can judge the mechanism to be rack, cable, or lever. Modern foreign cars most often have rack or cable options.
And although the design is quite simple, the system can begin to work incorrectly at any time.
An interesting fact is that the first power windows appeared in the United States in the 40s on Packard180 cars. A year later, the Lincoln automaker began introducing the new system into its seven-seat sedans.
The principle of operation of a car window lifter
The ability to switch between raising and lowering the windows is made possible by equipping the electric motor with a reverse power system. Structurally, the motion vector is changed either using a relay or directly through a switch. Window lifters of the latest generations are more complex, which is caused by the need to increase the safety of their use and increase comfort. Functions of modern mechanisms for automatically raising/lowering windows:
- uniform movement in one of the directions to the end point;
- discrete movement (for example, an inch) in one direction or another;
- slow mechanism locking;
- return movement (used to have time to remove part of the body from the window opening).
The window regulator control unit is the brains of the device, which includes, in addition to the control microcircuit, an electric motor relay, switches and electrical wiring connecting the control unit to the door lock and the top hatch cover. If you activate the window lift mode with one touch or command, it will move in the specified direction. As soon as the switch is moved to the reverse position, the motor will stop. The same will happen if the power window ECU receives a corresponding signal from the door circuit board.
The most common causes of problems
If the power windows stop working, the breakdown can occur for several reasons:
as a result of an accident, if the impact occurred on the side door. The window regulator may begin to work incorrectly or fail completely;
if moisture or dampness gets inside the structure. Despite the high tightness of the door, a short circuit of electrical components may occur as a result of condensation accumulation or prolonged exposure of the vehicle to water;
low-quality components or defective spare parts were installed.
Next, you need to consider the most common reasons why the window regulator may not work.
Interruptions in electrical components
If an electrical failure is the cause of a broken window regulator, then it is the easiest way to deal with such an error. As a rule, such malfunctions occur for several reasons:
partial or complete lack of contact with the opening control. As a rule, there is no sufficient contact with the power button. If there are oxidized or erased pads on the board, then interruptions in current will be observed. As a result, the window regulator begins to twitch sharply or even jams;
closures. The door is equipped with movable structures, so the wiring may become unusable over time or contacts may become pinched in these places. As a result, the glass can independently rise or fall;
The fuse has blown. If the voltage jumps, then most likely the fuse will burn out;
The gearbox malfunctioned for many reasons: the brushes were stuck, the contacts were oxidized.
It is important to note that in case of any breakdown, it is recommended to go to a service station to first check the condition of the fuse. But first of all, check the condition of the window regulators. In practice, most often the reason lies here.
Attention: the operation of the window lift mechanism is calculated for approximately 30,000 opening and closing cycles. On average, this is about 10 years of ordinary work. Then each working node begins to fail.
The power window raises but does not lower the window
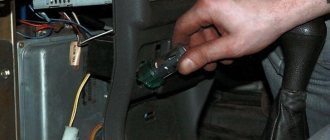
Greetings to all. Help me figure out the problem. The power window raises the window all the way, but does not lower it. I transferred the buttons from a known working lift - everything was the same. I disassembled the door, current flows from the button to the electric motor, and if you press the button up, then the plus comes from one wire, if you press the button down, then the plus comes from the other wire, only 2 wires to the electric motor.
Only a small part remains, in the photo with a blue sticker, it says AR00611, 15M6K. Who can tell me if she is responsible in the engine for making it spin in different directions? If not, where should I dig and what should I check?
Often it's just a matter of the motor. tap a little with a hammer and everything becomes humming, but not for long. the brain brushes are most likely floating. and “+” is changed by the button itself
The motor turns freely (in one direction), everything is lubricated, the brushes are not burnt, and besides, why does it only turn as it should in one direction, and absolutely zero in the other? - obviously not in brushes.
they change places, but in general it is immediately checked directly with the battery: + and - you change places and see how it works
So, how can I measure the minus?)) A plug with two wires, an up button on the left (for example, a plus), a down button on the right, a plus. There should be a minus on the opposite ones at this time, right?
Mechanical type faults
If the driver's window does not work, but the electrics are in order, then the problem is mechanical. Problems in this group occur much more often and can cause the mechanism to stop working properly. Among the most common problems are the following:
the cable broke. It is quite rare. Then the glass literally falls into the door frame and cannot rise when the button is pressed;
The lever or guides are bent. As a rule, the window regulator becomes stuck or the signal is completely ignored;
The gearbox gear has failed. Modern cars often come equipped with gears made of high-quality plastic. Over time, they begin to wear out, crack and even crumble, and the teeth slip. The glass either stops rising or begins to jam;
the mechanism sticks or jams due to lack of lubrication. Most often, this malfunction occurs on older car models. Mechanics cannot work forever and without interruptions; they have their own safety margin. Over the course of many years, the lubricant dries out in the components, which causes the parts to rub against each other and become unusable.
The cause of the breakdown can be determined as accurately as possible only after disassembling the door. You will also have to buy replacement items that have failed.
Fuses and relays VAZ 2110 - 2112, electrical diagrams
If some devices on your VAZ 2110 or VAZ 2112 , fuses or relays may be to blame. At the very least, the first thing you need to do is check them, and then draw some conclusions regarding the malfunctions.
Correct diagnosis of many electrical problems will allow you to accurately determine the cause of the inoperability of a particular unit. To find out what the fuses and relays of the VAZ 2110 - 2112 are responsible for and how to find the right one, read this article.
We recommend: Diesel engine turbine: mechanism design and repair
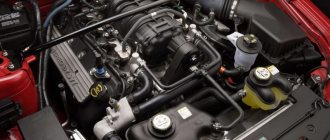
As in many other cars, in the VAZ-2112 and VAZ-2110, when the engine is turned off, the devices are powered directly from the battery. When the engine is running, voltage is supplied to the devices from the generator, which simultaneously charges the battery. If the current exceeds the permissible value or a short circuit occurs, the circuit fuse will blow. Powerful electrical appliances are connected via relays.
Fuse and relay box
The fuse and relay box is located on the left, lower part of the instrument panel. It is accessible by pressing the button and folding the lid down. To remove fuses, there are special non-conductive pliers in the upper left part of the mounting block.
1 - K5 - high beam relay . If the high beams in two headlights do not work, check this relay. If one of the high beam headlights does not work, check fuses F3 and F13, as well as the lamps and the high beam switch.
2 - K4 - low beam relay . If the low beam in both headlights does not work, check this relay. If only one low beam headlight does not work, check fuses F2 and F12, as well as the lamps themselves and the light switch.
3 - K1 - lamp health control relay.
4 - non-conductive tweezers for removing fuses.
5 - power window relay . If your power windows stop working, check this relay. It could also be in fuse F5, or in the window lift drive system itself. To get to the mechanism, you need to remove the door trim. Check the electric motor, the appearance of the gears and the absence of binding of the mechanism.
6 - K3 - turn signal and hazard warning relay . If your turn signals or hazard lights do not work, check this relay and fuse F16, as well as the turn signal lamps themselves and their switch.
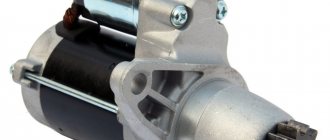
7 - starter relay . If the car does not start and the starter does not turn, check this relay. It could also be a dead battery, as well as the starter mechanism itself.
8 - backup fuses.
9 - fog lamp relay . If the fog lights do not work, check this relay and fuses F4 and F14. Also check their connection diagram, the serviceability of the wiring and connectors, as well as the lamps in the headlights and the power button.
10 - K2 - windshield wiper and washer relay . If your windshield wipers or windshield washer are not working, check this relay. Also check the wiper motor, washer pump and washer fluid level in the washer reservoir.
11 - K7 - rear window heating relay . If the heating does not work and the rear window fogs up, check this relay and fuses F8 and F9. Also check the connection contacts to the terminal points of the heating elements (at the edges of the glass at the rear pillars). If everything is in order, but the heating does not work, the issue may be in the wiring (the wires are frayed or something else).
12 - K6 - add. relay, ignition relay . If your ignition does not turn on or is having problems with it, check this relay. This relay protects the ignition switch contacts from burning. Also check the ignition switch itself and the contact group.
13 - row of fuses F1-F10
14 - row of fuses F11-F20
Circuit breakers
Now let's see which fuses are responsible for what in the same mounting block. I will also give the main reasons for troubleshooting.
F1 (5 A) - license plate lighting lamps, dashboard lighting, side lights on the panel, trunk lamp, left side lights . If any of the listed lamps do not work, check this fuse, as well as the lamps themselves and their contacts. If everything is in order, check the headlight switch button.
F2 (7.5 A) - low beam in the left headlight . If both low beam headlights do not work, also check relay K4 and the lamps themselves. It could also be the light switch and its contacts.
F3 (10 A) - high beam in the left headlight . If both high beam headlights do not work, check the K5 relay, the lamps themselves and the high beam switch knob.
F4 (10 A) - front fog lamp on the right side . If both fog lights do not work, check relay 9 and the headlight bulbs themselves, as well as the switch and its contacts.
We recommend: Central locking on the VAZ 2110: design and principle of operation
F5 (30 A) - window lift motors . If the power windows do not work, check this fuse and relay 5. In winter, check if the windows are frozen, warm them up and clear them of ice if necessary. It could also be the window lift motor, its mechanism and gears; in order to get to it, you need to remove the trim of the desired door.
F6 (15 A) - portable lamp fuse.
There may also be problems with the cigarette lighter. To check, unplug the cigarette lighter from the connector. If this fuse stops burning, then the problem is in the cigarette lighter.
F7 (20 A) - engine cooling fan, sound signal . If the cooling fan does not turn on and the engine overheats, check this fuse. Also check the operation of the fan motor by connecting it directly to the battery. It could also be the coolant temperature sensor or thermostat.
F8 (20 A) - heated rear window (element) . If the heating does not work and the rear window fogs up, check this fuse, fuse F9 and relay K7. Also check the contacts on the terminals of the heating elements, check the wiring, sometimes the wire frays. It could also be the heating switch and its contacts.
F9 (20 A) - recirculation valve, windshield wipers and washer, headlight washer, rear window heating relay coil . If the heating does not work, similar to the previous one. If the windshield wipers or washer do not work, also check relay K2, the fluid level in the washer reservoir, the washer pump, and the wiper motor. Another issue may be their switching handle, its wiring and contacts. The wires may be squashed or frayed and shorted to the housing.
F10 (20 A) - backup fuse.
F11 (5 A) - right side dimensions . If the left side does not work, check fuse F1. If none of the side lights work, check the light switch and its contacts. Also check the dimensions of the lamps themselves.
F12 (7.5 A) - low beam in the right headlight . Similar to fuse F2 for the left headlight.
F13 (10 A) - high beam in the right headlight, high beam lamp on the dashboard . Similar to fuse F3 for the right headlight. If the blue lamp on the panel does not light up when you turn on the high beams, check this fuse, as well as the lamp itself and the wiring to it.
F14 (10 A) - front fog lamp on the left side.
Similar to fuse F4 for the right fog light.
F15 (20 A) - seat heating, trunk locking . If the heated seats do not work, check this fuse and the power button on the dashboard, its contacts and wiring.
F16 (10 A) - direction indicators and hazard warning lights, hazard warning lamp . If the turn signals or hazard lights do not work, also check relay K3 and the lamps in the turn signals themselves, as well as the hazard light switch button.
F17 (7.5 A) - interior lighting, lighting, ignition switch lighting, brake lights, clock, on-board computer . If the brake lights do not work, check this fuse, the lamps themselves, and also the switch installed in the pedal unit.
F18 (25 A) - glove box lighting, heater controller, cigarette lighter . If the cigarette lighter does not work, check this fuse, disassemble the cigarette lighter and check for a short circuit in it, especially on the washer and contacts. Bend them if necessary or replace the entire cigarette lighter. Do not insert non-standard size connectors into it.
F19 (10 A) - door locks, control relay for brake lights and parking lights, turn signals and lamps for turning them on on the panel, reverse lamp, generator winding, control indication of the on-board system, dashboard, clock, on-board computer.
F20 (7.5 A) - rear fog lights.
If the rear fog lights do not work, check this fuse and relay 9. Also check the lamps themselves, wiring, connectors and the switch on the panel.
Never replace blown fuses with fuses of a higher rating (current), this can cause burnout of tracks on the mounting block, failure of devices, etc. In this case, repairs will cost more, so it is better to deal with the problem immediately and fix the problem. If you cannot find what’s wrong on your own, contact a car service; usually such problems are dealt with by electricians, who will not have any difficulty identifying the problem and fixing it.
Malfunctions of a different nature
In practice, there have been cases when the window regulator stopped working for unknown reasons. Malfunction may occur due to the following negative aspects:
severe frosts. Due to the temperature difference, condensation begins to accumulate. At night, the car gradually cools down, and moisture accumulations turn into ice where the glass adjoins the doorway. Ice formation can occur on the outside or inside the lifting mechanism. As a result, the operation of the window regulators becomes more complicated;
a foreign object gets into the gap between the glass and the door.
Regardless of the category of breakdown, in 90% of cases the fault is eliminated after disassembling the door, when it is possible to determine the exact cause.
Lada 2114 Logbook The problem with the passenger window not working has been resolved
Good day to all.
Almost immediately after I switched to 2114, I encountered the problem of the window regulator on the passenger side not working at times.
It looked something like this:
Due to the fact that this happened mainly after washing.
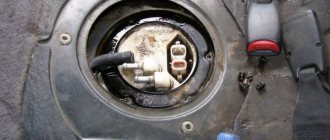
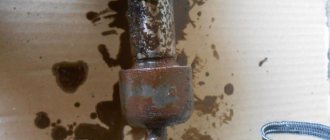
I began to sin because the door was somehow miraculously flooding. I start the car, the power window doesn’t work, I drive it, I press it... it’s just miracles. A Google/drive search revealed several possible reasons: 1. Wire break or short to ground at the point where the wires pass from the passenger compartment to the door, 2. Failure of the window lift motor/gear wear on the mechanism.3. Malfunction of the button The blown fuse was dismissed immediately - everything is fine on the driver’s side. Yesterday I had a free evening, I began to disassemble the trim. I examined all the possible wires in the door and was ready to look further, in the corrugation, but... There are two wires in the door connected through a white connector (the wires themselves are white and blue, the photo shows what they look like.
It was discovered that one of the wires on one side had come out of the chip, so, apparently, while jumping on bumps, the contact appeared and disappeared. Therefore, if you encounter a problem of this kind, first check all connections, this way you can get by with little damage)
__________________The 2113 had a tuned radiator grille.
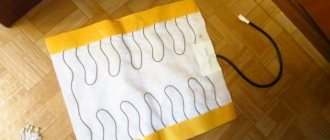
It so happened that before selling it, I installed the factory one I had bought at a disassembly, but this one was left gathering dust + was not in excellent condition, with broken fasteners. I began to make a blind grille out of it (and possibly with holes, and possibly with a mesh). Stretched vertically. to give it a more even shape. I covered it with fabric and doused it with epoxy. Let's see what happens. Peace for everyone.
How to restore the power window operation
The first stage is carrying out a comprehensive and high-quality diagnosis in order to understand the cause of the breakdown and its localization. To do this you will need to perform several steps:
check the condition of the fuse located on the window regulator;
turn on the button and try to raise the glass, repeat the action from the control panel. If in the second case everything works, then the problem lies in the button;
listen to see if the motor is running. If there is sound, but the glass still does not rise, you need to disassemble the door, since it is the lifting mechanism that has failed.
If the structure fails inside the door, then you will have to disassemble it. As a rule, you first have to spend money on new components.
The button stopped working
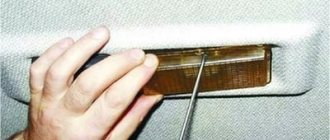
This procedure is considered the simplest and least time-consuming. There is no need to remove the door trim and do a complete disassembly. As a rule, you just need to get rid of the plastic cover, which will reveal the electrical mechanism and connected wires.
To remove the plugs, it is best to use a sharp knife: carefully pry the plate and remove it. Then see what condition the contact group is in. In some cases, it is enough to clean only the contacts.
Don't rush and run to the store to buy a new button. First you need to take a multimeter to ring the element. If the current passes normally through the circuit, it means that some areas may have oxidized and it is enough to just re-solder.
When the button begins to ignore the command and stops conducting electricity, you will still have to insert a new one and reassemble it in the reverse order.
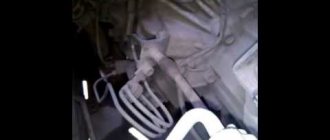
How to replace an electric motor
You can install a new electric motor only after completely disassembling the door. To avoid damaging the upholstery, just follow a simple procedure:
remove power from the battery to avoid short circuit;
remove decorative elements from the door, handles and caps. It is best to use a sharp knife. There is no need to rush, each edge is lifted in turn to first determine the position of the latches and other fasteners;
remove the covers from the speakers, first take a screwdriver and unscrew them;
slowly remove the remaining upholstery, prying the edges around the entire perimeter. It is best to choose one direction: counterclockwise or clockwise;
additional wires are disconnected from the threshold lamps and speakers that lead to the upholstery.
If everything is done correctly, an opening should form through which the window regulator structure will be visible.
The operation of the motor is checked using special multimeter equipment. If the element does not show any working signs, then you can safely remove the entire structure, including gears and levers. First you need to twist the motor, remove the mounting bolts, and then install a new structure. It is also recommended to oil or grease the gears and levers after installing the new motor.
Attention: to disassemble the door without mechanical damage or chips, it is best to use the instructions for the specific make and model of the car. As a rule, such literature is most often found in service centers, on forums and websites.
Elimination of mechanical breakdowns
The fight against mechanical breakdowns should also occur on the disassembled door. Among the most common elimination methods are the following:
The plastic gear on the gearbox has failed. In this case, only replacement is possible; there is no point in repairing such a part. If the element is worn out or cracked, then you need to purchase a new model;
the guides were bent. Most often this problem occurs after an accident. It is best to buy a new part and make a replacement;
the cable broke. Then only a complete replacement is possible;
The grease has dried out. It is recommended to completely remove the mechanical assembly, lubricate and clean the structure.
The above methods are quite enough to cope with breakdowns related to the mechanical system. It is important to take into account that purchasing a new original spare part can be much more expensive. A part can take a very long time to order.
DIY repair vs. specialist services
If the problem is not serious, then you can handle it yourself, but if the fault lies in the electrical wiring, then it is better to contact specialists. You can not only purchase contract spare parts, but also ask for help in replacing them.
A contract window lifting mechanism will cost much less if you order it from us. You should not change the entire structure yourself; it is better to entrust this matter to professionals who, among other things, will also provide you with a guarantee.