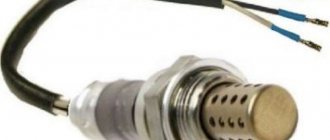
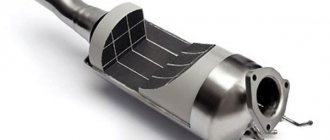
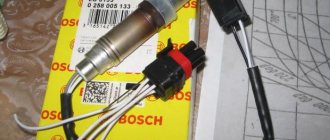
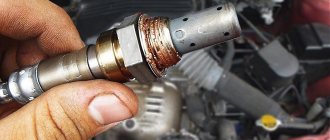
To meet modern requirements for environmental friendliness and to minimize environmental pollution, a catalytic converter is provided in the design of the exhaust system of the Renault Logan car. For its correct operation, the oxygen level is monitored by a lambda probe.
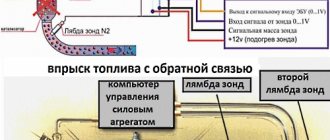
It sends a signal to the ECU. The main module, according to the established algorithms, adjusts the composition of the air-fuel mixture.
Replacing the lambda probe sensor on Renault Logan
- Home /
- All news /
- Replacing the lambda probe sensor on Renault Logan
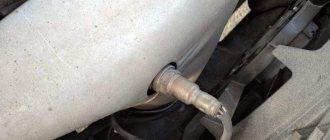
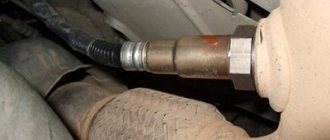
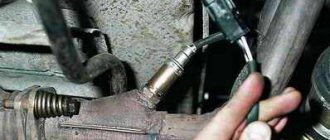
The oxygen sensor (lambda probe) is mounted on the exhaust catalyst of Renault Logan.
Through this detail, the automated control unit “knows” how good the mixture is before serving. Timely replacement of the Renault Logan lambda probe ensures correct supply regulation.
If you do not replace this spare part on time, fuel will be consumed more than usual, and the engine itself will not be able to operate stably.
How does an oxygen sensor work on a Renault Logan?
The structure consists of a metal shell and a special galvanic element, which is located inside.
Exhaust gases leaving the catalyst are passed through the holes, then analyzed by a sensor. The electronic control unit receives signals depending on the proportion of oxygen in the exhaust. The signal level can be of two types:
- low - if the mixture is lean, that is, there is more oxygen in it than required;
- high - if the mixture is overly enriched, that is, there is less oxygen in it than necessary.
The sensor helps the control unit supply the desired mixture to the combustion chamber.
What are the risks of a faulty oxygen sensor?
The power plant may fail altogether. If the control unit has stopped receiving signals from the sensor or if these signals are clearly higher than normal, then the engine will not be able to fully start.
If the probe is faulty or has begun to “die” slowly but surely, much more fuel is consumed than normal. If fuel consumption has increased without any apparent reason (modifications, design changes), then first of all you need to check this particular sensor. When replacing the lambda probe for Renault Logan 1.4, 1.6 is carried out by masters of their craft, this work is preceded by a thorough diagnosis.
To check the sensor, start the engine, first turning off the probe. Disconnecting the plug block helps to do this. The sensor itself is not unscrewed. When it is turned off, they try to start the engine - if it works, we can assume that the problem has been found.
When the probe is turned off, the power plant operates in emergency mode. In this case, the stability of operation is disrupted, and fuel consumption increases. The presence of an on-board computer allows you to see the sensor error.
What is needed to replace a lambda probe with a new one
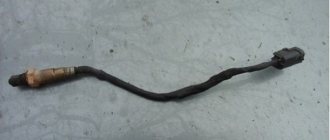
The original Logan is equipped with an orange sensor with part number 8200052063. In addition, a white probe with number 7700109844 and a blue one - 8200495791 can be used. This point can be clarified based on the year the car was produced.
Replacement is carried out by turning off the ignition. The procedure is as follows:
- The wiring harness block is disconnected from the control system.
- The exhaust manifold heat shield is disconnected by first unscrewing three fasteners.
- The wire is pulled out from a special holder where it was folded in the original design.
- Using a 22 wrench, unscrew the old probe, then take it out.
- It is recommended to lubricate the threads of the new part with a graphite-based compound.
- After this, you can screw in the new sensor and carry out all the steps in reverse order.
Our range
In our car service center you can use the services of our competent and experienced specialists who will help you choose a lambda probe from the wide range available. For various vehicles we have:
- Original and non-original lambda probes
- Universal oxygen sensors
- Lambda probes for middle class cars
- Lambda probes for premium car brands
- Sensors manufactured in Russia, Asia, America and Europe
This is interesting: Do-it-yourself BMW M5 tuning: interior, body, engine
Oxygen sensor (lambda probe) malfunction and replacement for Renault Logan
The oxygen sensor (lambda probe) for Renault Logan is installed on the exhaust catalyst (screwed into a threaded hole). With its help, the Electronic Engine Control Unit receives information about the quality of the mixture and regulates its supply. A malfunction of the oxygen sensor can lead to increased fuel consumption and unstable engine operation.
Oxygen sensor for Renault Logan - operating principle
A lambda probe, also known as an oxygen sensor, consists of a metal shell and a special galvanic element located inside the sensor. Through the holes in the sensor, exhaust gases from the exhaust catalyst pass through the sensor. Depending on the amount of oxygen in the gases, the signal that the sensor transmits to the ECU changes.
The sensor transmits two types of signals - high and low levels. A low signal transmitted by the sensor indicates a high oxygen content and, therefore, a lean mixture. When a high signal is transmitted, there is a low oxygen level in the exhaust mixture, which indicates that the mixture is over-enriched. Thus, thanks to the oxygen sensor, the ECU controls the supply of mixture to the combustion chamber.
Oxygen sensor malfunctions and consequences for the car
What does the oxygen sensor do if it doesn't work? Due to a faulty sensor, the engine may not start at all. This is caused by the fact that the sensor either does not send signals to the ECU at all, or the signals are too high, which prevents normal engine starting.
As a rule, one of the main signs indicating a malfunction or “dying” of the sensor is increased fuel consumption. If you notice that your fuel consumption has increased significantly, and you have not made any modifications or changes, you need to check the oxygen sensor
Methods for checking a lambda probe (oxygen sensor)
After checking the sensor, you can confidently talk about replacing it. The link above describes several ways to check the oxygen sensor and determine the cause of its malfunction.
Renault Logan won't start due to an oxygen sensor, what should I do?
The engine of your car does not start, and you are “sinning” with the lambda probe? The easiest way to check it is to turn it off and start the engine. To disconnect the sensor, simply disconnect the connector, but do not unscrew the sensor itself. After disconnecting, you can try to start the engine; if it starts working, then the reason is in the sensor.
When the lambda probe is disconnected, the engine goes into emergency mode. It will work, but not stably and with high fuel consumption. If you have an on-board computer, it will definitely show a sensor error.
What lambda probe is installed on Logan
The number of the original oxygen sensor for Logan is 8200052063. Its cost starts from 1100 rubles. There are three types of lambda probe and they differ in color:
- Orange 8200052063 price from 1100 rub.
- white 7700109844 price from 900 rub.
- blue 8200495791 price from 1600 rub.
The color and type of sensor depends on the year of manufacture of your car. Sensor 8200052063 is suitable for Renault Logan 1, 2 as well as Largus and Sandero.
How to replace a lambda probe yourself?
We carry out all work with the ignition off. First, disconnect the sensor wiring harness from the engine management system.
- Next, remove the exhaust manifold heat shield. Unscrew the three nuts and remove it as shown in the photo
- The sensor wire is placed in a special holder, so it must be pulled out from there.
Now, using the “22” key, unscrew the old sensor and remove it. Before installation, it is advisable to apply graphite lubricant to the threads of the new sensor, and only then tighten it.
Now we assemble everything in reverse order. The engine should run smoothly.
Device diagram
Let's look at the probe diagram, which gives an idea of the placement of nodes. Knowledge of the design allows you to understand the locations of parts that are prone to failure.
- 1 - metal fitting intended for installing a probe, there are turnkey edges on the outer surface, a thread is located below;
- 2 - ceramic insulator;
- 3 — sealing element for inserting the wiring harness;
- 4 - signal wires;
- 5 - metal protective cap, equipped with ventilation vents, designed to protect the measuring element from damage;
- 6 — spring contact part;
- 7 - sensitive element made of ceramic;
- 8 - heating rod;
- 9 - ventilation duct;
- 10 - outer metal casing.
Lambda probe for Renault Logan - operating principle, main faults, step-by-step replacement instructions
One of the main sensors of the Renault Logan car is the residual oxygen sensor (λ-probe). However, only a few motorists know how to check the lambda probe themselves, saving time and money. In today's article I will tell you how to do this, and you will also learn how to replace it with your own hands.
Lambda umbrella Renault Logan main faults
The reason for the failure of the lambda probe on Renault Logan may be the following:
- depressurization of the housing;
- penetration of external air and exhaust gases;
- overheating of the sensor due to poor-quality engine painting or improper operation of the ignition system;
- obsolescence;
- incorrect or interrupted power supply that leads to the main control unit; mechanical damage due to incorrect operation of the vehicle.
The gradual failure of the lambda probe can be divided into several stages. At the initial stage, the sensor stops functioning normally, that is, at certain operating moments of the motor, the device stops generating a signal, subsequently destabilizing the idle speed.
Diagnostics and troubleshooting of the lambda probe for Renault Logan
Typically, diagnostics of a lambda probe on a Renault Logan car is carried out using a voltmeter and an ohmmeter or a multimeter, which replaces both of these testers at once.
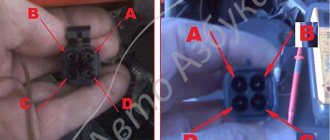
To check the filament coil of the regulator, you need to disconnect pins 3 and 4 of the connector from the block (usually these are brown and white wires) and connect the ends of the tester to their clamps.
If the resistance of the spiral is at least 5 ohms, then this is a good sign.
Also, checking the lambda probe with a multimeter allows you to find out the sensitivity of the tip of the oxygen sensor. To find out the thermoelectric parameters of the element, you need to turn on and warm up the engine to 70-80 degrees. After that:
- Raise the engine speed to 3000 and hold this value for 3 minutes to allow the sensor to warm up.
- Connect the negative probe of the tester (signal wire) to the ground of the car, and the second one to the output of the lambda probe.
- Check the tester readings, the data should vary from 0.2 to 1 V and update up to 10 times per second.
- Press the accelerator pedal sharply and release it; if the multimeter shows a value of 1 V, and then sharply drops to zero, then the lambda probe is ok. If the data on the tester does not jump when you press and release the pedal, and the readings are about 0.4 - 0.5 V, this indicates the need to replace the sensor.
Absolute pressure (vacuum) in the intake pipe
The absolute pressure sensor installed on the intake pipe can be replaced without problems when a malfunction is detected:
- First of all, you need to turn off the power to the on-board network, so disconnect the battery.
- Then the fastener is simply released and the wire that is connected to the device is disconnected.
- The DBP can be removed, but to do this you will need to use a little force to remove the rubber seals. If the seals are cracked or show signs of damage, it is best to replace them together with the regulator.
Replacing the oxygen sensor Logan 2 K7M — Renault Logan, 1.6 l., 2016 on DRIVE2
Good day everyone! I left for a short time without any problems. One day I began to notice very uneven engine operation in the morning. A plus to this was a slight twitching during acceleration. Since it’s warm now and I’m not particularly warming up the car, this became very noticeable. A little later I began to notice that there were popping noises in the exhaust.
I was really surprised, as if the carburetor was set to early ignition or the mixture was slightly richer at idle. But I don’t have a carburetor, I thought. So, after driving for another week and giving up on this matter, I somehow decided to turn off the lambda probe. And lo and behold. The claps stopped and the car drove off. I think, well, I haven’t changed it on the engine yet.
- Number 8200495791
- I would like to point out that the wire on it was orange.
Having seen that used sensors cost 1000-1500, I decided that it was expensive. And a new one generally costs 3000. So, having decided that it was expensive and having read the forums, I decided that there is nothing better than the Bosch lambda from the VAZ. Number 0258006537
Full size
The bolts themselves and the tool for unscrewing them.
It is not difficult to install. To do this, I removed the heat shield by unscrewing a number of 10-key bolts.
Full size
We cut off this plug from the lambda from the VAZ, and I just quickly put the plug from my old sensor on twists.
Full size
Here is the final result
Well what can I say. The car drove, and quite well. The pops disappeared, but I was not satisfied with the uneven idle when warming up, and also the jerking. Willy-nilly, I thought that something else was faulty. But after traveling like this for probably a month, including going back and forth to Moscow, I realized that it was as if the engine was strangling something.
And now the time has come for further experiments. I went and bought my original sensor for disassembly, only with blue insulation. I spent 500 rubles. To remove it this time and not have to remove practically anything, I bought this head for unscrewing the oxygen sensors. Very convenient, took it off in a minute.
Full size
And now the sensor is already in its original place
Well, what can I say, now there is a smooth idle and the car drives as it did before. I hasten to say this is not tuning at all, but only my need to get rid of uneven engine operation. Maybe this article will help someone as such a diagnosis on a collective farm, so to speak))) Thank you for your attention!
Price: 500 ₽ Mileage: 71,500 km
Removing the old lambda
- Find the lambda, which is located on the exhaust manifold.
- Disconnect the battery from the car's network.
- Disconnect the lambda connector from the system.
- The oxygen sensor wires are attached to engine parts using special clamps - disconnect them.
- Next, you will need a 22 or 24 key, with which you can unscrew the oxygen sensor.
It would seem that everything is so simple, but it was not so.
In most cases, removing the lambda the first time is problematic, this is due to the fact that it is installed on the exhaust manifold, which heats up to high temperatures and the oxygen sensor simply sticks to it in the threaded connection.
Therefore, if the wrench did not help, take:
- Ballonik (gas key);
- Hammer;
- A good Phillips screwdriver, not a thin one;
- An electric drill with drill bits so that the screwdriver can fit into the hole.
The handle of the gas wrench has a large lever, so the likelihood of unscrewing the O2 sensor is quite high.
If that doesn’t work, then we start drilling a hole in the lambda umbrella, right in the nut.
Then a screwdriver is inserted into the hole and a new attempt is made to remove the lambda probe. The screwdriver can be replaced with another, more durable tool, since most likely you will have to hit it with a hammer.
Highly professional replacement of oxygen sensor for Renault Logan (lambda probe)
There are two oxygen sensors or, as experts call them, lambda probes in the Renault Logan car, and both of them are located in the exhaust system. The first one is located directly behind the output manifold, the second one is at the very end of the exhaust tract. And although the designs of these elements are identical, their purposes are completely different.
Operating principle of the oxygen sensor
Today, there are two types of sensors that measure the level of oxygen in exhaust gases: broadband and two-level.
The design of the second type lambda probe includes the presence of two types of cells: measuring and pumping. Between them there is a small, several microns, gap filled with gas.
The mechanism of operation of such a sensor is that while there is little oxygen in the exhaust gases, they are sent to cells of the first type. When its concentration is above a certain parameter, the exhaust is automatically redirected to other cells.
The probe can only record which cells the exhaust passes through in order to determine whether it contains enough pure oxygen.
Sensors of this type are considered more accurate, but the former, due to the relative simplicity of their design, are less expensive and at the same time more reliable. Therefore, the choice of manufacturers of the budget car Renault Logan in favor of two-level lambda probes is completely justified.
Purpose of the first and second lambda probes
But if the amount of oxygen suddenly exceeds the maximum permissible level, this will indicate a serious malfunction of the engine. Which one exactly - this will be shown by car diagnostics. The ECU will simply turn on an alarm signal on the dashboard and, if the car owner does not contact the car service center in the near future, will prevent the engine from starting.
Services
Our car service "Lyoha Exhaust" offers a full package of services related to the lambda probe. Experienced specialists will quickly and skillfully solve any problems with the exhaust system of your car, as well as:
- Check each lambda probe for damage
- Replace non-working lambda probes
- Check the electrical wiring leading to the sensor
- Remove faulty oxygen sensors
- They will select a lambda probe for any make, model, generation and year of car
- They will conduct free computer diagnostics using sophisticated technical equipment.
See photos of high-quality exhaust systems in our
Removing engine oxygen concentration sensors 1.4-1.6(8V) Renault Sandero
We remove sensors for replacement, as well as when dismantling the exhaust gas system. We carry out the work when the exhaust system elements have cooled down.
Removing the engine oxygen concentration control sensor 1.4-1.6(8V)
- In the engine compartment with the ignition off...
- ...we press the lock of the engine management system wiring harness block... ...and disconnect the wiring harness block from the sensor wiring block.
- Unfasten the plastic holder and remove the sensor wiring harness from it.
- Using a 22mm wrench, unscrew the sensor from the exhaust pipe hole...
...and remove the sensor. We install the control oxygen concentration sensor in the reverse order. Before installing the sensor, apply a thin layer of graphite grease to its threads, preventing it from getting into the sensor through the hole in its tip.
We tighten the sensor to the prescribed torque (see “Appendices”).
Required Tools
To replace the oxygen sensor yourself, you need the tools from the table below.
Table - Tools for replacing the oxygen sensor
| Name | Note |
| Special key for unscrewing the oxygen sensor | You can make it yourself from a socket head “22” |
| Screwdriver | Flat blade |
| Socket wrench | "at 13", "at 15" |
| Wrench | "at 13", "at 15" |
| Penetrating lubricant | For example, VD-40 |
| Rags and wire brush | For cleaning contaminated surfaces |
To unscrew the lambda probe, a special key is required. If it is not available, car owners make it themselves from a long “22” head. You can also unscrew the sensor with an open-end wrench, but there is a risk of licking off the edges. As a last resort, drivers cut the wiring harness and unscrew the sensor with a regular 22mm socket.
It is convenient to replace oxygen sensors from the bottom of the vehicle. Therefore, to carry out repair work, an inspection pit, overpass or lift is required.
To facilitate subsequent dismantling of the lambda probe, it is recommended to treat the threads of the sensor and its seat with a special agent. It is important when choosing a lubricant to take into account that it should be as heat-resistant as possible.
Crankshaft position sensor
The sensor that determines what position the crankshaft is in at a certain period of time is called a crankshaft position sensor (CPS). The sensor serves to determine the top dead center of the piston, that is, it makes it clear to the ECU at what point in time to supply a spark to the desired cylinder.
Location
The Renault Logan crankshaft position sensor is located under the air filter housing and is attached to the gearbox housing with a plate with two bolts. Reads DPKV readings from the flywheel.
Signs of malfunction:
- The engine does not start (no spark);
- The engine is tripping;
- The traction is gone, the car is jerking;
Phase control valve
It is installed to determine the oil pressure on the phase regulator, which changes the ignition timing. The valve deflection is carried out by an electric motor, its parameters are reflected in the parameters of the ignition timing, and ranges from 0 to 45, the more intense the engine works, the higher the value.
Signs of a faulty phase control valve - the car begins to stall at idle, traction drops, and fuel consumption increases. If the engine stalls at idle, the valve bolt loosens and is removed. Often its connector becomes clogged with plastic shavings and the valve stops working.
