Smoke generator for car diagnostics
Automotive smoke generator
This device is needed to identify places where the tightness required for the normal functioning of a particular system is broken - the intake and exhaust tracts of a car, for example.
The smoke generator pumps out thick white smoke, which is clearly visible when it leaks from the path being diagnosed.
The principle of its use is simple, like everything ingenious - smoke is injected into the system or part that needs to be checked, which begins to come out in places where the tightness is broken. In a very similar way, tire shop workers check a wheel for air leaks by immersing it in a bath of water - the escaping air manifests itself in the form of floating bubbles. The smoke generator pumps out thick white smoke, which is clearly visible when it leaks; you just need to connect its output hose to the part being diagnosed, having first “plugged off” all other holes in it. The principle of operation of smoke generators manufactured by various auto equipment manufacturers is to heat liquid oil (like ATF), which, when evaporated, creates the required smoke. The smoke generator includes a compressor for pumping smoke.
Characteristics of the smoke generator
What is the structure of the smoke generator, what is the principle of operation of the system? How to do the installation yourself, what drawings and diagrams can you use for this? First, let's look at the issue of purpose and functions.
Purpose and functions
A smoke generator is a device that is used for autodiagnostics, in particular, for checking leaks:
- intake systems;
- exhaust gases;
- exhaust tract of the power unit;
- cooling systems;
- to detect punctures in rubber;
- to diagnose the tightness of the headlights, if they begin to fog up, etc.
As for the principle of operation, the operation of a smoke generator for diagnostics is based on the use and formation of thick white smoke and its further supply to the systems being diagnosed. In order for the smoke to get into all the components being tested, it must be supplied under low pressure; this is a prerequisite, since this will allow the smoke to look for possible damage and leaks. Thanks to the pressure, the device will allow you to identify even small microcracks that cannot be visually identified.
Device
The design of such a generator set may vary, depending on the specific purpose and manufacturer.
The simplest smoke generators consist of:
- pump;
- pressure gauge;
- hose;
- connection fittings;
- wires;
- evaporation device;
- clamps for connecting to a battery or cigarette lighter adapter;
- more advanced systems are also equipped with a control unit (the author of the video is the TEXaS TV channel).
Advantages and disadvantages of use
First, let's look at the main advantages:
- first of all, this is the ability to quickly detect possible leaks in the operation of certain vehicle systems;
- ergonomics and reliability of devices, if we are talking about branded installations;
- thanks to the presence of a control module in branded devices, the car owner can independently change the smoke density value during diagnostics;
- if the device is equipped with a timer, this will prevent overheating of the heating component and, accordingly, its breakdown;
- branded devices have a special tank that allows you to store smoke liquid for a long time;
- if necessary, the device can be placed in the engine compartment, as well as on the wall in the garage, etc.
As for the disadvantages, if we are talking about branded systems, then their cost is not as low as we would like. If you decide to build such a device with your own hands, you must understand that for this you will need certain skills and knowledge.
Popular on the site
17 Dec
Auto News
4 283
2022 Kia Sportage. When will the new body appear in Russia?
On the page are the first details about the new Kia Sportage body of the 2021 model year, possible configurations and prices, release date in Russia, photos, technical specifications and video test drive of the new model.
24 Dec
Repair Electronics and equipment
3 511
Symptoms of a faulty engine control unit (ECU)
The engine control unit (ECU), also called the engine control module or transmission control module, is one of the most important components found on almost all modern vehicles.
09 Feb
Engine and its components Ignition system
2 527
Nissan Qashqai 2 2.0 — Do-it-yourself replacement of spark plugs (photo report)
Replacing spark plugs on a modified MR20DD Qashqai 2 engine ( J11
) 2.0 l. according to the regulatory deadlines, it should be carried out over a mileage of 30,000 km or once every 24 months. Since this Qashqai, the second generation, was released not so long ago, it has a different, improved engine (a naturally aspirated engine with an aluminum cylinder block with a high compression ratio), unlike its counterparts, it uses more modern, iridium spark plugs.
19 Aug
Articles Engine and its components
2 482
Error code P0014 (symptoms, causes and solutions)
The vehicle's variable valve timing system improves engine performance and fuel efficiency. It regulates the opening and closing of the exhaust and intake valves, in turn controlling the air-fuel mixture. This control provides more power, better fuel economy or a balanced approach depending on the engine requirements at any given time.
24 Dec
Repair Engine and its components
2 283
Symptoms of a bad or faulty oil pressure sensor
Without the proper amount of oil, your engine will be severely damaged. Several systems in your vehicle are designed to maintain proper engine oil levels and pressure.
28 Dec
Articles Engine and its components
2 119
Symptoms of a bad or faulty intake manifold gasket
Intake manifold gaskets are one of the most important gaskets on an engine. Gaskets are seals placed between engine components before they are assembled to provide a good seal. They can be made from paper, rubber, metal, or sometimes a combination of the three.
18 Dec
Electronics and equipment Electrical circuits
2 097
2022 Jeep Grand Cherokee. Release date of the new body in Russia
Development of the fifth-generation 2022 Jeep Grand Cherokee began with the creation of a new platform. The basis was taken from the Giorgio “trolley”, currently used on the Alfa Romeo Stelvio and Giulia.
09 Jan
Articles Engine and its components Ignition system
1 867
Glow plug relay - how to check its functionality? + Video
Each car has its own glow plug relay circuit. It, like every part, can fail and will have to be replaced. To deal with the rather serious question of how exactly to make a replacement, you need to start with the basics.
28 Jan
Automotive software Repair/operation manuals
1 561
Toyota Avensis - DIY radiator replacement
Before we begin the replacement, let's say a few words about the new radiator and the tool. The tools you will need are: several screwdrivers, a standard set of keys and an empty container for antifreeze.
29 Dec
Tuning Car tuning
954
Mansory Body Kit makes a Rolls-Royce Cullinan look good in white
Unlike Bentley, which has made several versions of its big boy, Rolls-Royce is in no hurry to fix anything. But fortunately, many clients are wealthy enough to afford a complete makeover. The Mansory body kit actually came out much earlier, at the 2022 Geneva Motor Show.
Manufacturing instructions
If you strictly follow the instructions, the procedure for making a smoke generator for a car will not cause problems. In general, there are quite a lot of designs and circuits for such devices, but we suggest familiarizing yourself with the production of a generator set from a syringe and solid lubricant.
To do this you will need:
- the syringe itself;
- glow plug, these are used on diesel engines;
- wiring with terminals, required for connecting spark plugs;
- heat shrink paste;
- pipes with clamps, as well as rubberized sealing gaskets;
- copper tube, its diameter should be approximately 6 mm;
- drill and set of drills;
- air flow fitting;
- You will also need a metal mesh for washing dishes (the author of the video review of a simple homemade smoke generator is the ZP GARIK channel).
How can you make a smoke generator for a car from such materials:
- First of all, it is necessary to disassemble the syringe, remove the blower hose, as well as the pumping device. For further work, you will need a syringe housing; it is in it that the process of smoke formation will take place, which will subsequently be used for diagnostics. In addition, there is a special hole in the lid that is required for normal operation. It is necessary to install a piece of copper pipe into this hole; its length should be about 16 cm. For better fixation of the tube, it is better to treat the joint with epoxy resin.
- A copper hose will force a compressed air stream into the oil, usually transmission fluid is used for this. Oil is used to generate smoke and then push it out of the housing. The hose is installed all the way, this will block the air flow.
- Next, you will need to drill the copper pipe through the inlet hole. This will allow the air flow to be directed in a specific direction, in particular, into the housing of the generator unit.
- When these steps are completed, it will be necessary to install a fitting into the second hole through which air will escape. Securely secure this item to prevent possible future leakage.
- Now we move on to the next stage - the manufacture of the electrical component of the system. To do this, you will need to install a glow plug from a diesel engine in the bottom cover of the device, and use gaskets for better sealing. Also, the spark plug should be tightened as much as possible, otherwise transmission oil may leak. When the spark plug is installed and fixed, you need to connect a wire with quick-release alligator clips to it.
- Next, a special adapter for the smoke supply pipe should be installed in the hole through which the oil will flow. In this case, it is best to use transparent pipes; this will allow the car owner to control the air flow to the unit or system being diagnosed. You need to install a tip at the end of the nozzle; for this you can use the part that was built into the syringe, but before that you will need to remove the check valve ball from it. You also need to provide the ability to adjust the air flow, but here you need to rely on what kind of air source will be used. In addition, a check valve should also be installed in the supply line.
- Actually, at this point the device assembly procedure can be considered complete, the system is now ready for operation. Next, you will need to fill the working fluid, that is, oil, into the reservoir; its volume should be slightly higher than the glow plug. After a few minutes, you will be able to see the smoke formed in the outlet pipe. The pressure level of the incoming air can be about 0.5-1 bar, but this parameter should be selected more accurately by experimental method. If you have a compressor, then use it; if not, then in principle you can use other options, for example, a spare tire of a car or a pumping device for inflating water mattresses.
- When the manufacturing steps are completed, all you have to do is check the functionality of the system.
Making a smoke generator
Basically, this entire device is a heating plate. This is an aluminum block in which the heater is immersed (insulated from the silicone by the aluminum block, of course). In modern irons, a thin chrome plated steel sheet is placed on the bottom to make ironing easier. It is best to remove this sheet and you will be left with a bare aluminum surface. Next, you should close all the holes through which the steam initially escapes - in this case, these are silicone-coated screws. That's the whole structure.
In this iron, it was possible to calibrate the thermostat very conveniently by rotating a small screw placed inside the corresponding temperature control knob. The pictures show the right handle, inside of which there is a screw with a diameter of about 2 mm for calibration. The tests began by covering all the holes with screws and leaving only one. Push the pump tube through the heat-resistant piece of twisty object that was in the iron. This thing worked very well, but it was leaking. I had to modify the design. The top of the chamber was made from a thin sheet of aluminum that was sealed with silicone and carefully glued to the base of the iron. I had to remove the sheet and polish the top surface to make it level.
Then cut out the top part of the aluminum sheet, make holes for screws, a hole for liquid supply, milling for bimetal. We milled it using a table drill, so the result turned out funny, but it serves its purpose.
We also cut off the front of the iron and drilled a hole there. So far there is only a 3mm hole. The whole was sealed with silicone for ovens that can withstand up to 1500C, because there was no required heat-resistant material on hand. After this operation, wrap the block with heat-resistant cotton wool.
Of course, the resulting homemade smoke generator looks ugly and could have been done better, but there was no need. There is no point in precision grinding the sides of an aluminum plate, for example, because it has no effect on the functioning of the device. Also this part could be done more accurately, like some other things, but why?
How it works?
The process of operation of a homemade smoke generator The hose is connected to the intake manifold, if necessary, clamping the base with a clamp. On the other hand, a pump or compressor hose should be connected to the nipple. The air coming from the pump or car compressor will light the cigarette and the smoke will go through the design of the homemade smoke generator directly into the car system. If the system is working properly and there is no depressurization, then smoke will not break through the pipes and hoses. If there is still a problem, then smoke will begin to seep out in places where air is leaking, and all you have to do is fix this problem. It is very important not to overdo the air supply, as a high flow can burn the cigarette too much, and it will burn out before the smoke enters the system.
Video
Another option using the housing from the grease fitting:
Hi all!
I offer for display my smoke generator to search for air leaks in the intake manifold and the systems connected to it.
True, I’ll say right away that I haven’t tried using it on a car yet, but it basically smokes a cigarette as it should. The main objectives in creating this smoke generator were its low cost and the ability to create at least some slight pressure in the manifold, as a result of which leaky places would reveal themselves. Since I don’t smoke and don’t plan to start, simply blowing smoke into some hose connected to the manifold is an insurmountable task for me. However, in my opinion, using a cigarette to create smoke is the easiest. That's why I used a lit cigarette as the basis for the smoke generator.
So, first I went to the auto store and bought some cheap auto parts:
1. tee for the glass washer system from VAZ 2101 - 1 piece (5 rubles)
2. vacuum hose for a trailer from a classic VAZ - 2 pieces (65*2=130 rubles). At their ends, pieces of a larger diameter hose were put on and loosely glued, I removed them and I will need one of them later.
At home I found 2 bottles of Red Line liquid soap with a dispenser. Although they are different in size, the dispensers are absolutely the same.
I also found a piece of tin cut from a liter beer can. I immediately cut 4 strips from it, 2-3 mm wide and 4 cm long. Then I’ll tell you why)
I also found among the tools something from the past - a glass washer nozzle from IZh-od with a nut.
To understand the process, here is a diagram of how the smoke generator works:
From the diagram it is clear that here the bottle plays the role of bellows. By alternately pressing and releasing, we create pressure and vacuum in it, and the valves redistribute the air flows, first from the cigarette into the bottle, and then from the bottle into the hose to the outlet. This system allows you, firstly, to quickly change cigarettes, and secondly, you can change the bottle if it stops drawing in air normally due to deformation. You can also create something more serious as bellows and simply connect it instead of a bottle.
So first I cut off the tops of both soap jars.
I decided to use a large jar as a body, so when cutting off the neck I tried not to damage it. Next, I made 2 holes in the side wall of this jar along the diameter of the thread of the necks at a distance of about 2-3 cm from each other and one small hole along the diameter of the hose closer to the place where the neck of the jar used to be
Next I disassembled the valves. To do this, you need to remove the button neck by pulling it upward with force. Be careful, there is a glass ball under it, it will definitely jump out and roll under the bed. We take it out and put it away, we don’t need it. Then you need to pull out the long transparent tube from below. After this, with thin pliers you need to grab the socket into which it was inserted, with the other hand grab the threaded cap and pull them in different directions. When the valve body gives way, a spring will jump out, a fixing glass and another ball, which, unlike the first one, we will need.
I immediately tried the loose screw caps and cut off necks onto the holes in the bottle. After making sure that they were fixed properly, I took them off. In fact, one of the covers will not be standing that way, but upside down.
Due to the fact that the ball in the glass dangles very much (since the viscosity of the soap is high), you will have to make a small pedestal for it in this glass so that it becomes closer to the hole that it is designed to block. The transparent tube that goes to the bottom of the jar is suitable for this. You need to cut a ring about 3 mm high from it and put it in a glass. Place a ball on it.
then place the glass on the spring and insert it into the valve body from below. the whole thing needs to be pressed with a piston. To prevent the piston from coming out of the body, I secured it with those very strips of tin. There are 2 strips per valve. They need to be inserted into one window in the neck of the housing and, bypassing the piston rod on both sides, out of the opposite window. Bend the ends in different directions and secure them by putting a soft washer on them.
I carried out these procedures with both valves
Next we prepare the bottle. To begin with, I selected a drill according to the diameter of the hole in the washer nozzle fitting and drilled through the nozzle through the fitting. I opened the bottle, the lemonade must have been very tasty, but I let it float freely. I drilled a hole in the lid along the diameter of the thread on the nozzle fitting and assembled the following structure:
Here the hose is directed downwards, but I then converted it to the top next to the valves so that the bottom of the structure was free.
Now, on the end of the valve, which is released outside with the transparent side, we put one of the pieces of wide rubber hose that were at the ends of the vacuum hoses. We dress not completely, but halfway. It turns out that it just contains a cigarette.
We put the end of the released hose onto the fitting in the bottle cap and screw on the bottle.
Using soap, we pull a second vacuum hose onto the end of the red valve, which will then be connected to the intake manifold. At its end, something needs to be done to connect to the collector, but this is up to each individual. I installed some kind of bushing. I made an ashtray from a piece of tin. It turned out like this:
The smoke generator was tested for the first time on the balcony. I smoked the cigarette in 20 seconds)) At the same time, almost all the smoke collected in the bottle and began to come out when the cigarette was gone, so you will have to change cigarettes often, it’s good that this is not difficult. Tomorrow I'll go try it in the car. I'll let you know how the experiment goes. Thank you all for your attention. I hope that my experience will be useful for creating something of your own.
The easiest way to find it in a car engine is to use a smoke generator. A smoke generator is, as Captain Obvious would say, a device that creates smoke and supplies it to the engine intake manifold. The easiest way to make it is from a cigarette and a plastic bottle. This is exactly what we will talk about next.
How to make: design features
One bottle must be cut into two parts, the top one - 3 fingers longer than the bottom one. We also cut the second bottle into two parts, leaving only the bottom, in the center of which we drill a hole suitable for the diameter of the cigarette. In the bottom of the first bottle we also make a hole for the nipple from the camera. If necessary, you can use a winder so that both the nipple and the cigarette fit tightly into the hole. We insert a hose into the neck, winding it to the bottle so that the structure is airtight. Next, you need to light a cigarette and insert it into the hole in the first bottom of the bottle, and attach it to the second, upper part. For better results, you must first cut off the filter from one of the cigarettes and tape it with paper tape to the other cigarette. This way you will have more smoke, which means the test will be more effective.
|
|
It is important that the cigarette filter “looks” towards the hose. The second bottom, into which the nipple is inserted, is put on the structure of the bottle, hose and cigarette, completing this device.
Required Tools
To assemble a smoke generator for a car you will need the following tools:
- Source of compressed air.
- Blowing air gun.
- Pressure regulator.
- Cigarettes.
You can buy all these things at a hardware store. As for the source of compressed air, it is better to use some kind of compact compressor. In this case, the alternative is a wheel cylinder.
Let's get started
The blow gun needs to be upgraded. The inner hole into which we will insert the cigarette must be made with a diameter of about 8 mm. If this value is less, drill the hole with a drill.
After this, the air pressure regulator must be connected to the upgraded gun. We connect a source of compressed air here. Note that the output pressure should not be too high, so choose a weaker compressor. You will likely need to vary the airflow to obtain the most optimal smoke output. The pressure itself should be no higher than 0.5 Bar. Otherwise, it will be more difficult to check the parts for leaks, since you will need a whole carton of cigarettes.
Next, insert the cigarette into the nose of the gun, light it and screw it into the tool. That's it - your smoke generator is ready to work. You can use another more complex method of creating diagnostic equipment. This will ensure that you can carry out professional diagnostics for leaks.
How to make a smoke generator for a car with your own hands
The cost of the cheapest smoke generator for a car is at least 6,000 rubles, so many car enthusiasts make homemade devices, showing remarkable ingenuity.
Homemade smoke generator for cars with an oil evaporator
Smoke generator diagram for a car
To make such a device you will need:
To manufacture a smoke generator, two necessary conditions are required - sources of compressed air and smoke.
- A container that will serve as the main module. This could be a grease gun, a metal can with a tight lid, or even an old fire extinguisher with a screw cap.
- Glow plug from a diesel engine.
- Time relay.
- Hoses, tubes for air supply.
- Source of compressed air.
In addition, you may need taps for cutting threads, compounds for sealing the joints of fittings, clamps - you will select all this in accordance with the source materials from which the main module of the automobile smoke generator that you will make yourself - the evaporator - will be made from. There is absolutely no need to make an exact drawing for making a smoke generator for a car with your own hands - after all, you will select the materials yourself, which means the sizes of the parts may be different (except for the glow plug).
A turn relay is used as a time relay, connecting a candle instead of light bulbs. This is necessary so that it does not burn out - the glow plug is not designed for long-term operation, and the relay will periodically turn it on and off. To connect the negative terminal of the battery to the spark plug, connect it with a wire to the body of the device. Please note that the oil level in the container is small - otherwise the candle will not warm it up enough and it will not evaporate. The air inlet tube should be immersed in oil - this will act as a kind of check valve for air at low pressure.
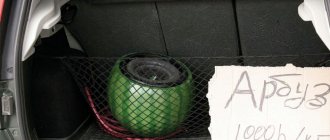
If you don’t have a compressor at hand, then an inflated car inner tube or spare tire is suitable as a source of compressed air.
If you do not have a compressor, then you can use your own spare tire as an air receiver (storage unit) - or use a car inner tube, having previously inflated it. As you can see, there is nothing complicated - such a simple smoke generator for a car will cost you much less than a purchased one. You can simply ask your friends at a car service center for a glow plug - craftsmen often leave such things “just in case”, and they lie idle in the workshop for years. The air supply can be adjusted by installing a suitable valve in the hose. To begin with - during testing - it is enough to pinch the hose by hand, bending it in half.
Do-it-yourself smoke generator for a car from a cigarette
Smoke generator made from a cigarette and a blowing gun
This simplest “smoke generator” for a car does not need unnecessary comments - you just need to make an adapter to connect a cigarette to a hose - that is, a banal mouthpiece.
As you can see, there is nothing particularly complicated behind the device’s initially frightening name. Especially if as a child you practiced making various “smoke products” - from casein, newspaper soaked in ammonium nitrate solution, etc.
Upgrading the grease syringe
The design is based on the housing of a grease gun. It can be purchased for about 300-500 rubles. As in the first case with the pistol, you will have to modify the syringe yourself. You need to install an adapter partition in the middle of the device. A glow plug is screwed into one side of it. The latter can be taken from any domestic diesel engine (for example, from MMZ D 240 or 245, which is installed on the ZIL “Bychok”). In terms of voltage, the glow plug should correspond to 12 or 24V. For the first, it is necessary to apply a power limiting circuit. The simplest and cheapest option would be to use a turn relay. Thanks to this detail, the operating time of the candle is almost halved.
What is a smoke generator
To impart a smoky aroma and taste to foods, you need to produce smoke and envelop the food in it. Lighting a fire and laying a path for smoke in the form of pipes is the simplest option, which has many nuances. The temperature of the supplied smoke with this method is high and strict control is necessary, as this affects the final smoking result. For cooling, the chimney is buried underground, which complicates the design. Smoke generators are considered an alternative.
How does a smoke generator work?
These devices are compact and easy to use.
The principle of operation of the device is to produce smoke as a result of smoldering sawdust, which is loaded into a special chamber.
The smoke temperature is low. It moves through the chimney into the chamber with the products thanks to the operation of the compressor, fills it and ensures the preparation of smoked meats. Using a smoke generator, hot or cold smoking is carried out. This affects the structure of the unit.
Smoke generators: from application to operating principle
The name of this device - a smoke generator - speaks for itself. With its help, smoke is produced and supplied to the smoking cabinet.
Description of the operating principle
Sawdust is placed in the lower part of the chamber, usually made of heat-resistant material. Then, through a special hole (blower), they are set on fire. The draft is also regulated by the blower.
As a result of sawdust smoldering in a closed chamber, the required amount of smoke rises upward. At the same time, air is blown into the chamber by a small compressor connected by a hose to a pipe.
The air allows smoke to enter through the tube - the chimney - into the chamber with the products placed. Such a device is called an ejector. The smoke temperature at the outlet is low, since the fire burns slowly and the product is cooked under almost ideal conditions.
Homemade smokehouse from a pipe: how to make
A pipe smokehouse is one of the simplest options that you can easily make yourself.
Materials and tools that will be required
For a homemade design you need to prepare:
- steel pipe with a diameter of 10 centimeters;
- plastic corrugation - the length should not exceed three meters, or you can use a metal sleeve;
- a piece of metal tube - up to 40 cm with a diameter of 2.5-4 cm;
- a small compressor - an aquarium compressor will do;
- fitting connection, which will have the same diameter as the smoke duct;
- switch and electrical wires;
- thermometer.
The tools you need to prepare are a welding machine and a grinder. It is advisable to have at least minimal experience working with these tools in order to avoid injury during the generator assembly process and do everything correctly and accurately.
Drawing of a smoke generator from a pipe
To make the assembly process easier, it is worth studying the drawings of a pipe smoke generator.
Drawing of a smoke generator made of a pipe with a lower and upper ejector.
Step by step assembly
You need to use all previously prepared materials to assemble a smoke generator, which will be used for cold smoking, with your own hands from a pipe.
- First of all, the camera is made. As a rule, the average height of a smoke generator is 70-80 centimeters. There should be a lid at the top that can be removed. This is necessary so that you can easily pour fuel inside the device. A small container is made at the bottom where the ash will fall.
- In the simplest versions of the generator, wood chips are poured onto the bottom of the device, which is welded tightly to the edge of the pipe. In this case, the structure is turned over to clean it. There is no ash pan in such a homemade smoke generator.
- There is also another design option. The wood chips are poured onto a grate, which is pre-attached at a certain distance from the bottom of the device. The ash that remains after the fuel burns out will fall through the grate. Typically, the bottom of such devices is removable. You can also add a flapper to clean out the ash pan. This option is considered the most labor-intensive.
- Regardless of the chosen option, a small hole is drilled in the lower part of the homemade generator, the diameter of which will be 5-6 millimeters. A minimum amount of air will enter the device through it so that the sawdust slowly smolders.
- If the hole is larger, it may cause a fire.
- In the upper part of the structure, approximately 7-9 centimeters below the upper edge of the pipe used, another hole is made. With its help, the smoke exhaust pipe will be attached to the smoke generator.
Next the ejector is assembled. This device is used to suck smoke from the smoke generator and direct it into the chimney. A small diameter tube into which pressure will be supplied from the compressor fits a couple of centimeters into the chimney pipe, which has a larger diameter.
- After all the most important parts have been connected and secured, you only need to finally assemble the homemade smoke generator and check how efficiently it works.
- Chips must be placed inside the structure. It is enough to use 700-800 grams of fuel. It is best to use sawdust from deciduous or fruit trees, which will make the finished smoked product not only tasty, but also quite aromatic.
- Next, you need to tightly close the lid of the device and install the constructed structure in a certain place next to the wall of the smokehouse. If the smoke generator is free-standing, then you need to attach a hose to the chimney, which will be directed directly into the smokehouse.
- Then the fuel is ignited through a small side hole and the compressor is turned on.
- Now all that remains is to ensure that the sawdust smolders evenly and does not die out from time to time, so that you get tasty and aromatic home-made smoked meats.
Types of smoke generators by ejector location
Smoke generators come with an upper or lower ejector.
The main advantages of the top-mounted option are as follows:
- Increased combustion area volume. The result is more stable smoldering.
- Economical. The wood chips smolder slowly, which reduces firewood consumption.
- Longer pipe life. Being located at a sufficient distance from the place of heating, the parts of the device are less exposed to the negative effects of temperature.
The disadvantages of this type of smoke generators include the need for additional smoke filtering due to the high draft in the chamber.
If the ejector is located at the bottom, large particles of fuel may enter the chimney. Its length must be increased. This is not always feasible in a small summer cottage or the territory of a private house. In addition, exposure to high temperatures reduces the service life of the ejector.
Smoke generators of both types have found their use among smoking enthusiasts. However, in home smoking it is better to use the top type of device.
How to handle a smoke generator
Once all the elements have been collected, you can begin cold smoking meat and fish products. The commissioning process looks like this:
- Wood chips are loaded into the combustion chamber. How much of it is required for smoking is determined during the operation of the device, since this indicator depends on the fraction of the fuel, its humidity and operating power. The diameter of the installed pipes also affects the flow rate.
- The supercharger turns on at full power.
- The wood chips are set on fire through a special hole. It is convenient to use a gas burner.
- Adjust the compressor power by setting the necessary parameters.
- Wait the specified amount of time, adding wood chips if necessary.
- After every 3-4 smoking sessions, the device should be thoroughly cleaned.
If, as a result of the work, any inaccuracies in the operation are revealed, then it is better to bring the homemade generator to perfection so that the smoking result is satisfactory and the prepared products are tasty and safe.
Review of several smoke generators on the market
You can find any smoke generator for cold smoking on the market. Each of the presented models has its own pros and cons, which are worth learning about before purchasing this or that smoke generator for cold smoking.
Summer resident
The summer resident is small in size and weighs up to six kilograms. The manufacturer provides a five-year warranty. the average cost of the structure is 3,400 rubles.
Pros:
- consumes approximately 313 grams of wood chips per hour;
- there is no need to change the load for three months;
- operating the device is very simple;
- installation does not require any special knowledge;
- has small dimensions;
- installation of the structure does not take much time;
- you can independently adjust all the necessary smoke parameters;
- despite the fact that the device is very simple, it has proven its effectiveness in practice;
- The resulting products are tasty, aromatic and rich in healthy ingredients.
Minuses:
nondescript appearance of the structure.
Hanhi zmei 7l
The device has a high performance rate and can work on one load for 12 hours. In addition, the design is equipped with a special filter, which not only retains excess moisture, but also cleans the smoke from resin to make the finished product even tastier.
The smoke generator Hanhi zmei 7l has a weight that reaches 12 kilograms. The manufacturer provides a one-year warranty on this model. The average cost of the structure is 11 thousand rubles.
- the smoke generator is equipped with a special safe electrical stand for heating wood chips;
- the device can work offline for 12 hours;
- you can manually adjust the smoke power, taking into account the type of semi-finished product;
- the length of the coil reaches six meters, which allows the smoke to cool to the desired temperature - 27 degrees;
- the device is very reliable and has a long service life;
- It is small in size, so it does not take up much space in the room.
Minuses:
users did not find any significant disadvantages.
Smoke Dymych
The weight of the device is 6.75 kilograms. Manufacturer's warranty – one year. The average cost of the Dym Dymych smoke generator is 4,000 rubles.
Pros:
- the design is quite simple, but at the same time has good strength indicators;
- in one smoking session you can load up to 15 kilograms of various products;
- installation of a smoke generator does not take much time; anyone can cope with the task, even those who are completely ignorant of technology;
- the body of the structure is made of stainless steel;
- can work offline for up to 15 hours.
Minuses:
- It’s a little difficult and inconvenient to remove the cover;
- case walls are not thick enough - 0.8 millimeters;
- no special stand.
Мerkel premium
The device has 2 mm walls made of high-quality stainless steel. This means that the design will work for a long time and at the same time it is very reliable. In offline mode, the device can work for almost 12 hours.
Pros:
- The device is very easy to clean – it doesn’t take much time;
- at the outlet the smoke has an ideal temperature, which does not exceed 25 degrees;
- in order to drain the collected condensate, there is no need to completely disassemble the structure;
- High-quality wood is used for the lid, which will not swell or dry out over time;
- the Merkel smoke generator has a beautiful design;
- differs from many other models in its light weight.
Minuses:
the only drawback that users have found is that they need to remember to add fuel regularly.
Let's look at the main mistakes
Beginners are often not satisfied with the smoking result. This is because they make a number of common mistakes:
- Incorrect salting. To prevent food from spoiling, they must be thoroughly salted. For high-quality salting, take 2-3% salt for every kilogram of meat or fish. It is better to take nitrite salt or a mixture of nitrite and table salt. This way, moisture is better removed from the products.
- Pre-drying. Salted meat contains a lot of moisture, so it should be dried before placing it in the smokehouse. Prolonged drying will result in a dry product. It is enough to keep the meat ventilated for 6-10 hours.
- Using the wrong wood chips. Using wet fuel will result in a bitter taste in smoked meats. The same effect is possible if the smoke generator operates too intensively, so its performance must be monitored.
Use without ventilation. After smoking, meat and fish should be ventilated, which will help remove the pungent odor and improve the taste. During your time in the fresh air, not only the taste will change, but also the color.
Considering these simple tips, everyone will be able to prepare stunning masterpieces that will delight even demanding gourmets with their taste, and the cost will be several times cheaper than store-bought dishes.
Safety regulations
A smoke generator is a fire-hazardous device, so fire safety precautions must be observed, as well as the requirements when working with electrical devices. The device is placed on a non-flammable base to prevent the possibility of ignition. The wiring is checked for integrity before switching on. The presence of an automatic switch will prevent device failure and make operation more comfortable.
A homemade smoke generator is a salvation for many smoked meat lovers. With such a device, you can easily create delicious dishes at home that will benefit the body and bring pleasure. To manufacture the device, no special skills or tools are required. In a short time, even a novice master will be able to create a functional and practical smoke generator.
Sources
- https://mytopgear.ru/interesting/raznoe/dyimogenerator-dlya-avto-svoimi-rukami/
- https://avtozam.com/elektronika/auxiliary/generator-dyma-svoimi-rukami/
- https://the-drive.ru/288-professionalnyj-dymogenerator-dlja-avto-kak-sdelat-osobennosti-konstrukcii.html
- https://1pokopcheniyu.ru/dymogenerator/kak-sdelat-dymogenerator
- https://gidrukodeliya.ru/dymogenerator-svoimi-rukami
[collapse]