What kind of lamps are installed?
| Name | Base | Power, W |
| Block headlight | ||
| high/low beam lamp | H4 | 60/55 |
| turn signal lamp | PY21W | 21 |
| size lamp | W5W | 5 |
| Back light | ||
| turn signal lamp | PY21W | 21 |
| brake light | P21W | 21 |
| side light lamp | W5W | 5 |
| fog lamp | P21W | 21 |
| reverse lamp | P21W | 21 |
| fog lamp | HB4 | 51 |
2276-6-13-9-06
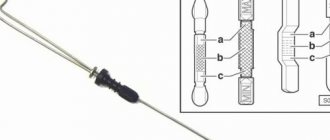
Remove the headlight bulb from the headlight housing.
Attention! The headlight lamp is halogen. You should not touch its glass bulb with your fingers, as traces from them will lead to darkening of the lamp when heated. You can remove dirt from the flask with a clean rag soaked in alcohol.
We install the new H4 lamp in the reverse order.
Replacing Volkswagen Polo lamps - until 2015
Low and high beam lamps
Operations for replacing low and high beam lamps are considered using the example of one (right) headlight of a Volkswagen Polo.
- First, the block with a set of supply wires is disconnected from the lighting device.
- Pull the tip of the rubber protective boot and remove it.
- By pressing the protrusion of the retainer with the spring, you must carefully remove its edges from engagement with the retaining hooks on the body.
- At the last stage, the damaged illuminator is easily removed from the headlight housing.
- To do this, simply pull it towards you.
To remove dirt from the holders, use a clean rag moistened with alcohol.
The new lamp, designated H4, is installed in its place in the reverse order to that described above.
When removing light bulbs, they can only be held by the socket. This is explained by the fact that the updated products are halogen-type illuminators, the bulb of which, according to the instructions, is prohibited from touching with your own hands. Otherwise, when they are heated, individual parts of the surface may darken.
Turning lamps (as part of the headlight)
To remove the turning lamps that are part of a unit that has already been removed from the car, you will need:
- First, you should grab the base with your hand and press on it.
- Turn it in a clockwise direction.
- In the next step, the lamp is removed from the structure holder with a force directed towards itself.
At the final stage of the procedure for removing the turn signal lamps, a new PY21W type light fixture is taken and mounted in the reverse order.
Marker lamps
Replacement of side lamps on Polo cars is carried out in the following order:
- With a little force, press the cartridge and carefully turn it counterclockwise (you should act very carefully so as not to crush the flask).
- At the end of the disassembly, the burnt-out marker lamp is removed from the housing.
In order to replace a light bulb on a Polo Sedan (install a new light bulb in place of a burnt one), you should press it into the base and turn it clockwise by hand. The remaining operations are carried out in the reverse order.
Lamps in the rear light unit
Removing the rear light bulbs follows step-by-step instructions. According to this document, to dismantle the illuminator, you must do the following:
- First, the trunk lid opens, and then the flap of its upholstery is pulled back with force.
- Using a regular screwdriver, the housing of the lead wire block clamp is lifted.
- By lifting the latch, you can pull the block out of the flashlight connector with your own hands.
At the next stage of disassembly, you will need to unscrew the plastic bolt securing the unit to the car body. After unscrewing it, you must:
- Remove the bolt fastening along with the spring.
- Completely remove the rear light.
- After this unit is freed from its fastenings, you need to forcefully squeeze out all five spring elements that secure the holders with lamps in the sockets.
- All of them are removed from the headlight unit.
Once that stage of disassembling the lantern is completed, you can proceed to dismantling the individual illuminators. To do this, you will need to perform the following mandatory operations:
- first you need to remove the lamp from the socket by slightly pulling it towards you;
- if necessary, you can clean the fixation area and install a new W5W product;
- the process of installing it is done in reverse order.
Having finished with the size bulb, you can move on to the brake warning light. To extract it you will need:
- By lightly pressing the glass bulb, it is necessary to completely recess the dismantled light bulb into the socket.
- Turn counterclockwise and carefully remove from the socket.
- At the end of the process, a new P21W lamp is taken and installed in its place in the reverse order of disassembly.
From the set of lamps, it remains to update the fog lamp P21W, located in the left lamp, and the reversing light - P21W, located in the right block. Together with the turn signal lamp, they all change in exactly the same way as the previously discussed products.
You should pay attention to the fact that the grooves on its cartridge are not entirely symmetrical. After updating the individual lamps, the complete taillight assembly is installed in place.
How to change a light bulb on a VW Polo sedan
How to change a light bulb on a Volkswagen Polo Sedan?
Article
Tuning Volkswagen Polo Sedan
includes not only changes in the appearance of the car, but also the replacement of individual elements.
For example, headlights. Replacing light
is most often associated with burnt out lamps.
Convenient access allows you to do everything yourself without any difficulties. As a rule,
lamps from
Philips
,
Osram
headlights .
- Replacing low beam bulbs
- Replacing high beam bulbs
- Replacing dimensions
- Replacing PTF
Replacing low beam bulbs on a Polo sedan
The installation has its own procedure. How to change a low beam light bulb
for
Volkswagen Polo
:
- Initially, the hood opens, the minus contact from the power supply is disconnected.
- The block is disconnected from the terminals of the base. To do this, you need to pull it towards you with gentle rocking.
- The rubber plug is removed.
- Access to the locking spring is provided. If you pull it towards you, you will be able to unfasten the element.
- The old lamp is removed and a new one is installed. It is better to use gloves so that no greasy stains remain on the flask. Otherwise, the electrics will overheat and quickly become unusable.
- The steps are performed in the reverse order: the base is clamped with a spring, the boot is mounted, the block is put on the terminals.
Replacing the lamp
It will take about 10-20 minutes even for a beginner.
Replacing high beam bulbs on a Polo sedan
The instructions will help you perform the steps correctly. Using the example of the right headlight, let's look at how to change the high beam bulb
:
- the old element is disconnected by tightening the block with the cables that enter it;
- the rubber gasket is removed;
- the spring clamp is lowered;
- the light source is replaced;
- assembled in reverse order.
That's all.
Replacing headlight bulbs on a Polo sedan
How to change light bulbs
? To do this you need:
- rotate the cartridge counterclockwise and remove it;
- replace the lamp;
- install the cartridge back.
Everything is much simpler than in the case of the head light.
Replacing PTF lamps on a Polo sedan
How to change PTF light bulbs
? Actions are performed in the following sequence:
- remove the negative terminal from the battery;
- the crankcase protection, if present, is removed or the plastic boot is dismantled;
- the trim on the bumper is picked up with a screwdriver and then moved back a few millimeters, after which it is removed;
- new wires are passed through an empty cell;
- PTFs are connected and mounted;
- the pad is put on;
- a fuse is installed;
- wires are thrown into the cabin and pulled through the plug;
- the switch is removed and the connector is “exposed” on the clamps, where a small pin is inserted into socket 8;
- The wiring is attached, the parts are mounted in the reverse order.
PTF can be used with both low and high beams.
Replacing Volkswagen Polo lamps: restyling
When handling lighting fixtures on car models manufactured after 2015, you will have to take into account the following important points:
- A complete update of the lamps is only possible if the headlight assembly has to be removed from the car.
- The dismantling procedure itself is quite simple and will take no more than half an hour of personal time from any car enthusiast.
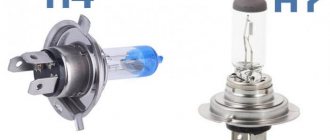
H7 lamp
(55W);
Low and high beam, dimensions, turn signals
Independent replacement of the low beam lamp on the restyled version is carried out in the following order:
- Using a TORX T30 wrench, unscrew the two screws holding the headlight. They are clearly visible in the photo below.
- Remove the power supply; to do this, you will have to press the special latch and forcefully release it.
- At the next stage of disassembly comes the most crucial moment. It involves carefully removing the entire headlight from the housing niche.
In addition to the screws, the headlight is held in place by two latches.
- Remove the protective cover under which the faulty lamp is located. In order to get it out of the socket, you will need to turn its base counterclockwise.
- At the final stage of work, a previously prepared new H7 lamp is taken and installed in place of the burnt product. The procedure for assembling the headlight and returning it to its original place is carried out in reverse order.
Do-it-yourself dismantling and replacement of low beam
As mentioned above, it is often necessary to replace low beam lamps. The reason is that drivers use them as DRLs, which means these headlights are constantly talking. And it doesn’t matter whether you have xenon or halogen, the part can quickly become unusable. Replacement can be done manually.
To replace the lamps you need to do the following.
- Lift the hood and lock it in this position, leaning on the latch.
- Now you need to disconnect the wires from the lamp. To do this, you need to take the block and separate it.
- Then pry off the lamp plug (you can use a flathead screwdriver).
- Now step aside and lower the metal latch all the way.
- Unscrew the old light bulb. Be careful not to break the glass. Sometimes the old part is firmly in place due to corrosion and other phenomena, so a little more effort is needed.
- Install the new lamp and press it with the clamp.
- Perform all subsequent steps in reverse order. Don't forget to adjust the headlights.
Headlight Controls Remember that light bulbs can be quite hot, especially if they have just been turned on. Remove them with gloves. Also, don't leave fingerprints or dirt on your new parts. This will worsen the lighting in the future. In this case, use a clean cloth and alcohol to clean.
Let's sum it up
In the final part of the topic under consideration, we note that replacing lamps on Polo can be done on your own. All that is required is knowledge of the basic techniques for removing burnt-out lighting equipment and installing new products in its place.
Under the molding of the plastic DRL trim there are two holes for removal:
We thread a hook through them and with a little force we snap off the DRL trim:
Unscrew the DRL mounting bolts:
We bend the upper latches, remove the socket by turning it clockwise and remove the lampshade:
We change the light bulb and reassemble in reverse order. All is ready!
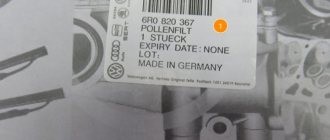
Original DRL lamps made in Hungary:
Until I started bothering with light bulbs, I installed an analogue of the original P21W, manufactured by OSRAM:
In the future I plan to install OSRAM 7456CW-02B in the DRL.
When installing these LED lamps, is it necessary to change the polarity in the standard sockets?
Can anyone advise which lamps are best to install in the DRLs of the Volkswagen Polo Sedan?
Tools required for installation
In order to install daytime running lights on a Volkswagen Polo, you need the tools that are shown in the table below.
| Criterion | Light-emitting diode | Halogen lamp |
| Durability | Long service life | Service life often does not exceed 1000 hours |
| Load on on-board network | Minimal | Less compared to low beam, but higher than LED |
| Glow brightness | High | Sufficient for DRL |
| Vibration Tolerance | Not afraid of vibrations and overloads | High risk of filament breakage |
| Stylish | Wide possibilities for tuning | Very limited styling options |
| Heat | Minimum | May lead to meltdowns. Cracks are also common when water drops hit the heated glass of the DRL. |
Side light circuit
It's very easy to replace the side light bulb yourself.
In order to save fuel and reduce the load on the generator, daytime running lights are now often included in this circuit, which makes it quite complicated.
The standard wiring option is quite simple and consists of the following elements:
- circuit breakers;
- front and rear position lamps;
- central or key switch;
- Let's take a closer look at the first two elements.
Circuit breakers
Sometimes blown fuses are the reason why the side lights do not light up on one side or another.
There are usually two fuses in the circuit, for the left and right sides separately. Since the light bulbs consume little power (4-5 W each), the fuse rating is small, only 5-7.5 A.
Where are the side light fuses located?
In the same place as the others, in a single block. On most modern cars, this block is located under the instrument panel next to the steering column, or, more often, on the lower left, under a plastic trim.
Article on the topic: How to properly grind valves, grinding devices, checking
In the latter case, it is enough to remove the cover protecting the unit, mounted on latches. On the back of the cover, as a rule, there is a sticker with information about which circuit this or that fuse protects, indicating its rating.
The biggest inconvenience in this case may be insufficient knowledge of the English language - it is in this language that inscriptions are usually made, even on Korean and Japanese cars.
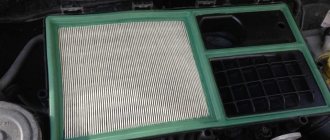
Lamps
Externally, the headlight bulb is marked W5W, but today LED sidelight bulbs are increasingly used.
Their advantage over incandescent lamps is their greater durability, and the price of both largely depends on the manufacturer. The most famous products are Philips, Osram, Tesla.
Watch the video about LED bulbs for side lights:
Moreover, as the “Behind the Wheel” test showed, expensive products do not always justify their price.
Also, quite often, the front dimensions are equipped with light bulbs with a metal base, but this, one might say, is a thing of the past.
For rear position lights, the most common lamp is with two spirals - 21 and 5 (or 4) W.
The 21 W coil lights up when you press the brake, i.e. In this case, the light bulb serves as a brake light, while the lower power spiral works as a side light.
Just as with any other lamps, purchasing a more expensive product does not guarantee any exceptional durability.
Requirements for installing DRLs
Before installing daytime running lights on a Volkswagen Polo sedan, it is important to make sure that they comply with the following rules, which are enshrined in law:
- the height of the DRL from the ground is more than 25 cm;
- daytime running lights are located at a height of no more than 150 cm;
- the distance between the right and left DRL headlights must be at least 60 cm;
- the covered area is in the range of 25-250 cm2;
- The luminous intensity is in the range of 400-800 Cd.
Adjusting headlights in Polo Sedan cars
Always after replacing the lamps in the headlight, it is important to adjust the lighting system in the Volkswagen
. This procedure can also be carried out independently.
To do this, you need to recreate the real operating conditions of the machine. The car should be installed horizontally against a flat wall at a distance of five meters. The driver's seat should be occupied by a person of your build. The trunk should have one spare tire and a set of tools for car repairs.
Then you need to open the hood. It contains all the elements with which the headlights are adjusted. Each headlight unit has two mirror-arranged adjustment levers. On the wall to which the headlights will be directed, you need to apply guidelines to adjust the light.
When everything is ready, you need to turn on the low beam headlights (forward and reverse). Ideally, the drawing should repeat the drawing applied to the wall. If this does not happen, then it is necessary to adjust the headlight controls so that the result satisfies the requirements for correct and convenient illumination. Use a screwdriver to turn the levers clockwise and adjust the headlights. If you turn the controls counterclockwise, the light will shift in the opposite direction. After this procedure, there is no need to record the results of adjusting the lighting system in the Polo Sedan.