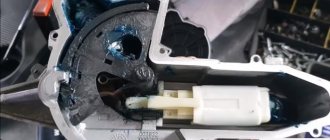
On cars of the Lada Vesta and X-RAY family, a standard clutch unit with one disc is pre-installed. The contact between the clutch and the drive disk occurs under the influence of a pressure spring.
The main difference between a manual and robotic gearbox is the type of drive:
- Manual transmission: hydraulic;
- AMT: electromechanical.
Repairing a clutch is quite complicated; it is better not to try it without experience in servicing; use the services of professional workshops. It is quite possible to do the diagnosis yourself.
Why does the clutch pedal click on the Lada Grant?
Often, owners of the new Lada Grana complain about the clicking of the clutch assembly. In most cases, the reason lies in insufficient lubrication of the drive cable.
Lubricating the cable yourself is not difficult. The lubrication procedure is described above; read additionally if repairs are necessary.
Sometimes the cause of the clicking sound lies in a faulty sensor (clutch pedal switch) located on the rear side. For dismantling and subsequent replacement you must:
- Remove the block with wires coming from the dashboard.
- Unscrew the two screws securing the base of the board to the pedal and replace the part.
- Reassemble in reverse order.
Other malfunctions, such as loose pedals, stiffness, failure, are also associated with cable stretching, fiber delamination, winding damage, and worn out hinges.
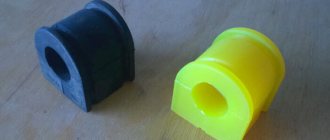
How to independently eliminate knocking calipers on Vesta
Short guides are located on one side of the part. Because of this, the caliper body is mobile and begins to rattle on road irregularities.
Lubrication of brake caliper guides. Photo source: https://www.drive2.ru/l/479015710731796983
What to do to eliminate the knocking:
- Plastic clamps are used. They tighten the body of the assembly with its bracket. The method is primitive: the plastic breaks quickly.
- They use a spring from the “classics”. One end is hooked to the bracket, the other to the body. This limits the movement of the part and the knocking noise disappears.
- Bend the plate that holds the pads in their proper places. The edge is folded and tucked behind the body of the assembly.
- Install the pressure springs into the holes on the brake pads. The moving part is pressed from the reverse side.
The reason for the squeaking clutch pedal on the Lada Grant
The design of the clutch on the Lada Granta car is different from previous VAZ models. The shaft drive is activated by a cable with an automatic tensioner.
If the adjustment was made correctly from the factory, then the owner does not need to re-adjust the strain relief. In practice, this is far from the case; problems do happen. Especially at the stage of passing the first and second technical inspections.
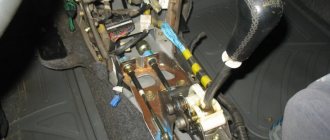
Stage No. 1 Adjusting the clutch pedal of Lada Granta
The appearance of third-party noises and squeaks indicates the need for preventive maintenance and troubleshooting of clutch elements. First of all, we check the clearance on the drive fork.
In the engine compartment, dismantle the plastic casing of the air element and remove the pipes. Using a caliper, measure the size of the gap between the plastic wing and the fork. The factory standard is 27 mm, exceeding or reducing the length is unacceptable. We correct the gap by unscrewing the nut (key set to “10”).
Stage No. 2 Lubrication of elements
Lubricating the moving elements of the pedal assembly, including the compensator ratchet, clutch pedal bushing, and cable sheath.
To simplify the lubrication process, we use a grease gun, fill a medical syringe with transmission oil, and apply it to the surface.
Sometimes the creaking comes from the engine compartment. The reason is the leash of the tip. To eliminate squeaking, apply oil to the contact area between the nut and the drive fork.
Stage No. 3 Insufficient amount of lubricant
In rare cases, the cause of the squeak is the lack of lubrication on the input shaft of the gearbox. The defect is eliminated by applying graphite lubricant to the surface of the shaft. First remove the rubber bushing and spray lubricant using an aerosol can.
FakeHeader
Comments 14
I also wanted to get confused, bought the 10th cable, went to the service center, removed the old one and then surprise, the factory cable was 10 cm longer than the 10th (Kalina 1 ’13) and the bummer had to be replaced with a Kalinovsky one.
Like for your efforts. But. For example, I have a stock cable and am quite happy with it, sometimes it clicks once every now and then, but it doesn’t bother me because it happens very rarely. True, I myself re-adjusted it according to the manual and lubricated it, after the adjustment I pressed the pedal several times, the device tightened it and that’s it, I drive, nothing bothers me.
When I was working on getting rid of the squeak, I also wanted to do the same thing (although it can be cheaper to buy both the cable and the fastener at a disassembly) until half a year later nothing creaks. I installed it while there is a spring in the BZ. So far I’m happy with it and another option is to press in another loop and not change the entire cable.
and someone else had another option - remove the machine gun and weld a metal ring to the end of the cable.
you can't weld it to the cable. only if you fill it with tin. Separately solder the cable with acid and then pour it into the tube.
On the pedal side, the cable already has a metal tip with teeth. I saw someone had it welded to it.
I thoroughly lubricated the auto-tensioning mechanism and there was no squeaking or squeaking.
The only inconvenience of the standard clutch for you is clicking, and this is completely normal, does not affect the ride in any way, does not irritate me, an absolutely pointless idea, you will still change to the classic! There's also a gap you can adjust at the bottom, which is cool. Looks like the world has gone crazy! Sorry, I just can’t get my head around this alteration, you’re looking for problems for yourself! On the contrary, they did it well; there is no need to adjust anything during operation. For example, a friend of mine drove a two-wheeler with his leg stuck in the knee due to manual adjustment, until I adjusted everything properly for him, and one wonders why go against real improvement.
So everything started well and ruined everything with the last phrase. It's a pity, it's a pity.
The technique is not suitable for everyone. It won't work like that on a cable car.
The right thing to do! Good job!
Add to favorites, I've been wanting to do the same thing for a long time!
You have an old box with a short cable, on a new (cable) box 2181, there is a longer clutch cable, your method is only suitable for grants with black bumpers where the old box has a rocker.
Clutch malfunctions on AMT. Ways to eliminate them
The robotic version of the Lada Vesta box is not ideal. The most common breakdowns are associated with knocking, howling, roaring when shifting to higher gears.
A faulty release bearing is a source of extraneous sound. When replacing discs, the bearing must be replaced, regardless of the actual condition.
The AMT needs to be repaired (adapted) at a service station, but you can carry out preventive maintenance yourself.
Algorithm of actions:
- Turn the ignition key to position “2”, depress the brake, and alternately move the gear lever. Check that the numbering on the dashboard matches the transmission.
- Turn on the engine, listen to possible sounds coming from the transmission. Most likely, the release bearing, the pressure spring are faulty, or the clutch on the robot is overheating.
- With the engine active, switch the selector to different positions. The transition should be easy, without crunching or knocking. Otherwise, the release bearing must be replaced. Less common are breakdowns of the electromechanical drive and burning of the clutch on Lada Vesta. The transmission control unit is subject to prevention.
- Engage neutral gear, squeeze and release the brake. The car should not move.
- Engage first gear and gently press the accelerator. The ride is quiet, without jerking.
- We switch the AMT to manual control mode and change gears step by step. The transmission operates normally.
To carry out comprehensive diagnostics, contact certified service stations.
Conclusion
It is not difficult to independently diagnose an automatic or manual transmission. Another thing is repair, or as it is called for a “machine” - adaptation. It is impossible to do without the skills of specialists and specialized equipment. When purchasing components, carefully check the catalog numbers with the data specified in the instruction manual.
Reviews
| № | Positive |
| 1. | Semyon (www.zr.ru): mileage 50,000 km, clutch works in normal mode. |
| 2. | Andrey (autobann.su): I drove Vesta for two seasons without any comments, the build quality is acceptable. |
| 3. | Georgy (lada-vesta.net): there are no comments on the flywheel or transmission, they work stably. |
| 4. | Stepan (otzovik.com): the pedal catches me under the top, it’s uncomfortable at first, but I’ve already gotten used to it. |
| 5. | Vladimir (www.zr.ru): positive review, no comments. |
| 6. | Alexander (autobann.su): I’m happy with the Lada, I bought it from scratch. The only drawback is the occasional knocking sound in the box when shifting to lower gears. |
| 7. | Mikhalych (forumvesta.ru): drove 70,000 km, there were no critical breakdowns, he fixed “small things” on his own. |
| 8. | Vitaly (lada-vesta.net): I recently underwent scheduled maintenance, the master said that there were no comments on the condition of the car. |
| 9. | Timofey (otzovik.com): three years of successful operation of the car. |
| 10. | Stanislav (www.zr.ru): Before Vesta there was Priora, the quality is incomparable. Finally, a domestic manufacturer has learned to assemble cars. |
| 11. | Gennady (autobann.su): in two years I replaced the brake fluid once, the clutch was normal, there were no comments from the master. |
| 12. | Alexey (https://forumvesta.ru): I treat the car with care, I regularly carry out maintenance, it is in good condition, all components are in good working order. |
| Negative | |
| 13. | Konstantin (www.zr.ru): problems with the clutch and gearbox began after 15,000 km, since then I have been a frequent visitor to the workshop. |
| 14. | Vitaly (otzovik.com): dissatisfied with the assembly of the Lada Vesta, there are many defects. Recently the transmission failed, there was a squeaking noise and a clutch smell in the cabin. |
| 15. | Grigory (autobann.su): why make a model if defects are inherited. In particular: transmission, chassis. |
| 16. | Kirill (lada-vesta.net): periodically I do something near the car, sometimes I ask the mechanics to help. Lately the clutch on the Lada Vesta has been slipping. |
Related link:
How to make an armrest for a Lada Granta yourself. Recommendations from professionals
The clutch does not disengage (drives)
Often, the Lada mechanism does not fully release due to the hydraulic clutch release. This could be due to poor drive adjustment, leaking fluid system, or cable wedge. Such breakdowns are easily eliminated. It is much more difficult when one of the elements of the main device breaks down.
If the mechanism does not completely disengage, it means that something is holding it: a deformed driven circle, the formation of dirt, rust in the spline joint, flywheel wear, as well as a change in the shape of the release fork, weakening of the pressure plate. In all cases, the disk will need to be replaced.
Clutch malfunctions on manual transmission. Ways to eliminate them
The hydraulic drive consists of a pipeline, main and working cylinders. The main part of the structure is located in the crankcase. Brake fluid simultaneously performs the functions of “hydraulics”
That is why it is so important to change DOT-4 in a timely manner and carry out unit prevention
The most common mechanical failures:
- airiness of the circuit, as a result of which the speeds are switched tightly, unclearly, with obvious effort;
- wear of the cuffs in the cylinders, resulting in audible clutch knocking;
- brake fluid leak, system depressurization;
- clutch pedal squeaking;
- third-party mechanical damage to cylinders and pipelines.
The design of the hydraulic drive is quite reliable, unlike the electromechanical one, and has a long service life. A breakdown can occur at the most inopportune moment due to air getting inside the circuit.
To independently diagnose the manual transmission hydraulic drive, follow the instructions:
| What to do | What will happen |
| Turn off the engine, hold down the clutch pedal (hereinafter referred to as “SC”). | No outside sounds should be heard. The stroke of the PS is smooth, without jamming, with pick-up 2/3 of the way. |
| Start the car. | Clutch noise is heard - depress the clutch. If the sound disappears, then there is a problem with the release bearing and it must be replaced with a new one. |
| Start the engine, depress the gearbox, and engage first gear. | There should be no knocking of the clutch pedal in Vesta and other third-party sounds. Otherwise, these are the first signs of incomplete disengagement of the clutch, malfunction of the master and slave cylinders, and the diaphragm spring. |
| With the engine running, shift to second gear and smoothly release the clutch. | A knocking sound is heard when the clutch is released - a sign of damage to the disc, damper, or transmission oil getting on the working surface. |
| While driving, press the accelerator sharply. | The revolutions have increased, but the speed has not increased - the damper is slipping. The interior of the Lada Vesta smells like clutch. |
If none of the above methods help, then contact a workshop for comprehensive diagnostics by specialists using digital equipment.
If after replacing the clutch the car jerks
For example, before the repair, the car did not pick up speed well, it was slipping, and the clutch pedal was activated at the very top. All the signs of a worn driven disc were present. After replacing the disk, the car began to jerk. What could happen after the repairs were carried out?
- The issue may be a defective part. This is not so rare when it comes to non-original spare parts. In Russian-made cars (VAZ, GAZ, AZLK, IZH), defects also occur in factory parts. That is, the driven disk is simply curved. On the clutch basket (drive disc), the pressure petals may be at different levels, then the release occurs unevenly and the car jerks.
- The car may jerk due to clutch adjustment. More precisely, it was not performed after replacing the disk. The linings of the new part are much thicker; in this case, the clutch pedal “takes at the very end”. When starting off, the car moves jerkily, and the gear shifts into gear with a crunch.
- The car jerks due to the replacement of not all the parts that needed it. In particular, the cause of jerking is the worn surface of the flywheel under the driven disk. If the flywheel has not been replaced, there may be jerking when driving, and the car may also slip.
There is an opinion that the car may jerk due to incorrect installation of the clutch disc, that is, it was installed on the wrong side. Theoretically, this is possible on some car models. But the disc is designed in such a way that even depressing the pedal normally and moving off will not work with this installation.
Why does the clutch pedal click on a Lada Vesta - the degree of danger and the design of the assembly module
Design
The situation in which the box clicks when you release the clutch on the Lada Vesta or squeeze it in is typical for products from both companies. Experts assure that extraneous clicks are regarded as a defect. But apart from acoustic discomfort, they will not bring serious problems such as, say, bent valves due to untimely replacement of the timing belt on the Lada Vesta engine.
Clutch
The design diagram of the unit links the work of several structural units:
- Basket.
- Driven disk with friction linings.
- Hydraulic drive.
The basket part consists of a pressure plate with a friction insert and a diaphragm spring mounted on its body. The latter is bolted in the amount of six pieces to the engine flywheel. The driven part is located between the pressure plate and the flywheel. When the pedal is released, the discs are engaged and transmit torque from the engine to the gearbox.
Drive part
The structure of the hydraulic drive includes the following elements:
- Main cylinder.
- Pipelines.
- Working cylinder.
- Expansion tank.
It is noteworthy that the design does not provide forks. The working cylinder and the release bearing are connected in one housing and represent a single part with its own article number:
- 21810160118001 – manual transmission VAZ.
- 306201586R – Renault gearbox.
What is the moral of this fable?
One gets the feeling that among all the shortcomings of Vesta, the main one is the low level of production culture (in simple terms, the crookedness of the hands of those who assemble it).
And also the need to firmly push official dealers so that they do their job, and not refuse repairs with the wording “these are design features, not a malfunction.” I would like to thank Dzerzhinsky Unicor - they approached the solution of the problem with a fair amount of responsibility.
The timing roller seems to be a cheap part, but if the belt tension is incorrectly adjusted, it can become a source of much bigger problems. An overtightened belt wears out faster, and the load on the shaft bearings and their wear also increases. Regular replacement of the timing belt on Vesta is provided once every 180 thousand kilometers. What will tightened belt turn into after such a mileage?
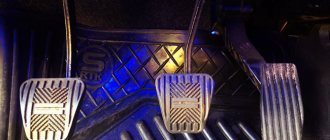
What should be the clutch pedal travel of the Lada Granta?
The free play of the clutch pedal on the Lada Grant is 146 mm - this is the distance from the base of the body to the back of the pedal (frog). The manufacturer allows a stroke play of 2.0 mm.
If the above distance does not meet the standard, we carry out the following adjustment steps:
- In the engine compartment, pull the end of the cable forward as far as it will go. Using a caliper, measure the actual distance from the plastic nut to the drive fork. Factory standard 27 mm.
- We carry out adjustments and adjustments as necessary (key to “10”).
- We pump the pedal 2-3 times and take repeated measurements.
- Inside the car we measure the pedal stroke, it should be equal to 146 mm.
If the pedal travel increases/decreases, the clutch cable must be replaced with a new one. To eliminate free play, use the Lada Granta clutch pedal repair kit.
Includes:
- pressure bushings;
- plastic compensator;
- spring.
Total
If it clicks when releasing or tightening the Lada Vesta clutch in the cabin, the reason may be the limit switch, pedal holder or hydraulic cylinder design. More serious knocking noises in the engine compartment - less often the dealer will refuse to find out the cause, as this may indicate a malfunction of important parts: springs, release bearings, working cylinder.
As a temporary solution to the problem of heavy knocking, drivers use the accelerator. You need to adapt to this: when the clutch is released, the driver gives more gas and the knock disappears. Typically, such actions indicate defects in the media release manual.
Lada Vesta became the new flagship of AvtoVAZ in 2015. The appearance, interior and equipment are radically different from all previous models. For the first time in many years, the new product was able to compete with the most popular foreign cars from Europe and Asia. In addition, Vesta is not inferior to them in quality and in some cases can give them an advantage.
Clutch adjustment on Lada Vesta cars
Since the knot is constantly engaged/disengaged, it needs fine adjustment. Adjustments are made on site during installation. The driven disk is centered, the basket, and the release bearing are also centered - they must fit exactly into the splines of the flywheel and the input shaft of the gearbox.
In the future, you can adjust the position of the clutch cable so that the pedal is softer/harder, so that it responds better to the command (during operation, the cable may stretch).
On a Lada with a robotic gearbox, the clutch is regulated by special programs. Adaptation can only be completed at an official dealer. However, the service life of the AMT clutch is significantly longer than that of a manual transmission.
If there is a knocking noise after replacing the clutch
As a rule, the cause of knocking after replacing parts is defective parts. In particular, there are dangling damper springs in the driven disk. Therefore, before installing such a spare part on a car, you need to carefully inspect it. Parts of the disk may also be poorly riveted. Knocks in the clutch area can occur due to a crack in the release bearing bushing (the bushings are often made of plastic). Even at the site where the bushing fits on the flange of the gearbox input shaft, play may form, which also leads to a knocking sound.
The knocking noise occurs due to a broken clutch basket petal, but such a defect occurs infrequently. Another reason for the knocking is a broken starter housing in the Bendix area; it rattles when the car moves. A tooth on the flywheel crown may break off, and it will also knock when touching the rotating parts.
Clutch device
On the Lada Vesta, as well as on all its modifications, including the X-RAY crossover and Cross versions, a standard unit with one disk is installed. The contact of the friction and drive disk occurs under the action of a spring. The main difference between the Vesta clutch and other AvtoVAZ models is the drive.
Structurally, the Vesta clutch is designed according to the standard type and consists of a pressure and driven disc that interact with each other. A pressure disk is installed in the basket; the basket itself is a steel body. The pressure plate in the basket is pressed using a special device in the form of a spring. The clutch basket is installed directly on the flywheel of the power unit and is firmly attached to bolted connections.
A disc with friction linings is placed between the flywheel and the drive disc. The driven clutch disc is also called a friction disc due to special linings attached to both sides. A damper with springs is installed in the center of the hole, designed to eliminate vibrations when the clutch is engaged. The friction disc is mounted through the hub onto the engine input shaft.
Features of the Vesta clutch hydraulic drive
The hydraulic drive consists of pipelines and two cylinders (worker and main). From the master cylinder, the pressure from the rod is transferred to the working one. This, in turn, exerts an influence on the clamping device through pipelines. The working cylinder is a module where the release bearing is also located. All this is mounted in the clutch housing.
Brake fluid performs the functions of working fluid. To ensure the reliability and performance of the hydraulic drive, it is necessary to promptly change the working fluid in accordance with the regulations. Problems with the hydraulic drive most often result from air in the system. In advanced cases, it will simply be impossible to change gears on the car.
Features of the electric clutch drive on Vesta
The electric drive, unlike the hydraulic one, is designed slightly differently; it acts directly on the clutch fork. When the fork is turned, the force puts pressure on the release bearing, which, in turn, presses on the petals of the pressure plate spring. The release bearing is reinforced and is constantly in operation, and the spring is always pressed against the coupling due to the absence of any gaps.
The release bearing does not require periodic maintenance, i.e. no lubrication is needed, the manufacturer took care of this too. The bearing lasts a long time and is simply replaced if it fails. You can recognize this by the characteristic noise. The release plate must also be replaced when replacing the driven or pressure disks, regardless of whether the bearing is in good condition or not.
Malfunctions in the operation of the hydraulic drive can be easily eliminated with your own hands; often it is enough to bleed the system and get rid of the air. But with an electromechanical drive, troubleshooting is much more complicated. A similar procedure on automatic and robotic gearboxes is called adaptation, and it is impossible to perform it without knowledge, skills and equipment. In such cases, the only correct decision is to contact an official dealer.
Today, the AvtoVAZ plant is actively introducing modern technologies into its cars, this also applies to clutches. Nowadays, structural elements that meet international quality standards are used for this. Friction linings and springs are much more reliable and durable.
Replacing the clutch on a Lada Vesta with gearbox 21807 / jr3 / jr5 (mt)
Required tool:
- inspection hole;
- assistant;
- wheel chocks;
- jack;
- supports – 2;
- keys: wheel, 18 mm (2 pcs.);
- socket heads: 8, 10, 13, 16, 17, 18, 30 mm, Torx E10;
- bits: Torx T20;
- centering mandrel;
- mounting blade;
- hexagon – 5mm;
- tetrahedron – 8mm;
- empty container for transmission oil – 5 l;
- screwdriver: slotted, Phillips;
- hammer;
- barb or metal rod.
The procedure is as follows:
- Drive into the inspection hole, engage the parking brake, and place chocks under the rear wheels.
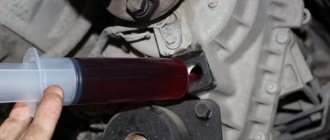
- Pump out the brake fluid from the brake system hydraulic reservoir to a level below the fitting to which the clutch hoses are connected.
- Loosen the wheel bolts and hub nuts on the front wheels, raise the front of the car on a jack, install the supports and remove the jack.
- Remove the wheels.
- Remove the gearbox: Unscrew the 13 bolts securing the engine splash guard (protection) and the lower clutch housing cover..
- Remove the battery and its shelf.
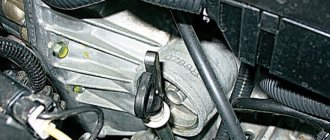
- Remove the air filter housing.
- Disconnect the gear selection cables by pressing the lock on the gearbox housing and disconnect the cable end. Press the fasteners securing the cable sheath to the box body. Remove the cable from the repair area.
- Disconnect the hose supplying the brake fluid to the clutch slave cylinder and drain it.
- Disconnect the wiring connectors: oxygen sensor, reversing light switch.
- Drain the oil by unscrewing the plug with a 17" socket (21807) or a square socket (JR3 / JR5).
- Remove the left fender liner by removing the screws using a T20 Torx bit and removing the clips using a slotted screwdriver.
- Place a jack under the gearbox and lift it, unloading the left power unit support.
- Unscrew the pinch bolt from the steering gear driveshaft and disconnect it from the steering column.
- Remove the starter by unscrewing the nut from the power contact with a “13” socket and 3 mounting bolts with an E10 socket.
- Disconnect the stabilizer struts from the shock absorber struts by unscrewing the nut from the ball joint pin with a 16mm socket, holding the pin from turning with a hexagon.
- Remove the rear engine mount by unscrewing with a socket and an 18mm wrench the 3 bolts securing the mount to the front subframe and gearbox housing.
- Disconnect the ball joints from the steering knuckles by unscrewing the nuts with a 18mm socket.
- Remove the front subframe longitudinal members,
- Remove the subframe by unscrewing the 4 bolts securing it to the body using a 18mm head.
- Remove the front wheel drives: unscrew the hub nuts, pull the outer CV joint shank out of the hub. With the mounting blade resting on the inner CV joint, push the drive out of the gearbox.
- Remove the bolts securing the gearbox to the cylinder block.
- Remove the left power unit support by unscrewing with a 16" head the 4 bolts securing it to the body, and unscrewing with a 18" head the 2 bolts securing the support to the gearbox.
- Remove the unit from the vehicle.
Noise when disengaging or engaging the clutch
A noise similar to rustling, grinding, a slight hum, or howling appears when the unit is turned off. When turned on, it disappears. With almost one hundred percent probability we can say that the release bearing has worn out. Replacing it does not require removing the entire component. However, its untimely replacement leads to failure of the entire mechanism. A squelching, whistling sound when you press the pedal is associated with wear on the master or slave cylinders. There is pressure, the broken part does not hold it - the liquid breaks through further, making noise. The noise in the box disappears only when the clutch is disengaged.
The second type of sound is constant, disappears only when the gear is disengaged, and is located in the area of the gearbox. The nature of the “tinkling” of Lada Vesta is a weakened connection between the three main nodes.
The worn driven circle loses its volume and begins to dangle inside the housing. Worn dampers are not able to press the circle tightly. The box is not tightly connected to the engine. Replacing the clutch on a manual gearbox
The procedure is very complicated. The main difficulty is not even that the gearbox needs to be completely removed, but that during assembly it needs to be centered in weight with the flywheel. Repairs can be done with your own hands. But if you do not have the proper experience, saving is not worth it, because we are talking about direct contact with the most important “organs” of the Lada. In general, the process looks like this:
- We de-energize Vesta, remove all attachments that block access to the gearbox mounting bolts (air filter, pipes);
- To prevent the loose internal combustion engine of the Lada from falling, we will hold it with a small diamond-shaped, barrel jack;
- We unscrew the power fasteners so as not to drain the oil, dismantle the box assembly with drives;
- We loosen one by one, then unscrew the fastening elements of the engaging mechanism housing (the bolts here are strong, but small in diameter, you need a good 8mm wrench). We remove the part and find the defect;
- We install the new product, adjust the position of the driven circle inside with a special tool;
- We change the release bearing in the box housing;
- Smoothly, without tilting, the input shaft of the gearbox hits the flywheel splines;
- We check the operation of the drive.
Not all operations are described here. For example, in order to remove the gearbox with drives, it is necessary to dismantle the suspension arms and so on.
The connection mechanism between the box and the engine is a “vitally” important element. Like any detail, it loves careful handling and timely service. The mechanism is directly connected to the internal combustion engine and gearbox; prolonged use of a faulty part can damage these two components. Do not neglect any suspicions that a unit is malfunctioning. May the car serve you for a long time.
The proper functioning of the Lada Vesta manual transmission is characterized by a monotonous, quiet sound. Violations of the factory condition occur: owners often complain of a clicking sound when operating the clutch. The official response on this matter has been disappointing. In 90% of cases, no action is even taken to eliminate the malfunction; arguments are only given in favor of supposedly additional features of the normal functioning of the mechanism.
Sachs clutch
The production of clutches for various car brands also has its own innovations. The clutch, like all other mechanisms, wears out quickly, and every driver wonders how to choose the right mechanism. Driving style and operating conditions are directly proportional to service life. Therefore, Sachs specialists, taking into account all the wishes of drivers, have released completely new, environmentally tested flywheels, release bearings, clutch discs and slave cylinders, compact clutch units and other equally interesting design solutions. These new products include:
- MZ type clutch basket with pull-out action.
- XTend with automatic wear compensation.
- Dual-mass flywheel ZMS.
- Release bearing type CSC.
- Ultra-compact clutch unit (for sports cars).
Which clutch to install is up to you, but if the driver takes good care of his car, replacement can be done after 100,000 km. The clutch pedal is a kind of indicator of the technical condition of the engine and transmission.
Hi all. I recently talked about the reasons for clutch pedal failure, as well as ways to solve this phenomenon. Today I decided to supplement the series of articles about the clutch with another, no less relevant topic - the creaking of the clutch pedal.
You will learn about the reasons why the clutch pedal squeaks and how to get rid of it.
I’ll say right away that the creaking of a pedal, whether it’s a clutch or a brake, in most cases does not affect its functionality and, by and large, is a common irritant that infuriates many motorists. Creaking or grinding of pedals rarely indicates serious damage, but before you give up on it with the words “I still have nerves of iron,” I recommend making sure that the problem is really not worth attention.
The box on Vesta howls. Is it a box? Negative post with a happy ending
For a long time I was tempted to start eliminating the howling of the manual transmission in 2nd and 3rd gear. It's not that it's loud - it's just there.
I went to the official service center (AGAT, Nizhny Novgorod, Komsomolskoye Shosse) and complained that a characteristic “trolleybus” sound was heard when driving. The problem is quite common and, alas, cannot be completely solved - this is a design feature of the Vesta box. You can reduce the noise level by replacing the standard semi-synthetic gear oil with a higher quality synthetic one (the manufacturer recommends ZIC). The cost including work is 4,300 rubles, including washing and removal/installation of protection.
Coincidentally, I had this amount of money with me and the master was free. Well, I think it was not! I gave the car back and an hour later it was returned to me. I started it, drove off, and still howled. Nothing has changed at all! I just noticed that after some time the gears began to shift more easily and clearly. But in general the result is this:
4300 rubles down the drain!
I really want to hope that the car was happy about such a nice thing suddenly falling on it as an unscheduled oil change in the box, but it didn’t make me any happier. The only plus is that the gears have become easier to engage, like on a foreign car.
And after I paid 4,300 rubles, I noticed purely by chance that the howl was coming not from the box, but from the engine! Moreover, it manifests itself in the range from 1500 to 2500 rpm - both in neutral and with the clutch depressed. The hum peaks at approximately 2000 rpm - that is, in regularly used driving modes - 40 km/h in third gear, 60 km/h in fourth, 80 km/h in fifth.
After googling, I found out that I’m not the only one having the problem. Moreover, not only VAZ cars. Judging by auto forums, the most likely cause of the “trolleybus” howl is a overtightened timing belt.
I drove to the dealer (Agat, Nizhny Novgorod) and explained the situation. The technician listened to the car and admitted that there was sound. Moreover, this situation occurs in almost every second car. He gave a recommendation - drive and not bother until the next maintenance. If the sound gets stronger, come for diagnostics.
Updated 04/04/2019
I went to another official (Unicor Dzerzhinsk) - they took the car for diagnostics, listened for a long time, but again found nothing (there is a suspicion that they weren’t even looking!). They say that half of Vest makes such sounds as a “resonance phenomenon”. To which I replied that in this situation, the second half of West is NOT publishing it and I want mine not to publish it either. He also hinted that this engine has been studied inside and out by everyone, and if they are officials, they should generally be able to assemble it with their eyes closed and know what can howl where and how. They promised to take this issue under control and call back. I am waiting for a call.
Taking the opportunity, I changed the oil (mileage 20 thousand km), changed the car for the summer) and ordered a warranty replacement of the front stabilizer - it creaked in cold damp weather.
Updated 04/06/2019
They actually called back! There was a call from the dealer's quality service. They called to find out if I was happy with the way they changed my oil, I replied that there were no complaints about the oil, but the problem with the sound of the engine was not solved. They promised to sort it out.
Updated 04/07/2019
To the howl of the engine at 1500-2000 rpm was added an extraneous sound at idle - something howling, rattling, droning at mid-range frequencies. If you increase the speed a little, the sound disappears, but at 1500 a “trolleybus buzz” appears, which turns into a squeal as the speed increases. The sound comes from the drive belts.
The dealer called and said that the stabilizer had arrived for a warranty replacement. Once again I will hint that the sounds made by the engine are something not normal.
Updated 04/08/2019
I took the car to Unicor in the evening. The main task is a warranty replacement of the front stabilizer. Secondary - to understand the causes of extraneous noise at idle and squealing in the range of 1500-2500 rpm. They promised to call within the next day and report the results.
Updated 04/09/2019
They called from Unicor. They replaced the stabilizer and were happy to report that they had found the cause of the engine noise - they had tightened the timing belt tensioner pulley. How many times have they told the world - there are plenty of videos on Youtube and discussions on car forums, but... the hedgehog is a proud bird, if you don’t kick it, it won’t fly! The problem was fixed under warranty.
But what is especially pleasing are the words of the inspection master from Agat (Nizhny Novgorod) that the belt, by definition, cannot be tightened, because it has an automatic tensioner.
Video compiled from recordings from the recorder before and after adjusting the timing belt tension:
Signs of clutch failure
The occurrence of malfunctions in the Vesta clutch mechanism is most often associated with improper operation (inexperience of the driver, aggressive driving style), an initial defect in the part, or breakdown of other components interacting with it. Of course, you will immediately notice problems with the clutch - the car will begin to behave differently:
- Gears are difficult to shift/do not work at all;
- Pedal too soft/hard;
- The car jerks;
- The device is activated in the upper position of the pedal.
There can be many reasons for this behavior of Vesta, and not all of them are related to the intermediate part between the internal combustion engine and the gearbox. Often the problem comes from the fluid system. There may be a malfunction of the brake master cylinder, clutch slave cylinder, damaged hoses, a simply low DOT4 level or an air lock. Such problems (especially problems with the cylinder of the unit) have exactly the same effect as the failure of the entire unit. The clutch consists of a housing cast together with the drive/pressure plate (basket) and the driven disc. The release bearing of the Lada Vesta acts on the petals of the basket, which, in turn, with the help of damper springs, press the inner disk away from the flywheel - the clutch opens. The bearing moves either under the influence of the hydraulic pedal drive (manually) - manual gearbox, or from the actuator (automatically) - manual gearbox. These parts can fail: more often - the release mechanism, less often - the basket body. Let's take a closer look at the most common “breakdowns”.
Diagnosis of bearing failure
A high level of rustling noise when the clutch pedal is released, starting at approximately halfway through the pedal's full travel (at this moment the input shaft and gearbox gears begin to rotate). In this case, the most likely problem is the front bearing of the input shaft, less often - the rear one.
.
For vehicles with a cable-operated clutch release or a side-mounted clutch slave cylinder, you can additionally check by forcibly moving the clutch release clutch behind the fork from its connection with the pressure plate petals. If the car has a cable-operated clutch release, then to do this it is necessary to remove the tip of the cable from the fork and, using slight force on the fork, move the clutch away from the pressure plate to a distance of no more than 1 cm (act in the direction of the engine) and evaluate whether changes have occurred in noise level. If the car has a side-mounted clutch slave cylinder, then by acting on the fork, move the clutch away from the pressure plate (act towards the engine), in this case it will be necessary to overcome the force of pressing the cylinder rod, and evaluate whether there have been changes in the noise level. If there are no changes, then the fault is related to the gearbox bearings.
.
Attention!
When retracting the fork, apply a little force, otherwise there is a risk of breaking the thrust protrusions on the clutch release clutch and the fork may disengage with the clutch.
To determine clutch bearing noise
(release bearing) for vehicles with AMT (Vesta, XRAY, Kalina, Granta, Priora) it is necessary:
- adjust the position of the clutch release mechanism actuator according to the relevant technological instructions (download for XRAY, Vesta, Grant, Kalina, Priora, Niva 4×4). ;
- start the engine, assess the noise level and whether there are any comments. Qualify the nature of the noise. It must be taken into account that on AMT vehicles, when starting the engine, the clutch is open (similar to the situation with the clutch pedal fully depressed);
- for cars with new modifications of the KURKP software - move the selector lever to the “N” position, wait 1-1.5 minutes until the clutch closes. At the same time, the overall noise background from the operation of the car will change, as the rotation of the input shaft and gearbox gears will begin. If the car has software without this function, then you can close the clutch using DST or Grad-X in the relevant sections on controlling the clutch release mechanism actuator. Based on the nature of the noise change when the clutch is closed, determine the source of the noise.
Source