Replacement of camshafts on the 16-valve VAZ-2112 engine occurs when they wear out and the support journals wear out. Most often this happens when the time for a major overhaul of the power unit or cylinder head passes. This is a rather complicated procedure, but you can really do it yourself.
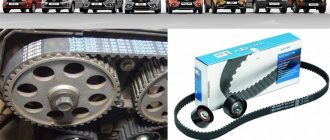
The video below shows the installation of camshafts and split gears on a 16-valve engine of the VAZ family
The video material will tell you how to replace camshafts on a VAZ-2112 16 valves, and give some recommendations and advice.
Advantages of a 16-valve engine
The VAZ 2112 with 16 engine valves has a number of advantages over cars of the same brand, but with fewer valves. Its main advantage is the ability to achieve maximum engine power, regardless of the type of the latter. (see picture).
For comparison:
- VAZ 2112 with a volume of 1500 cubic cm, has 77 horsepower.
- A VAZ 2112 of the same volume can have a power of up to 90 horsepower.
This difference is possible due to the fact that in the second case the filling of the cylinders with the warm-air mixture is much higher. In addition, the advantages of the 16-valve engine:
Better performance of the cooling system and, as a result, greater strength of the unit. Possibility of increasing engine knock resistance
This is especially important if low quality fuel is used. With 16 valves, the intake and exhaust tracts are located on opposite sides of the cylinder head, which facilitates their installation, repair, etc.
What is a throttle cable
By throttle cable, car enthusiasts understand the throttle cable, which plays an important role in the proper operation of the vehicle. The throttle valve is a structural part of the fuel intake system into an internal combustion engine. Its main function is to regulate the amount of air supplied to the engine for the air-fuel mixture. This damper is located between the air filter and the intake manifold. If the throttle valve opens, the pressure in the intake system is compared to atmospheric pressure. If it is in the closed position, then the pressure drops to vacuum. This action of the throttle valve is necessary to enhance the operation of the vehicle’s braking system and to ventilate the adsorber in the gasoline vapor recovery system.
Removing camshafts
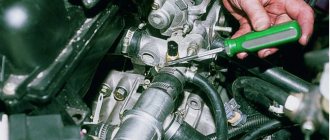
To begin with, as with any repair operations, it is necessary to remove the “minus terminal” from the battery. Remove the timing belt cover. Now you need to remove the valve cover
Please note that the bolt tightening order must be followed during assembly. Disconnect the wires of the emergency oil pressure sensor, and then unscrew it. Using a socket wrench or 8mm socket, unscrew the 20 bolts securing the camshaft cover. We dismantle the camshaft bearing housing. Now, there is free access to two plugs that are located on the rear side of the cylinder head. We take them out. We take out the intake camshaft. We take out the exhaust camshaft. We press the seals out of the camshafts.
Tuning a car VAZ 2110, 2111, 2112 Ten - Camshaft
Lada 2108 Raketa Logbook repair of the camshaft bed of the cylinder head of a VAZ 2112 or shesnar
Remove the camshaft gear pulley (see Composite camshaft drive pulley for an eight-valve engine).
To avoid losing the pulley key, remove it from the camshaft groove.
Using a 10mm wrench, unscrew the nut securing the rear timing belt cover.
Using a 10mm wrench, unscrew the two nuts securing the throttle cable bracket to the receiver...
...and remove the bracket.
Using a Phillips screwdriver, loosen the clamps securing the two crankcase ventilation outlet hoses and remove the hoses from the valve cover fittings.
Using a Phillips screwdriver, loosen the clamp securing the crankcase ventilation supply hose and remove the hose.
Using a 10mm wrench, unscrew the two nuts securing the valve cover.
Remove the valve cover.
Rubber sealing bushings are installed in the valve cover holes.
Remove the valve cover gasket.
Using a 10mm wrench, unscrew the two nuts securing the ends of the ground wires to the studs of the cylinder head plug and remove the wires from the studs.
Use a 10mm wrench to unscrew the two nuts...
...and one bolt securing the plug.
We remove the plug...
...and its O-ring.
Using a “13” wrench, evenly in several steps (until the pressure of the valve springs is removed), unscrew the ten nuts securing the camshaft bearing housings.
Remove the front one from the studs...
...and the rear camshaft bearing housings.
Moving the rear timing belt cover slightly away from the cylinder head, remove the camshaft.
Remove the camshaft oil seal.
We install the tuning camshaft in the following sequence.
We clean the mating surfaces of the cylinder head and bearing housings from sealant and oil.
Lubricate the bearing journals and camshaft cams with engine oil. We place the shaft in the cylinder head supports so that the cams of the first cylinder are directed upward (the figure shows the position of the cams of the first cylinder when the camshaft is placed in the cylinder head supports).
On the surfaces of the cylinder head that interface with the bearing housings in the area of the outer supports, apply a thin layer of sealant (arrows).
We install the bearing housings and tighten the nuts securing them in two steps.
Pre-tighten the nuts in the sequence shown in the figure until the surfaces of the bearing housings touch the cylinder head.
In this case, it is necessary to ensure that the installation sleeves of the housings fit freely into their sockets. We finally tighten the nuts to a torque of 21.6 N.m (2.2 kgf.m) in the same sequence.
After tightening the nuts, carefully remove any remaining sealant.
After lubricating the working edge of the new oil seal with engine oil, press it into place with a suitable piece of pipe.
We install the camshaft timing belt and timing belt. (See Composite camshaft pulley for eight-valve engine).
Turn the crankshaft clockwise until the timing marks on the camshaft sprocket and the rear timing belt cover align.
Then we turn the crankshaft another 40-50° (2.5-3 teeth on the camshaft pulley).
In this position of the shafts, we use a set of feeler gauges to check the gaps at the first...
... and the third camshaft cam.
The clearance between the camshaft lobes and the washers should be 0.20 mm for the intake valves and 0.35 mm for the exhaust valves. The clearance tolerance for all jaws is ±0.05 mm.
If the gap differs from the norm, then install a device for adjusting the valves on the studs of the camshaft bearing housings.
We introduce the “fang” of the device between the cam and the pusher.
We rotate the pusher so that the slot in its upper part faces forward (along the direction of the car).
By pressing the lever of the device, we recess the pusher with the “fang”...
...and install a clamp between the edge of the pusher and the camshaft, which holds the pusher in the lower position.
Move the lever of the device to the upper position.
Using tweezers, pry the adjusting washer through the pusher slot and remove it.
If you do not have a device for adjusting the valves, you can use two screwdrivers.
Using a powerful screwdriver, leaning on the cam, press the pusher down. By inserting the edge of another screwdriver (with a blade at least 10 mm wide) between the edge of the pusher and the camshaft, we fix the pusher.
Use tweezers to remove the adjusting washer.
Camshaft replacement process
In order to install camshafts on the VAZ-2112 16 valves, they must first be dismantled. Like any spare part, they are installed in the reverse order from disassembly.
So, let's look at the step-by-step process of removing and installing the intake and exhaust camshaft.
Removing camshafts
To begin with, as with any repair operations, it is necessary to remove the “minus terminal” from the battery.
Remove the timing belt cover.
Now you need to remove the valve cover
Please note that the bolt tightening order must be followed during assembly.
Disconnect the wires of the emergency oil pressure sensor, and then unscrew it.
Using a socket wrench or 8mm socket, unscrew the 20 bolts securing the camshaft cover.
We dismantle the camshaft bearing housing.
Now, there is free access to two plugs that are located on the rear side of the cylinder head. We take them out.
We take out the intake camshaft.
We take out the exhaust camshaft.
We press the seals out of the camshafts.
Installation of camshafts
Now that everything is removed, you can proceed to installing new camshafts on the car:
- Lubricate the cams and shaft support journals with engine oil.
- We place each camshaft in its seat. It is worth considering that camshafts are not interchangeable, so they should not be confused.
- Apply sealant to the surface of the cylinder head and camshaft bearing housing.
- We put the camshaft cover and cylinder head in place. Tighten the bolts evenly to a certain torque.
- We press new oil seals and install the rear plugs.
- We collect the remaining parts that were removed from the car.
Choice
Cylinder head camshafts for the VAZ-2112 are produced only by the manufacturer, so there is no need to look for analogues.
Original catalog numbers: inlet - 2112-1006015, outlet - 2112-1006014. Each camshaft costs an average of about 3,000 rubles.
Nuances
When installing the bearing housing and cylinder head, do not apply sealant that contains silicone. This is due to the fact that the motor heats up, and accordingly the sealant heats up, which releases vapors that can get into the cylinders and further through the system. You should use a sealant whose instructions or packaging indicate that it is safe for the oxygen sensor.
When applying sealant to cavities, you should not apply a lot of it, because when tightening the bolts, it can get inside and this will lead to clogging of the oil channels, and therefore there will be no lubrication. The lack of lubricant will lead to increased wear of parts that will quickly fail.
Replacing camshafts on a VAZ 2114 with your own hands
Camshafts, like other mechanisms and components of a car, determine the quality of engine operation. This material will tell you how to determine the malfunction of the shafts, how to replace the camshafts on a VAZ 2112 16 valves, and what needs to be prepared for this.
The pulleys of the 16-valve VAZ 2112 must be replaced when they are worn out or have mechanical damage. In particular, we are talking about:
Lada 2112 with 16 cl internal combustion engine
If some kind of extraneous knock appears in the valves while the engine is running, it is usually caused by one of these damages. If you have recorded a reduced pressure of the engine fluid in the system, this may indicate an increase in the clearances in the bearings.
To do this, in order to eliminate this malfunction, it is necessary to grind and restore the pulley bearing journals. You should also enlarge the grooves through which the engine fluid flows. This is done so that the lubricating fluid, after the next grinding, lubricates the internal combustion engine elements. As for the necks, after grinding they should be polished with green GOI paste.
Step-by-step instructions for a 16 valve car
Required Tools
You need to prepare:
- new replacement parts (exhaust and intake timing pulleys);
- 8 mm socket wrench;
- sealant.
New sports shafts Socket wrench “8” Glue sealant
Stages of work
To correctly carry out the process of replacing exhaust elements, we suggest you use the instructions prepared specifically for our users. This manual is also suitable for those who want to replace exhaust camshaft seals, sensors or plugs.
- Open the hood of your 16 valve VAZ 2112. Remove the protective cover of the timing belt.
- After this, it is necessary to remove the cylinder head cover, as well as the engine fluid emergency pressure monitoring device (sensor). The sensor is removed so that it is not damaged during the work. You can also remove the sensor wire tip.
- Once the sensor is removed, you need to remove all the screws that secure the camshaft bearing housing. This is done using an “8” socket wrench. All bolts should be unscrewed evenly, not one at a time.
- After this, dismantle the bearing housing of the exhaust camshafts of the 16 valve VAZ 2112. It should be noted that the housing is dismantled with spark plug wells. They need to be pulled out of the case.
- Now regarding the plugs for technological holes. During the camshaft replacement procedure, motorists often lose the plugs. The plugs are small round shaped parts.
The plugs need to be removed from their installation locations in the cylinder head; there are two plugs in total, and they are located in the area of the rear ends of the camshafts.
Once these items are removed, place them separately. It's better not to lose the plugs.
Tightening torque for VAZ-2112 camshaft bed 16 valves: order
Many motorists have heard that it is necessary to correctly tighten the threaded connections on the 16-valve VAZ-2112 engine, but they have never done it themselves. Thus, the tightening torque is determined by the manufacturer and is indicated in the service repair manuals.
Video about installing camshafts and split gears on a 16 valve engine
https://youtube.com/watch?v=rR42oOIgHEE
The video will tell you how to properly tighten the threaded connections on the camshaft beds
Torque and sequence of tightening the camshaft bed
Camshaft cover tightening sequence
Correct tightening of the camshaft bed, as well as other parts of the cylinder head, determines the normal functioning of all components and assemblies. So, in order to tighten threaded connections, a standard tightening pattern and a torque wrench are used.
Before installing the bolts in place, they must be washed thoroughly and lubricated with silicone grease.
In order to properly tighten the bolts, you need to know the sequence. It starts from the middle part and gradually moves directly to the edges. The detailed sequence can be seen in the photo below.
Tightening diagram for each camshaft bed bolt with numbering
As for the tightening force itself, it is 8.0-10.0 Nm. After the bed is installed on the block head, the connection bolts are tightened by hand or without much force using a ratchet with a head.
We tighten all the bolts by hand, but do not tighten them
When all the bolts are in place, you need to take a torque wrench and tighten them according to the standards in the order indicated above.
Torque wrench for tightening threaded connections
In what cases is it necessary to tighten the camshaft bed?
The bolts are tightened. Marked with arrows
Tightening the camshaft bed will be necessary if it was previously dismantled for restoration and repair work. So, in what cases will you need to remove the bed, let’s look at it in more detail:
- Replacing camshafts, lifters or valve seals.
- Overhaul of the block head.
- Engine repair operations.
- Replacement of individual elements of the cylinder head.
Consequences of improper bed tightening
The consequences of improperly tightening the camshaft bed include the following:
- Oil leakage due to a gap or loose connection.
- Passing air inside the cylinder head.
- Malfunction of the engine or cylinder head.
- Ingress of foreign objects (water, dirt, dust).
All these factors can negatively affect the performance of the cylinder head and main power unit.
The torque and sequence of tightening the camshaft bed on the 16-valve VAZ-2112 engines must be correct, since this factor affects the operation of the cylinder head and the engine as a whole. Thus, incorrect implementation of the procedure can lead to more serious consequences. If the car enthusiast is not able to do this on his own, then it is necessary to contact a car service, where everything will be done quickly and efficiently.
Replacement of camshafts on the 16-valve VAZ-2112 engine occurs when they wear out and the support journals wear out. Most often this happens when the time for a major overhaul of the power unit or cylinder head passes. This is a rather complicated procedure, but you can really do it yourself.
The video below shows the installation of camshafts and split gears on a 16-valve engine of the VAZ family
https://youtube.com/watch?v=rR42oOIgHEE
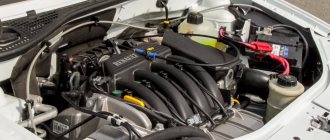
Engine VAZ-21127 features
The VAZ-21127 engine is one of the latest developments of the Volzhsky Automobile Plant. Today we will talk about its main differences from other VAZ engines, and also share our impressions of driving a car with this engine.
The VAZ-21127 engine is based on the “Prior” 16-valve VAZ-21126 engine, but has the following differences from it:
- maximum power increased to 106 hp. (VAZ-21126 has 98 hp)
- torque increased from 145 to 148 Nm
- Instead of a mass air flow sensor (MAF), an absolute pressure sensor (MAP) and an air temperature sensor (ATS) are installed
Characteristics of the VAZ - 21127 engine
Displacement - 1596 cc.
Maximum power - 78/5800 kW/rpm.
Maximum torque - 148/4000 Nm/rpm.
Maximum engine power - 106 hp.
Changes in the VAZ-21127 engine
The main change in the VAZ-21127 engine is the appearance of a controlled air intake system.
It is a new receiver in which controlled dampers are installed that regulate its volume depending on engine speed. At low speeds, air enters the engine through a long channel, at high speeds through a short channel, which should improve the elasticity of the engine. In essence, this is a conventional inertial supercharging system.
Impressions from the operation of the VAZ-21127 engine
For the first time, the VAZ-21127 engine began to be installed in the spring of 2013. At the moment it is installed on Kalina, Grant and Priora cars.
We tested this engine paired with a manual transmission on the new Lada Kalina, as well as with a robotic transmission on the Lada Priora.
What can you say about this engine? Indeed, the engine accelerates the car more readily. This is especially noticeable at low speeds, up to 2.5 thousand. Where a 98-horsepower engine accelerates rather sluggishly, a 106-horsepower engine allows you to maintain a good acceleration rate. But at high speeds, over 4 thousand, the differences are no longer so noticeable.
By the way, after abandoning the mass air flow sensor, the problem of floating speed at idle, which many owners of domestic cars suffered from, practically disappeared.
Causes of valve malfunction on VAZ 2110, 2112
The main reason is that the timing belt has broken. The consequences that this can cause are the bending of these parts. Although the design of the 8-valve engine on the “tens” does not imply that the valves meet the pistons at the so-called dead center during breaks. But on the 2114(1.3) engine and 16-valve engines 2112(1.5), 2114(1.5) this leads to the inevitable “death” of the valves and quite expensive repairs. Another quite trivial reason is wear of the valve stem, which must have certain dimensions, measured with a micrometer.
If the valve stem during measurement is less than 7.97 millimeters, then the valve must be replaced. You also need to change the valve if it is burnt out or cracked.
Replacing VAZ 2110, 2112 valves is a very responsible matter and requires certain skills from the employee. However, no special equipment is needed. Therefore, a person who is familiar with the tool and has an idea of the design of mechanisms can do it with his own hands, in the garage.
Engine 2112 characteristics
Which is better Lada Priora or Lada Kalina
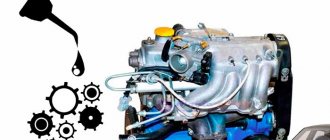
Years of production - (1997 - 2004) Cylinder block material - cast iron Power system - injector Type - in-line Number of cylinders - 4 Valves per cylinder - 4 Piston stroke - 71mm Cylinder diameter - 82mm Compression ratio - 10.5 Engine displacement 2112 - 1499 cm cube Engine power 2112 – 93 hp. /5600 rpm Torque - 128 Nm / 3700 rpm Fuel - AI95 Fuel consumption - city 8.8 l. | track 5.5 l. | mixed 7.2 l/100 km Oil consumption - 50 g/1000 km Weight of the VAZ 2112 engine - 127 kg Overall dimensions of the 2112 engine (LxWxH), mm - Oil for the VAZ 2112 engine: 5W-30 5W-40 10W-40 15W40 How much oil in engine 2112: 3.5 l. When replacing, pour 3.2 liters.
Resource: 1. According to the plant – 150 thousand km 2. In practice – 250 thousand km
TUNING Potential – 400+ hp. Without loss of resource - up to 120 hp.
The engine was installed on: VAZ 21103 VAZ 2111 VAZ 2112
Consequences of untimely shift
If the timing belt is not changed in a timely manner, it may break. While driving on the highway, this can lead to an accident. If the accident was avoided, you will have to spend money on a tow truck to deliver the car to the repair site. If the belt breaks, the movement of the camshafts and valves will stop, but the movement of the crankshaft will continue, which may result in damage to the valves as a result of the impact of the pistons. Repair may be limited to replacing the timing belt and rollers. But only if an 8 valve engine or 16v 1600 cc is installed. cm, that is, safe from the point of view of bending the valves (21114, 21124 or simply 124).
If the valves are bent, a major overhaul of the engine will be required, which will cost from 20–30 thousand rubles. In some cases, it will be cheaper to purchase a new engine, although this will lead to other problems - registration. Based on the above, it is much easier, safer and cheaper to change an inexpensive part on time.
The video shows the process of replacing the timing belt on a VAZ 2112. Filmed by the ExpertR channel.
Process Features
Each engine has its own torque, as does the pin tightening pattern. The indicator of this moment is influenced not only by the type of engine, but also by other factors that you need to know if you decide to carry out this procedure yourself.
The same factors:
- how well the pin holes are lubricated and the very condition of the elements;
- the quality of the bolts plays a big role - bad or old ones may not survive tightening;
- if the thread or the pin itself is deformed, it is better not to tighten it. Because after a short period of time, all elements that do not meet operating standards will fail.
The most urgent need for the tensioning procedure occurs when dismantling the cylinder head, as well as when reinstalling it.
Some car enthusiasts tighten very elongated bolts in 4 stages. In this case, at the second step the torque is 70-85 N*m, which is absolutely unacceptable when working with a Lada Priora engine with 16 valves.
The correct sequence of tightening the keys is very important. Only in this case will the head correctly perform its primary and secondary functions.
Before installation, be sure to clean all threaded bushing holes. Then all the bushings are placed in place, and a gasket is placed on top. All metal elements must be free of grease.
No sealants or other lubricating oils are used during gasket installation.
Description of the procedure for replacing the timing belt VAZ 2110, (2112) 16 valves
Former flagship of the Russian automobile industry VAZ 2110 with a 1.5 16 valve engine. Scheduled replacement of the timing belt 30,000 km after the last replacement. The autopsy showed that if they had not changed it today, then tomorrow there would have been more work for our mechanic. In general, we recommend that all customers check the condition of the belt at least once every 5,000, or once a year. But knowing the quality of our spare parts, more often is better. On this engine, if the belt breaks, almost all the valves bend. The article is also relevant for VAZ 2112))
We look, remember and don’t let it get to that point.
The patient became five millimeters narrower and generally looked very bad. We send him to the honor board.
And here is the hero of the occasion himself.
We remove the absorber and power steering reservoir so that they do not interfere in the future.
We loosen the bolt by seventeen, the tension roller of the service belt and remove the last one. It will not be possible to remove it completely because the engine mount is in the way. If the belt requires replacement, you will have to unscrew the engine mount.
Remove the tension roller. We unscrew the bolts securing the upper protective cover; they are hexagonal.
Remove the right wheel, plastic mudguard and drain the antifreeze.
We see the crankshaft pulley. Using its bolt, clockwise, rotate the crankshaft until the marks on the camshaft pulleys and the timing belt protective cover match.
Markings on the left exhaust camshaft. The mark on the protective cover is highlighted in red.
Likewise for the intake camshaft. He's on the right. Its pulley has an inner ring for the phase sensor, so it is very difficult to mix up the pulleys.
Remove the crankshaft pulley. Let's lock the crankshaft with the help of a friend. We put him in the car and force him to turn on fifth gear and press the brake all the way. And at this time, with a slight movement of your hand, unscrew the crankshaft pulley bolt. Remove it and the lower protective cover.
We see that the mark on the sprockets and the slot on the ebb of the crankshaft cover coincide.
Loosen the seventeen bolts of the tension and idler pulleys and remove the timing belt. Then the videos themselves. We change them anyway.
We lock and unscrew the camshaft pulleys and remove them. Remember that the right camshaft has a pulley with an inner ring for the phase sensor. The picture should look like this.
We unscrew everything that holds the protective plastic cover and remove the latter. Unscrew the three bolts holding the pump. They are hexagonal.
The pump for a sixteen valve engine is slightly different from the usual for an eight valve engine. It has a small threaded ear for attaching the protective casing.
Lubricate the gasket with a thin layer of sealant and put the pump in place. Tighten the fastening bolts. We put the protective cover in place. We make sure that he sits in his place, otherwise he will rub the belt. If everything is in order, tighten everything that holds it and install the camshaft pulleys and new rollers.
We check that the marks on the camshafts and crankshaft match. We install a new timing belt. If there are no directional arrows, put it so that the inscription is read from left to right.
The right, or descending, branch of the belt should be tight. You can turn the right camshaft clockwise a few degrees, put on the belt and turn it back. In this way we will stretch the descending branch. The tension roller has two holes for a special key. You can find it in any auto store. The issue price is 60 rubles. To tension the timing belt, insert a special key and turn the roller counterclockwise. Since there is a lot of controversy about tensioning the timing belt, we will write this: a tensioned belt should not have a sag between the camshafts of more than 5 mm when pressed and 7 mm on the longest branch (specially experimented). Remember: an overtightened belt reduces the service life of the pump, and an undertightened belt can lead to cylinder head repair. (photo below)
We check all the marks. We turn the crankshaft two turns and check the marks again. If the pistons and valves do not meet and the marks coincide, then accept my congratulations. Then we put everything back in place in the reverse order of removal. Don't forget to tighten the bolts. We tighten the service belt roller with the same wrench as the timing belt tension roller. Fill with antifreeze and start the car. We wish the belt many years of service, but don’t forget to check it periodically; after all, it was made in Russia.
Other cases in which dismantling of the cylinder head is required
Of course, it is not necessary to remove the cylinder head for every breakdown. This is only necessary if major repairs are needed. Such “major” cases include:
- Gasket wear.
- Formation of carbon deposits on parts.
- Valve deformation.
- Need to replace guide bushings.
- Failure of the camshaft, etc.
Of course, repairing it yourself or through a service in any case involves certain financial costs. To ensure smooth operation of the engine, regular diagnostics of the cylinder head are necessary. It is recommended to use high-quality fuel. In addition, try to prevent the car from overheating - because of this, the cylinder head may lead.
If some points remain unclear to you, then you can visually familiarize yourself with the process of replacing valves by watching the video:
HomeCarsVAZVAZ 2112
How to replace valves on a VAZ-2112 (21120) engine. One of the current methods is to remove the cylinder head
There is nothing special, but it is important to grind the valves in during the process. This applies to all VAZ engines
When the throttle cable needs to be replaced
How to determine the moment when the VAZ-2110 throttle cable requires replacement? Experts recommend paying attention to the following points in the operation of this vehicle part:
- it is not possible to regulate the throttle valve drive;
- when pressing the accelerator pedal, the damper cannot open and close fully;
- the metal part of the cable began to “shag” (this can be seen visually when checking the internal parts of the car);
- When the throttle valve is operating, the gas cable constantly gets stuck.
If you find one of these problems in the operation of your vehicle, then you need to immediately buy a new throttle cable and replace it.
Disassembling the timing belt
The main goal is to remove two camshafts. To do this you need:
- Remove the minus terminal.
- Remove all wires from the spark plugs.
- Disconnect the spark plugs from the coils.
- Remove the ignition module and the hose responsible for crankcase ventilation.
- Remove the bracket securing the injector wiring. It is screwed to the cylinder head cover. The same actions must be performed with harness bracket No. 2.
- Remove the receiver.
- Cover the entire intake manifold with a cloth.
Next you need to disconnect the phase sensor located under the timing pulley. You also need to disconnect the pressure sensor located near the removed bracket. You can take a 17mm wrench and, without touching or turning the pulleys, loosen the mounting screws.
To dismantle the shaft, several steps must be taken:
- Remove the cylinder head cover.
- Unscrew 20 bolts.
- Take two 15mm wrenches and unscrew the nuts on the upper rod. The same actions must be performed with the nuts located on the nut bracket, but you need a 13mm wrench.
- Remove the bearing housing.
- Remove the camshafts.
How to change valves on VAZ 2110/2112 (instructions)
- Replacement must be done in a garage or closed box, where there is no wind and dust.
- Turn off the power to the car and disconnect the battery.
- Drain the engine lubricant and cooling fluid.
- We dismantle all the attachments: hoses, fuel supply, vacuum system, we get wide access to the parts that need to be worked with.
- Remove the cover from the main cylinder block (cylinder head).
- Remove the casing and belt.
- We unscrew the bolts that secure the cylinder head.
- After removing the cylinder head, we arm ourselves with a special puller (if it’s not available, ask your neighbors in the garage - it’s really more convenient to do the work with it). We remove the camshaft and disassemble the pushers from the cylinder head. We attach the removal device to the studs. And put a stand under the plate and take out the fastener crackers. We remove the plate along with the springs, as well as the stop plates located under the springs (before that, we also remove the valve seal).
- We remove worn out or damaged valves.
- The next step is to replace the guide bushings. It is better to use a special device (screw version) because when struck there is a chance of damaging not only the head, but also the landing site. We press out the guides and treat the new ones with lubricant.
- We press each bushing into its proper place. They have special locking rings installed on them, so we press them in until there is a characteristic click, which means that the part has found its place. Everything should happen without strong tension, which could damage the bushing. If things get tough, don't rush. When the guide is pressed in, it is adjusted to the required fit dimensions (we use a reamer 8 mm in diameter, install it in the guide and scroll).
- We blow air through the holes, removing any foreign debris. We take measurements of the guide holes. We insert new valves.
- If you notice that the valve does not fully adhere to the seat, you need to grind the valves. It is produced on special machines. However, it should be remembered that you should not grind the valve too much, and after grinding it must be thoroughly washed. An ideal grind is considered to be one in which the working visible strip is 1 millimeter.
- We assemble the cylinder head in the reverse order and connect the fuel and air supply and cooling systems. We connect the battery.
The valve guides must be pressed in with the retaining rings in place. The intake valve guides are shorter than the exhaust valve guides. On the inner surface of the bushings there are spiral grooves for lubrication of the valves: for the intake valve guide bushings - up to half the length of the hole, for the exhaust valve bushings - along the entire length of the hole.
Installation and dismantling procedure
The part called the cylinder head is attached to the cylinder block with 10 screws. They are unscrewed with a 10mm socket wrench. The procedure for dismantling the cylinder head is shown in the first photo.
Reversal sequence (1-10)
The standard screw length is 93 mm. If the screw has been pulled out to at least 95 mm, it is replaced with a new one (AvtoVAZ requirement).
During installation, a different scheme is used (photo 2). Each screw is lubricated with machine oil, otherwise the efforts will be reduced to nothing.
The order of tightening the head is indicated in this photo
Tightening torque for cylinder head cover bolts
For VAZ-2112, the cylinder head tightening torque is standardized:
- First pass – the force is 20 N*m;
- Each screw is turned 90 degrees to the right;
- Wait 20 minutes, then turn the screws another 90 degrees.
At first the effort is very small. But at “step 3” it will be difficult to cope with the work. Use the lever.
Why are guide bushings needed?
Before installing the cylinder head, perform the following steps: clean the threaded holes, as well as all holes for the bushings (photo 1). Each bushing is installed in place, and only then a gasket is placed on top.
Everything is ready to install the cylinder head
Metal parts adjacent to the gasket must be degreased. We looked at the cylinder head tightening diagram, but the cylinder head itself must be installed correctly:
- We place the cylinder head on the cylinder block;
- By moving the part in different directions, we ensure that the bushings fit into the recesses.
After “step 2” the screws can be tightened.
Sealant
No sealing compounds are used when installing the gasket! Solidol, CIATIM and other lubricants are not even needed. The main thing is that the metal must be degreased. And the cylinder head gasket must be new.
Hi all.
Last fall I noticed drops of oil in cylinder 4 and leaks around the entire perimeter of the valve cover.
I've been through the winter and it's time to fix the problem. I change everything together as usual. What we need:
1) Anaerobic sealant "Locktite" 20 ml - 150r2) Camshaft oil seal BRT (cat. number 21080-1005034-00) 2 pcs - 240r per pair 3) Camshaft plugs 2 pieces (cat. number 21120-1003290-00) - 100r pair4) Crankcase ventilation pipes for engine 21126 (21126-1014240-00 (E-gas) - thin long, 21124-1014058-00 upper small, 21120-1014056-00 lower large - 3 pieces - 250r set5) Filter " Knecht" KL23of - 150r6) Carburetor cleaner - 150r7) Intake manifold and throttle gaskets - 150r set BRT8) Oil dipstick seal (cat number 21120-1009078-00) - 30r9) Torque wrench
I don’t see any point in describing the entire process of disassembling the valve cover. There are plenty of manuals, I’ll only focus on the moments that cause difficulties
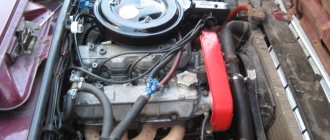
Remove the decorative cover
We remove all wires, ventilation hoses, and throttle. The receiver is secured with 2 bolts and 3 nuts. The nuts with the left bolt unscrew easily, you can crawl up. But there is a problem with the right bolt; the generator does not work.
I have a car with air conditioning, the pipes are in the way. There are two bolts near the gene; we remove them (the bolts are visible in the photo). When you remove the intake manifold, you need to bend the tubes, don’t be afraid to bend them, there are rubber inserts. Remove the generator belt, unscrew the top fastening and carefully move the gene towards the radiator with a pry bar.
Many motorists have heard that it is necessary to correctly tighten the threaded connections on the 16-valve VAZ-2112 engine, but they have never done it themselves. Thus, the tightening torque is determined by the manufacturer and is indicated in the service repair manuals.
Video about installing camshafts and split gears on a 16 valve engine
Procedure for installation and dismantling
The cylinder block is the basis for mounting the head, which is held on by 10 screws. Unscrewing is carried out with a special socket wrench - “ten”.
The photo shows the correct folding order:
- Top right corner.
- Bottom right corner.
- Top left corner.
- Bottom left corner.
- Top second from left.
- Top second from the right.
- Second bottom from the right.
- Second bottom from the left.
- Top in the middle.
- Bottom in the middle.
By strictly observing this sequence, you can avoid deformation of bolts and threads, as well as other unpleasant moments.
The design of the unit is quite complex, although at first glance it seems primitive.
The head is attached with bolts or studs to the block and closes the cylinders on top. The seating area of the upper element is very large, therefore the correct sequence of tightening the threaded connections with a specific force is very important. Previously, older car models had cast iron elements of this unit, which were easier to work with. Nowadays, softer, lighter and more ductile aluminum is predominantly used, when working with which it is very easy to damage a cylinder. Cast iron is also much more resistant to heat shrinkage and deformation, which does not yet allow us to completely abandon it.
The standard screw size in the model we are considering is 93 mm. If even one stretches even a couple of millimeters, it must be replaced immediately.
The installation sequence differs from the above order and is shown in the photo:
- Middle bottom.
- Upper lower.
- Bottom second from left.
- Bottom second from right.
- Top second from the right.
- Top second from left.
- Bottom corner left.
- Top corner left.
- Bottom corner right.
- Top corner right.
Tension torque standards:
- The force at the first stage is 20 N*m.
- Each element should be turned to the right by 90°.
- After waiting 20 minutes, you need to turn it another 90°.
The initial effort is small. But from the third stage the work becomes more difficult, so a lever is used. If you have any difficulties with the stretching process, watch the video tutorial in which everything is shown and explained in detail.
Installing a cylinder head under a turbine on an internal combustion engine is not much different from the option discussed above, but in case of inconsistencies or other problems, it is better to seek advice or help from qualified specialists.
Installation and replacement of VAZ-2112 camshafts 16 valves: photo, video
Replacement of camshafts on the 16-valve VAZ-2112 engine occurs when they wear out and the support journals wear out. Most often this happens when the time for a major overhaul of the power unit or cylinder head passes. This is a rather complicated procedure, but you can really do it yourself.
The video below shows the installation of camshafts and split gears on a 16-valve engine of the VAZ family
https://youtube.com/watch?v=rR42oOIgHEE
The video material will tell you how to replace camshafts on a VAZ-2112 16 valves, and give some recommendations and advice.
Camshaft replacement process
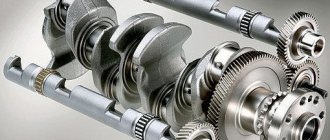
Camshafts with gears and fasteners
In order to install camshafts on the VAZ-2112 16 valves, they must first be dismantled. Like any spare part, they are installed in the reverse order from disassembly.
So, let's look at the step-by-step process of removing and installing the intake and exhaust camshaft.
Removing camshafts
To begin with, as with any repair operations, it is necessary to remove the “minus terminal” from the battery. Remove the timing belt cover. Unscrew the mounting bolts indicated in the diagram and remove the timing belt cover.
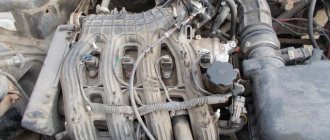
Now you need to remove the valve cover
Please note that during assembly you must follow the tightening order of the bolts. After unscrewing the fastening nuts, remove the valve cover
Disconnect the wires of the emergency oil pressure sensor, and then unscrew it. Disconnect the emergency oil pressure sensor
Using a socket wrench or 8-mm socket, unscrew the 20 bolts securing the camshaft cover. Scheme for dismantling and tightening the camshaft bearing housing bolts
We dismantle the camshaft bearing housing. Now, there is free access to two plugs that are located on the rear side of the cylinder head. We take them out. You need to be careful with the camshaft plugs; if you install them incorrectly, oil will leak out
If you don’t notice it in time, you will shorten the engine’s life or “get stuck for major repairs.”
Remove the two rear cylinder head plugs
We take out the intake camshaft. We take out the exhaust camshaft. We take out the camshafts from their seats
We press out the oil seals from the camshafts. We remove the oil seals from the camshaft. If it does not come off, carefully cut it or pry it off with a screwdriver.
Installation of camshafts
Now that everything is removed, you can proceed to installing new camshafts on the car:
- Lubricate the cams and shaft support journals with engine oil.
Lubricate the camshaft journals and cams with engine oil. - We place each camshaft in its seat.
It is worth considering that camshafts are not interchangeable, so they should not be confused. The intake camshaft is shown on the left and the exhaust camshaft on the right. - Apply sealant to the surface of the cylinder head and camshaft bearing housing.
How to apply sealant to the camshaft bearing housing cover - We put the camshaft cover and cylinder head in place. Tighten the bolts evenly to a certain torque.
- We press new oil seals and install the rear plugs.
We press new oil seals onto the camshafts - We collect the remaining parts that were removed from the car.
Choice
Cylinder head camshafts for the VAZ-2112 are produced only by the manufacturer, so there is no need to look for analogues.
Original catalog numbers: inlet - 2112-1006015, outlet - 2112-1006014. Each camshaft costs an average of about 3,000 rubles.
Intake camshaft marking Exhaust camshaft marking
Nuances
When installing the bearing housing and cylinder head, do not apply sealant that contains silicone. This is due to the fact that the motor heats up, and accordingly the sealant heats up, which releases vapors that can get into the cylinders and further through the system. You should use a sealant whose instructions or packaging indicate that it is safe for the oxygen sensor.
When applying sealant to cavities, you should not apply a lot of it, because when tightening the bolts, it can get inside and this will lead to clogging of the oil channels, and therefore there will be no lubrication. The lack of lubricant will lead to increased wear of parts that will quickly fail.
Replacing and installing camshafts on a 16-valve VAZ-2112 is not entirely easy, but it is quite possible
The main thing to ensure results is caution and following instructions. It is worth noting separately that the intake and exhaust camshafts are different and not interchangeable
On the intake there is an additional border for the phase sensor.
How to distinguish the intake camshaft from the exhaust camshaft of a VAZ-2112: photo
The camshafts of the 16-valve VAZ-2112 admit the working mixture and release exhaust gases. Unlike an 8-valve engine, where one camshaft serves for intake and exhaust, on a 16-valve engine there is a separate element for each phase. This improves not only engine performance, but also contributes to lower fuel consumption.
Photo of intake and exhaust camshafts
The intake and exhaust camshafts are indicated by arrows in the photo. The photo shows the engine with the valve cover removed.
Camshaft difference
The difference between the intake and exhaust camshafts is the presence of a groove for the phase sensor
In fact, there is no difference in the design of the exhaust and intake camshafts. There is only one reason why they are not interchangeable. There is a lip on the intake camshaft that is designed for a valve timing sensor.
Some car enthusiasts install sports camshafts instead of standard factory camshafts, which increase power. This is where the significant difference begins.
The intake camshaft has a larger cam size, which in turn opens the valve not by 7.6 mm, but by 13.2. This allows the engine to increase power characteristics. So the exhaust itself has slightly different characteristics - the valve opens not by 7.6, but by 10.8 mm, which significantly adds power.
Differences in sporty camshafts
conclusions
The camshafts of the 16-valve engine on the VAZ-2112 do not differ in design features, except that an additional edge is machined on the intake shaft for the camshaft (phase) sensor. If the intake and exhaust elements are swapped in places, this will lead to a violation of the valve timing, and if the engine operates in this mode for a long time, the owner will inevitably face a major overhaul of the cylinder head, at best.