I bought a new MMS inexpensively for 2,500 rubles, they shared the phone number on the site. I wanted a new one with navigation, but the price kills all desire to buy it.
On the right side of the radio there is a USB connector, which is designed to connect:
1. USB Flash card (USB 2.0 and 3.0 up to 64 GB); 2.USB Flash player with a memory capacity of at least 1024 MB; 3.USB HDD with FAT32 file system; 4.Mobile phone (only in charging mode).
On the left side of the radio there is a slot for SD cards. SD Memory Card Slot: Supports SD, SDHC cards of 32 x 24 x 2.1mm size. SDHC up to 32 GB, SD up to 32 GB.
The file allocation table (FAT) of the connected device must be version FAT16 (2 GB). The maximum number of primary partitions should be no more than 4. It is advisable that the directory tree of the connected device have no more than eight levels. There should be no more than 1000 files in one directory.
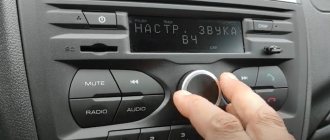
While playing files, the display shows all the necessary information about the track. The playback source is selected using the AUDIO button on the left side of the radio. The radio has equalizer presets (JAZZ, POP, CLASSICAL, VOCAL and USER). The range of timbre adjustments for bass, treble, balance, and front/rear balance is from “‒7” to “+7” units.
The radio has Bluetooth and Handsfree functions. You can connect your phone by long pressing the handset button. When pairing on the phone, the inscription “MMC12” should appear in the list of found devices, the default password is “0000”. After successful connection, the BT icon will appear on the display of the radio. There is no phone book on the Kalina 2 and Grant radio, but it is possible to save up to 6 numbers in the radio’s memory. The audio system also remembers the last outgoing and incoming calls. The manufacturer does not guarantee operation of a phone in Handsfree mode that uses two or more SIM cards.
The radio allows you to listen to audio files from your mobile phone. To do this, you need to connect your phone to the radio via Bluetooth and launch the player on your phone. The manufacturer states that certain cell phone models may not work correctly with this radio, but this is not a sign of a malfunction.
The Kalina 2 and Granta radio has its own battery, which allows you to save user settings after disconnecting the battery for 10 days.
Supported Audio Formats
The audio system supports audio formats (MP3. With constant or variable bit rate, bit rate 32–320 kb/s and sampling rate 44.1/48 kHz; WMA. (without DRM protection). With constant bit rate and bit rate 10–320 kb/s , with variable bitrate and transmission speed 32–192 kb/sec).
Video review of the radio, the video is not mine.
The standard radio for Kalina 2 and Grant has all the necessary functions for a modern car. The audio system works flawlessly, there are no freezes, all operations are performed instantly. The build quality is at a high level. The only disadvantage is the lack of a CD/DVD drive, but nowadays discs are becoming a thing of the past. The standard radio of the Lada Kalina 2 and Granta without an LCD display is a good alternative for those who find physical buttons more convenient than a sensor.
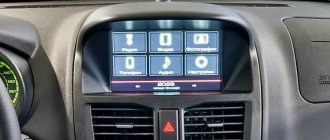
Many motorists who prefer domestic cars were sincerely pleased with the appearance of a new multimedia system in the Lada Granta. A standard radio with a liquid crystal display and many new useful functions began to be installed on the “Lux” package in two versions: 1Din and 2Din. Considering that the presence of such options is still very rare for Russian cars, the richer version of 2Din is of real interest.
Hidden capabilities of standard Lada radios
In order to improve the sound quality in Lada Granta, Vesta, Priora, Kalina cars, it is absolutely not necessary to purchase a new radio. You can set up a crappy radio on these cars and get acceptable sound quality, suitable even for building a basic audio system in a car. But how to do this? How to set up the standard radio in Lada Granta, Vesta, Priora, Kalina? Let's find out!
Lada Granta head unit settings
To improve the sound quality, we need to adjust the equalizer on Grant's standard radio. To do this, press the center key on the console once, go to the equalizer, then to the user settings. In this menu, we enable the loudness function, adjust the high and low frequencies, as well as the sound balance and sound volume distribution between the front and rear speakers. Watch the video below to see how to do this:
Setting the equalizer of the Lada Granta (Kalina, Datsun) head unit:
It is important to know! On standard Lada Granta, Kalina radios, the equalizer must be adjusted for each sound source separately! That is, you need to configure loudness, high and low frequencies and other settings separately for the radio, music from a flash drive, music from a phone (AUX). For information on how to turn off the sound signal when pressing a key on the standard radio of a Grant or Kalina, see the chapter - Hidden capabilities of standard Lada radios
PS To improve the sound on standard Lada radios, it is very important to turn on the loudness function!
Lada Vesta head unit settings
The basic quality settings of the Lada Vesta radio are as simple as those on the Grant. You can customize the sound in just a couple of minutes. To get into the equalizer we need to press the center key on the radio console. The first thing we need to do in the equalizer is to enable the loudness function. By activating it, we will immediately hear a richer and more vibrant sound from the car speakers. Next, we can now adjust the high and low frequencies, as well as the sound balance, at our discretion. (Sound balance is the time interval at the beginning of music playback between the left and right speakers. Balance settings help center the sound in the car.) In order to turn off the sound signal when pressing the button of the Lada Vesta standard radio, we need to find the item in the radio settings menu - Signal and turn it off.
Setting the sound of the Lada Vesta head unit:
Lada Priora head unit settings
To connect a phone or player to a shaky Priora radio via Bluetooth, you need to turn on the Navi mode (a2dp) and press the call button, and then the af key. If Bluetooth requires a PIN code, then you need to enter 0000 - the default.
Setting up the Lada Priora head unit:
PS If the Priora's stock radio is frozen, you can reboot it quickly and easily. To do this, you need to press the Reset button, which is recessed into a very small hole. You can press it using a toothpick or similar thin object.
Lada Kalina head unit settings
The standard radio on Kalina is configured in exactly the same way as on Grant. Here you also need to go to the equalizer settings menu and enable the loudness compensation function. Next, you need to adjust the high and low frequencies as you wish. The sound signal when you press the radio buttons can be turned off in the hidden radio options menu. How to get to the hidden settings menu, see the chapter - Hidden capabilities of standard Lada radios.
Setting the equalizer of the Lada Granta (Kalina, Datsun) head unit:
It is important to know! On standard Lada Granta, Kalina radios, the equalizer must be adjusted for each sound source separately! That is, you need to configure loudness, high and low frequencies and other settings separately for the radio, music from a flash drive, music from a phone (AUX).
PS To improve the sound on standard Lada radios, it is very important to turn on the loudness function!
Hidden capabilities of standard Lada radios
Entering hidden settings on Lada radios is accomplished by holding down the central key on the radio control console. The following functions and settings are available in the hidden menu of the Lada radio:
- Setting the clock mode;
- Setting radio standards;
- Noise reduction function;
- Function of turning on/off the sound signal when pressing the radio buttons;
- Selecting the system language;
- Antenna activation;
- Reset system to factory settings;
Hidden menu of the standard MMS Lada Granta FL:
About setting up standard radios for Grant, Vesta, Priora, Kalina
Friends, let’s once again briefly go through the most important points in setting up the standard radios of the Lada Grant and Kalina, Vesta, Priora. The most important thing to improve the sound quality of the standard radio is that we need to go to the equalizer menu item and there, in the settings, enable the loudness compensation function. It will use the radio processor and begin to automatically equalize the frequencies of the songs. For even better sound quality, we can adjust the low and high frequencies, as well as the sound balance, to your taste. The sound settings in rickety Lada Priora radios are much simpler and easy to adjust. It is much more important to know that the Bluetooth function is enabled through Navi mode (a2dp) and pressing the call button and then the af key. If the Bluetooth function on the Priora's standard radio requires a PIN code, then you must enter 0000 - this is the default password.
Source
High pass filter
Next we find the HPF (High-passFilter) item. This is a high-pass filter that cuts the frequency of the sound supplied to the speakers below their specified limit value. This is done because it is very difficult for standard speakers (13–16 cm) to reproduce low frequencies due to their small diaphragm diameter and low power. As a result, the sound is reproduced with distortion even at low volumes. By cutting the low frequencies, you can get clear sound over a larger volume range.
If you do not have a subwoofer, we recommend installing an HPF filter at a frequency of 50 or 63 Hz.
You can then exit the menu using the return button and check the result. It is better to do this at a volume of 30.
If the sound quality is not satisfactory, or if you are outdoors and want to have a loud disco, you can raise the lower limit from 80–120 Hz or more. It is recommended to use the same level of boundary cut if you have a subwoofer. These measures will allow you to increase the purity and volume of the reproduced sound.
First impressions
At first glance at the radio, you can say that it fits harmoniously into the interior of the car. There is nothing superfluous that would raise questions from a design point of view. The build quality is pleasing; it is worth noting the smooth, smooth movement of the buttons, the absence of backlash and the plastic of the radio that is pleasant to the touch. The radio backlight is green.
The radio is turned on by pressing a special button in the upper left corner of the radio. Loading occurs within a few seconds, during which the inscription “Lada Kalina” is briefly displayed on the display.
Sony ZS-PS30CP
Hello, I can't automatically tune in radio channels. There are no instructions. I pour autoreset and hold it, but nothing happens. Maybe I should do it differently?
Answers 2
Listening to the radio
1 Press the OPERATE button.
2 Press the RADIO BAND button several times. Each time you press the button, the radio band switches between AM and FM.
3 Hold down /TUNE + or – until the frequencies shown on the display begin to change. The device will automatically start scanning radio frequencies and stop when it detects a stable station.
If you cannot tune in a station, press /TUNE + or – repeatedly to change the frequency step by step.
If there is reception interference in the FM range, switch to
Mono mode usually reduces noise.
1 Press MODE . “STEREO” or “MONO” appears.
The pinout of the Sony radio involves the correct installation, connection and configuration of the car audio device. When performing such work, you must follow some rules, otherwise the tape recorder will not function correctly.
Radio capabilities
On the right side of the radio there is a USB connector, which is designed to connect:
- USB Flash card (USB 2.0 and 3.0 up to 64 GB);
- USB Flash player with a memory capacity of at least 1024 MB;
- USB HDD with FAT32 file system;
- Mobile phone (only in charging mode).
On the left side of the radio there is a slot for SD cards. SD Memory Card Slot: Supports SD, SDHC cards of size 32 X 24 X 2.1 mm. SDHC up to 32 GB, SD up to 32 GB.
The file allocation table (FAT) of the connected device must be version FAT16 (2 GB). The maximum number of primary partitions should be no more than 4. It is advisable that the directory tree of the connected device have no more than eight levels. There should be no more than 1000 files in one directory.
While playing files, the display shows all the necessary information about the track. The playback source is selected using the AUDIO button on the left side of the radio. The radio has equalizer presets (JAZZ, POP, CLASSICAL, VOCAL and USER). The range of timbre adjustments for bass, treble, balance, front/rear balance is from “-7” to “+7” units.
The radio has Bluetooth and Handsfree functions. You can connect your phone by long pressing the handset button. When pairing on the phone, the inscription “MMC12” should appear in the list of found devices, the default password is “0000”. After successful connection, the BT icon will appear on the display of the radio. There is no phone book on the Kalina 2 and Grant radio, but it is possible to save up to 6 numbers in the radio’s memory. The audio system also remembers the last outgoing and incoming calls. The manufacturer does not guarantee operation of a phone in Handsfree mode that uses two or more SIM cards.
The radio allows you to listen to audio files from your mobile phone. To do this, you need to connect your phone to the radio via Bluetooth and launch the player on your phone. The manufacturer states that certain cell phone models may not work correctly with this radio, but this is not a sign of a malfunction.
The Kalina 2 and Granta radio has its own battery, which allows you to save user settings after disconnecting the battery for 10 days.
Control your cell phone and view photos
There are no problems viewing photos on the device; you just need to press the required menu button. Slight delays may occur when scrolling through high-resolution images. They have a fairly large volume (over 10 MB), so it takes a few fractions of a second to load them into the radio’s memory. You can view photos downloaded from your cell phone.
All functions related to device management are located in the “Phone” menu item. After your cell phone is connected, configured and saved in memory via Bluetooth, you can control calls using the Granta's standard radio. It is very convenient to use the buttons on the display, which are clearly visible and at hand, instead of using your cell phone on the go.
You can talk by speakerphone or using a Hands free headset. You can also load your phone book into the radio's memory for convenience. In the same way, you can play music that is stored in the device’s memory, controlling the process exclusively using the LCD display. You can simply put your cell phone in a convenient place in the car and not touch it until the very end of the trip.
Video review of the radio
The standard radio for Kalina 2 and Grant has all the necessary functions for a modern car. The audio system works flawlessly, there are no freezes, all operations are performed instantly. The build quality is at a high level. The only disadvantage is the lack of a CD/DVD drive, but nowadays discs are becoming a thing of the past. The standard radio of the Lada Kalina 2 and Granta without an LCD display is a good alternative for those who find physical buttons more convenient than a sensor.
Download the manual for operating the radio (from page 173): To download files you need to log in to the website
Let us remind you that AvtoVAZ installs radios with an LCD display on the “Lux” configuration.
Itelma official website mms 2190
Description: How to ask the right question:
1. Indicate the make of the car, equipment, year of manufacture. 2. Indicate the software of your MMS (information from info), whether the software was flashed, and if flashed, then with what firmware - write the full number and name. Show in full... 3. If the CAN controller was flashed, what version was it flashed with? 4. If an alternative menu is installed, write which one: Singlemenu or Newmenu, version and what skin is used. 5. Briefly state the essence of the problem (if possible, attach screenshots) and what actions were taken.
Before you do, use the wall search; most likely, your problem has already been addressed before. Actions of the administration are not discussed = ban.
The firmware is a build of Windows CE with built-in add-ons and a standard shell. The firmware consists of 4 files: Chain.bin is the firmware header file, there are no files there, only offsets needed by the bootloader. chain.lst - a list of firmware files, needed for the bootloader so that it knows what to flash. NK.bin - archive of main files. TINYNK.bin is a very important file, it contains firewood for the flash memory of the SD card, the registry and the main files needed to start the box before Windows boots. Firmware for MMC Grants and Kalinas/Priors - NOT COMPATIBLE`. For Granta - 21,*,*,** For Kalina/Priora - 23,*,*,** MMC firmware and FAQ - https://4pda.ru/forum/index.php?showtopic=715138&v..
The altmenu is an alternative finger-oriented shell for displaying the necessary data, controlling devices (switching and adjusting sound, Bluetooth, etc.) and launching applications. This includes: SingleMenu - https://4pda.ru/forum/index.php?showtopic=721507 NewMenu - https://4pda.ru/forum/index.php?showtopic=715138&s.. also here SM and NM — https://vk.com/topic-69519788_34655735
MMC design Skin builders have developed various styles for the Altmenu - (different graphic design of the menu with a different set of functionality) MMC design - https://4pda.ru/forum/index.php?showtopic=715138&s..
Review of standard luxury radio Lada Granta
The text is based on reviews from car enthusiasts who have a standard luxury radio (2 din) in their Lada Granta. So, Itelm's radio tape recorder runs on WinCE 6.0.0.3. and it takes a couple of seconds to turn it on. Screen . Bright, sensitive, resistive (capacitive ones work very poorly in cold weather, while resistive ones are better in this regard, and are able to work in more difficult conditions, but working with them is not as convenient as with capacitive ones). The picture has ordinary color rendering (there can be no comparison with LED panels), but is quite readable in the sun. A couple of pictures in bright weather:
USB. Supported file systems: FAT16, FAT32. There is a USB button in the radio menu, but there is no connector on the front panel. In fact, there is a USB connector, and it is located on the back of the radio, wrapped in dark foam rubber, and was not wound with other wires. Some dealers deny the presence of USB. By the way, in the glove compartment itself, there is an empty window for the USB connector.SD cards . We tested an 8GB memory card and there were no problems identifying or playing music. The manufacturer warns: The USB and SD connectors are designed for connecting SD cards and USB flash drives. Connecting other devices may damage the radio or the connected device.
Hands free . The standard radio of the Lada Granta even has such a function as pairing with a phone via bluetooth. We managed to connect a couple of phones (android 2.1 and WM 6.5), but you have to wait to load the phone book. In addition, you can play audio via bluetooth. However, it’s difficult to call the work of the phone-radio combination stable, and remembering two phones on the list is a whole epic. Video . Supported format WMV 320*240. We tried to play a video in AVI 720p format, but the car radio couldn't handle it. The picture slows down a lot and lags behind the sound. Thus, to view higher format videos, you will need to use a converter (for example, Xilisoft Video Converter Ultimate).
Audio. Supported formats are MP3, WMA and WAV. The sound quality is not bad. The sound is clear, pleasant, without audible cuts in the highs or lows. The screen displays information about the album, artist, and also shows the album cover, if available. There is an equalizer in which you will find several preset “presets” such as Jazz, Rock, Voice, etc.Photo . There is support for viewing photos. Supported formats: JPEG, .JPG, .JPE, .BMP, GIF, .PNG. If a 1MB 800x1397px photo takes 1 second to open, then a 1978x3456px, 7MB photo will load the radio for as much as 9 seconds.
Antenna. The 2 din Granta radio comes complete with an antenna that is mounted on the roof of the car. When listening to FM radio channels, it happens that the sound volume fluctuates, the antenna is to blame. Settings.- General settings (screen saver that only works with the radio, factory reset, language settings, date settings, clock settings).
- Phone settings
- Sound settings
- Display settings
- Photo viewing settings
- Video player settings
- Radio settings
There is no option to connect a rear view camera.
The standard speakers are 13 cm, obviously weak for a luxury radio, so it is recommended to install speakers in the rear doors and replace the existing ones. Installing soundproofing will make the sound in the cabin even clearer.
In conclusion, we can say that you shouldn’t expect much from the Granta luxury radio; it is still far from a full-fledged multimedia system. The slow processor (even though it is declared Dual Core), the meager amount of RAM memory (128MB), the lack of AV output and navigation are upsetting. The positive aspects include a simple and intuitive interface, support for USB and SD memory cards and the ability to play video clips (albeit only in a strictly limited format, but the option itself is quite rare). The good news is that AvtoVAZ has work in this direction, and this means a lot.
Itelma official website mms 2190
Description: How to ask the question correctly:
1. Indicate the make of the car, equipment, year of manufacture. 2. Indicate the software of your MMS (information from info), whether the software was flashed, and if flashed, then with what firmware - write the full number and name. Show in full... 3. If the CAN controller was flashed, what version was it flashed with? 4. If an alternative menu is installed, write which one: Singlemenu or Newmenu, version and what skin is used. 5. Briefly state the essence of the problem (if possible, attach screenshots) and what actions were taken.
Before you do, use the wall search; most likely, your problem has already been addressed before. Actions of the administration are not discussed = ban.
The firmware is a build of Windows CE with built-in add-ons and a standard shell. The firmware consists of 4 files: Chain.bin is the firmware header file, there are no files there, only offsets needed by the bootloader. chain.lst - a list of firmware files, needed for the bootloader so that it knows what to flash. NK.bin - archive of main files. TINYNK.bin is a very important file, it contains firewood for the flash memory of the SD card, the registry and the main files needed to start the box before Windows boots. Firmware for MMC Grants and Kalinas/Priors - NOT COMPATIBLE`. For Granta - 21,*,*,** For Kalina/Priora - 23,*,*,** MMC firmware and FAQ - https://4pda.ru/forum/index.php?showtopic=715138&v..
The altmenu is an alternative finger-oriented shell for displaying the necessary data, controlling devices (switching and adjusting sound, Bluetooth, etc.) and launching applications. This includes: SingleMenu - https://4pda.ru/forum/index.php?showtopic=721507 NewMenu - https://4pda.ru/forum/index.php?showtopic=715138&s.. also here SM and NM — https://vk.com/topic-69519788_34655735
MMC design Skin builders have developed various styles for the Altmenu - (different graphic design of the menu with a different set of functionality) MMC design - https://4pda.ru/forum/index.php?showtopic=715138&s..
SinglePlayer is a powerful audio player for consoles running WINCE 6.0. Made for an alternative shell SingleMenu and NewMenu SinglePlayer - https://4pda.ru/forum/index.php?showtopic=724655
CAN bus CAN (Controller Area Network) - provides connection to any devices that can simultaneously receive and transmit digital information. On the MMC it is needed to read and erase ECU errors. CAN bus firmware - https://vk.com/topic-69519788_32222656
We kindly ask you to ask all your questions in this thread, and not in PM, because... many points have to be explained to different people several times. Otherwise, someone with the same question will have a ready answer and write the car model at the beginning of the message, because... sometimes it is necessary. You can use the search by records, most likely your issue is resolved: https://vk.com/wall-69519788?search=1
You may be denied entry into the group without explanation. Persons under 18 years of age are not accepted into the group.
Installing a radio in a Lada Granta with your own hands. Advice from the experts
Since the beginning of 2011, all Lada Granta models have been manufactured with audio preparation: factory radios and receivers. The quality of reception and sound is not always at the highest level due to its cheapness and simplicity. When purchasing a Lada Grant from the showroom, the owner receives audio preparation, acoustic wires, and installed electrical wiring.
The door panels have already prepared openings for installing speakers. True, few people use the standard seat, as they prefer the rear shelf to improve the sound.
Choosing the right radio size
We carry out installation either independently or by contacting specialists at the service center. In the second case, the service is paid.
By default, all VAZ and Lada models are equipped with a 1-DIN radio. The opening dimensions correspond to: 180 x 50 mm. This is an old standardization that has been in force since the times of the USSR. Modern audio modules can be purchased complete with a pre-installed LCD display. The size of the opening must comply with the standard: 180 x 100 mm, that is, doubled in height. Size marking: 2-DIN.
To install the radio in the Granta liftback, cut out the top pocket, remove the plastic, and install the assembled module. For a beginner, the process will seem somewhat complicated, so strictly follow the instructions.
How to connect a Lada Granta head unit with a 1-DIN connector
- We carry out the work inside the car, having previously disconnected the terminals from the battery in order to prevent a short circuit in the circuit;
- We remove the plastic partition - pocket. It covers the hole, preventing objects from falling inside the torpedo. We use a flat-head screwdriver to unscrew the bolts;
- Two ISO plugs are visible behind the partition body. These types of wire terminals are manufactured in accordance with international automotive standards. More than 98% of all automakers use the standard when equipping technical equipment;
- We remove the metal frame - the block - from the body of the audio unit and place it in the cavity of the torpedo.
- We first connect the blocks with wires. Fitting into the connectors is accompanied by a characteristic click;
- We insert the module into the metal frame.
Note to the driver. Incorrect terminal connections result in a short circuit. To ensure the safety of the connection process, the connectors have guides that allow you to install the block in only one position.
Common mistakes when installing a standard Granta liftback radio with your own hands
- when connecting additional terminals, manual twisting of wires is used instead of classical soldering;
- regular insulating tape is used on connections instead of heat-resistant sleeves;
- Incorrect connection of a large number of speakers on one branch leads to overload, heating, and short circuit.
Installing a sound amplifier
By liftback radio amplifier we mean:
- crossover installation;
- subwoofer installation.
The choice is up to the owner of the Lada Grant, as different goals are pursued: cleanliness, sound quality. Obviously, the cost of equipment will also increase. Crossovers are installed in the cavity of the glove box, since their dimensions do not exceed 100 x 150 mm and are rectangular in shape. Subwoofers are fixed in the luggage compartment. Equipment requires more space.
Connection of an external device is carried out strictly in accordance with the operating instructions:
- brown wire color: responsible for the operation of the system;
- black: power supply to equipment;
- yellow: audio module activation;
- red: settings and programming.
At the very end, do not forget to connect a red wire with a pre-installed fuse to the positive terminal of the battery. It directly connects the amplifier (subwoofer) to the current source.
Installing two speakers in the front doors
- dismantle the door card, handle, control unit;
- We compare the standard cutouts for the speakers with the actual dimensions. If necessary, expand with a file or fine sandpaper. It is strictly forbidden to use cutting objects, as there is a high risk of damage to the plastic of the door card;
- we check for the absence of roughness in the hole, install the speaker, fix it, connect the standard terminals with wiring;
- we check the operation of the speaker, install the door card, and fix the metal grille to protect the speaker from mechanical damage.
Working in audio mode
The device allows you to listen to songs in the three most common formats. At the same time, according to reviews from Lada owners, the sound in the cabin is of average quality. The fact is that the 13 cm speakers built into the front doors of the car do not reproduce music very well due to the fact that they are a budget option. The radio itself has nothing to do with it.
Experts recommend buying a set of new good quality speakers and installing them in the rear and front doors; structurally, such a possibility exists. It is possible to connect an amplifier and a subwoofer to the standard radio. This is done in a certain order. After successfully carrying out the above activities, listening to music in the Lada Granta salon will bring you real pleasure.
- Stretch and connect a thick red power wire (“plus”) from the battery to the amplifier.
- The black wire is the negative wire. Connect it to the amplifier and lead it to the car body.
- Hidden the wires for connecting the speakers and subwoofer and connect them to the amplifier.
- Run a wire from the amplifier to the radio. This wiring should be routed separately from other vehicle wiring to avoid interference with the sound.
- Connect the wire from the amplifier to the radio.
Characteristics of the standard radio "Lada Grants Liftback"
The radio for the Lada Granta liftback is supplied as standard equipment. Product in 2-DIM format (100 x 180 mm).
In addition to the classic radio, there is a built-in card reader, Bluetooth, and a USB output for connecting flash drives. The only disadvantage of the audio module is that it is a push-button type. Which is not to the liking of many car enthusiasts, which is why they install more modern modifications.
During the startup of the audio module, a greeting from Lada Kalina 2 is displayed. This is not an error, as many owners think. This type of audio was originally developed for the Lada Kalina 2. Obviously, the manufacturer did not change anything and started production for the Granta. Installation/disassembly of the module is somewhat complicated due to the tight fit, so be prepared for this.
It is based on the Windows operating system, which allows you to connect to the World Wide Web via a 3G modem. There is no such option out of the box; you first need to reflash the device, but more on that later.
Via Bluetooth, it is possible to connect to a phone, and the “hands-free” option is activated. Which is very convenient and practical when driving. The owners were also pleased with the stock radio. At first glance it looks simple, but it turns out not to be so. Available programming function for a specific channel on a given topic.
For example, as soon as a news broadcast comes on, the radio automatically switches to the programmed channel. The audio module reads the following formats: MP3, WMA, WAV, WMV. Control of the standard radio of the Lada Granta liftback is accessible and intuitive, even for an inexperienced owner.
Reviews
| Module type | Price, rub.) |
| Standard 1-DIM (push-button version) | from 3500 – 3700 |
| Standard 2-DIM (sensor) only for Lada Granta liftback | from 7500 – 8000 |
| Third party manufacturers, depending on configuration and specifications |
| № | Positive |
| 1. | Victor, 39 years old: after buying the car, he did not change the radio, despite the push-button control option. The sound quality is good, the radio reception is excellent, that's enough for me. |
| 2. | Konstantin, 41 years old: bought the car second-hand, second owner. I didn’t change anything, I left the original radio. The functionality is good, the build quality is also good, it reads from a flash drive. |
| 3. | Vasily, 44 years old: I listen to the radio more, the reception in the city is good. True, it causes interference near metal structures, but this is natural. |
| 4. | Kirill, 36 years old: I work as a taxi driver, on wheels all day. The standard tape recorder saves the day, it works properly. My friends recommended replacing it with a touchscreen model from the new Granta, but so far the old one hasn’t failed. |
| Negative | |
| 1. | Victor, 38 years old: the standard audio module, although not bad, seemed to me not enough, so I replaced it with a foreign one and supplemented it with an amplifier. Now the volume is good, the quality is high. |
| 2. | Mikhail, 42 years old: I work as a courier, I drive for the entire shift. I expected more from the standard radio, so I had to replace it with a new one. The volume suits me, I plan to connect an amplifier - a crossover. |
| 3. | Ivan, 33 years old: I bought the car second-hand, immediately replaced the audio module, the reviews are not good. New and high-quality equipment from Trinity, no problems. |
| 4. | Vladlen, 40 years old: friends gave me a gift in the form of a radio with touch control for our anniversary. Before this there was a push-button one. Can't compare, quality, sound, control, functionality at a high level. |
Conclusion The opinions of motorists on the functionality and sound quality of the standard radio are divided, which is obvious. Everyone evaluates according to their own criteria. Some people care about sound, others about functionality, and others about control. Regardless of the type of radio: push-button or touch-sensitive, the workmanship is good. No massive breakdowns or defects were recorded. Maintenance is not expensive, parts and components are available both at official representative offices and on the Internet. Now it will not be difficult for the owner to remove the radio on the Granta liftback with his own hands without contacting a service station.
How to flash the firmware
- Buy an SD card, format it in FAT, exFAT format;
- We download the firmware for free on the manufacturer’s official website;
- We save the data in the root directory of the SD card;
- We insert the SD card into the slot on the radio, start it, wait for the update to finish;
- Turn on and off the module;
- We customize the new interface for ourselves.
If the firmware is installed incorrectly, additional screen calibration using the CAN bus will be required. It is impossible to do this yourself, only in a service station. After successful flashing, the following is available:
- graphic equalizer;
- viewing photos, pictures, videos;
- improved sound quality;
- possibility of installing a navigation system.
Disadvantages of a standard radio
- Outdated firmware from the “box”;
- Not all options are initially available;
- The need for periodic software updates;
- Push-button interface.
Source
How to install a head unit on a car with basic equipment?
Since the Lada Granta base is not equipped with musical equipment, and only a push-button radio is installed on board, the question justifiably arises: how is the standard radio installed in the cabin? In reality, this is a simpler procedure than it might seem at first. The occurrence of problems during installation is excluded, since a seat is already provided for the standard device on the Lada Granta panel, regardless of the level of equipment.
You can purchase the device in a retail chain or on an Internet site, where you can actually find an improved version, equipped with a navigation system with a detailed map of the Russian Federation. Don't forget to buy an additional luxury panel. Although multimedia will fit into the standard panel without any problems, the appearance will not be so beautiful. The price for this device reaches 2.5 thousand rubles.
Next comes the installation of the radio. The design feature of the landing niche in the Grants panel does not provide for the need for additional wiring.
- The first step is to remove the plastic pocket in the audio system opening. This is done using a flat-profile screwdriver. There is access to several connectors that involve connecting a radio.
- We remove the frame from the head unit and fix it at the location of the pocket.
- Next we move on to the connection. To do this, connect a couple of connectors and install the device in the landing niche.
- After this, you can install the speakers in the front door cards. The procedure involves the need to dismantle door trims with unlocking handles and adjust the position of the glass. Using a special template, we begin cutting out the mounting holes.
We attach the speakers to the cards using self-tapping screws. We insert the cables from the speakers into the input connectors intended for this on the rear panel of the car radio. We install the decorative door panels in their original places and evaluate the sound provided by the standard head unit. Thus, the radio is connected.
Attention! We carry out all manipulations with the battery disconnected from the on-board network!
