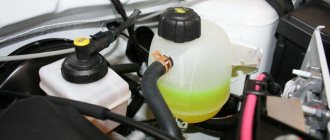
Such a small part as the expansion tank cap, unfortunately, almost always causes the least suspicion when any malfunction of the cooling system occurs. The expansion tank cap plays an important role in engine cooling. Its design allows you to regulate the pressure in the cooling system and maintain the correct temperature. Its malfunction can lead to a coolant leak or some kind of engine damage.
Main function of the tank cap
During operation of the power unit, pressure increases in its cooling system. This is caused by the heating of the coolant. Increased pressure requires constant adjustment. This is what the expansion tank cap is used for. Maintaining a stable high pressure helped shift the point at which the liquid boiled in the system. At normal atmospheric pressure, water boils at 100°C, and antifreeze boils at about 120°C. The normal temperature for most modern engines is almost very close to these marks.
In some situations, the coolant temperature increases rapidly. To prevent engine overheating, pressure increase is necessary. This is accompanied by an increase in the boiling point of the liquid. In this regard, experts came to the conclusion that in order to prevent the liquid from boiling in the engine cooling system during short but significant heating, it is necessary to maintain a stable pressure in the system in the range from 1.1 to 1.5 kgf/cm 2 . This is quite enough, since at higher pressures it will be necessary to equip the engines with more reliable and durable cooling system components.
In this regard, the tank cap must maintain pressure to the required value, after which it releases the air inside the tank.
List of tools used when replacing containers
To remove the old tank and install a new one efficiently, you need to acquire the following standard tools:
- wrenches (set);
- pliers;
- Screwdriver Set;
- new clamps (the use of old clamps is undesirable);
- sandpaper.
Sandpaper is used to process the inlet holes in the new plastic tank in order to eliminate existing roughness. Smooth surfaces of the holes will ensure tightness, strength and reliability when screwing the plug.
The cooling system in the car is completely sealed, and as the engine heats up, its coolant also heats up. Due to tightness, when the liquid is heated, increased pressure is created in the system, and the liquid begins to expand. Up to a certain point, the air displaced by the liquid accumulates in the expansion tank. When the pressure reaches a critical point, the release valve in the expansion tank cap is activated, and all excess air leaves the cooling system. As the liquid cools down, it begins to shrink, threatening to create decompensation (increased vacuum). To prevent this from happening, an inlet valve is also provided in the tank lid. The inlet valve begins to operate when the pressure in the tank drops below atmospheric pressure. By letting in air, the system equalizes the pressure.
Be sure to watch the video:
How does an expansion tank work?
To create the required pressure with the engine running, the cover must provide a tight seal. The safety valve is responsible for reducing the pressure. If the pressure in the system exceeds 1.1–1.5 kgf/cm2, this valve should open. After the pressure drops to operating values, the valve closes.
There is also an inlet or vacuum valve installed in the lid. It supplies air to the cooling system. After stopping the engine, the coolant temperature decreases and the pressure in the system also drops. The volume of liquid in the tank decreases, which entails a drop in pressure in the system. This leads to space for air in the expansion tank. At a certain point, the pressure in the system becomes equal to atmospheric air pressure. If at this moment the coolant temperature is higher than the outside air temperature, its volume will continue to decrease.
As a result of all this, the so-called vacuum or rarefaction effect is created. Outside air will press on the system components. If one of the parts of the cooling system is leaking, air will end up inside it. This leads to the appearance of an air lock. After starting the engine, it can get into the expansion tank. But it is also possible that problems may arise in the normal circulation of fluid in the system. Sometimes this leads to engine overheating or problems with the heating system.
Air may end up in the cooling system due to leaks in pipes and other parts. To avoid this, the pressure in the system must be equal to atmospheric pressure, which is what the inlet valve is responsible for. It starts working if the vacuum reaches 0.03–0.1 kgf/cm2. This valve supplies the air that was released by the safety valve while the fluid was heating up. Due to this, the pressure in the system does not differ from atmospheric pressure.
Typical problems and their diagnosis
- Violation of the tightness of the tank: the tank begins to leak due to mechanical damage;
- Rupture of the container due to impact or technological defect.
- Problems with the reservoir cap.
Tank cap malfunctions need to be disassembled separately, as this is the most diverse and common group of breakdowns. A clogged cover valve most often causes inconvenience to owners of “fourteeners”. The valve “clogs” due to dirt and stops releasing hot air. This leads to multiple excesses of operating pressure and overheating of the motor.
Also, coolant may leak through the cap, causing the working fluid level to gradually decrease. A leak can be identified by the presence of smudges in the expansion tank.
Common signs of a broken expansion tank:
- traces of leaks on the tank body;
- The engine overheating indicator light is on;
- smoke from under the hood, other signs of significant overheating;
- warm air does not come out of the heating deflectors, despite the fact that there are “symptoms” of a significant increase in the operating temperature of the engine.
Signs of a malfunctioning expansion tank plug
In most cases, the driver pays attention to the cap if the coolant boils without serious reasons. In some cases, liquid may be released into the engine compartment. If the engine temperature is within normal limits, the culprit is usually the reservoir plug.
Another possible reason is the failure of the intake valve, resulting in air in the system. It has formed a plug, the presence of which prevents proper circulation of the liquid.
The consequences of a malfunctioning expansion tank cap can be extremely unpleasant:
- damage to pipes due to natural wear or poor quality of the part;
- thermostat housing rupture;
- leak in the main radiator or heater radiator;
- expansion tank rupture.
Such troubles are caused by excessively high pressure in the cooling system of the power unit. The culprit for this is a faulty cap.
Location of expansion tank
Communities Lada Priora Lada Priora Club Blog Ignition switch wires
A plastic reservoir for excess coolant is installed by the manufacturer in different places depending on the model of the “tenth” family:
- in cars of the VAZ 2110-12 series, the reservoir is located on the left side (in the direction of travel) between the pillar glass and the wall of the interior partition;
- in VAZ 2114-15 cars, the container is also located on the driver’s side, but is placed in front of the pillar glass.
The expansion tank is attached to the body elements with a clamp in the form of a flat rubber belt with a metal hook that hooks onto a protrusion on the side member. There are 3 hoses connected to the tank:
- A large diameter pipe leading from the thermostat is connected to the bottom.
- The upper tube of small diameter goes through the partition to the radiator of the cabin heater.
- The middle small tube connects the tank to the upper fitting of the main cooling radiator.
Each hose performs a separate function. The thick pipe serves to expand the coolant and fill the system while pouring antifreeze through the neck of the tank. Two thin tubes are designed to drain the steam-water mixture from the stove and the main radiator into the tank when heated to the maximum permissible antifreeze temperature of 95 ° C.
The expansion tank (item 1) is located at the highest point of the cooling system at the same level as the throttle valve
How to check the expansion tank cap and prevent negative consequences?
- At the first stage, a routine inspection of the part is carried out to ensure the absence of mechanical damage. If you bought a new cover, it also needs to be inspected, as there are frequent cases of manufacturing defects.
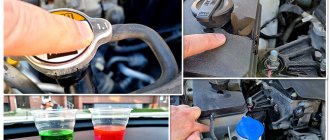
- If the appearance of the cover does not raise any doubts, we check its functionality with the engine running. The cap must be screwed on and the engine warmed up to operating temperature, then slowly begin to unscrew it. You should hear a hissing sound of air escaping. This is a sign of a normally functioning lid.
- With the engine running, you need to inspect the thick pipes of the cooling system. If the caps do not work, they may be dented, which is a sign that the pressure in the system is too low.
- Another option is to unscrew the tank cap and squeeze one of the thick pipes. Next, screw on the cap and release the pipe. If the lid is working correctly, this area should be restored to its original shape.
- The most effective method is to use a pump with a built-in pressure gauge. It is also necessary to prepare an empty expansion tank from any other car. One of its fittings must be connected to the pump hose (without a nipple tip) and securely secured with a clamp. Other tank fittings must be plugged. After this, the tank must be closed with a plug, the serviceability of which you check.
You can check the expansion tank cap directly on your car. There is no need to drain the liquid. It is necessary to disconnect the upper pipe from the tank, which is designed to remove steam from the system. We connect the pump hose to the tank fitting. The hole in the pipe must be plugged. A bolt of the appropriate diameter is suitable for this. The pressure will increase, so you need to put a clamp on the hose over the bolt and tighten it well so that the bolt does not fly out in the future.
We begin to increase the pressure in the system using a pump. At a certain moment you will hear characteristic sounds - clicking and hissing. This is the sound of air being released from the reservoir cap valve. If the valve operates at a pressure of about 1.1–1.5 kgf/cm2, and adding air only increases the hissing and does not lead to an increase in pressure, the intake valve is fully operational. And the safety valve does its job perfectly.
Bought a new cover and it doesn't work?
If checking the new expansion tank cap shows that one or both valves are faulty, you can try to modify the part. Owners of VAZ 2110 and 2114 cars often encounter this problem. Usually the valves do not work correctly due to the manufacturer using too stiff springs.
First you need to disassemble the cover using a flathead screwdriver and pliers. During disassembly, remember exactly how all the components were installed, since the springs may fly apart in different directions. After disassembly, it is necessary to reduce the length of the springs. The large spring for the pressure relief valve is shortened by one turn, and the smaller one by two.
The safety valve spring (large) must be shortened taking into account exactly when the valve was triggered during the check of the cover. The main thing in this matter is not to overdo it. But with the second spring everything is much simpler - it should create at least minimal pressure on the intake valve at the moment of its closing. After finishing the cover, all components must be assembled in reverse order. The plug check must be repeated to ensure that the valves operate in a timely manner.
The attention of drivers who are accustomed to servicing their car themselves is usually focused on the engine and chassis. Of course, these components are considered basic in the operation of the entire car. However, equal attention must be paid even to such seemingly insignificant details as the cap on the expansion tank. What role does this element play in the cooling system? Most drivers don’t even realize that the quality of engine cooling depends entirely on this cover!
Dismantling and replacing the tank on the “ten”
To replace the device, you will need to drain the coolant if it has not leaked out before. The expansion tank VAZ-2110 is dismantled as follows:
- Disconnect the negative cable from the battery.
- Disconnect the wire from the refrigerant level sensor.
- Using a Phillips-head screwdriver, unscrew the screws on the clamps of all hoses, loosening them.
- Disconnect all hoses going to the tank.
- Unfasten the rubber strap securing the tank and remove it.
Installing a new device is carried out in the reverse order. Don't forget to add coolant to the correct level!
What is an expansion tank cap
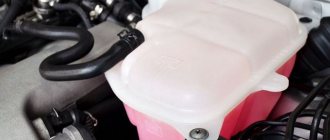
Any driver, even the most inexperienced, knows well why an expansion tank is needed in a car. Coolant is poured into it, and the remaining free volume is designed to compensate for the increase or decrease in the amount of expanded liquid.
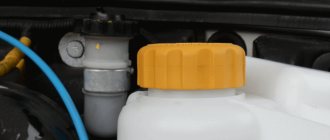
Accordingly, the tank is closed with a lid. The cover is installed on the tank neck in the upper part. Many drivers do not attach much importance to the lid - after all, it is important to simply maintain the tightness of the tank, and what exactly to close it with does not matter.
Yes, the expansion tank cap is a locking element. However, contrary to popular belief, the lid has a complex structure and performs special functions.
The cover cavity includes a rubber seal and a double valve mechanism
What does the element consist of?
The lid has two valves. They are designed to protect the cooling system from possible damage due to overheating, in addition, these valves stabilize the operation of the entire system.
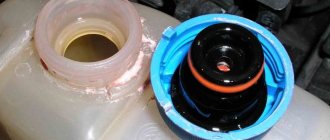
If you unscrew the cap from the tank and look at its internal structure, you can see a kind of pressure regulation sensor.
The lid must fit tightly (without gaps) to the edges of the tank. To ensure a reliable connection, the lid includes a rubber seal. There are two valves built inside:
- the first relieves excess pressure in the tank;
- the second pumps the necessary pressure into the tank if the pump for some reason does not cope with its job.
These valves got their names due to the use of high or low pressure: on VAZs the first valve is called a safety valve, and the second is called a vacuum valve. However, both are at rest as long as the pressure in the tank is within the specified reading range.
The driver cannot always notice malfunctions in the operation of the cover valves in time. It is simply impossible to make a visual diagnosis. But failure of parts of the expansion tank cap can lead to serious problems with the engine unit.
Symptoms of a faulty expansion tank cap
Owners of Russian-made cars know how important it is to monitor the condition of all systems in the car’s design. Even such a small element as the expansion tank cap can cause a lot of trouble - for example, if the valve mechanisms fail, the operation of the entire cooling system can be disrupted. As a result, the engine overheats and the cylinders jam. In this case, the driver will face expensive repairs.
Therefore, in order to prevent unpleasant consequences, you need to carefully monitor some features in the car’s behavior while driving:
- Puffs of smoke appear from under the hood - therefore, coolant has hit the hot surface of the intake manifold. Antifreeze could get onto the manifold for only one reason - the safety valve on the cover had failed;
- Cool air comes out of the stove, and the engine gets very hot: this is a sign of failure of the vacuum valve of the cover. Due to malfunctions in its operation, air plugs occur in the cooling system, which leads to overheating of the engine;
- failures of clamps and ruptures of hoses also indicate that the pressure in the system is unstable. And since it is the expansion tank cap that is responsible for the pressure, these symptoms indicate that it is time to replace or repair it.
If plumes of smoke are escaping from under the hood, this may indicate a faulty expansion tank cap.
Tank defects leading to system malfunction
Malfunctions of the container often cause antifreeze or antifreeze to squeeze out through the lid. Failures of the tank that require its replacement include the following defects:
- The presence of burrs and burrs on the threads and inlet of the cover.
- Failure of the pressure regulating valve.
- Damage to the sensor indicating the coolant level.
- Rupture of the walls of the container, leading to intense leakage of coolant.
- Wear and aging of container elements leading to malfunctions.
- Mechanical damage to the body due to impacts received during an accident.
Irregularities on the thread create difficulties when tightening the plug and do not allow the connection to be sealed.
Plastic walls often crack due to prolonged exposure to boiling liquid, high pressure, or due to insufficient thickness of the plastic. When purchasing a new tank, you need to make sure that the materials from which this unit is made are of good quality.
How to check the cover yourself on Priora, Grant, Kalina
It seems that it is enough to unscrew the cap from the expansion tank and inspect its insides to understand the specifics of the problem. However, it is not. For example, service centers use special pressure pumps that can pump the required number of atmospheres . By creating artificial pressure in the cooling system, the device allows you to calculate the correct operation of the valves.
A device for diagnosing VAZ tank caps has a pressure gauge and a pump
But drivers don't have this expensive equipment, so they have to make do with what they have in a standard garage. Diagnostics of the quality of operation of the tank cap will be less accurate, but it will be possible to identify the main malfunctions of the valves:
- Turn off the engine.
- Unscrew the cap from the tank neck.
- Inspect the product for cracks, dents, and chips. The seal may have ruptured or become severely worn.
- If there is no visible damage, screw the cover back on and start the engine.
- Wait until the engine warms up to its normal temperature.
- Start slowly unscrewing the cap from the tank.
- If, during the process of unscrewing, a whistle of escaping air is heard (this sound can be compared to the release of gases when opening lemonade), then the lid is in working order, since it restrains the pressure in the tank and hoses.
- After this, you need to turn off the engine again.
- Inspect the cooling system pipes. If they are pulled in, the vacuum valve of the lid does not work well, since the pressure in the system is extremely low.
Photo gallery: algorithm for checking the operation of the lid
This is a typical scheme for checking expansion tank cap valves on all models of AvtoVAZ vehicles.
Checking the cover on the main VAZ models
Experienced owners of domestic cars have made it a rule to change the expansion tank cap every two to three years. On the one hand, such attention to detail greatly simplifies the operation of the internal combustion engine cooling system, and on the other hand, the cover costs less than 100 rubles, so absolutely every driver can afford to buy it.
And replacing the cover does not cause any difficulties. First, with the car cooled down, unscrew the cap from the tank. Then screw in the new one until it stops.
Video: diagnosing the performance of the lid
Checking the cover on the VAZ 2108/2109
The design of the “eights” and “nines” produced by AvtoVAZ allows you to check the functionality of the tank cap in one minute. The operation looks like this:
- Open the hood of a car that has cooled down after driving.
- Unscrew the cap of the expansion tank.
- Squeeze the supply hose as tightly as possible with your hand.
- At the same time, screw the lid back on.
- After this, lower the hose.
If the compression area immediately regains its original elasticity, it means that the valves on the cover are working properly. If it still cannot recover for a long time, it is recommended to replace the tank cap with a new one.
You can check the operation of the coolant reservoir cap on a VAZ 2109 with your own hands by simply squeezing the pipe with antifreeze
How to check the functionality of the cover on a VAZ 2110/2111/2112
The procedure for checking the valves on the cover is the same as for previous VAZ models. The only nuance on the VAZ of the tenth family is that when unscrewing the cap from the tank, the valve mechanism itself may fall out of the cavity of the cap. This is not an indicator of failure, but, most likely, an insecurely fixed element will not work for long.
On a VAZ of the tenth family, the expansion tank cap tends to unscrew from the neck without valves
Checking the expansion tank cap on a VAZ 2113–2116
Diagnostics of the coolant tank cap on the latest VAZ models is as follows:
- Start the engine.
- Open the hood and start unscrewing the lid.
- If after the very first actions a characteristic sound of gases (“zilch”) escapes from under the lid, then we can talk about the working condition of the valves.
For a more accurate diagnosis of the tank cap, it is best to contact a specialized service center
However, modern VAZ models are equipped with more complex valve mechanisms, which is why a check in a garage may not show any breakdowns or malfunctions. It is recommended to contact a service center to have the cover checked using special pumping equipment.
The expansion tank cap on VAZ cars only looks like a simple element. Inside the lid there are important valves for the entire cooling system that regulate the antifreeze pressure. It is recommended to replace the cap every two or three years - in this case, you can avoid more expensive repairs to the remaining elements of the cooling system.
The cap of the expansion tank of a car's engine cooling system, as a rule, does not raise suspicions about its serviceability. This, as many people think, very “modest” in importance part is entrusted with a very important task - to regulate the pressure in the cooling system. When the lid stops coping with this, in the best case, liquid will boil or leak out, and in the worst case, this will lead to the breakdown of some components.
Repair
If you find leaks at the inlet and outlet of the hoses into the tank, you just need to replace them and secure them with new clamps. In this case, it is advisable to place the new hoses on the sealant. If you notice leaks of fluid from under the reservoir cap, it needs to be replaced. But what to do if you find a malfunction on the road and there is no auto shop nearby? You need to try to temporarily fix the problem on your own and to do this:
- Wait until the coolant cools down and the pressure in the expansion tank drops.
- Unscrew the tank cap.
- Using a screwdriver or knife, remove the rubber and valve spring from the cover
- The spring needs to be shortened by several turns by biting them off with pliers or simply breaking them off.
This repair should last for some time, even if the rubber seal on the lid is worn out.
Buy a tank cap as soon as possible. As noted earlier on models of the VAZ 08 -15 family, this part is identical.
If the expansion tank has received mechanical damage: it has burst, worn out, then it can be repaired by sealing it. But such repairs are undesirable due to unreliability, and replacement will not cause big problems, neither technical nor financial.
What is the main role of the tank cap?
As is known, a running engine creates a pressure in the cooling system that differs from normal atmospheric pressure. This occurs due to the fact that the coolant heats up along with the engine, as a result of which it expands and increases in volume. As a result, the pressure inside the engine cooling system (ECS) increases, but it is not in contact with the external environment, and there is nowhere for it to relieve excess pressure.
Developers of modern cars do not fight the increased pressure in the ODS “radically” - they do not try to completely get rid of it. It is adjusted using the tank cap. Increased pressure in the SOD is used to shift the coolant boiling point. After all, it’s no secret that at normal atmospheric pressure for water it occurs at a temperature of 100 °C, for antifreeze – 105–110 °C, and for antifreeze – 120 °C. The operating temperature of modern car engines is very close to these critical values.
So, for example, for carburetor VAZs it should be in the range of 90–95 °C, and for injection ones – 97–105 °C.
However, under certain engine operating conditions, a short-term increase in its temperature occurs to higher values, which, however, does not lead to failure of a serviceable engine, but causes the same heating of the coolant. For example, on injection VAZ 2109 the liquid at such moments can be 120–125 °C. Obviously, even antifreeze cannot withstand such heat. At the same time, an increase in the pressure of any liquid leads to an increase in its boiling point.
Injection VAZ 2109
Engineers designing engines have long found out that to prevent the coolant from boiling even during short-term critical heating of the engine, it is enough to maintain the pressure in the coolant at the level of 1.1–1.5 kgf/cm 2 (1.1–1.5 bar). A higher temperature is not needed, because the engine is not designed for it, and it will lead to its failure. And it makes no sense to allow a greater spontaneous increase in pressure, which can nevertheless occur, because it will complicate the process of manufacturing and servicing the motor, as well as increase its cost, since it will require a more durable and sealed SOD (more durable pipes and expansion tank, strong clamps).
Therefore, the tank lid must be sealed, but only up to the required pressure limits indicated above, after reaching which it maintains them, connecting the system with the external environment as necessary to release the air compressed inside the expansion tank.
Cover tasks
The serviceability of the valve cover from the expansion tank directly affects the performance of the entire cooling system of the power unit.
During operation, the engine heats up, which is quite natural and understandable to everyone. When the engine heats up, antifreeze takes away some of this heat so that the internal combustion engine does not overheat. When the coolant itself heats up, it increases in volume, that is, it expands, and at the same time the internal pressure in the system increases. The hotter the engine, the higher the pressure in the cooling system. In order to avoid ruptures of the pipes and the tank itself, the radiator and other components through which antifreeze or antifreeze passes, a valve cover is used.
It is very important not only to tighten the plug correctly, but also to periodically check its functionality. If repairs or replacements are required, they are carried out at the first sign of problems.
The lid serves not only as protection against overpressure. The design provides two valves, or one, but combining both functions. One valve serves to relieve excess pressure, and the other to inject it.
For the motor to work correctly, it must be maintained at operating temperature. Typically it is in the range from 95 to 120 degrees. Depends on the design features of the engine itself. At these temperatures, the expansion of the coolant occurs by approximately 20-30%. This leads to excess pressure. And normal pressure is considered to be 1.1-1.5 atmospheres. The valve cap of the expansion tank, if necessary, removes excess pressure from the system, or pumps it in so that a vacuum does not form inside, the pipes do not compress and the hoses do not stop circulating antifreeze.
If the plug is working correctly, the engine will operate at optimal temperature and normal operating pressure. If not, the consequences of a malfunction can be disastrous for the internal combustion engine. And the culprit is the usual lid.
The design and principle of operation of the expansion tank cap
In order for the necessary pressure to be created in the SOD when the engine is running, the lid device ensures a tight, hermetically sealed closure of the tank. A safety valve is provided to relieve excess pressure. It operates (opens) only when the pressure inside the SOD becomes 1.1–1.5 kgf/cm2 (depending on the design of the lid and its manufacturer).
While it is lower, the valve is closed, and immediately after releasing the excess pressure to a value that is less than that indicated above - partial release of the air compressed in the tank - it closes. There is one more valve in the lid - the inlet valve, it is also called a vacuum valve. Its purpose is exactly the opposite of protective. The inlet valve serves to intake (suction) air into the SOD. The fact is that after stopping the engine, as you know, it begins to cool down. The coolant temperature also drops.
Inlet valve cover
At the same time, it decreases in volume, which is accompanied by a decrease in pressure inside the SOD. The coolant that enters the tank, upon its own heating, begins to flow back into the system, freeing up space for the air remaining in the expansion tank and ceasing to put pressure on it. Then there comes a moment when the pressure in the SOD is compared with the external atmospheric pressure. If at the same time the temperature of the coolant turns out to be higher than in the external environment, then it, continuing to cool, will further decrease in volume.
Signs and possible consequences of a part malfunction
Most often, the consequence of a malfunction of the cap is boiling of the coolant, sometimes accompanied by the ejection of the coolant from the expansion tank - a common occurrence for VAZ cars. If this happens at engine operating temperatures, then most likely the plug does not hold the required pressure.
Car coolant boiling
Another reason for the same phenomenon is that due to a malfunction of the vacuum valve, air entered the ODS and formed a plug, which disrupts normal circulation, and therefore the cooling of the coolant. In winter, due to an air lock, the stove may not work well. Unpleasant consequences: loss of coolant, which has to be topped up regularly. This happens when, due to increased pressure in the SOD, liquid is “expelled” through the joints between the fittings and pipes put on them, through clamps.
- rupture of low-quality pipes or those that have not been changed for a long time (a picture familiar not only to VAZ owners);
- the appearance of a leak in the main or heating radiator;
- tears the thermostat housing (for Nexia it’s a common thing - into 2 parts);
- burst expansion tank.
A leak appears in the main radiator
All these signs and consequences of a malfunctioning lid are the result of increased pressure in the SOD. The latter is not uncommon for VAZ 2108, 2109 and especially 2110 cars with new-style tanks. Of course, it is obvious that the plastic of these expansion tanks leaves much to be desired, but, nevertheless, this is also due to a malfunction of the plug. So the lid, by regulating the pressure in the SOD, also protects its elements from mechanical damage.
VAZ cars: repair, maintenance, tuning
Great things come from little things. So said some Chinese sage and, obviously, he was right. However, another wise Chinese said that you don’t need to think too much about great things, you need to not pay attention to the little things. And many car enthusiasts agree with the last one in absentia. For example, is such a trifle as the expansion tank cap worthy of our attention? It turns out that this plug is not so simple and not only the operation of the cooling system, but also the life of the entire engine depends on it.
How to check the cover and identify problems?
Before checking the expansion tank cap, it must first be inspected to make sure that it is intact and has no mechanical damage in the form of scratches, cracks and severe wear, and is also free of rust, dirt, scale and other defects. Then you should check the functionality of its valves. Several simple diagnostic methods that allow you to only approximately determine their serviceability are given below.
For safety valve. With the engine running and warm, loosen the cap. There should be a hissing sound of compressed air coming out of the tank. This means the valve holds pressure. But not every professional can determine which one exactly.
Unscrewing the tank cap
- If the SOD pipes look deformed (compressed, flat) before starting the engine for the first time in the morning, the valve is definitely faulty.
- Unscrew and remove the cover. Then we strongly squeeze one of the SOD pipes and, holding it like that, install and screw the plug back. Let go of the pipe. If it begins to take its original shape, the valve is most likely working.
A more reliable way to check the operation of the valves is to use a pump with a pressure gauge. You will also need any empty expansion tank. We connect to one of its fittings, and then fix with a clamp the pump hose, from which the tip for the nipple was previously removed. We plug the remaining outputs from the tank with some kind of plugs. Then close the tank with the lid being tested.
Pump with pressure gauge
You can also check it on the tank installed on your car without draining the coolant. To do this, for example, on a VAZ 2109, we disconnect from the expansion tank the pipe that comes from above and removes steam from the SOD. We install a pump hose instead. In order to plug it, we insert something of a round cross-section and suitable diameter, for example, a drill, into the disconnected pipe. Then we put a clamp on this hose and tighten it.
We turn on the pump and, watching the needle on its pressure gauge, record the moment a click appears, followed by a hissing sound coming out of the tank through the air plug. If this happened at around 1.1–1.5 kgf/cm2, and further pumping only leads to increased hissing, but the pressure does not increase, it means that the vacuum valve is not leaking, and the safety valve is working as expected.
Refinement of a new part - what to do if it does not function?
When it turns out that the lid stubbornly refuses to relieve excess pressure and/or is not able to restore air losses in the SOD, it can be modified. For some reason, the most complaints come from owners of VAZ, model 2109, including those who buy new plugs. It is clear that the reason for the incorrect operation of the cover valves lies in the too much rigidity of their springs.
To modify the cover, for example, for a VAZ 2109, it must first be disassembled. This must be done carefully, using pliers and a thin flat-blade screwdriver. We must try to remember where everything stood so that the springs do not fly away to God knows where. After the lid for the VAZ 2109 tank has been disassembled, it’s time for the wire cutters. They need to shorten the springs: the large one, for the safety valve, usually by 1 turn, and the small one by 2.
Shortening the plug spring
For the second, the length of the removed segment is not critical - as long as it generally supports the vacuum valve when it is closed and does not resist the external air pressure of 0.03–0.1 kgf/cm 2 . With a large spring it is more difficult - as if not to overdo it. You need to look at its rigidity and the pressure at which the safety valve opened when checking the tank cap of the VAZ 2109. After shortening the springs, we assemble the cap in the reverse order. Before use, it is advisable to check again how it works.
