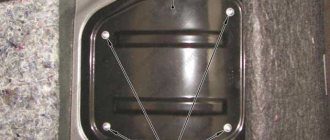
Heater deflector ring (ventilation nozzle) silver Lada Granta/Kalina-2, Datsun
- 120 rub.
Heater deflector ring (ventilation nozzle) silver luxury.
Installed on Lada Granta, Kalina-2, Datsun on-DO and Mi-DO cars.
How to find out the cost of delivery of goods? Very simple!
Place all the desired items in your cart (via the green “Add to cart” button) and click the “Place an order” button.
On the ordering page, enter your exact address, after which the site will show all possible delivery methods with prices and terms.
The cost of delivery by Russian Post starts from 180 rubles, depending on your address, the weight of the parcel and its cost.
The cost of delivery by transport companies starts from 200 rubles, depending on your address and the dimensions of the parcel.
We recommend watching
Silver instrument panel trims (moldings) for Lada Kalina-2 and Granta FL cars. Moldings..
Hooks (levers) of internal door opening handles LUX for Lada Granta, Kalina-2 and Datsun cars..
New items
Ball joint mounting bolt (pin M12) for Lada Largus and Xray cars. ..
This product is individually manufactured according to the buyer's order and is shipped only upon prepayment (not sent to...
Removing the deflector on VAZ cars: step by step
The most common problem faced by owners of VAZ cars is the breakdown of the plastic curtains on the central deflector, as well as the air intake clogged with debris and dust.
On the VAZ 2106
The rotary air duct deflectors on the VAZ 2106 are round and are located on top of the instrument panel. It is held in place by three plastic snap fasteners.
Layout of deflectors on the VAZ 2107
On the classic, there are two deflectors (33) in the center, separated by a plastic partition. They are inserted into the sealing rubber inside and held in place by compression. Plus there are small floating clips on the top and bottom. Easy to remove. At the attachment points they are pryed with a screwdriver and pulled out. The side deflectors (5) are removed in the same way.
On old-style cars VAZ 2110, 2111, 2112, everything is also very simple. The grille is held in place by latches, so you just need to pry the grille with a screwdriver and it will snap off. You must first remove the plastic cover on the slider. The deflector on new cars cannot be dealt with so easily, since the grille is additionally fixed with screws. To remove it, you will need a Phillips and slotted screwdriver.
- The fasteners that need to be unscrewed are located behind the plastic cover.
- Pry it off with a flathead screwdriver.
- Under the insert you will see two screws, you need to unscrew them with a Phillips screwdriver.
- After removing the screws, simply remove the grille; it is no longer secured in any way.
Video: dismantling deflectors on a VAZ 2110
On the Lada Granta the process is trivial. The air duct deflectors are simply pulled out of their seats.
Video: removing deflectors on Lada Granta
On Priora and Kalina, air duct deflectors can also be removed without additional labor costs. On Kalina, for example, they are attached with two screws: from the top.
Top mount
Lower mount
However, Lada Vesta will throw up a lot of surprises in this sense. Since the air duct deflectors are additionally fixed there, and the screws of the side air ducts are located in hard-to-reach places.
To remove the side deflectors, remove the cover covering the fuse box on the left. It can be secured with a nail with a black plastic cover.
Video: dismantling the fuse cover on the Lada Vesta
Heater deflectors for Lada Granta
This product was chosen by 552 customers
The air duct nozzle of the luxury instrument panel is designed to replace the standard ones. Installed without any modifications.
Ring color: silver
Set: 1 nozzle
Weight, kg: 0.05 Dimensions, cm: 7 x 7 x 5 Volume, m3: 0.00025
Did you know about this?
Another useful feature that the manufacturer reserved is the ability to replace the front ring of the air duct nozzle. That is, in the standard configuration it is black, in comfort and luxury it is silver. Accordingly, by replacing the nozzle, you can change the color of the ring if you tune the interior to one tone: completely black or silver. In addition, there are also separate rings for sale for these air ducts, but already chrome-plated. Thus, we have 3 options for coloring the nozzle rings, which, you see, gives excellent scope for choosing the color scheme of the car interior. And the possibility of purchasing nozzles in a set or one at a time is perfect for everyone: those who decided to replace a broken 1 piece, or those who change all 4 pieces at once to the desired color tone.
Modification of the driver's foot air deflector
To redirect the air flow going to the driver’s feet, it is proposed to make a damper according to a template. A PET bottle or tin can is suitable as a material. Install as shown in the photo:
In addition, it is suggested to trim the carpet in the area (marked in red) so that it does not block the air duct.
The damper now directs the air flow horizontally over the pedals, preventing both of the driver's feet from freezing.
Heating, air conditioning and ventilation device Grants
The heating (air conditioning) and air ventilation system operates effectively when the windows are closed and is a single complex that provides the most comfortable conditions in the car, regardless of weather conditions and ambient temperature. The system includes:
- A heater that increases the air temperature in any operating mode of the system;
- Air conditioning, which reduces the temperature and humidity;
- Control unit for mixing cold and hot air to achieve the required temperature in the cabin.
The complex provides low-inertia regulation of air temperature, practically independent of vehicle speed. The amount of air entering the cabin is mainly determined by the operating mode of the fan, so it must be turned on even while driving at high speed.
Outside air can enter the cabin through the door windows when the windows are down and the air blower, the air intake of which is located in front of the windshield. Air from the air blower enters the vehicle interior through the windshield blower nozzles, side and central nozzles, as well as through the lower nozzles of the heater housing.
Air distribution of heater/air conditioner and ventilation of LADA Granta
Fig. 1 : Distribution of air flows from deflectors and air ducts of the heating (air conditioning) system and ventilation of the LADA Granta interior.
The following air flow distribution elements are located in the cabin:
- front door glass blower nozzles;
- side air supply nozzles to the driver and passenger in the front seat or to the front door windows;
- windshield blower nozzles;
- central air supply nozzles to the cabin;
- air ducts supplying air to the feet of passengers in the rear seat;
- air ducts for supplying air to the driver's and front passenger's footwells.
The quantity, temperature, direction and intensity of air flows are controlled by switches installed in the system control unit.
How to remove air ducts on a grant
We carry out work to replace the instrument panel, panel wiring harness and elements of the heating and ventilation system. Disconnect the wire terminal from the negative terminal of the battery. Drain the liquid from the engine cooling system (see “Replacing the coolant”). In the engine compartment, remove the heating and ventilation system filter (see “Replacing the heating and ventilation system filter and cleaning the drainage hole in the plenum box”).
Using a Phillips screwdriver, unscrew the four self-tapping screws that secure the filter housing of the heating and ventilation system to the instrument panel...
...and remove the casing. Loosen the clamps securing the heater inlet and outlet hoses...
...and remove the hoses from pipes 2 of the heater radiator. Using a high 10mm socket with an extension, unscrew nut 1 of the stud securing the flange of the heater radiator pipes to the front panel. Inside the car...
We disconnect the steering column from the instrument panel frame and lower it to the floor or remove the button completely (see “Removing the electric power steering column”).
We remove the seals of the openings of the right and left doors in the places where the instrument panel and the upholstery of the front pillars are installed.
Having overcome the resistance of the clamps, remove the left side trim of the instrument panel. Similarly, remove the right side trim of the instrument panel. Use a screwdriver to pry up the upholstery of the left front pillar and, overcoming the resistance of the pistons...
...remove the upholstery. Similarly, remove the upholstery of the right front pillar.
Remove the headlight beam direction control knob.
Using a 21mm socket, unscrew the nut securing the regulator to the instrument panel...
...and remove the nut.
We take out the headlight beam direction control from the hole in the instrument panel.
Using a screwdriver, press out the two latches on the glove box and remove the upper edge of the box from the instrument panel.
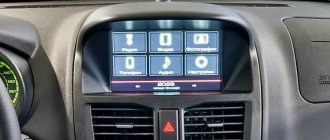
LADA Granta climate system control unit
Fig. 2 : LADA Granta climate unit not equipped with air conditioning. 1 — fan operating mode switch; 2 — temperature regulator for air supplied to the cabin; 3 — block of push-button switches; 4 — regulator for the distribution of air flows supplied to the cabin; 5 - control lever for the recirculation system
Fig. 3 : LADA Granta climate unit with air conditioning. 1 — fan operating mode switch; 2 — temperature regulator for air supplied to the cabin; 3 — block of push-button switches; 4 — regulator for the distribution of air flows supplied to the cabin; 5 — recirculation system control lever
The control units have the following switches and regulators: 1) Fan operating mode switch . To increase the intensity of air supply to the passenger compartment while driving and to ensure air supply when the vehicle is stationary, use the switch handle to set one of the four operating modes of the air blower fan. 2) Temperature regulator for air supplied to the cabin . To change the temperature of the air entering the cabin, rotate the temperature control knob. The blue part of the scale corresponds to the supply of the most cooled air, the red part to the supply of the most heated air. When the handle is in the middle position, air is supplied to the cabin at ambient temperature. On a car equipped with air conditioning, the system also provides an automatic mode for maintaining the set temperature in the cabin. 3) Block of push-button switches . Depending on the configuration, the unit can be equipped with: 4) A regulator for the distribution of air flows supplied to the cabin . To change the direction of air supply, use the control knob to select one of four options (clockwise):
- air supply to the windshield (through the windshield blower nozzles);
- air supply to the upper part of the cabin (through the side and central nozzles of the instrument panel);
- air supply to the lower part of the cabin (through the lower nozzles of the heater housing);
- air supply to the lower part of the cabin and to the windshield (through the lower nozzles of the heater housing and the windshield blower nozzles).
5) Recirculation system control lever . To turn on the recirculation mode, move the lever to the extreme right position. When the recirculation mode is turned on, outside air does not enter the cabin, and the air blower fan circulates air inside the cabin. This mode is used to quickly warm up the interior in the cold season, as well as when the surrounding air is dusty and gassy.
WARNING
— rear window defroster switch. When you press the button, the rear window heater turns on and the heater on indicator on the button lights up;
Quick heating of the interior
To do this, do the following:
- Turn control knob 2 to maximum heat.
- Place the regulator handle 4 opposite the pictogram -
- Switch the operating mode switch 1 of the electric heater fan to position “3”.
- Open the side and center vents on the instrument panel.
- Set lever 5 to the extreme right position - no outside air enters the cabin (recirculation mode).
WARNING
[td]It is not recommended to turn on the recirculation mode for a long time while the car is moving, as this usually leads to fogging of the windows.
Elements of the Lada Granta heating system
Let's look at the design of the Lada Granta stove in the “Norma” configuration:
- radiator;
- three air pipes supplying flow to the left/right/central deflectors;
- control module;
- radiator housing;
- rubber seals;
- fan;
- fan housing;
- cables, mechanical rods of dampers;
- regulator resistors.
Heater radiator
In the modification with a pre-installed air conditioner, the list is supplemented by a separate air duct, evaporator, and heater unit housing.
How does a stove fan work?
The main task of the fan is to take air flow from the outside and deliver it to the deflectors.
The fan is activated by a mechanical button, to which a 12 V power supply is supplied. In the Lada Granta version, the fan operates at one of three speeds. The driver selects the most optimal mode depending on the temperature inside the cabin.
Additional resistors Grants
Without resistors, the fan operates at one speed with a stable rpm. There are a total of 3 resistors installed on the board.
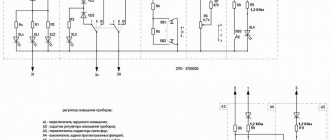
When the lever is moved to the first position (three resistors), the fan rotates at the first speed, the very minimum. Transfer to the second position - second speed (two resistors). Transfer to third - third speed (one resistor). The detailed diagram of the stove is shown in the photo.
Air distributor flap
Installed to regulate the air flow coming from the fan to the glass for blowing through air ducts.
Often, deformation and bending of the plastic body under the influence of temperature leads to flow leakage and depressurization.
Temperature control flap
Regulates the supply of warm air flow from the stove heater to the car interior. The wider the damper is open, the greater the throughput of the “channel”, and vice versa, the narrower it is, the less.
Heat exchanger Grants
Its main purpose is to heat the air flow entering the cabin. The heat exchanger is connected to the power unit through two rubber pipes: supply and return for fluid circulation.
The standard location is the central part of the dashboard of the car interior.
Air temperature sensor inside the car
Structurally installed inside a plastic interior lighting lamp. To avoid overheating, the sensor is equipped with a forced airflow system.
The installation is designed so as not to distort the actual temperature readings.
Pipes
Rubber pipes literally permeated the entire cooling, stove heating, and air conditioning system. Without their help, it is impossible to connect sections of highways with each other. Fixation method: with clamps, metal ties.
Removing the deflector on VAZ cars: step by step
The most common problem faced by owners of VAZ cars is the breakdown of the plastic curtains on the central deflector, as well as the air intake clogged with debris and dust.
On the VAZ 2106
The rotary air duct deflectors on the VAZ 2106 are round and are located on top of the instrument panel. It is held in place by three plastic snap fasteners.
Layout of deflectors on the VAZ 2107
On the classic, there are two deflectors (33) in the center, separated by a plastic partition. They are inserted into the sealing rubber inside and held in place by compression. Plus there are small floating clips on the top and bottom. Easy to remove. At the attachment points they are pryed with a screwdriver and pulled out. The side deflectors (5) are removed in the same way.
On old-style cars VAZ 2110, 2111, 2112, everything is also very simple. The grille is held in place by latches, so you just need to pry the grille with a screwdriver and it will snap off. You must first remove the plastic cover on the slider. The deflector on new cars cannot be dealt with so easily, since the grille is additionally fixed with screws. To remove it, you will need a Phillips and slotted screwdriver.
- The fasteners that need to be unscrewed are located behind the plastic cover.
- Pry it off with a flathead screwdriver.
- Under the insert you will see two screws, you need to unscrew them with a Phillips screwdriver.
- After removing the screws, simply remove the grille; it is no longer secured in any way.
Heating system control
To adjust the fan speed mode, the regulator has a gradation scale. The car owner independently selects the optimal fan rotation mode.
Heating system regulator in the cabin
Failure of the regulator blocks the operation of the entire vehicle interior heating system.
Interior ventilation and heating system of Lada Granta: checking, adjustment
The type of interior ventilation and heating system is supply and exhaust. The operating temperature of the interior heating fluid is in the range from 90 to 94°.
Warm (hot) air is supplied to the cabin by an electric fan. The feed speed is adjusted by a special regulator, which accelerates (reduces) the rotation speed of the impeller.
The electric motor has four positions:
- first;
- second;
- third speed;
- position: off
Stove motor
Air intake follows from the outside through air intakes under the frill in the engine compartment. A filter is pre-installed to clean the flow. Filling: synthetic material.
Air is exhausted through a ventilation window in the rear of the car, behind the bumper.
The heater module is installed in the central part of the dashboard, under the panel. During engine operation, the liquid heats up and circulates along the circuit (water jacket).
The amount of air that comes from outside is regulated by the driver. The flow distribution is also controlled by a damper using a cable drive.
We install new silent blocks
Now the moment has come when you can install new silent blocks on the Lada Granta, the main thing is to know how to press them in. The landing site will need to be pre-lubricated, you can use graphite lubricant, then the nut is screwed on, the silent blocks of the grant are pressed in, the price for them is not high. In this case, you can do without special devices that allow you to press parts. And you don’t need to remove the lever itself, as some people do.
When you have figured out how to change the silent blocks on the grant, it is worth remembering that after replacing you need to loosen the nut so that you can attach the crab. It must be taken into account that the holes intended for fastening are displaced. So Lada Granta, replacing silent blocks is not complete without a hammer, which is useful for adjusting the holes. It will be necessary to use it on both sides.
After replacing the silent blocks on the grant is completed, you may encounter an amazing effect. Drivers notice that the roughness in steering disappears, the steering wheel becomes more obedient, and the road holds without problems. Therefore, if there is a suspicion that the silent blocks of the front levers of the grant have become unusable, it is better to immediately look for the cause and replace them. As a result, you will receive a machine whose performance will only please you.